Difference between revisions of "Template:Alarm Record SystemUI NewGUI"
| (2 intermediate revisions by the same user not shown) | |||
| Line 1: | Line 1: | ||
| − | == | + | ==How To Setup Alarm Record== |
| − | ==Prerequisites== | + | ===Prerequisites=== |
| − | + | * Dahua device that supports Alarm Input recording | |
| − | ==Video Instructions== | + | * Physical alarm devices wired into Dahua devices - [[Template:Alarm Record Physical Alarm|How To Connect A Physical Alarm To A Dahua Device]] |
| + | ===Video Instructions=== | ||
<embedvideo service="youtube">https://youtu.be/OIt_pD3kU0s</embedvideo> | <embedvideo service="youtube">https://youtu.be/OIt_pD3kU0s</embedvideo> | ||
| − | ==Step by Step Instructions== | + | ===Step by Step Instructions=== |
1. From Live View | 1. From Live View | ||
Latest revision as of 19:53, 4 February 2020
Contents
How To Setup Alarm Record
Prerequisites
- Dahua device that supports Alarm Input recording
- Physical alarm devices wired into Dahua devices - How To Connect A Physical Alarm To A Dahua Device
Video Instructions
Step by Step Instructions
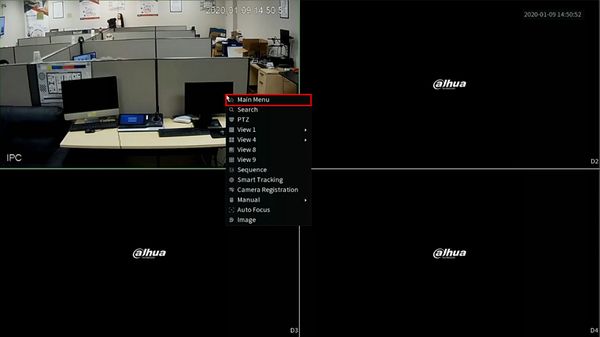
1. From Live View
Right click select Main Menu
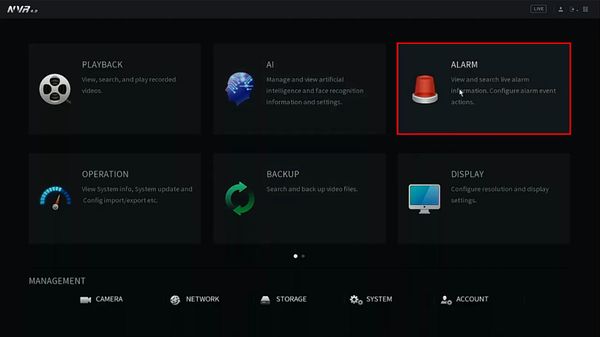
2. Click Alarm
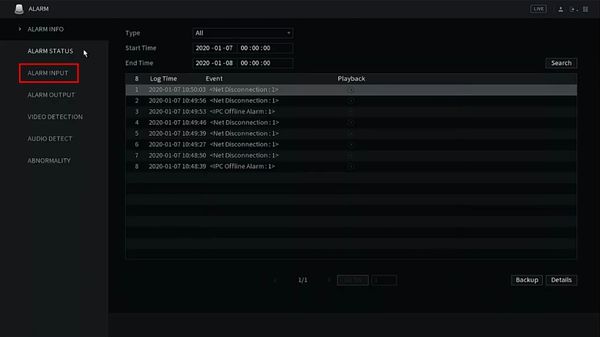
3. Click Alarm Input
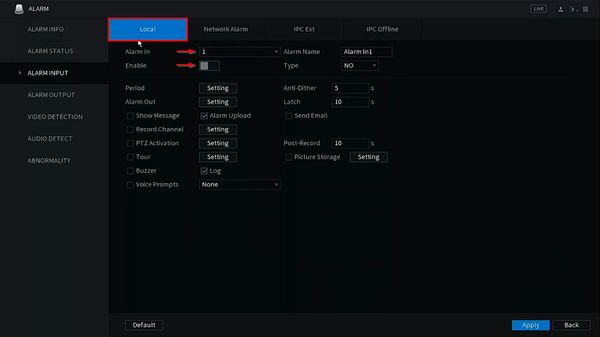
4. Click Local
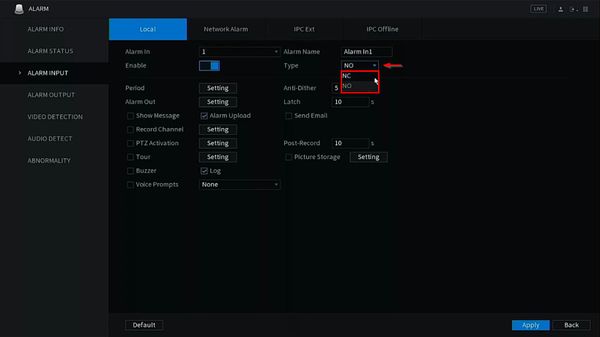
Use the dropdown box next to 'Alarm In' to select the Alarm Input to configure
Click to Enable the input
5. Use the dropdown box next to Type to select the type of Alarm Input:
- NC - Normally closed
- NO - Normally open
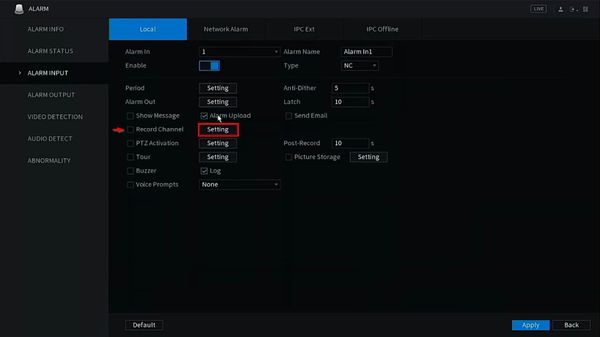
6. Check the box next to Record Channel
Click Setting
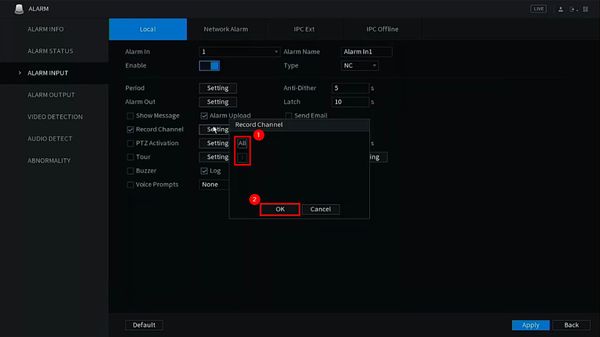
7. Use the Record Channel window to select which channels to record when the alarm input is triggered
Click OK to save
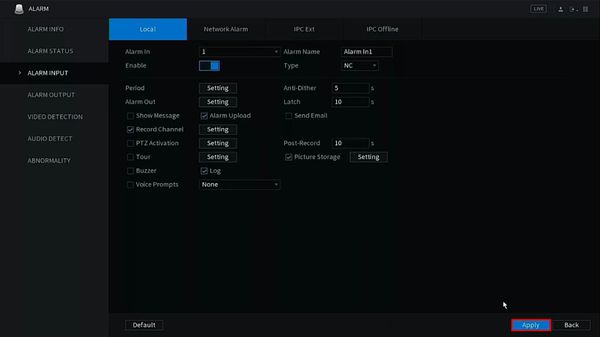
8. Click Apply to save settings
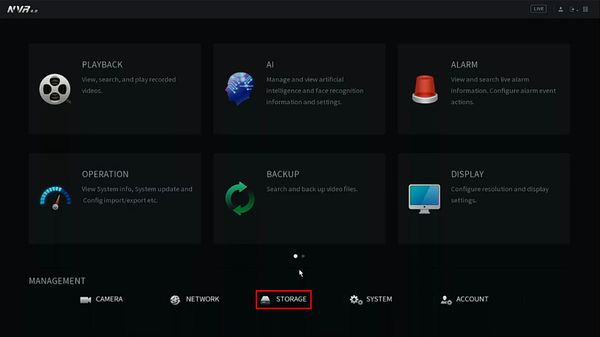
9. Click Storage
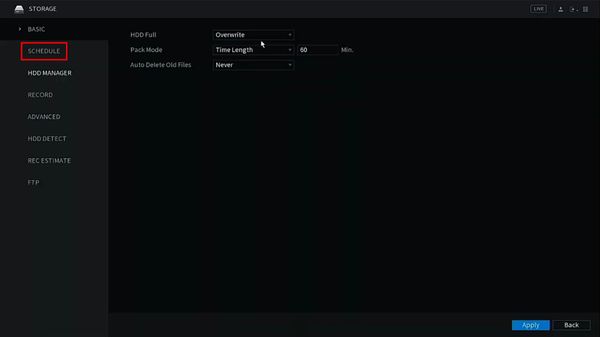
10. Click Schedule
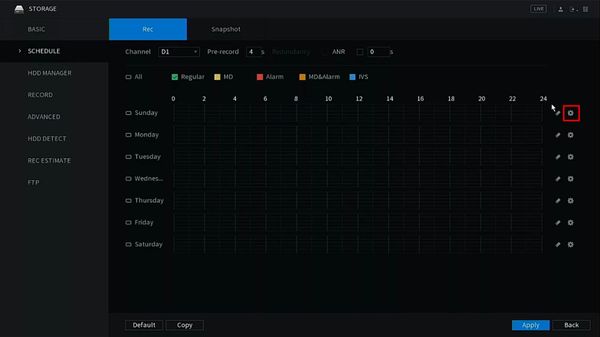
11. Under Rec tab
Click the gear icon to adjust Record settings
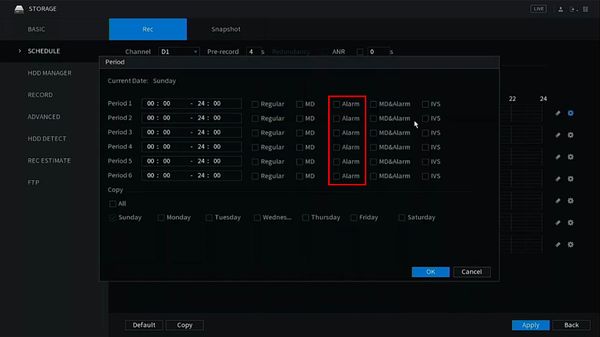
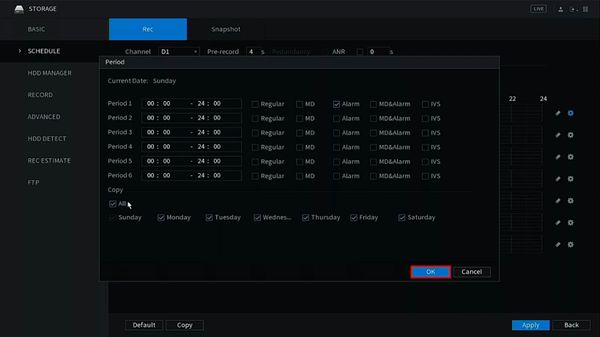
12. Use the window to set a recording period for the alarm input by checking the box next to 'Alarm' during the desired time periods
13. Click OK to save
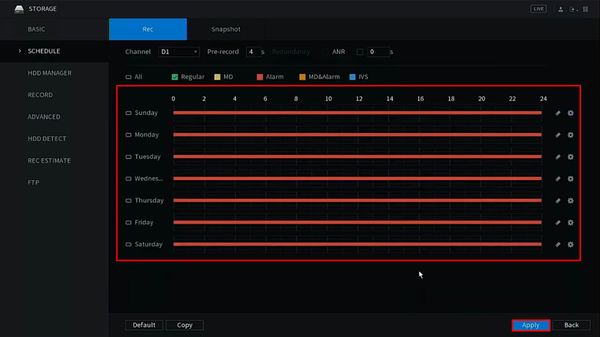
14. The recording schedule will be updated to reflect the changes
15. Click Apply to save all settings
