Difference between revisions of "Template:Alarm Record Physical Alarm"
| (8 intermediate revisions by the same user not shown) | |||
| Line 1: | Line 1: | ||
| − | ==How | + | ==How To Setup Alarm Recording Using A Physical Alarm Input== |
| − | + | ||
| − | |||
| − | |||
| − | |||
===Description=== | ===Description=== | ||
| − | + | This guide shows how to connect a physical alarm in conjunction to work with Dahua recording devices. | |
The correct wiring/relay connections can vary between models. Please refer to the User Manual for the specific device to look up the correct Alarm Relay diagram for the product you are working with | The correct wiring/relay connections can vary between models. Please refer to the User Manual for the specific device to look up the correct Alarm Relay diagram for the product you are working with | ||
| + | |||
| + | This guide will use a Door Sensor as the physical alarm input device | ||
===Prerequisites=== | ===Prerequisites=== | ||
| − | |||
| − | + | <gallery> | |
| − | + | file:PhysicalAlarmRecordSetup8Large.JPG|NVR or IP Camera with an Alarm Out | |
| − | + | File:PhysicalAlarmRecordSetup13Large.JPG|A low voltage physical alarm with a Normally Open / Normally Closed output - NO - Normally Open | |
| − | + | file:PhysicalAlarmRecordSetup1Large.JPG|NC -Normally Close | |
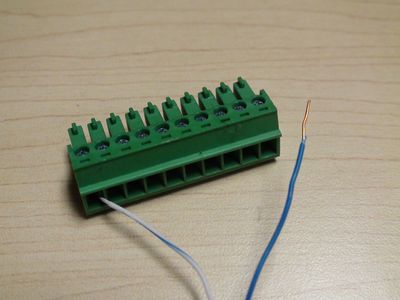
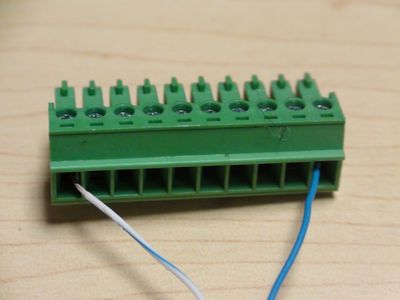
| − | + | file:PhysicalAlarmRecordSetup15Large.JPG|Dual pair 24 gauge run to the physical alarm | |
| − | + | file:PhysicalAlarmRecordSetup6Large.JPG|Alarm block | |
| − | + | </gallery> | |
| − | |||
| − | |||
| − | |||
| − | |||
| − | |||
| − | |||
===Video Instructions=== | ===Video Instructions=== | ||
<embedvideo service="youtube">https://youtu.be/ZrMtWrNTTH4</embedvideo> | <embedvideo service="youtube">https://youtu.be/ZrMtWrNTTH4</embedvideo> | ||
===Step by Step Instructions=== | ===Step by Step Instructions=== | ||
| − | 1. Identify which alarm out block you wish to use to connect your physical alarm. For this example we are going to use, "Alarm | + | 1. Identify which alarm out block you wish to use to connect your physical alarm. For this example we are going to use, "Alarm In Channel 1" |
[[file:PhysicalAlarmRecordSetup14.JPG|600px]] | [[file:PhysicalAlarmRecordSetup14.JPG|600px]] | ||
Latest revision as of 23:34, 4 February 2020
Contents
How To Setup Alarm Recording Using A Physical Alarm Input
Description
This guide shows how to connect a physical alarm in conjunction to work with Dahua recording devices.
The correct wiring/relay connections can vary between models. Please refer to the User Manual for the specific device to look up the correct Alarm Relay diagram for the product you are working with
This guide will use a Door Sensor as the physical alarm input device
Prerequisites
Video Instructions
Step by Step Instructions
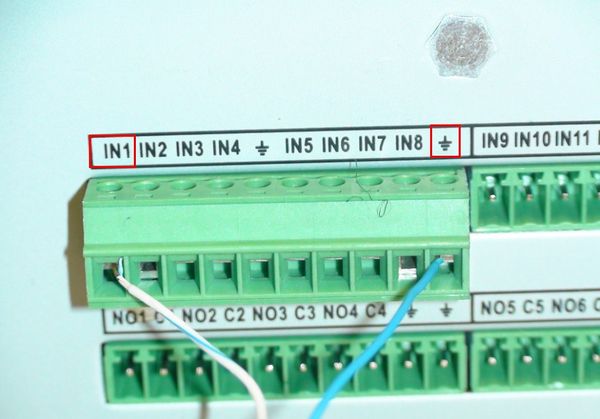
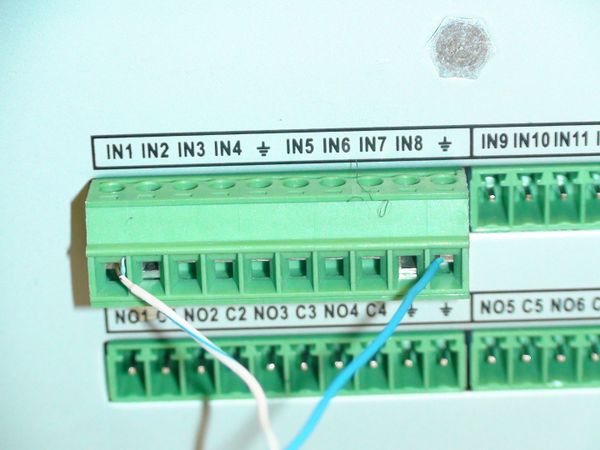
1. Identify which alarm out block you wish to use to connect your physical alarm. For this example we are going to use, "Alarm In Channel 1"
2. Connect the cable to your physical alarm.
3. Connect the cable to the alarm block on the ports labeled, "IN1" and "Ground"
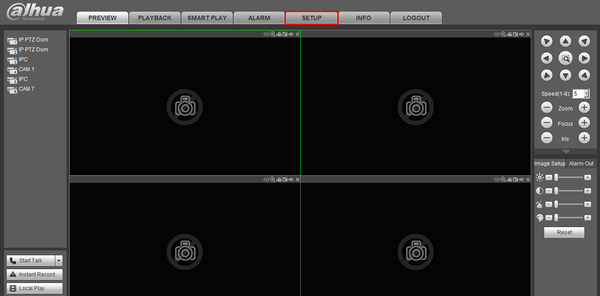
4. Login to the NVR, and click, "Setup"
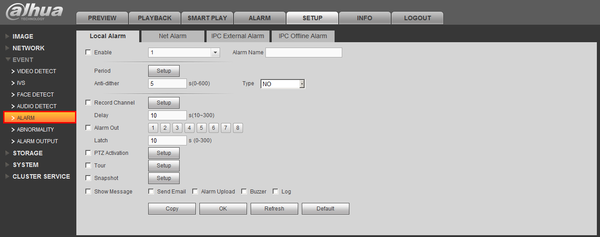
5. Click, "Event"
6. Click, "Alarm"
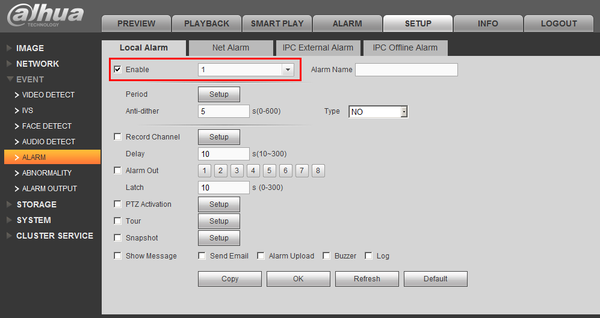
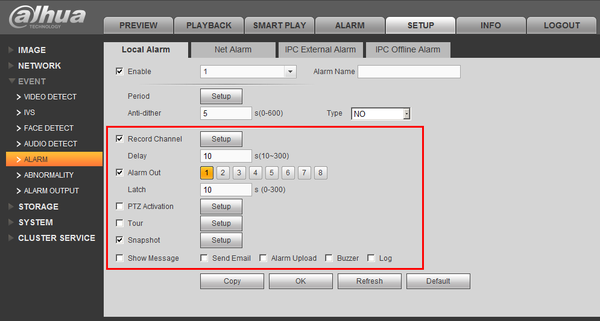
7. Select the Channel, and enable, "Local Alarm"
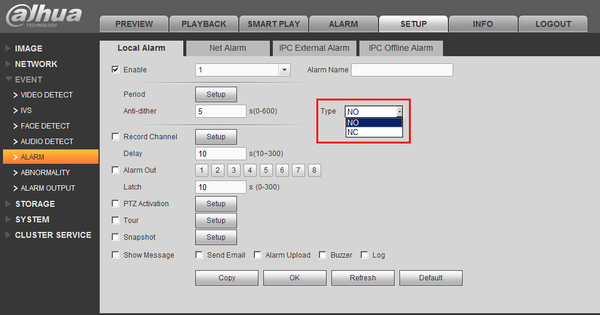
8. Select either, "NO" or "NC"
9. Next select what actions you want the system to perform, when the alarm is activated.
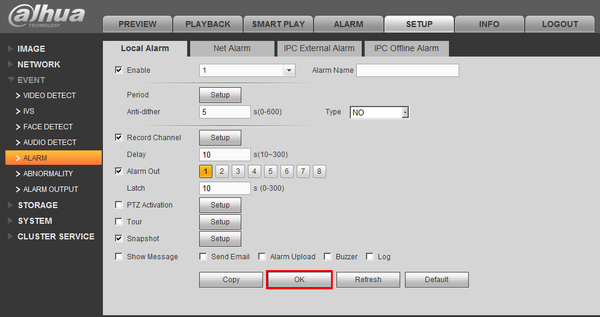
10. Click, "OK"
Links
| Related Articles in Category:Record | ||
|---|---|---|
|
<DynamicPageList> category = Record count=5 </DynamicPageList> |
<DynamicPageList> category = Record offset = 5 count= 5 </DynamicPageList> |
<DynamicPageList> category = Record offset = 10 count=5 </DynamicPageList> |


