Difference between revisions of "FTP/FTP Setup Core FTP Server"
(Created page with "==FTP Setup Core FTP Server== 1. Download and install Core FTP Server from this link: http://www.coreftp.com/download.html file:CoreFTP1.png 2. Click, "Setup" file:Co...") |
m (JP moved page FTP Setup Core FTP Server to FTP/FTP Setup Core FTP Server) |
||
| (6 intermediate revisions by 2 users not shown) | |||
| Line 1: | Line 1: | ||
==FTP Setup Core FTP Server== | ==FTP Setup Core FTP Server== | ||
| − | 1. Download and install Core FTP Server from this link: http://www.coreftp.com/ | + | 1. Download and install Core FTP Server 32-bit from this link: http://www.coreftp.com/server/index.html |
[[file:CoreFTP1.png]] | [[file:CoreFTP1.png]] | ||
| Line 9: | Line 9: | ||
3. Click, "New" | 3. Click, "New" | ||
| + | |||
| + | [[file:CoreFTP13.png]] | ||
4. Input the following, and click, "OK": | 4. Input the following, and click, "OK": | ||
Domain Name: (Any) | Domain Name: (Any) | ||
| + | |||
Domain IP/Address: (Your LAN IP Address. From Command Prompt input, "ipconfig") | Domain IP/Address: (Your LAN IP Address. From Command Prompt input, "ipconfig") | ||
| + | |||
Port: 21 by default can be changed to any other port if needed. | Port: 21 by default can be changed to any other port if needed. | ||
| + | |||
Base Directory: (This will be where the files are stored.) | Base Directory: (This will be where the files are stored.) | ||
| + | |||
Allow key authentication: (Checked) | Allow key authentication: (Checked) | ||
| + | |||
| + | [[file:CoreFTP3.png]] | ||
5. Click, "New" and input the following: | 5. Click, "New" and input the following: | ||
| + | |||
User name: (Any) | User name: (Any) | ||
| + | |||
Password: (Any) | Password: (Any) | ||
| + | |||
Home Directory: (Where you want the files to be stored) | Home Directory: (Where you want the files to be stored) | ||
| + | |||
Always allow login: (Checked) | Always allow login: (Checked) | ||
| + | |||
| + | [[file:CoreFTP4.png]]->[[file:CoreFTP5.png]] | ||
6. Click, "Permissions" | 6. Click, "Permissions" | ||
| − | 7. Check all the boxes on the right hand side | + | [[file:CoreFTP6.png]] |
| + | |||
| + | 7. Check all the boxes on the right hand side. | ||
| + | |||
| + | [[file:CoreFTP7.png]] | ||
| + | |||
| + | 8. Click "Add" to select the directory you wish to use for FTP storage. | ||
| + | |||
| + | [[file:CoreFTP8.png]]->[[file:CoreFTP9.png]] | ||
| + | |||
| + | 9. Click, "OK" twice to exit back to the main page. Then click, "Start" | ||
| − | + | [[file:CoreFTP10.png]] | |
| + | |||
| + | 10. Input your server's IP address into Internet Explorer to verify that the FTP is setup properly. | ||
| − | |||
Example: ftp://172.16.16.54/ | Example: ftp://172.16.16.54/ | ||
| − | + | [[file:CoreFTP11.png]] | |
| + | |||
| + | 11. If everything is working properly, you should see a login box pop up. Input the credentials you created earlier and press, "Enter" | ||
| + | |||
| + | 12. Log into an NVR or DVR and on the NVR or DVR, go to Main Menu -> Settings -> Network -> FTP and input the following: | ||
| − | |||
Host IP: (Your FTP server's IP address) | Host IP: (Your FTP server's IP address) | ||
| + | |||
User: (Your FTP server's user name) | User: (Your FTP server's user name) | ||
| + | |||
Password: (Your FTP server's password) | Password: (Your FTP server's password) | ||
| + | |||
Remote Directory: / | Remote Directory: / | ||
| − | Check the boxes for each channel you wish to enable FTP recording on, and press, " | + | |
| + | Check the boxes for each channel you wish to enable FTP recording on, and press, "OK" | ||
| + | |||
| + | [[file:CoreFTP12.png]] | ||
| + | |||
| + | 13. On the FTP server, go to the folder you specified when you setup CoreFTP and check that there are snapshots in that folder or subfolder. | ||
| + | |||
| + | [[file:CoreFTP14.png]] | ||
| + | [[Category:FTP]] | ||
Latest revision as of 15:25, 3 June 2016
FTP Setup Core FTP Server
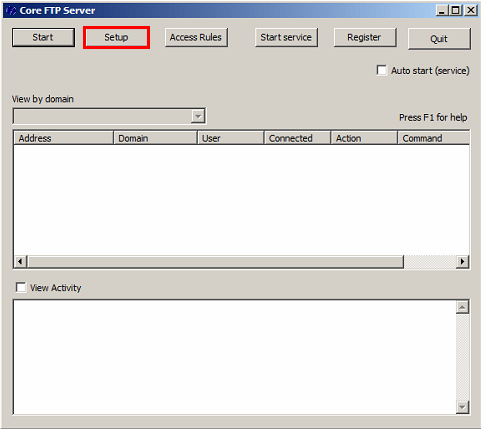
1. Download and install Core FTP Server 32-bit from this link: http://www.coreftp.com/server/index.html
2. Click, "Setup"
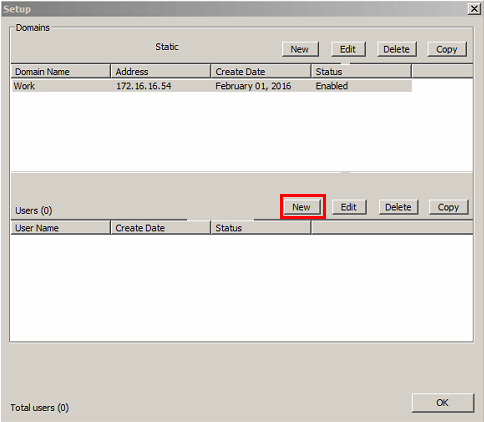
3. Click, "New"
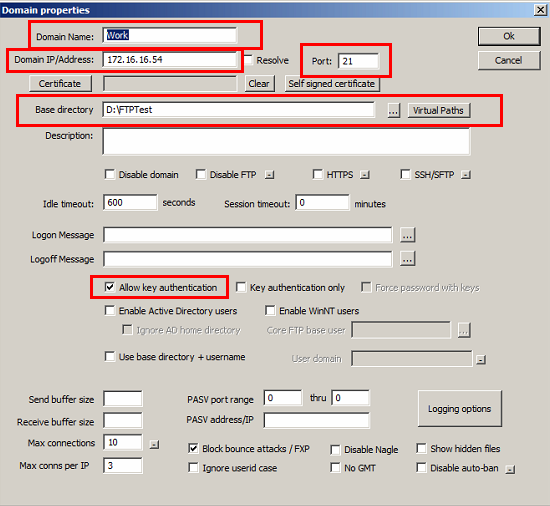
4. Input the following, and click, "OK":
Domain Name: (Any)
Domain IP/Address: (Your LAN IP Address. From Command Prompt input, "ipconfig")
Port: 21 by default can be changed to any other port if needed.
Base Directory: (This will be where the files are stored.)
Allow key authentication: (Checked)
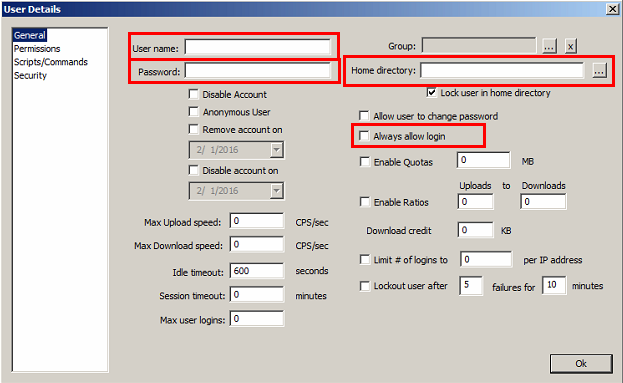
5. Click, "New" and input the following:
User name: (Any)
Password: (Any)
Home Directory: (Where you want the files to be stored)
Always allow login: (Checked)
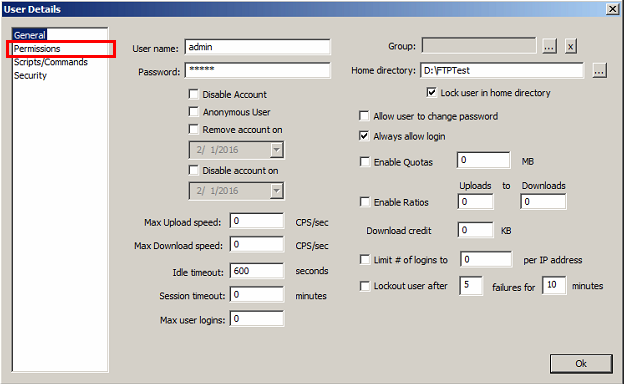
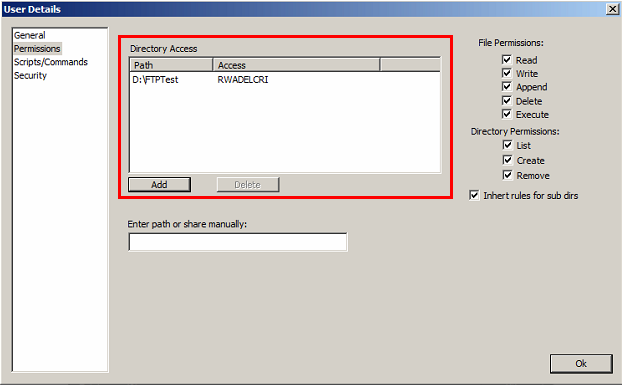
6. Click, "Permissions"
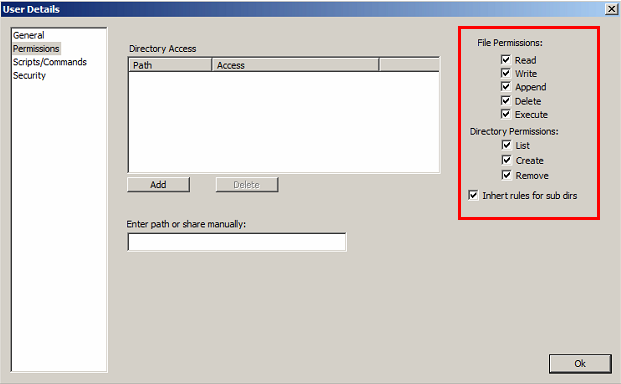
7. Check all the boxes on the right hand side.
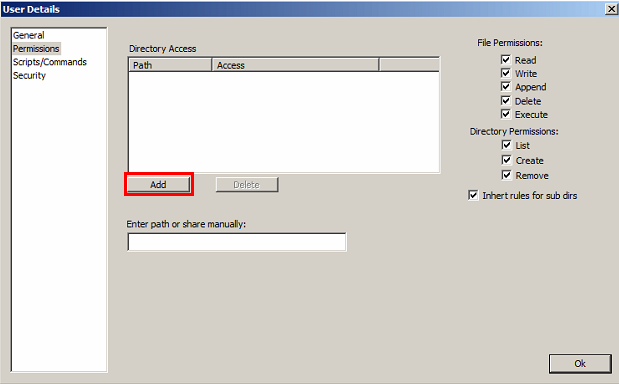
8. Click "Add" to select the directory you wish to use for FTP storage.
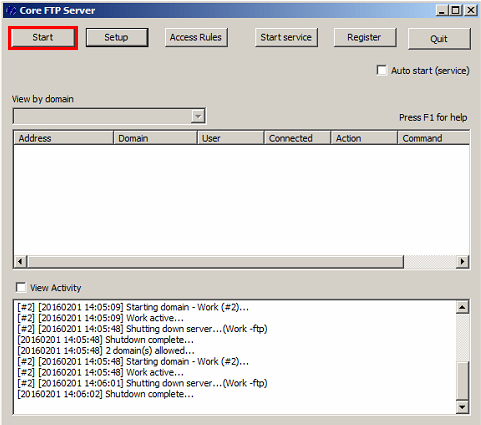
9. Click, "OK" twice to exit back to the main page. Then click, "Start"
10. Input your server's IP address into Internet Explorer to verify that the FTP is setup properly.
Example: ftp://172.16.16.54/
11. If everything is working properly, you should see a login box pop up. Input the credentials you created earlier and press, "Enter"
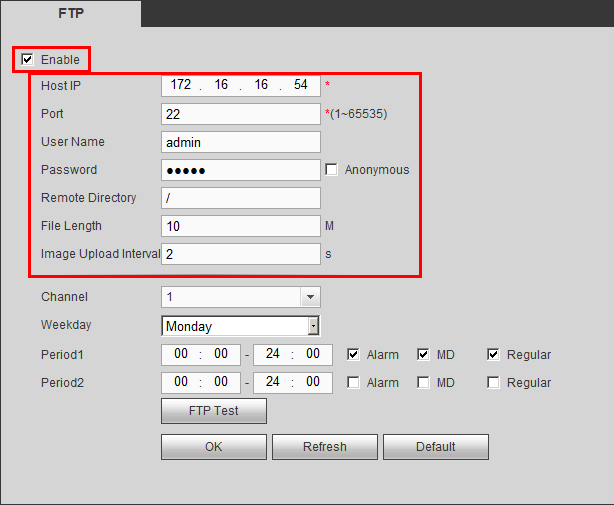
12. Log into an NVR or DVR and on the NVR or DVR, go to Main Menu -> Settings -> Network -> FTP and input the following:
Host IP: (Your FTP server's IP address)
User: (Your FTP server's user name)
Password: (Your FTP server's password)
Remote Directory: /
Check the boxes for each channel you wish to enable FTP recording on, and press, "OK"
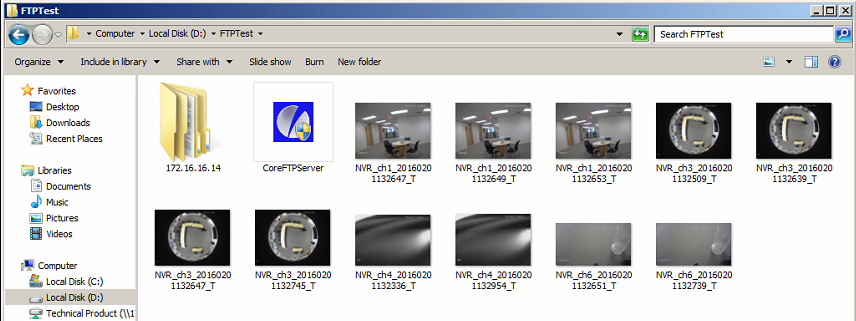
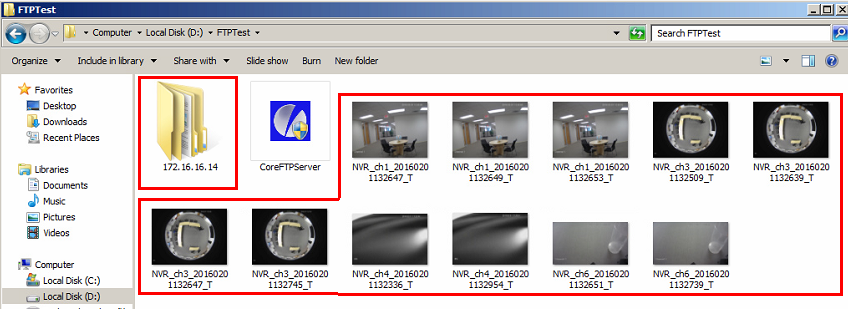
13. On the FTP server, go to the folder you specified when you setup CoreFTP and check that there are snapshots in that folder or subfolder.

