Difference between revisions of "Access Control/How to Create Timezones on DSSExpress"
| (4 intermediate revisions by the same user not shown) | |||
| Line 1: | Line 1: | ||
==Description== | ==Description== | ||
| − | This article will go over how to add Time Templates to DSS Express for access control. Time Templates are your general timezones for everyday use. These get linked to specific door groups. | + | This article will go over how to add Time Templates to DSS Express for access control. Time Templates are your general timezones for everyday use. These get linked to specific door groups and can be used on individual door configurations. |
This article will also go over the creation of Holidays and Holiday Schedules. These are special timezones that can be assigned by dates rather than general everyday time templates. | This article will also go over the creation of Holidays and Holiday Schedules. These are special timezones that can be assigned by dates rather than general everyday time templates. | ||
| Line 48: | Line 48: | ||
[[File:How to create timezones on DSS Express-10.png|900px]] | [[File:How to create timezones on DSS Express-10.png|900px]] | ||
| + | |||
| + | ===Holiday and Holiday Schedules=== | ||
| + | |||
| + | '''Quick Note: Holidays are special Timezones created per dates and amount of days the holiday lasts. These Holidays will be linked with the Holiday Schedule''' | ||
| + | |||
| + | 1. To create a Holiday go to the '''Holiday''' Tab | ||
| + | |||
| + | [[File:How to create timezones on DSS Express-11.png|900px]] | ||
| + | |||
| + | 2. Give the Holiday a name, Select the start date, then the amount of days the holiday will last. Click on '''OK''' when done. | ||
| + | |||
| + | [[File:How to create timezones on DSS Express-12.png|900px]] | ||
| + | |||
| + | 3. Now click on the '''Holiday Schedule''' Tab on the top to create a timezone to link the Holiday you just created. Give the timezone a name, edit the timeline, and be sure to select the Holiday you created so it links. Then click on '''OK''' to complete the setup. | ||
| + | |||
| + | [[File:How to create timezones on DSS Express-13.png|900px]] | ||
| + | |||
| + | 4. The Holiday is now complete and can be added to door groups. | ||
| + | |||
| + | [[File:How to create timezones on DSS Express-14.png|900px]] | ||
| + | |||
| + | Learn [[Access_Control/How_to_Create_Door_Groups_on_DSS Express|How to create Door Groups on DSS Express]] | ||
Latest revision as of 15:26, 5 October 2021
Contents
Description
This article will go over how to add Time Templates to DSS Express for access control. Time Templates are your general timezones for everyday use. These get linked to specific door groups and can be used on individual door configurations.
This article will also go over the creation of Holidays and Holiday Schedules. These are special timezones that can be assigned by dates rather than general everyday time templates.
Prerequisites
Step by Step Instructions
Time Templates
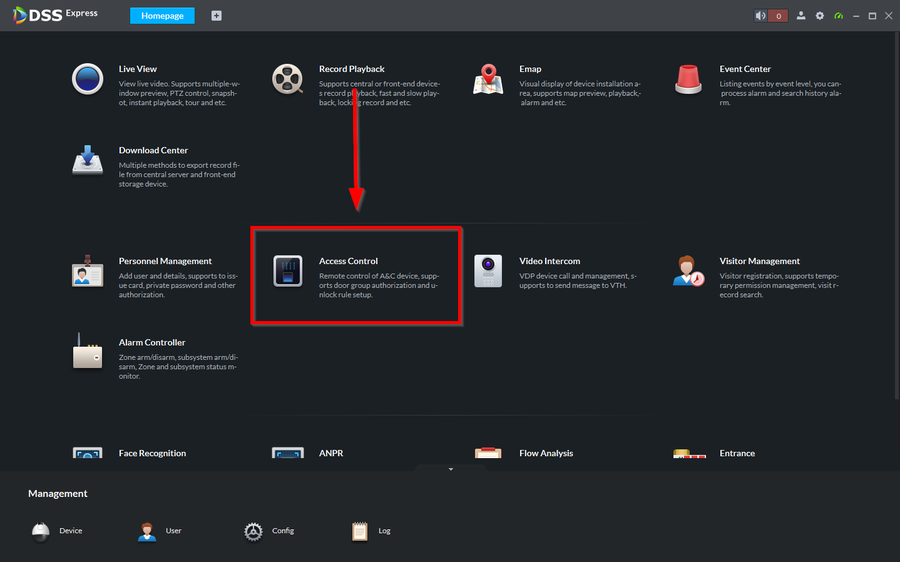
1. Open DSS Express Client and go to Access Control
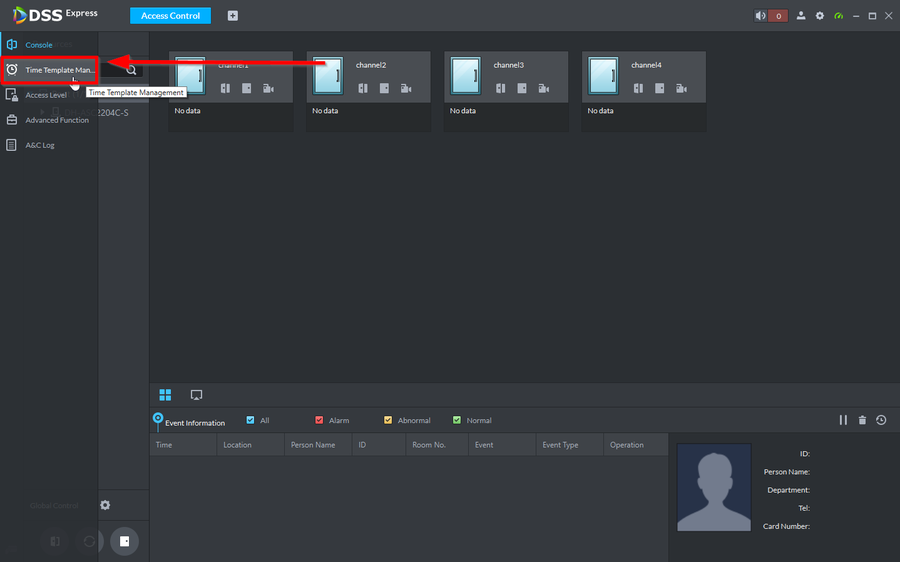
2. Hover over the left menu tabs and click on on the Time Template Management Icon
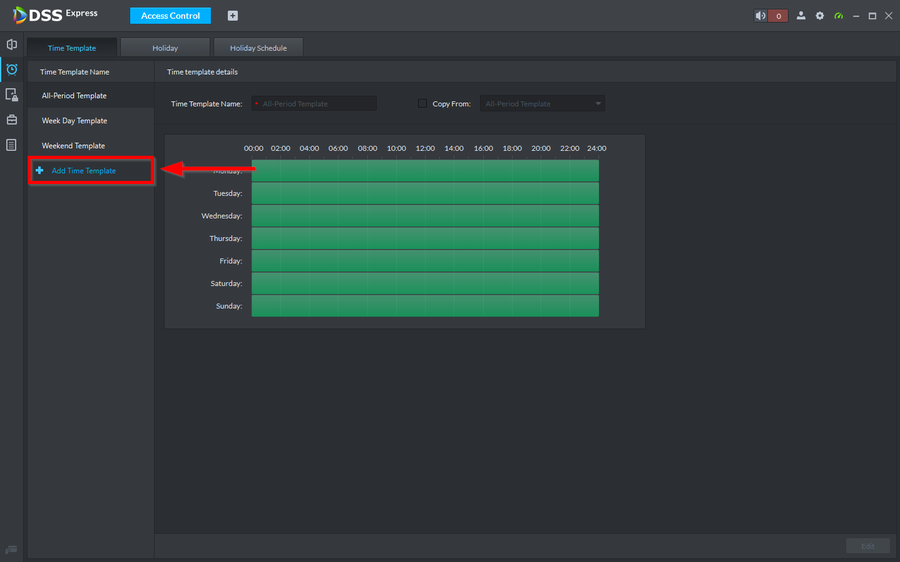
3. Here you will see three pre-made templates by DSS Express but if you want to add one you will need to click on Add Time Template
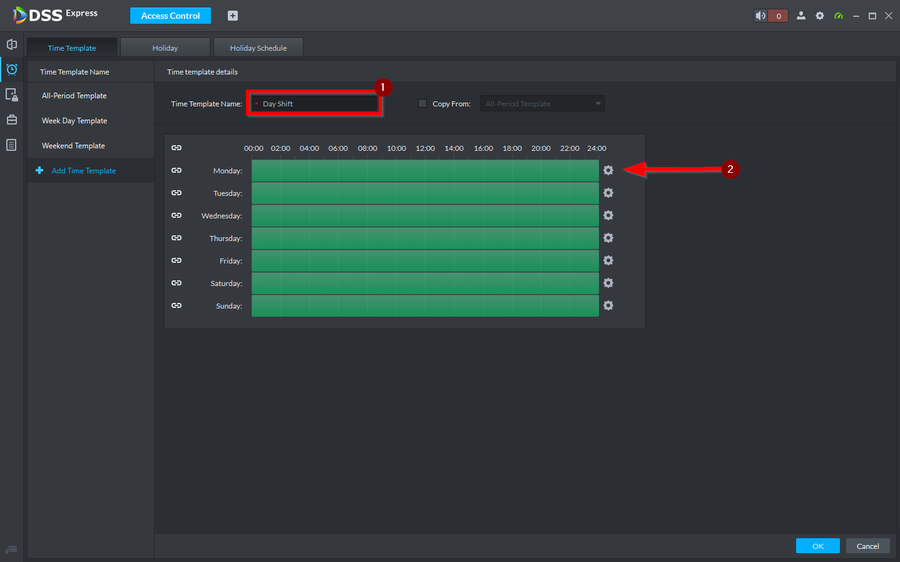
4. Give the template a name. Select the day you want to start with and click on the gear icon to start editing the time.
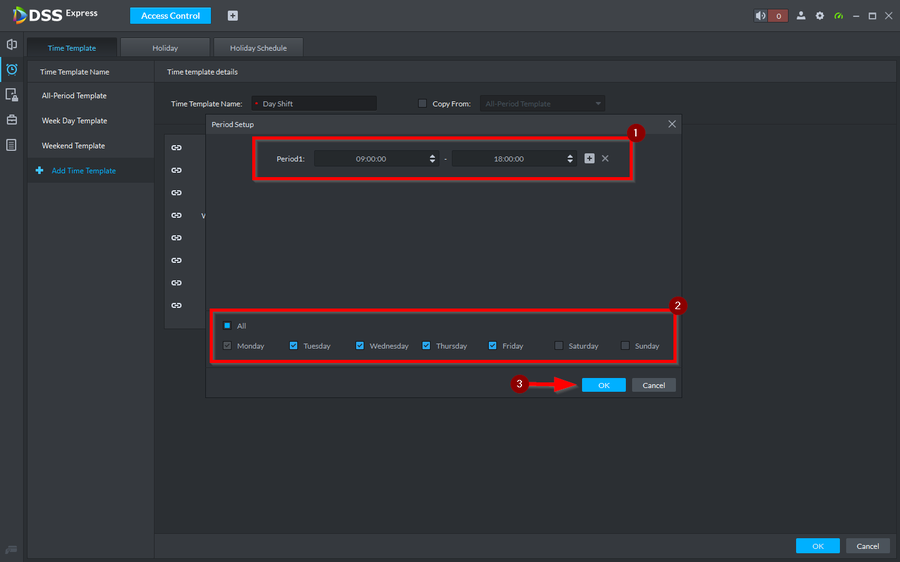
5. A pop up window will appear with the time you'd like to setup and it will allow you to copy to other days at the bottom. Click on OK when done.
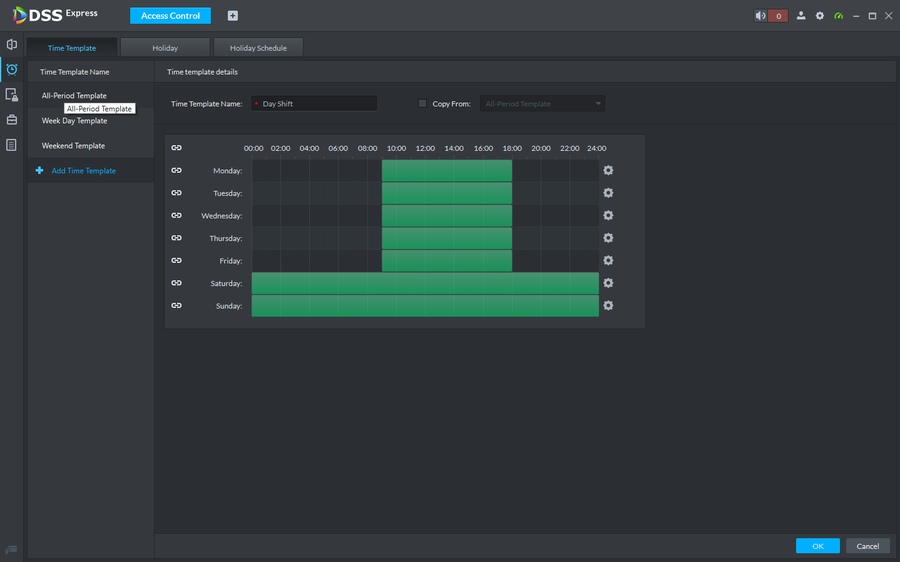
6. The times will populate
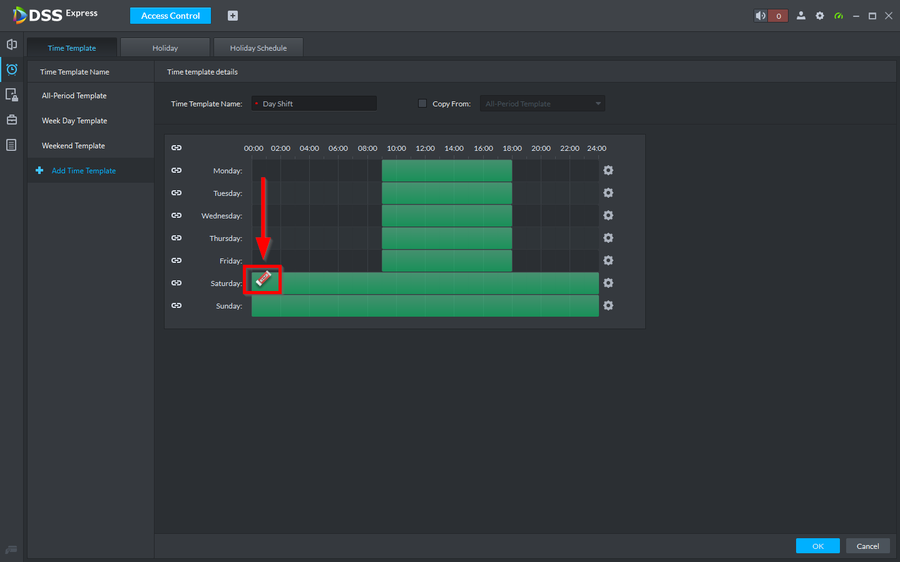
7. Additionally, you can erase the active times by hovering over the green timeline until an eraser icon appears. You can then click and drag the eraser to delete active times.
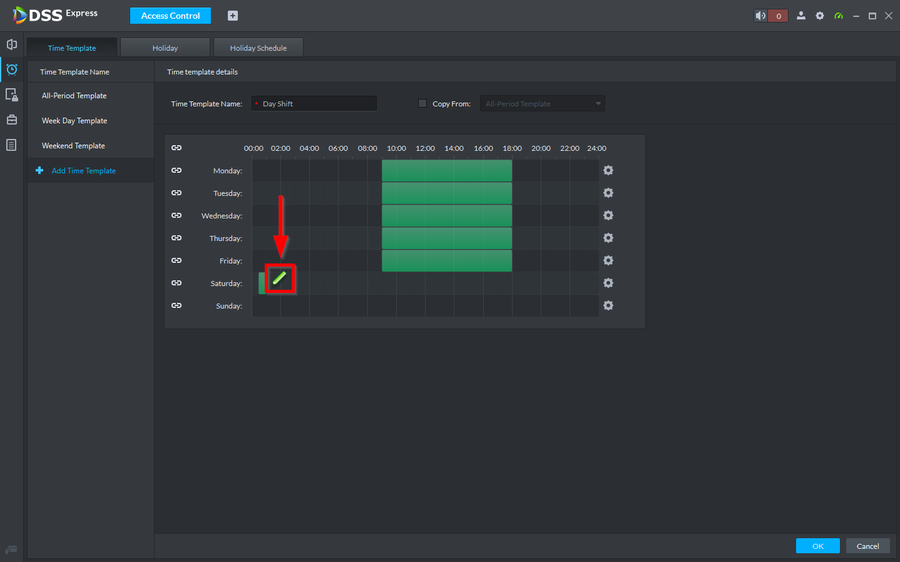
8. The pencil icon will create active timezones if the timeline is empty. Click and drag on the timeline to activate.
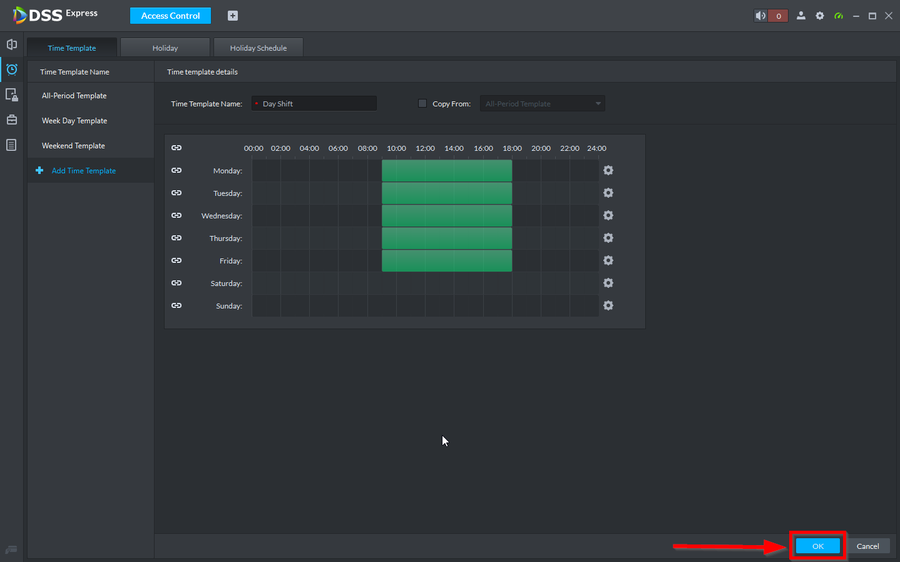
9. Click on OK to finalize your Time Template.
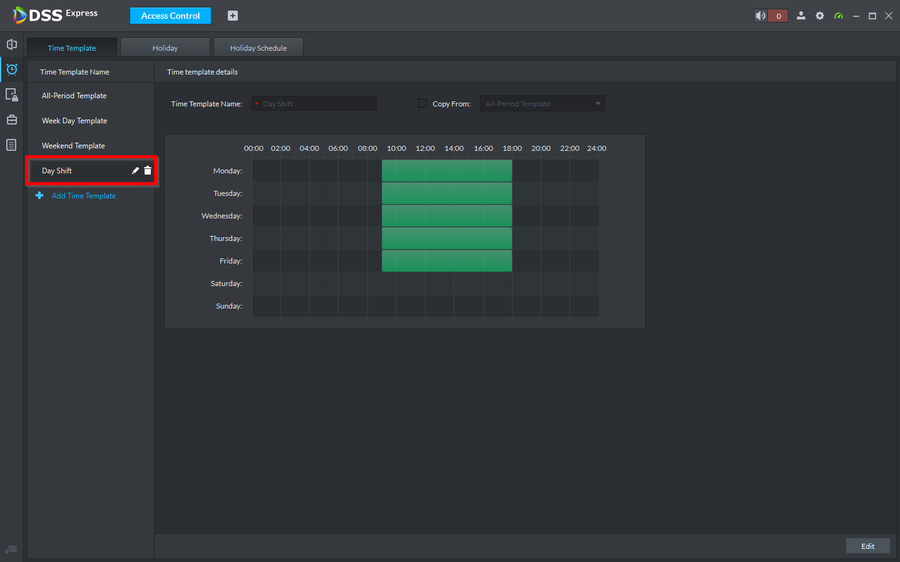
10. You will now see your new Time Template on the left where you can then edit or delete if necessary.
Holiday and Holiday Schedules
Quick Note: Holidays are special Timezones created per dates and amount of days the holiday lasts. These Holidays will be linked with the Holiday Schedule
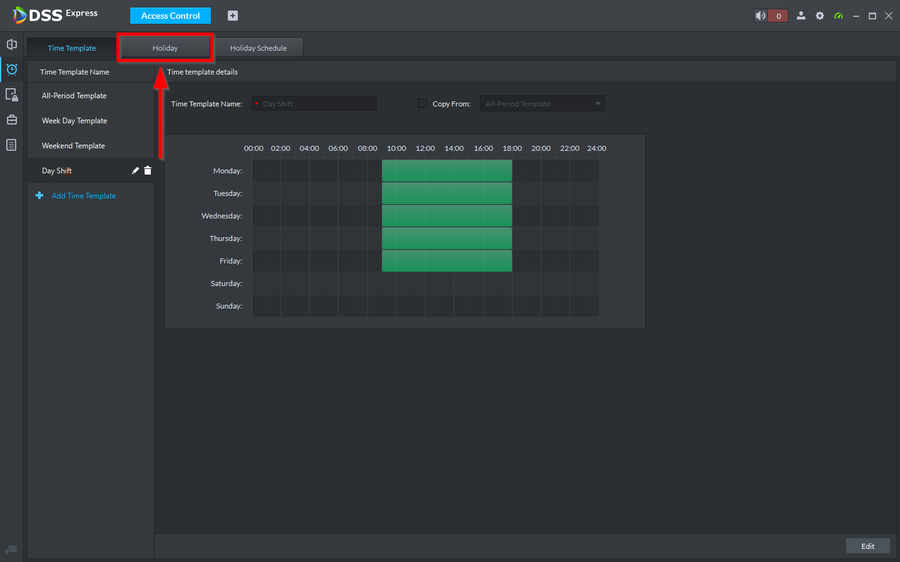
1. To create a Holiday go to the Holiday Tab
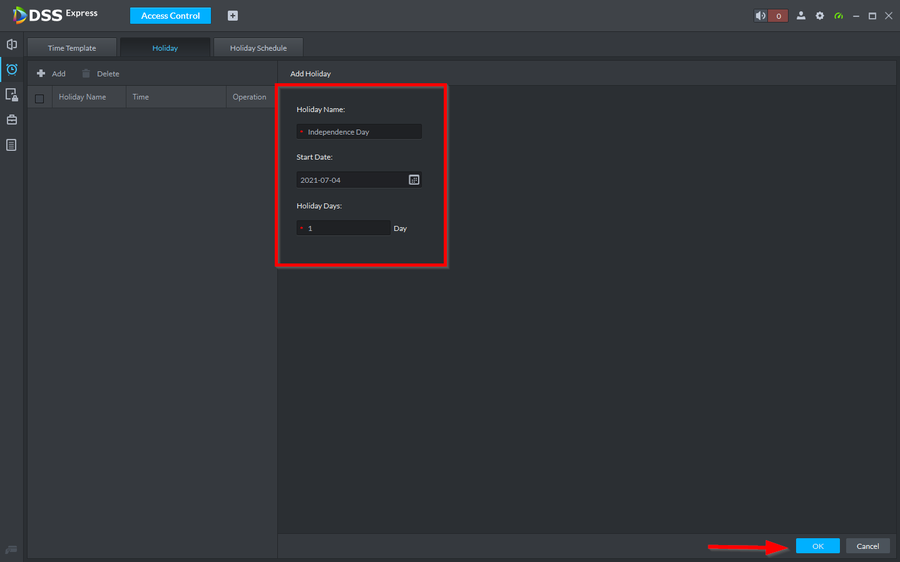
2. Give the Holiday a name, Select the start date, then the amount of days the holiday will last. Click on OK when done.
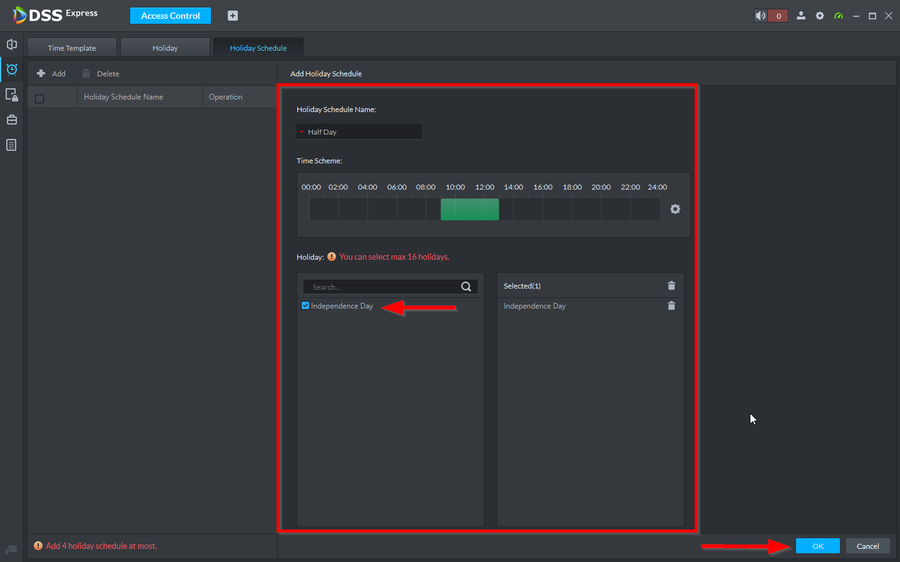
3. Now click on the Holiday Schedule Tab on the top to create a timezone to link the Holiday you just created. Give the timezone a name, edit the timeline, and be sure to select the Holiday you created so it links. Then click on OK to complete the setup.
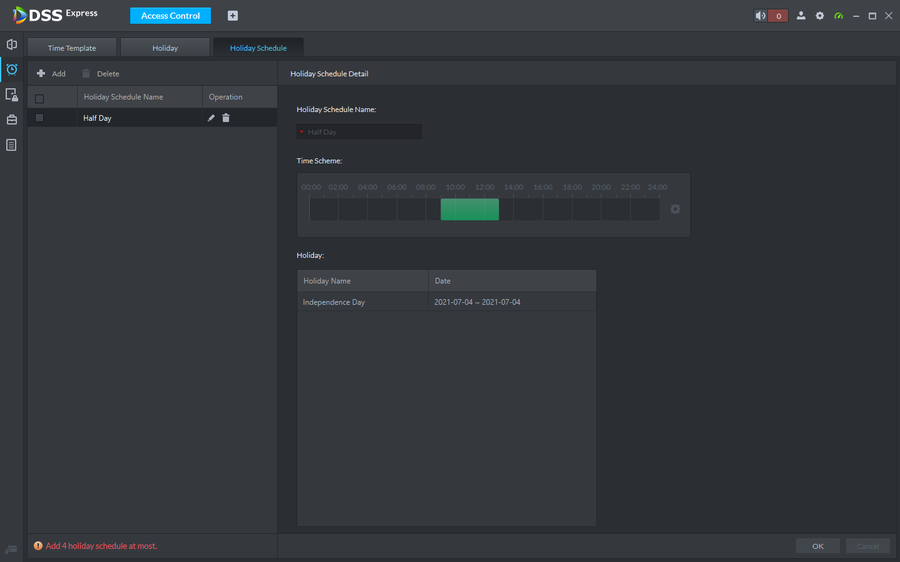
4. The Holiday is now complete and can be added to door groups.
