Difference between revisions of "Traffic/ITC431-RW1F-IRL8 Initial Setup"
| Line 7: | Line 7: | ||
==How-to Video== | ==How-to Video== | ||
| − | + | <embedvideo service="youtube">https://www.youtube.com/watch?v=z-j9PjoAH9I</embedvideo> | |
==Step by Step Instructions== | ==Step by Step Instructions== | ||
Latest revision as of 16:55, 18 March 2022
Contents
How to Configure ITC431-RW1F-IRL8 via WebGUI
Introduction
This guide will demonstrate how to configure the settings for the license plate camera via web interface.
Prerequisites
1. License plate camera initialized and on the network.
How-to Video
Step by Step Instructions
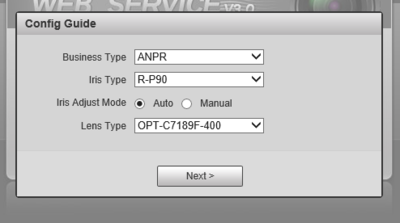
1. This prompt only appears when the camera is initialized and accessed for the first time. Leave these settings on default and save it.
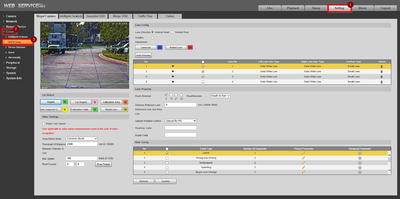
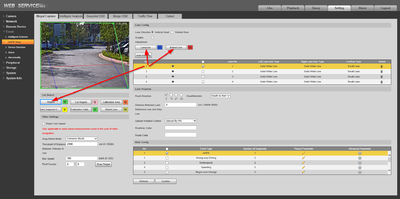
2. Go to Setting > Event > ANPR Snap
3. Remove all the drawing rules for 3 lans listed on the right side
- Select the first lane (It should be already selected by default).
- Click on the corresponding circle arrows for each color to remove them.
- Perform the same process for the other 2 lanes to remove all remaining drawings.
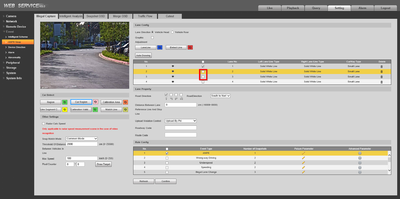
4. After the drawing rules are removed, we will need to disable number 2 and 3 by deselecting the checkboxes.
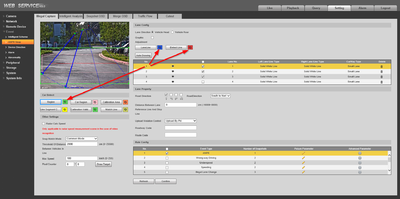
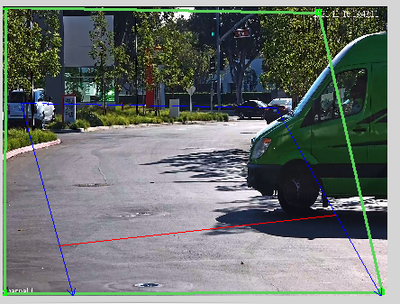
5. Select #1 again if it isn't already. Click on the 3 specified color options to proceed with the new drawing rules (green, blue and red)
Green is the detection box.
Blue is the lane where cars will be coming in/out.
Red is the detect line or snapline where the snapshot will be taken after the cars go passed it.
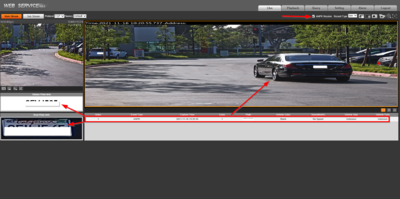
6. Navigate back to "Live" and enabled "ANPR Receive" to display the capture the license plates via webGUI.
