Difference between revisions of "CMS/DSS/Configure Record Schedule"
(→How to Configure Record Schedule) |
(→Prerequisites) |
||
| Line 15: | Line 15: | ||
* 1024×768 resolution or above | * 1024×768 resolution or above | ||
* Internet explorer 7 or above | * Internet explorer 7 or above | ||
| + | |||
| + | ===Video Instructions=== | ||
| + | |||
| + | <embedvideo service="youtube">https://youtu.be/lxJmm8DC01c</embedvideo> | ||
===Step by Step Instructions=== | ===Step by Step Instructions=== | ||
Latest revision as of 17:45, 22 September 2016
Contents
How to Configure Record Schedule
Prerequisites
- A Connection to the DSS Server
- An Internet Connection
- DSS server IP address
Windows:
- Microsoft Windows XP SP3, Microsoft Windows 7 or above
- Core 2 dual-core 3.0Ghz or above
- At least 10GB free hard disk space or above
- directX 9.0c or above
- 2GB Memory or above
- 1024×768 resolution or above
- Internet explorer 7 or above
Video Instructions
Step by Step Instructions
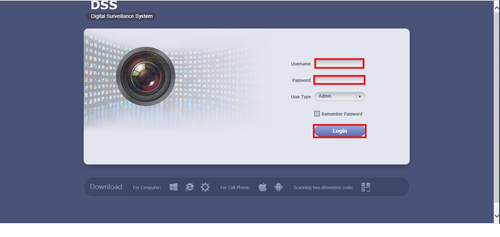
1. Go into your DSS and log in.
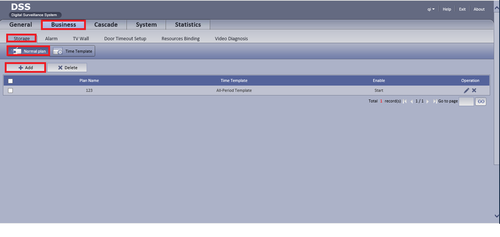
2. Go to Business, Storage, Normal Plan and then Add.
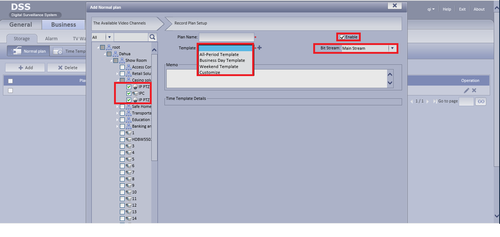
3. Select Cameras that you want to record under root, give a name for plan name, select a template for record, choose a stream and click on enable to enable the configuration.
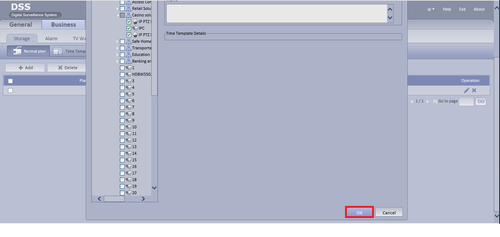
4. Click on ok and you're done.
Links
¶¶¶
| Related Articles in Category:Record | ||
|---|---|---|
| <DynamicPageList>
category = Record count=5 </DynamicPageList>
|
<DynamicPageList> category = Record offset = 5 count= 5 </DynamicPageList> |
<DynamicPageList>
category = Record offset = 10 count=5 </DynamicPageList> |


