Difference between revisions of "Mobile/iDMSS Push Notifications"
(→How to Setup Push Notifications via Mobile Application) |
|||
| Line 14: | Line 14: | ||
| − | '''Step 3.''' Select Recorder | + | '''Step 3.''' Select Recorder from list. '''Note''': You will not have "Education" |
| − | [[File: | + | [[File:push_not_10.png|300px]] |
| Line 26: | Line 26: | ||
| − | '''Step 5.''' Select Alarm Type | + | '''Step 5.''' Select Alarm Type. |
[[File:push_not_6.png|300px]] | [[File:push_not_6.png|300px]] | ||
| − | '''Step.6''' Select Camera or Cameras | + | '''Step.6''' Select Camera or Cameras. |
[[File:push_not_7.png|300px]] | [[File:push_not_7.png|300px]] | ||
| − | '''Step 7.''' Select back icon → Select Disk icon to | + | '''Step 7.''' Select back icon → Select Disk icon to subscribe entry. |
[[File:push_not_8.png|300px]] | [[File:push_not_8.png|300px]] | ||
[[File:push_not_9.png|300px]] | [[File:push_not_9.png|300px]] | ||
Revision as of 14:43, 26 January 2016
How to Setup Push Notifications via Mobile Application
Note: This is the paid version for IDMSS/GDMSS. For push notifications to work you must have Event and or Alarm enabled From the Device Manager in the main menu of IDMSS/GDMSS paid application.
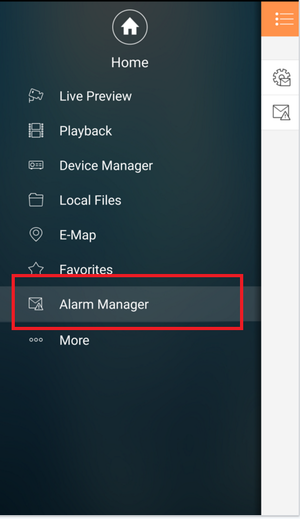
Step 1. From Main Menu Select "Alarm Manager"
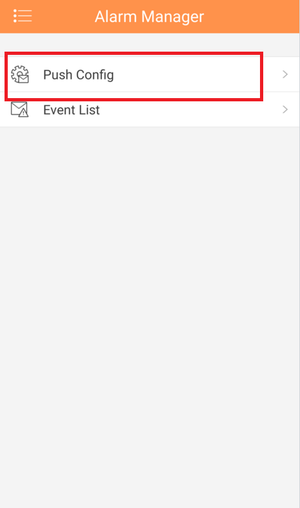
Step 2. Select "Push Config"
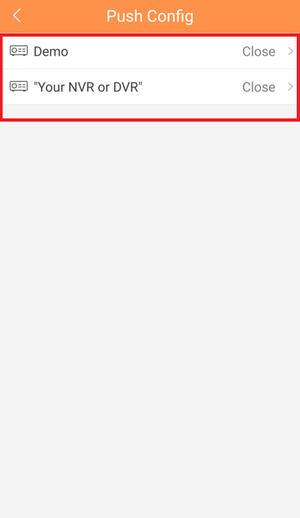
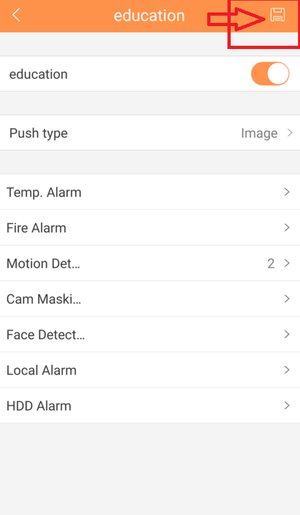
Step 3. Select Recorder from list. Note: You will not have "Education"
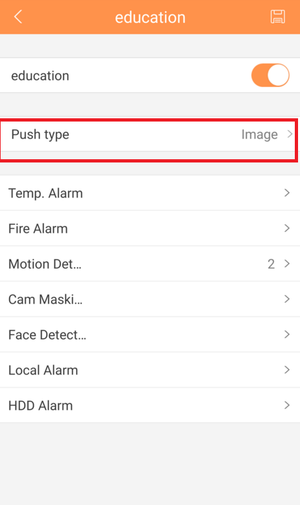
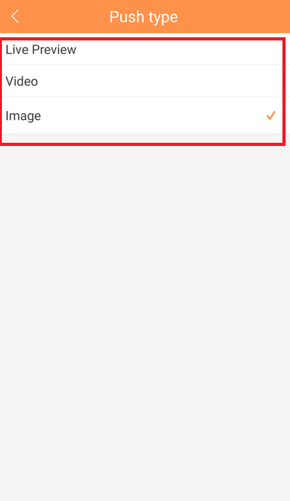
Step 4. Select "Push Type" → Select one of the following: Live Preview, Video or Image.
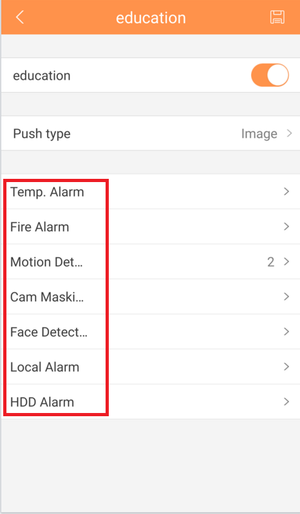
Step 5. Select Alarm Type.
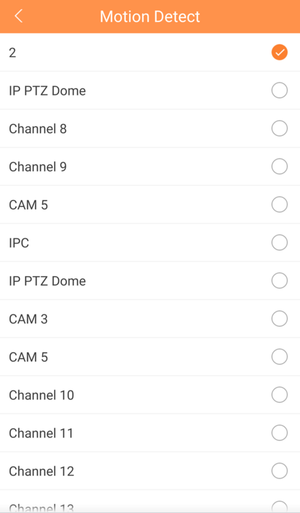
Step.6 Select Camera or Cameras.
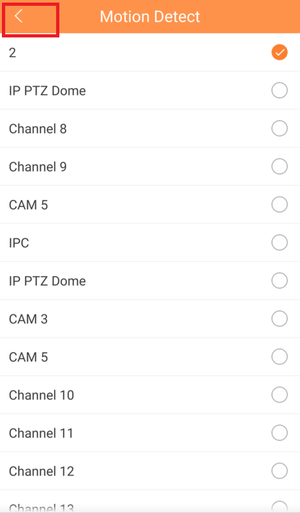
Step 7. Select back icon → Select Disk icon to subscribe entry.
