Difference between revisions of "Record/Advanced/SFTP Setup Using FreeNAS"
(→Instructions:Part 1 FreeNAS Setup) |
(→Instructions:Part 1 FreeNAS Setup) |
||
| Line 93: | Line 93: | ||
[[File:SFTP_Setup_Using_FreeNAS_-_16-1.jpg|500px]] | [[File:SFTP_Setup_Using_FreeNAS_-_16-1.jpg|500px]] | ||
| − | 15. Under | + | 15. Under Directories & Permissions |
| + | |||
| + | The directory that was created in the previous steps must be assisgned ot th enew user | ||
| + | |||
| + | Click the folder icon | ||
| + | |||
[[File:SFTP_Setup_Using_FreeNAS_-_17.jpg|500px]] | [[File:SFTP_Setup_Using_FreeNAS_-_17.jpg|500px]] | ||
| + | |||
| + | The file tree will expand | ||
| + | |||
| + | Find the directory created in the last step (in this example 'abc') | ||
[[File:SFTP_Setup_Using_FreeNAS_-_18.jpg|500px]] | [[File:SFTP_Setup_Using_FreeNAS_-_18.jpg|500px]] | ||
| + | |||
| + | Click the folder icon next to the directory and the Home Directory will update | ||
[[File:SFTP_Setup_Using_FreeNAS_-_19.jpg|500px]] | [[File:SFTP_Setup_Using_FreeNAS_-_19.jpg|500px]] | ||
| + | |||
| + | 16. Under Home Directory Permissions | ||
| + | |||
| + | Make the following permissions changes for the user: | ||
[[File:SFTP_Setup_Using_FreeNAS_-_20.jpg|500px]] | [[File:SFTP_Setup_Using_FreeNAS_-_20.jpg|500px]] | ||
| + | |||
| + | 17. Check the box next to 'Permit Sudo' | ||
[[File:SFTP_Setup_Using_FreeNAS_-_21.jpg|500px]] | [[File:SFTP_Setup_Using_FreeNAS_-_21.jpg|500px]] | ||
Revision as of 22:15, 12 December 2019
Contents
SFTP Setup Using FreeNAS
Description
Prerequisites
- Dedicated PC or VM running FreeNAS
- Dahua Recorder with FTP Function
- FileZilla Client
Instructions:Part 1 FreeNAS Setup
Video Instructions
Step by Step Instructions
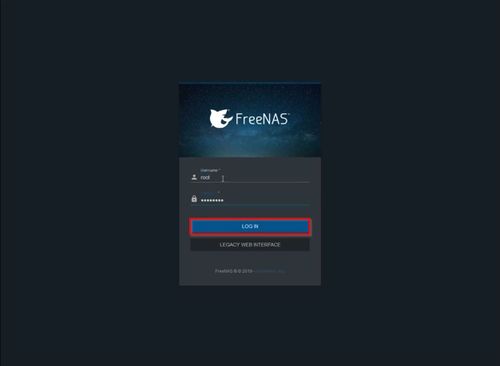
1. Log into the FreeNas web interface
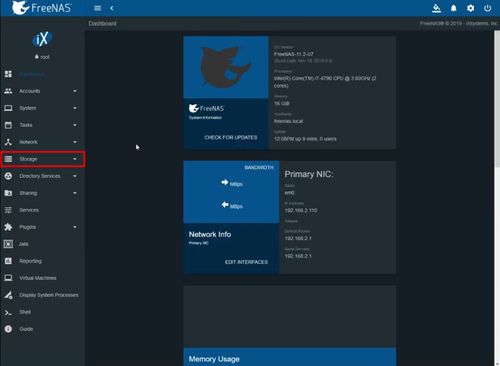
2. Click Storage
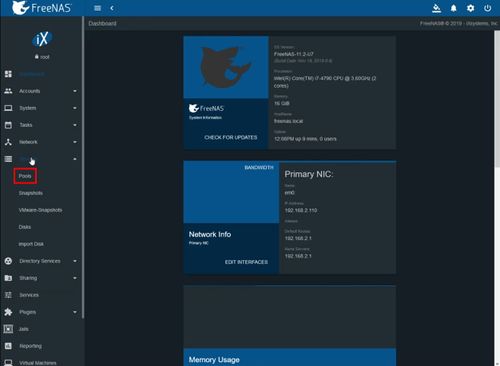
3. Click Pools
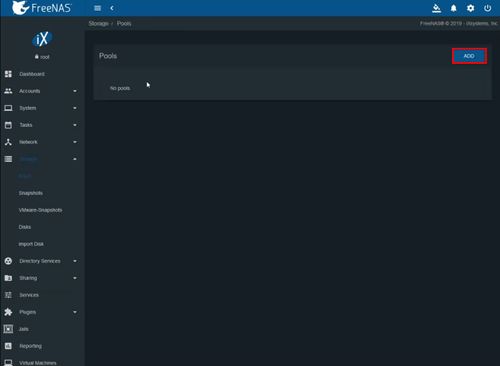
4. Click Add to create a new Pool
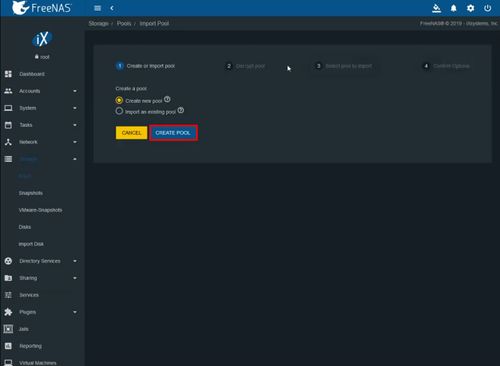
5. Select Create new pool
Click Create Pool
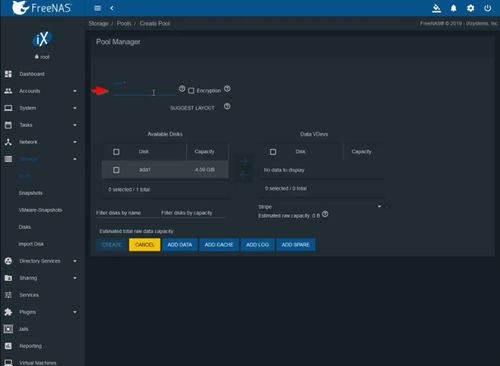
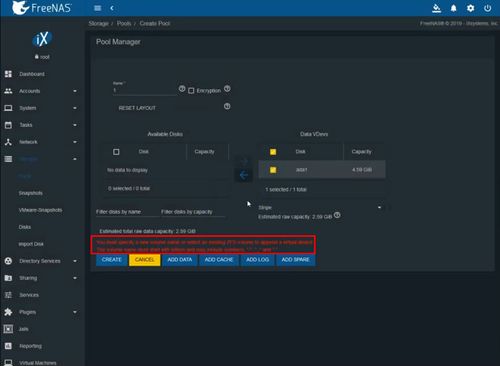
6. Enter a name for the pool
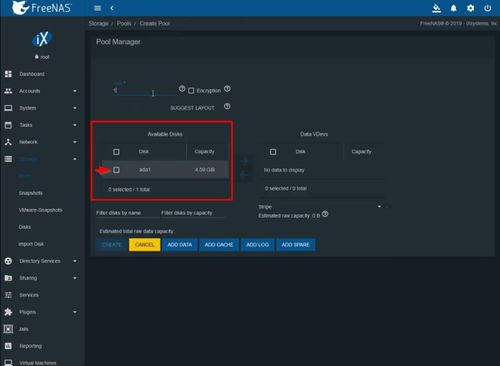
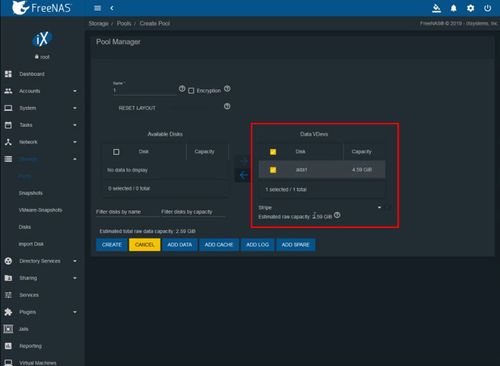
7. A list of hard disks that are available will be listed
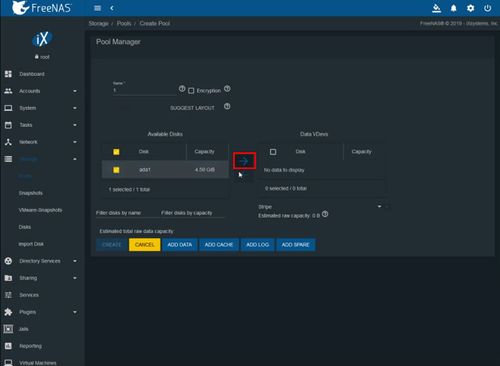
To add a hard disk to the pool
Click the checkbox next to the disk in the list
Click the arrow to add
The disk will be added to the pool
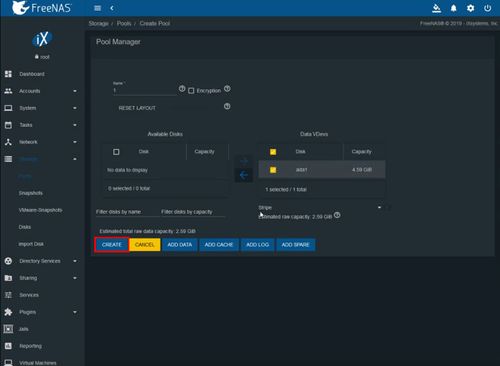
8. Click Create
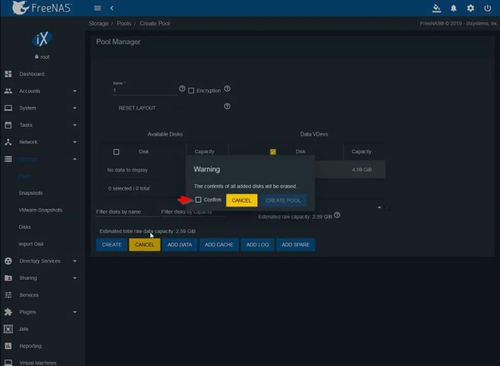
9. A prompt will appear to confirm
Check the box to Confirm
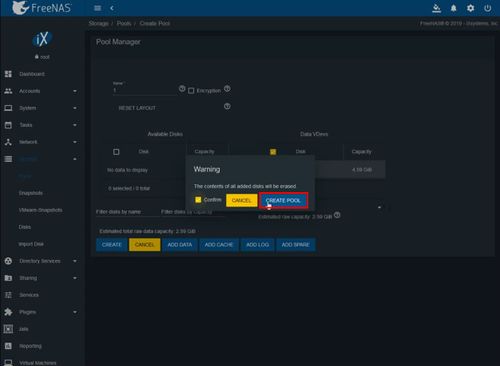
Click Create Pool
If there are any errors a message will appear. After resolving any errors make sure to click Create
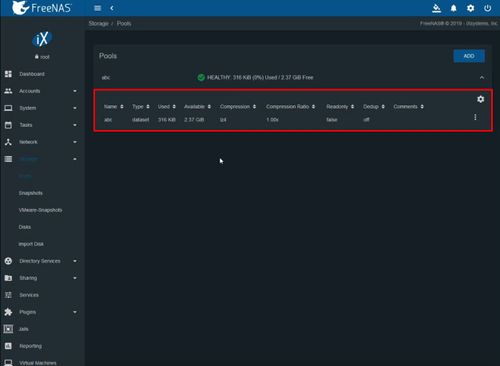
10. The created Pool will appear in the list
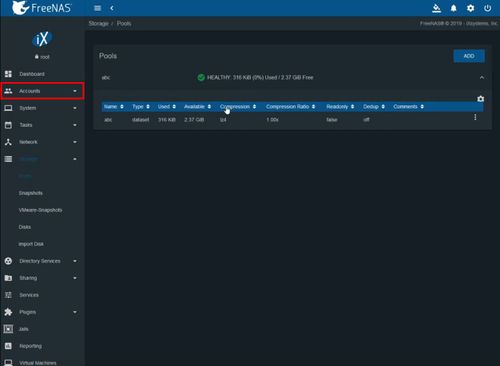
11. Click Accounts
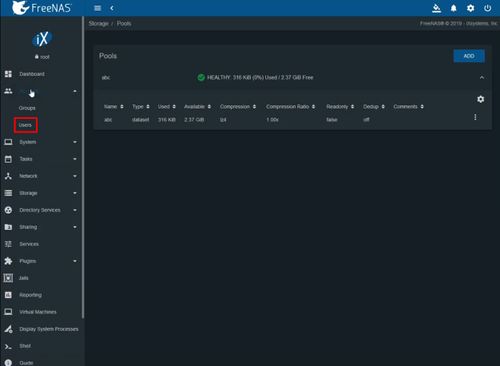
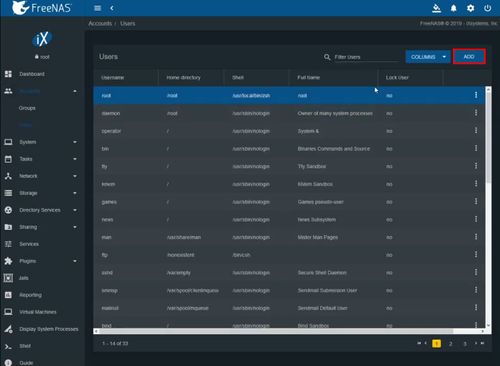
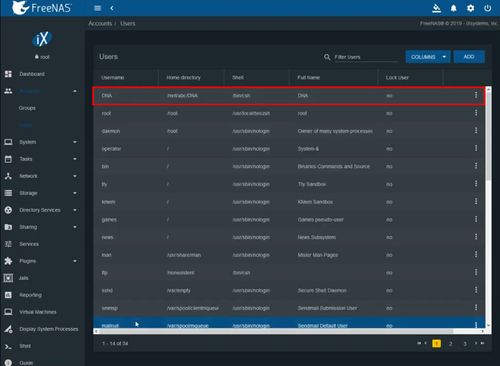
12. Click Users
13. Click Add to create a new user
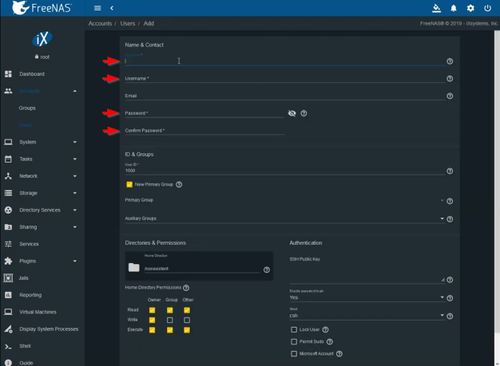
14. Enter the required information for the user:
- Full Name
- Username
- Password
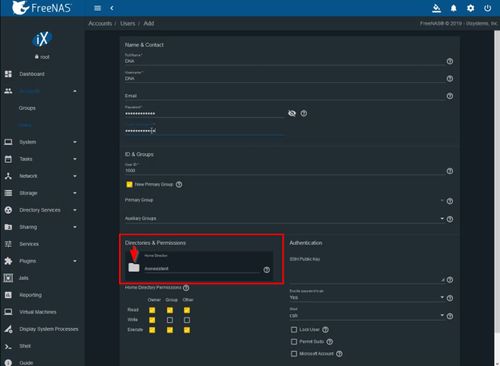
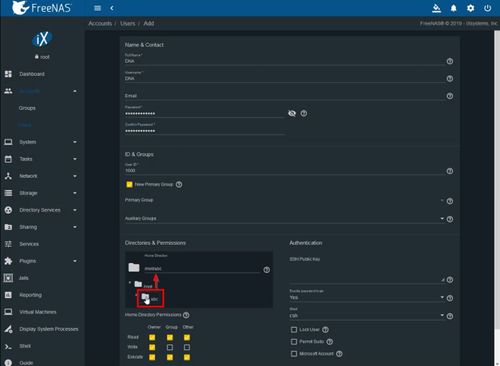
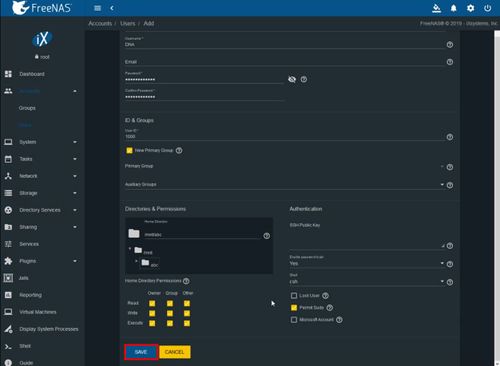
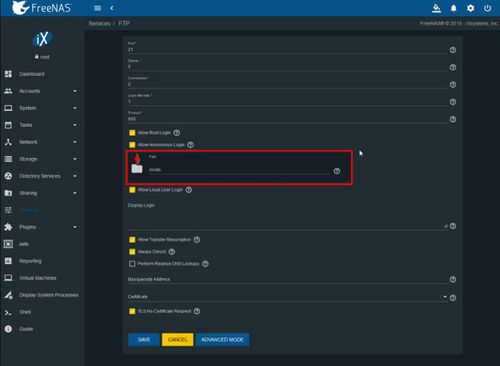
15. Under Directories & Permissions
The directory that was created in the previous steps must be assisgned ot th enew user
Click the folder icon
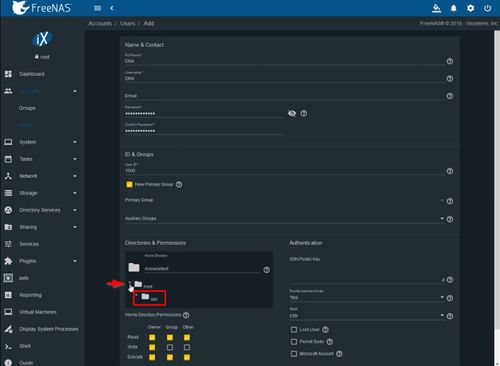
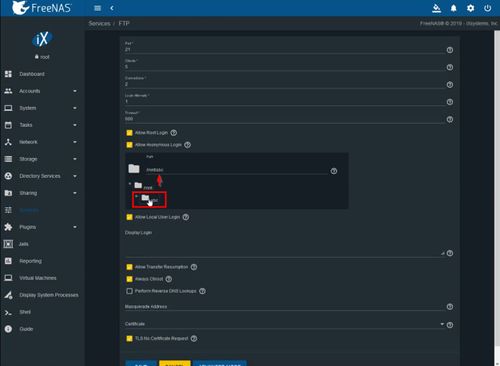
The file tree will expand
Find the directory created in the last step (in this example 'abc')
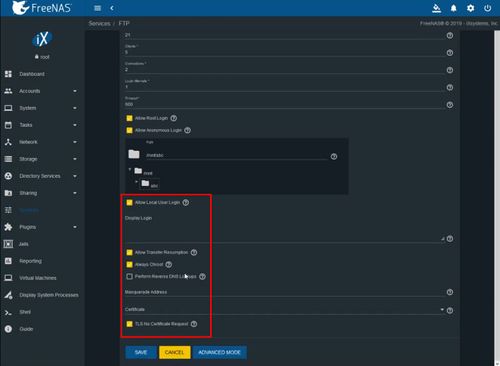
Click the folder icon next to the directory and the Home Directory will update
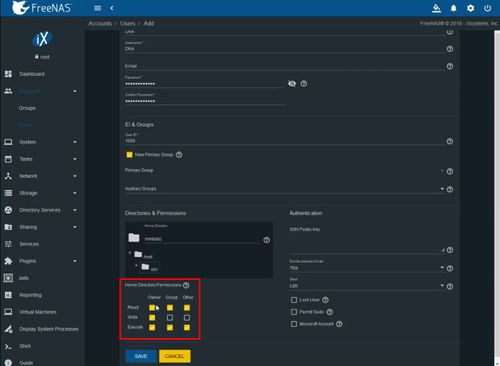
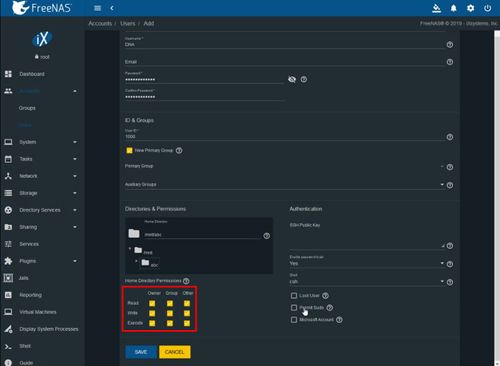
16. Under Home Directory Permissions
Make the following permissions changes for the user:
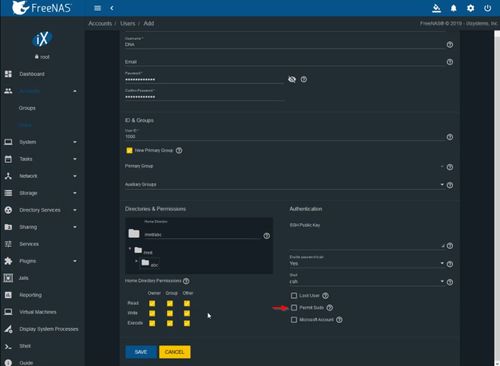
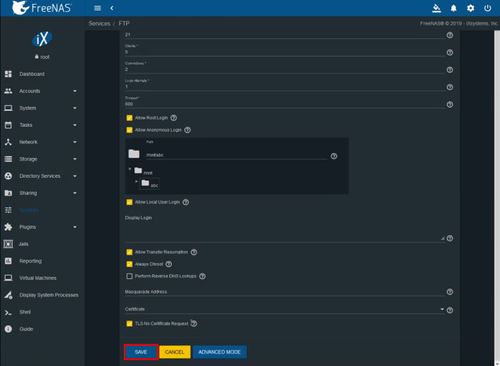
17. Check the box next to 'Permit Sudo'
Instructions:Part 2 Configure Dahua Recorder
Video Instructions
Step by Step Instructions
1. 800x800px
Instructions:Part 3 Download from SFTP via Filezilla Client
Video Instructions
Step by Step Instructions
1. 800x800px
