Difference between revisions of "Template:Audio Record SystemUI NewGUI"
| Line 17: | Line 17: | ||
3. Select "Encode" on the left and then select the "Encode" tab at the top. | 3. Select "Encode" on the left and then select the "Encode" tab at the top. | ||
| − | <br>Then select "More Setting" under the Main Stream section | + | <br>Then select the channel the camera with audio is on next to "Channel". |
| + | <br>Select "More Setting" under the Main Stream section | ||
[[File:AudioRecordingSystemUINew3.png|1000px]] | [[File:AudioRecordingSystemUINew3.png|1000px]] | ||
Latest revision as of 01:20, 4 February 2020
Prerequisites
- Dahua Camera with Audio Input
- Dahua Recorder with the New GUI, connected to a TV or Monitor
Video Instructions
Step by Step Instructions
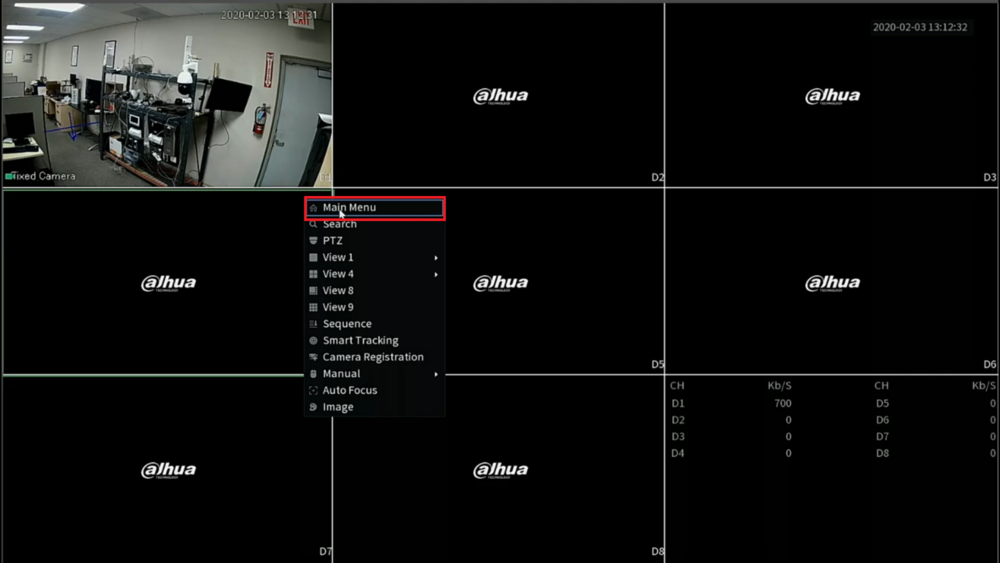
1. Right click on the Live View and select "Main Menu"
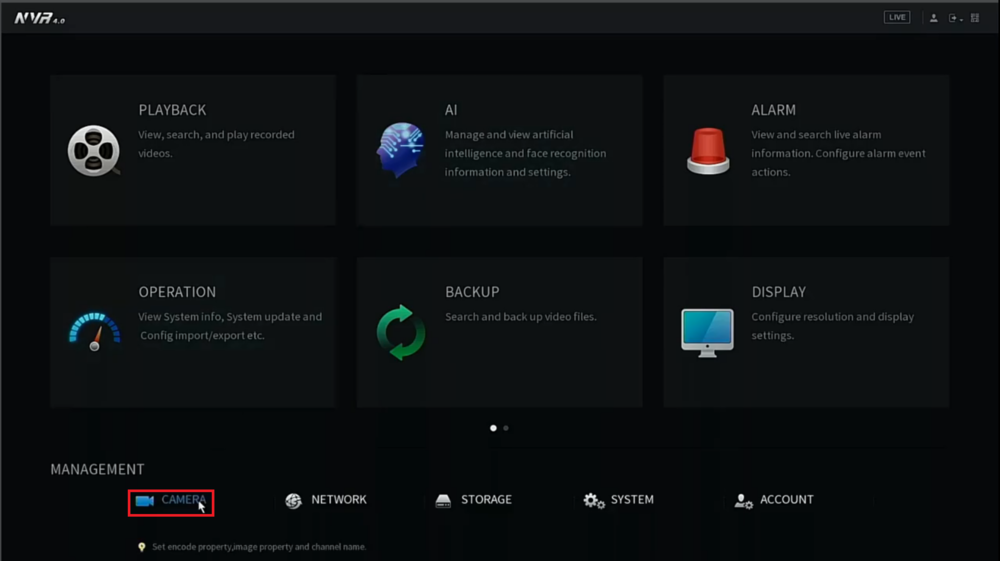
2. Select "Camera" at the bottom
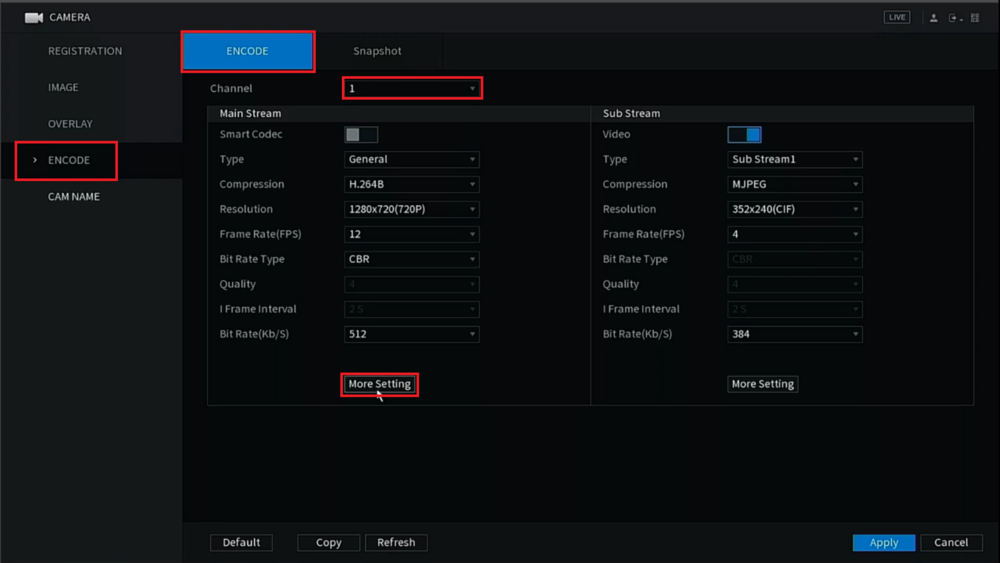
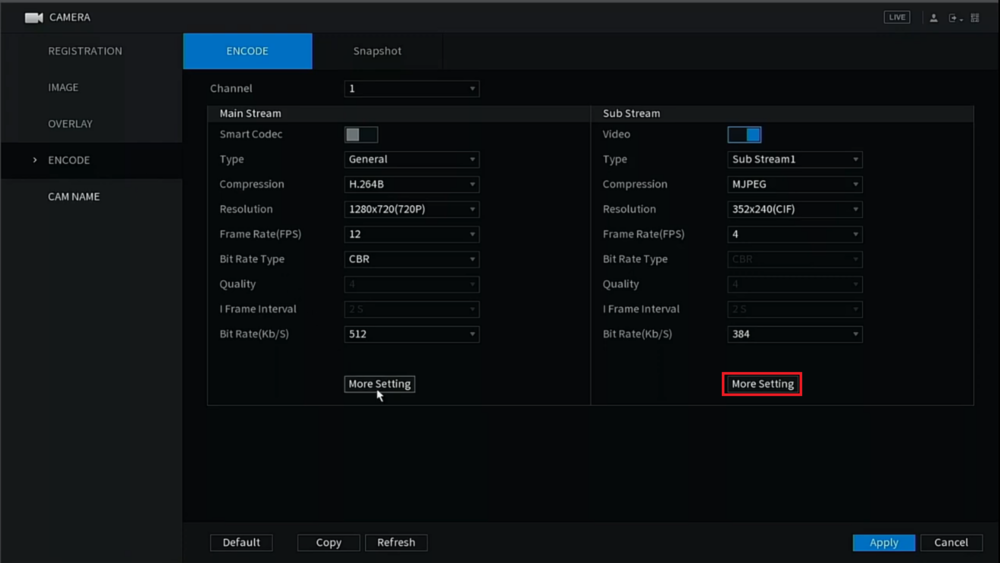
3. Select "Encode" on the left and then select the "Encode" tab at the top.
Then select the channel the camera with audio is on next to "Channel".
Select "More Setting" under the Main Stream section
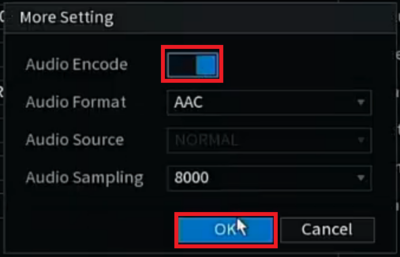
4. Enable "Audio Encode" and then select "OK"
5. Select "More Setting" under the Sub Stream section
6. Enable "Audio Encode" and then select "OK"
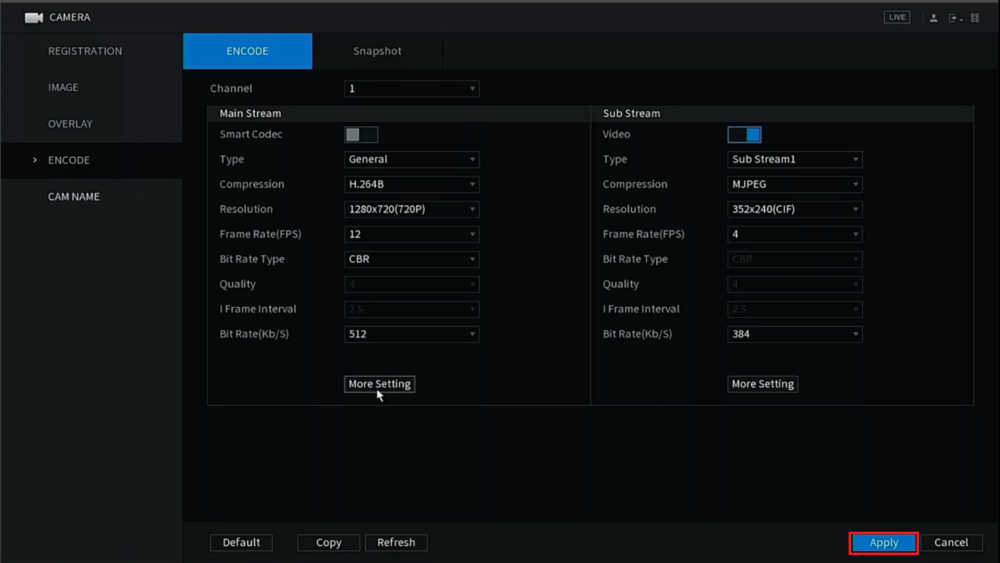
7. Select "Apply" at the bottom to save the settings
