Difference between revisions of "LincX2PRO/L26N Physical Install"
(→Step by Step Instructions) |
|||
| Line 5: | Line 5: | ||
<embedvideo service="youtube">https://youtu.be/8Wdm-T4nIBs</embedvideo> | <embedvideo service="youtube">https://youtu.be/8Wdm-T4nIBs</embedvideo> | ||
==Step by Step Instructions== | ==Step by Step Instructions== | ||
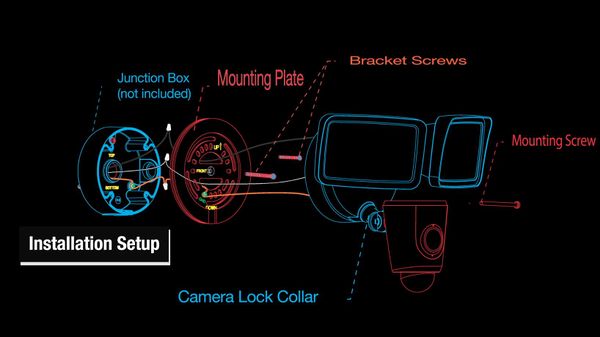
| − | + | Physical installation reference image: | |
[[File:L26_Physical_Install_-_0.jpg|600px]] | [[File:L26_Physical_Install_-_0.jpg|600px]] | ||
| + | |||
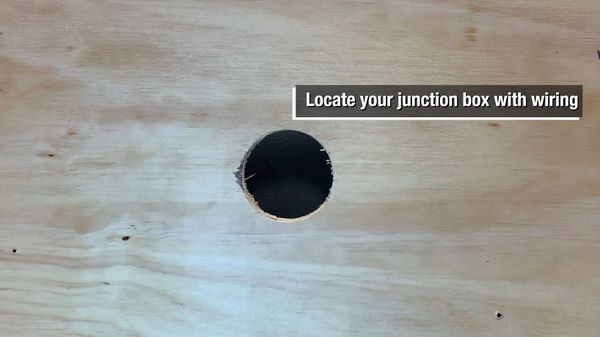
| + | 1. Locate the junction box with wiring | ||
[[File:L26_Physical_Install_-_1.jpg|600px]] | [[File:L26_Physical_Install_-_1.jpg|600px]] | ||
| + | |||
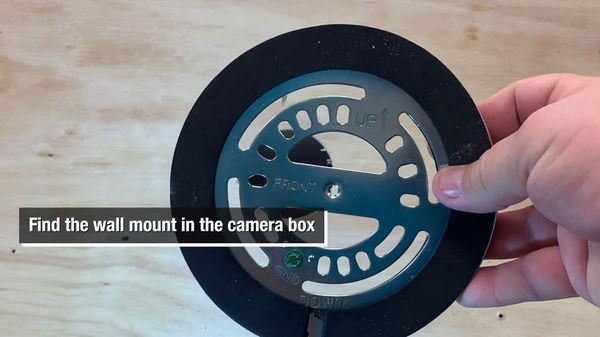
| + | 2. Find the wall mount in the camera box | ||
[[File:L26_Physical_Install_-_2.jpg|600px]] | [[File:L26_Physical_Install_-_2.jpg|600px]] | ||
| + | |||
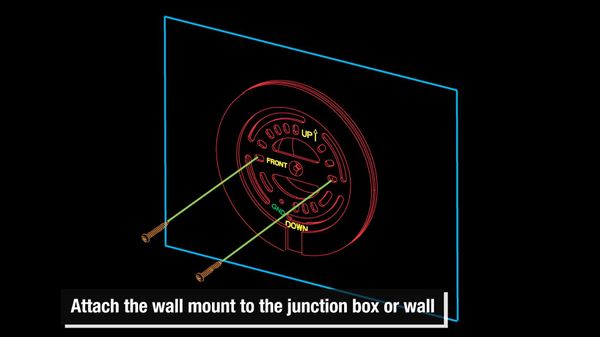
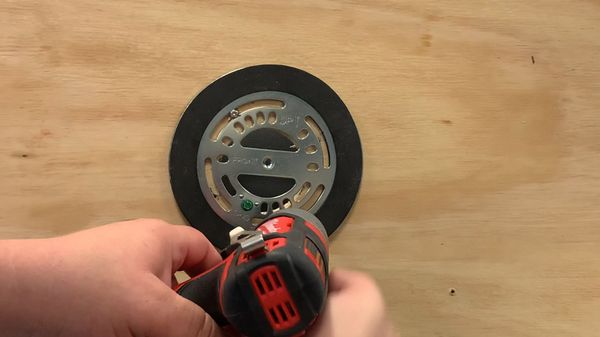
| + | 3. Attach the wall mount to the junction box or wall | ||
[[File:L26_Physical_Install_-_3.jpg|600px]] | [[File:L26_Physical_Install_-_3.jpg|600px]] | ||
[[File:L26_Physical_Install_-_3-1.jpg|600px]] | [[File:L26_Physical_Install_-_3-1.jpg|600px]] | ||
| + | |||
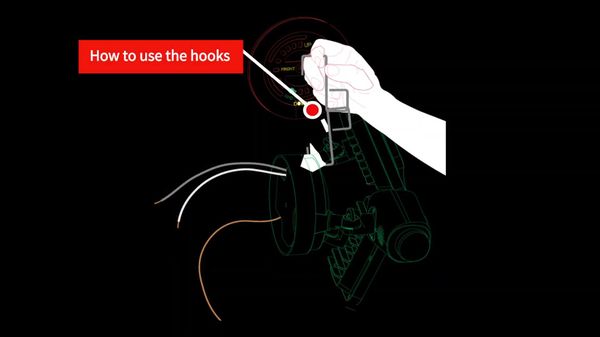
| + | 4. Use the hooks to assist in mounting | ||
[[File:L26_Physical_Install_-_4.jpg|600px]] | [[File:L26_Physical_Install_-_4.jpg|600px]] | ||
| + | |||
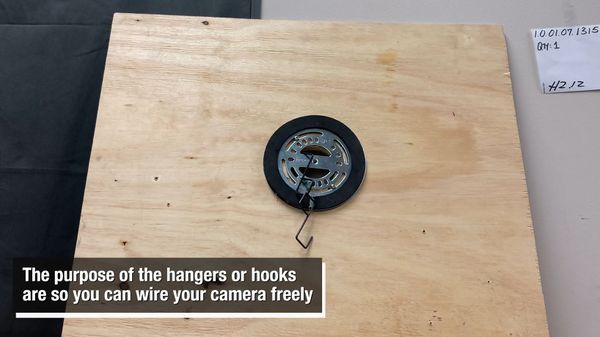
| + | The purpose of the hangers or hooks are to wire the camera freely | ||
[[File:L26_Physical_Install_-_5.jpg|600px]] | [[File:L26_Physical_Install_-_5.jpg|600px]] | ||
| + | |||
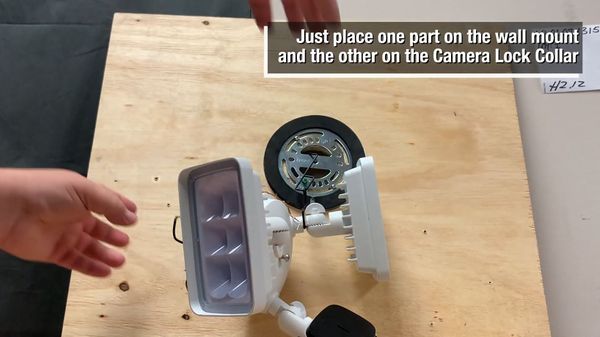
| + | 5. Place one part of hander/hook on the wall mount and the other on the Camera Lock Collar | ||
[[File:L26_Physical_Install_-_6.jpg|600px]] | [[File:L26_Physical_Install_-_6.jpg|600px]] | ||
| + | 6. Next step is connecting the power wires. | ||
| + | |||
| + | '''Important Notice: Make sure that power is turned off BEFORE you start connecting wires | ||
| + | ''' | ||
[[File:L26_Physical_Install_-_7.jpg|600px]] | [[File:L26_Physical_Install_-_7.jpg|600px]] | ||
| + | |||
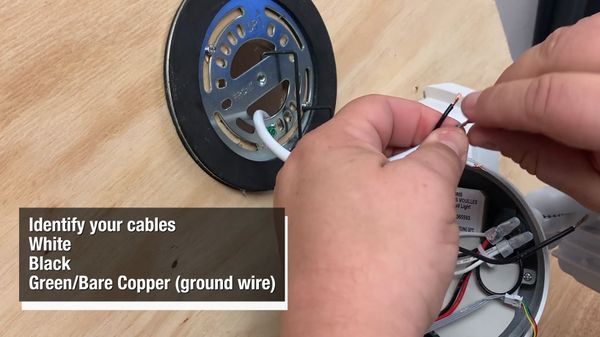
| + | 7. Identify the cables | ||
| + | |||
| + | * White | ||
| + | * Black | ||
| + | * Green/Bare Copper | ||
[[File:L26_Physical_Install_-_8.jpg|600px]] | [[File:L26_Physical_Install_-_8.jpg|600px]] | ||
| + | |||
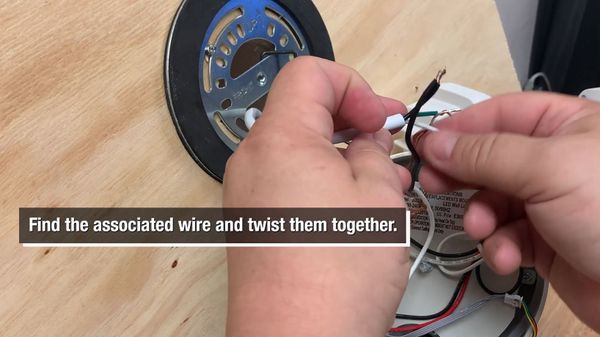
| + | 8. Find the associated wire and twist them together | ||
[[File:L26_Physical_Install_-_9.jpg|600px]] | [[File:L26_Physical_Install_-_9.jpg|600px]] | ||
| + | |||
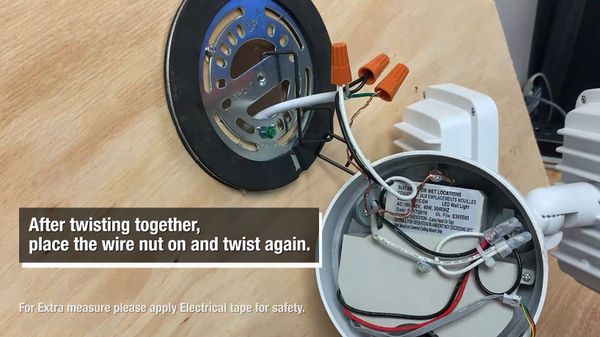
| + | 9. After twisting together, place the wire nut on and twist again. | ||
| + | |||
| + | For extra security please apply electrical tape for safety | ||
[[File:L26_Physical_Install_-_10.jpg|600px]] | [[File:L26_Physical_Install_-_10.jpg|600px]] | ||
| + | |||
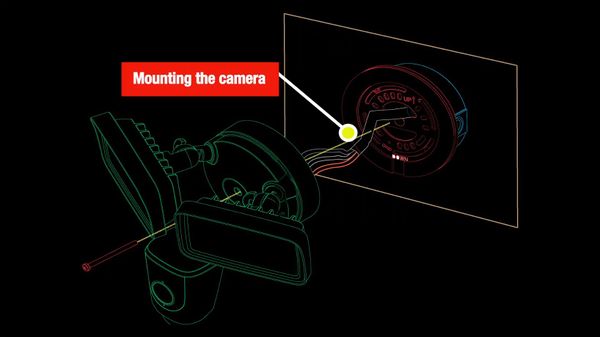
| + | 10. The camera will now be mounted | ||
[[File:L26_Physical_Install_-_11.jpg|600px]] | [[File:L26_Physical_Install_-_11.jpg|600px]] | ||
| + | |||
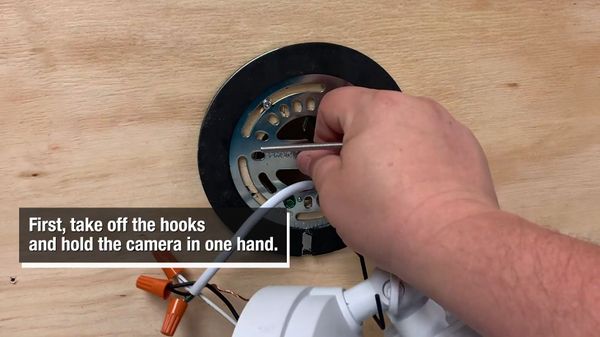
| + | 11. Take off the hanger/hook and hold the camera in one hand | ||
[[File:L26_Physical_Install_-_12.jpg|600px]] | [[File:L26_Physical_Install_-_12.jpg|600px]] | ||
| + | |||
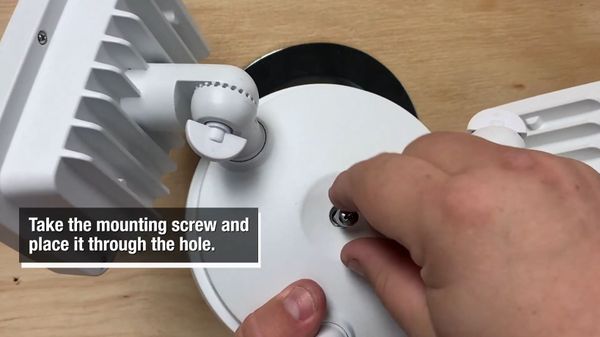
| + | 12. Take the mounting screw and place it through the hole | ||
[[File:L26_Physical_Install_-_13.jpg|600px]] | [[File:L26_Physical_Install_-_13.jpg|600px]] | ||
| + | |||
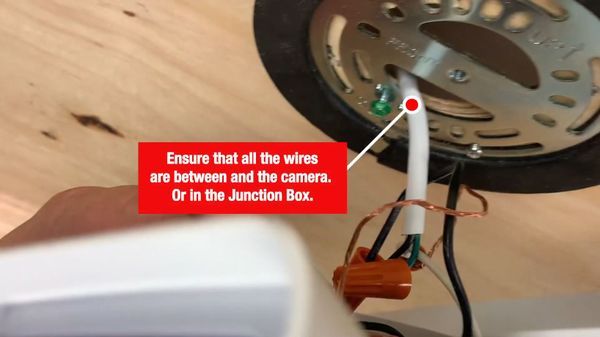
| + | 13. Ensure that all the wires are between the mounting plate and camera or in the junction box | ||
[[File:L26_Physical_Install_-_14.jpg|600px]] | [[File:L26_Physical_Install_-_14.jpg|600px]] | ||
| + | |||
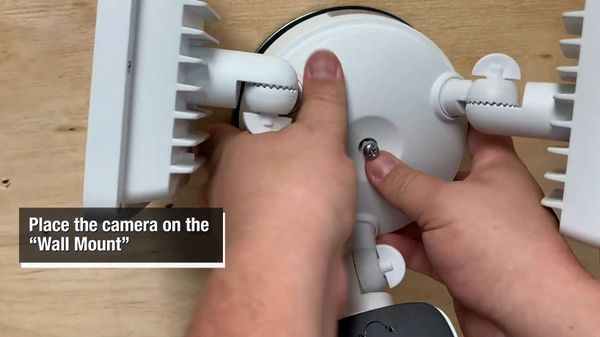
| + | 14. Place the camera on the wall mount | ||
[[File:L26_Physical_Install_-_15.jpg|600px]] | [[File:L26_Physical_Install_-_15.jpg|600px]] | ||
| + | |||
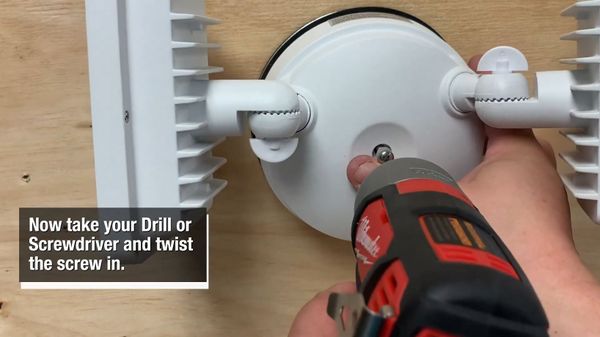
| + | 15. Screw in the mounting screw | ||
[[File:L26_Physical_Install_-_16.jpg|600px]] | [[File:L26_Physical_Install_-_16.jpg|600px]] | ||
| + | |||
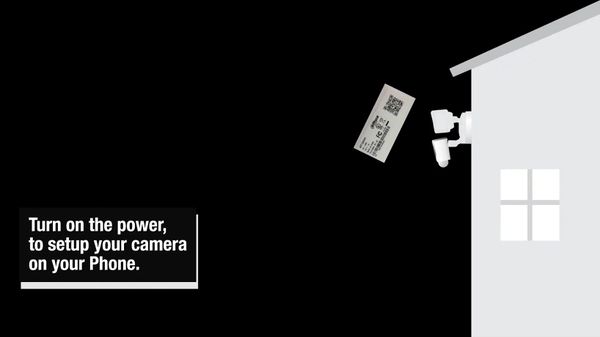
| + | 16. Turn on the power | ||
| + | |||
| + | Setup will continue using a phone running the mobile app iGDMSS / iDMSS | ||
[[File:L26_Physical_Install_-_17.jpg|600px]] | [[File:L26_Physical_Install_-_17.jpg|600px]] | ||
| + | |||
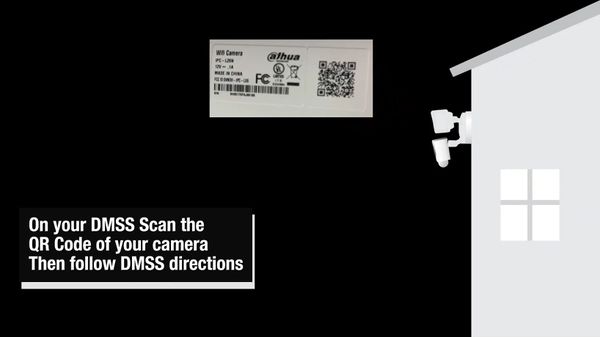
| + | 17. In gDMSS / iDMSS scan the QR code of the camera | ||
| + | |||
| + | Then follow the directions from the app to complete setup of the device | ||
[[File:L26_Physical_Install_-_18.jpg|600px]] | [[File:L26_Physical_Install_-_18.jpg|600px]] | ||
| + | |||
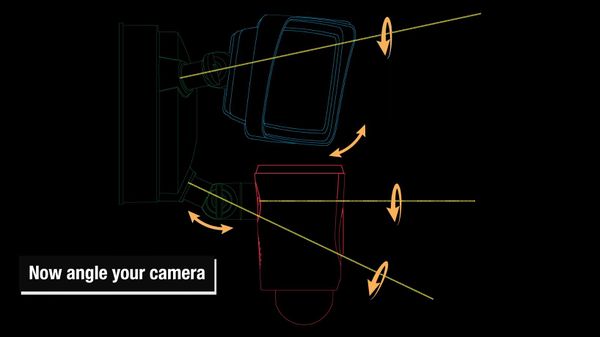
| + | 18. Angle the camera as desired | ||
[[File:L26_Physical_Install_-_19.jpg|600px]] | [[File:L26_Physical_Install_-_19.jpg|600px]] | ||
Revision as of 20:48, 25 February 2020
Contents
L26N Physical Install
Description
Prerequisites
Video Instructions
Step by Step Instructions
Physical installation reference image:
1. Locate the junction box with wiring
2. Find the wall mount in the camera box
3. Attach the wall mount to the junction box or wall
4. Use the hooks to assist in mounting
The purpose of the hangers or hooks are to wire the camera freely
5. Place one part of hander/hook on the wall mount and the other on the Camera Lock Collar
6. Next step is connecting the power wires.
Important Notice: Make sure that power is turned off BEFORE you start connecting wires
7. Identify the cables
- White
- Black
- Green/Bare Copper
8. Find the associated wire and twist them together
9. After twisting together, place the wire nut on and twist again.
For extra security please apply electrical tape for safety
10. The camera will now be mounted
11. Take off the hanger/hook and hold the camera in one hand
12. Take the mounting screw and place it through the hole
13. Ensure that all the wires are between the mounting plate and camera or in the junction box
14. Place the camera on the wall mount
15. Screw in the mounting screw
16. Turn on the power
Setup will continue using a phone running the mobile app iGDMSS / iDMSS
17. In gDMSS / iDMSS scan the QR code of the camera
Then follow the directions from the app to complete setup of the device
18. Angle the camera as desired
