Difference between revisions of "NVR/Recording Setup/Motion Record"
(→Setup Motion Recording via Web Interface) |
|||
| Line 29: | Line 29: | ||
===Setup Motion Recording via Web Interface=== | ===Setup Motion Recording via Web Interface=== | ||
| − | |||
'''Step 1.''' Set up tab → event → video detect. | '''Step 1.''' Set up tab → event → video detect. | ||
| Line 53: | Line 52: | ||
[[File:motion5.png|600px]] | [[File:motion5.png|600px]] | ||
| + | |||
| + | '''Step 6.''' | ||
Revision as of 14:07, 23 March 2016
Contents
Motion Record
Quick Video
Step-by-Step Instructions
Setup Motion Recording via System Interface
All the operations depend on the GUI of NVR.
1). In this order: Main menu → Advanced → Record,then check all the channels you need to set motion detect to Schedule.
2). In this order: Main menu → Setting → Detect, choose the channel you want to set, for example , like figure 1 shows channel 2 is selected to show this function. Check the box “Enable” and “Record channel”.
3). In this order: Main menu → Setting → Schedule, like figure 3 shows ,firstly select the channel you want to set, here it’s channel 2.
Then choose the Period of recording ,for your case you can select All, this NVR supports 6 periods to set this function, usually we just use one period 00:00-24:00. In the Period 1, you should check the video type box which you want to record, like “Regular”, “MD” (Motion Detect), “Alarm”, “MD & Alarm”. For your case, just check the box “MD” is okay.
4). Remember to save when you have set each step successfully .
You can set the region for detection trigger like figure 2, the red region refers to where you want to monitor the motion. Setting like the figure shows, it means anybody pass the room will trigger the motion detect, and the people’s movement in the room won’t. The default setting is monitor the motion of the whole screen. And you can set the motion sensitivity of the camera threshold, usually just set it as the default number.
Setup Motion Recording via Web Interface
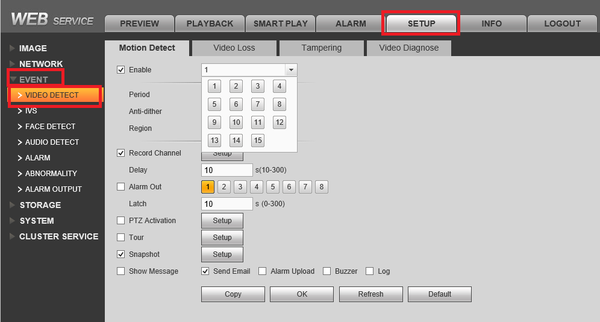
Step 1. Set up tab → event → video detect.
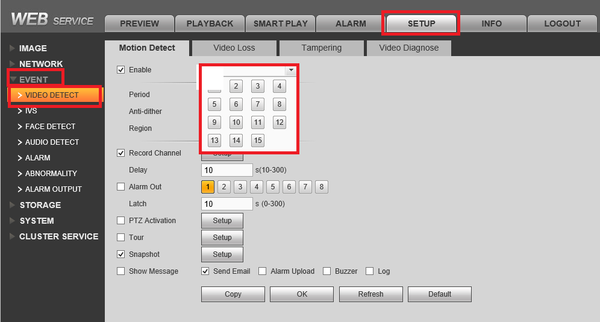
Step 2. Check enable → Choose which cameras you want motion detect set for. You may copy motion settings from one channel to another or from one channel to all by selecting the "Copy" button on the lower left.
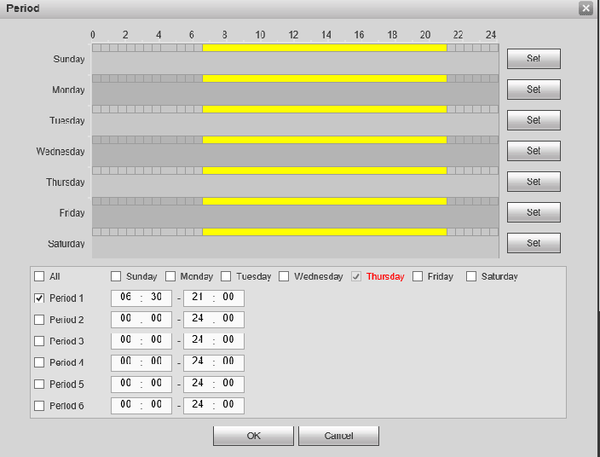
Step 3. Set Period. You can choose what days and times you want motion detect set.
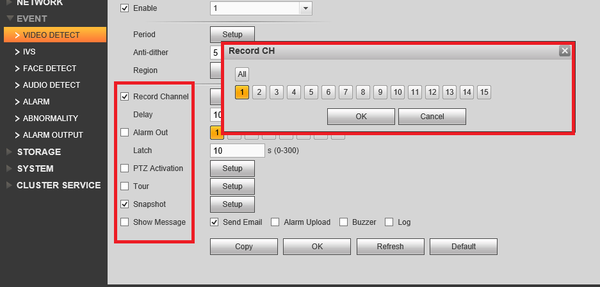
Step 4. Choose which functions you want motion to do when a motion event occurs such as snap shot and record channel. The set up is the same for record channel, snapshot and tour. You may choose which cameras record , snapshot , tour and PTZ activation when a motion event occurs. All or more than one camera maybe selected.
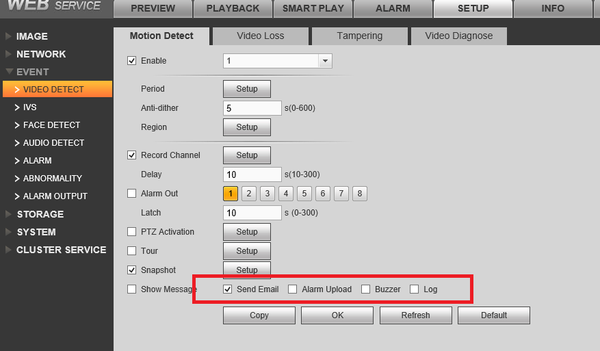
Step 5. Select notification when a motion event occurs. Remember to click "OK" to save settings.
Step 6.
