Difference between revisions of "Template:Initial Setup SystemUI NewGUI"
| Line 8: | Line 8: | ||
1. Connect the NVR to the display and power it on. | 1. Connect the NVR to the display and power it on. | ||
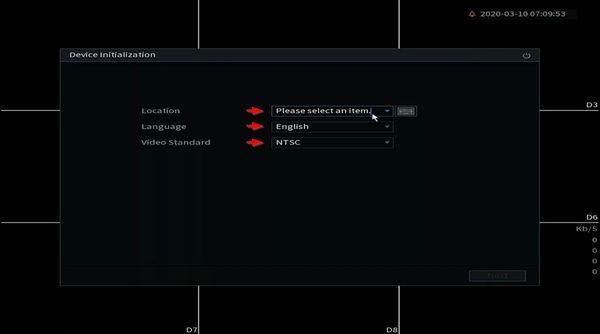
| + | Use the dropdown boxes to select | ||
| + | |||
| + | Location | ||
| + | Language | ||
| + | Video Standard | ||
[[File:Initial_Setup_-_SystemUI_New_-_1.jpg|600px]] | [[File:Initial_Setup_-_SystemUI_New_-_1.jpg|600px]] | ||
| + | |||
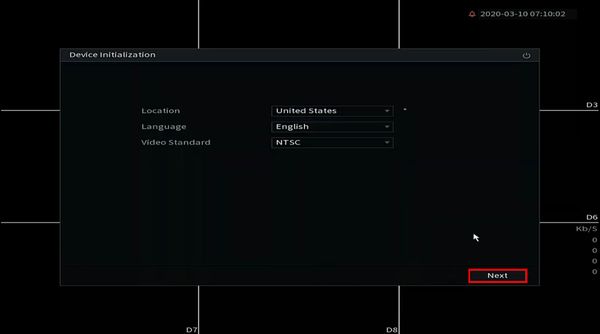
| + | Click Next | ||
[[File:Initial_Setup_-_SystemUI_New_-_2.jpg|600px]] | [[File:Initial_Setup_-_SystemUI_New_-_2.jpg|600px]] | ||
| + | |||
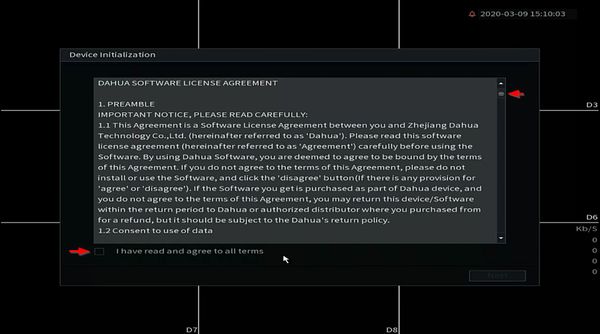
| + | 2. The Software License Agreement window will appear. | ||
| + | |||
| + | Use the scroll bar to review the agreement and check the box to agree | ||
[[File:Initial_Setup_-_SystemUI_New_-_3.jpg|600px]] | [[File:Initial_Setup_-_SystemUI_New_-_3.jpg|600px]] | ||
| + | |||
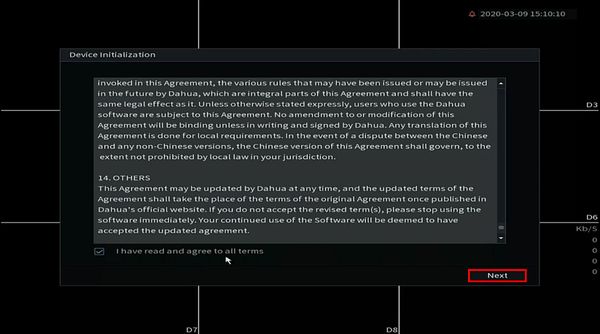
| + | Click Next | ||
[[File:Initial_Setup_-_SystemUI_New_-_4.jpg|600px]] | [[File:Initial_Setup_-_SystemUI_New_-_4.jpg|600px]] | ||
| + | |||
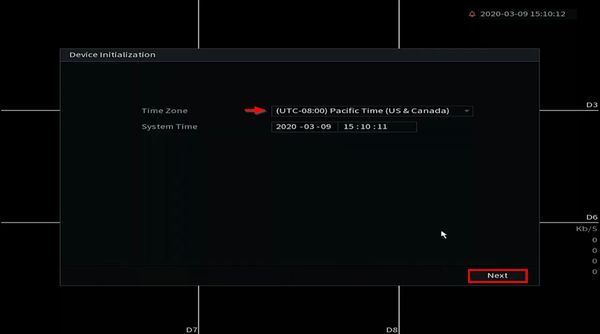
| + | 3. Use the dropdown box to select the Time Zone | ||
| + | |||
| + | Click Next | ||
[[File:Initial_Setup_-_SystemUI_New_-_5.jpg|600px]] | [[File:Initial_Setup_-_SystemUI_New_-_5.jpg|600px]] | ||
| + | |||
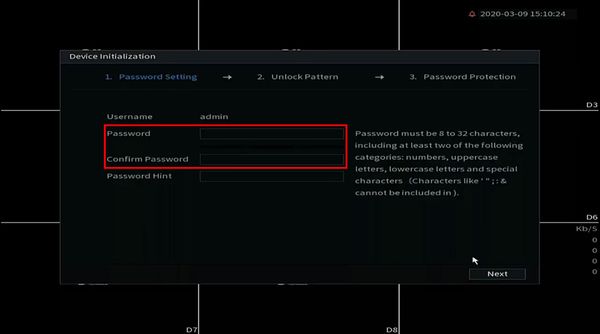
| + | 4. Use the interface to create a password for the admin account | ||
| + | |||
| + | The password must be 8 to 32 characters, including at least two of the following categories: numbers, uppercase letters, lowercase letters and special characters (Characters like '";:& cannot be included) | ||
| + | |||
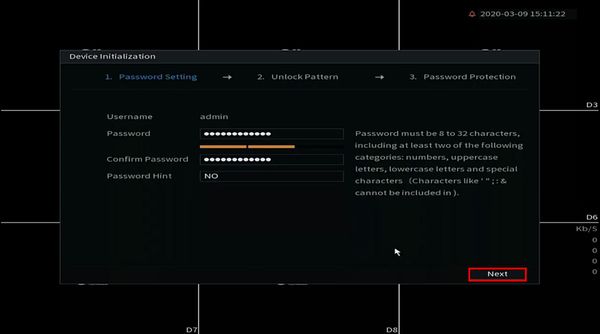
| + | Enter the password twice | ||
| + | |||
| + | Enter a Password Hint | ||
[[File:Initial_Setup_-_SystemUI_New_-_6.jpg|600px]] | [[File:Initial_Setup_-_SystemUI_New_-_6.jpg|600px]] | ||
| + | |||
| + | Click Next | ||
[[File:Initial_Setup_-_SystemUI_New_-_7.jpg|600px]] | [[File:Initial_Setup_-_SystemUI_New_-_7.jpg|600px]] | ||
| + | |||
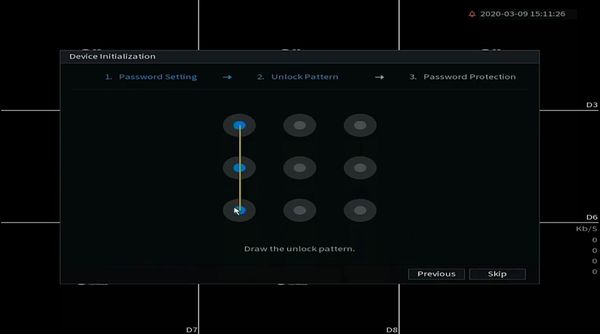
| + | 5. Use the interface to create a Device Unlock Pattern. This is another method of logging into the device. You can click Skip to skip this part of the setup. | ||
[[File:Initial_Setup_-_SystemUI_New_-_8.jpg|600px]] | [[File:Initial_Setup_-_SystemUI_New_-_8.jpg|600px]] | ||
| + | |||
| + | Draw the pattern again to confirm | ||
[[File:Initial_Setup_-_SystemUI_New_-_9.jpg|600px]] | [[File:Initial_Setup_-_SystemUI_New_-_9.jpg|600px]] | ||
| + | 6. Use the interface to setup Password Recovery for the device in case the password is lost or forgotten | ||
| + | |||
| + | Click to enable the Email Recovery feature, | ||
[[File:Initial_Setup_-_SystemUI_New_-_10.jpg|600px]] | [[File:Initial_Setup_-_SystemUI_New_-_10.jpg|600px]] | ||
Revision as of 17:27, 10 March 2020
Prerequisites
- Dahua Recorder: NVR, DVR, or XVR
Video Instructions
Step by Step Instructions
1. Connect the NVR to the display and power it on.
Use the dropdown boxes to select
Location Language Video Standard
Click Next
2. The Software License Agreement window will appear.
Use the scroll bar to review the agreement and check the box to agree
Click Next
3. Use the dropdown box to select the Time Zone
Click Next
4. Use the interface to create a password for the admin account
The password must be 8 to 32 characters, including at least two of the following categories: numbers, uppercase letters, lowercase letters and special characters (Characters like '";:& cannot be included)
Enter the password twice
Enter a Password Hint
Click Next
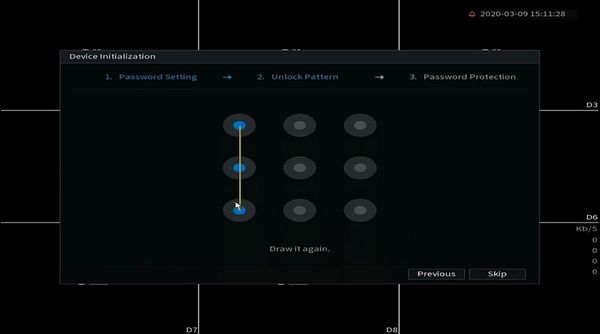
5. Use the interface to create a Device Unlock Pattern. This is another method of logging into the device. You can click Skip to skip this part of the setup.
Draw the pattern again to confirm
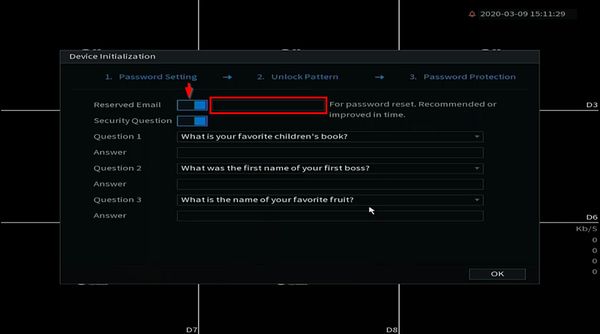
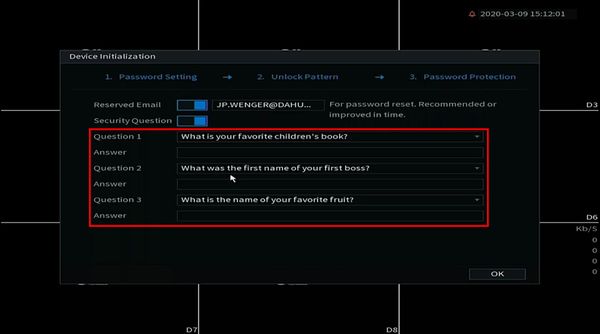
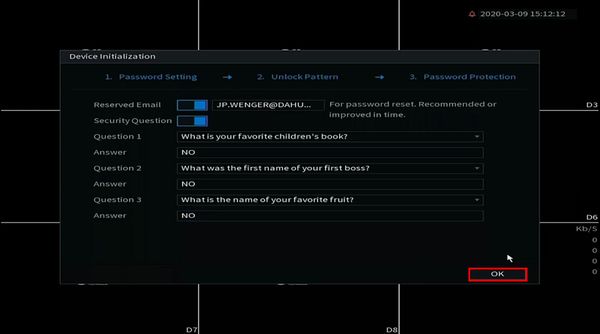
6. Use the interface to setup Password Recovery for the device in case the password is lost or forgotten
