Difference between revisions of "Video Wall How To"
| Line 28: | Line 28: | ||
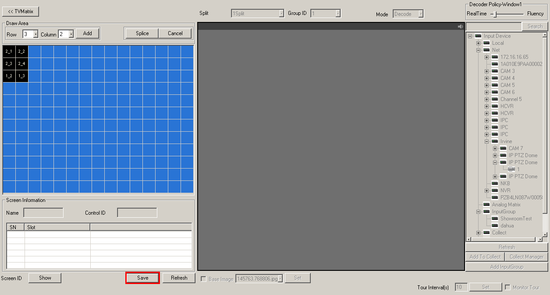
4. Input the number of rows and columns to be used. For this example we use, 3 Rows, and 2 Columns. At this time the displays should be blank or identifying just the Screen ID. | 4. Input the number of rows and columns to be used. For this example we use, 3 Rows, and 2 Columns. At this time the displays should be blank or identifying just the Screen ID. | ||
| − | [[file:VideoWallHowTo3.png]] | + | [[file:VideoWallHowTo3.png|550px]] |
5. Click, "1" and then click the slot. For this display we would select, "2.1" | 5. Click, "1" and then click the slot. For this display we would select, "2.1" | ||
| − | [[file:VideoWallHowTo5.png]][[file:VideoWallHowTo6.png]] | + | [[file:VideoWallHowTo5.png|550px]][[file:VideoWallHowTo6.png|550px]] |
6. Click, "2" and then click the slot. For this display we would select, "2.2" | 6. Click, "2" and then click the slot. For this display we would select, "2.2" | ||
| − | [[file:VideoWallHowTo8.png]][[file:VideoWallHowTo10.png]] | + | [[file:VideoWallHowTo8.png|550px]][[file:VideoWallHowTo10.png|550px]] |
7. Click, "3" and then click the slot. For this display we would select, "2.3" | 7. Click, "3" and then click the slot. For this display we would select, "2.3" | ||
| − | [[file:VideoWallHowTo11.png]][[file:VideoWallHowTo12.png]] | + | [[file:VideoWallHowTo11.png|550px]][[file:VideoWallHowTo12.png|550px]] |
8. Click, "4" and then click the slot. For this display we would select, "2.4" | 8. Click, "4" and then click the slot. For this display we would select, "2.4" | ||
| − | [[file:VideoWallHowTo13.png]][[file:VideoWallHowTo14.png]] | + | [[file:VideoWallHowTo13.png|550px]][[file:VideoWallHowTo14.png|550px]] |
9. Click, "5" and then click the slot. For this display we would select, "1.2" | 9. Click, "5" and then click the slot. For this display we would select, "1.2" | ||
| − | [[file:VideoWallHowTo15.png]][[file:VideoWallHowTo16.png]] | + | [[file:VideoWallHowTo15.png|550px]][[file:VideoWallHowTo16.png|550px]] |
10. Click, "6" and then click the slot. For this display we would select, "1.2" | 10. Click, "6" and then click the slot. For this display we would select, "1.2" | ||
| − | [[file:VideoWallHowTo17.png]][[file:VideoWallHowTo18.png]] | + | [[file:VideoWallHowTo17.png|550px]][[file:VideoWallHowTo18.png|550px]] |
11. Click, "Save" The displays should all be blank, or displaying only the input channel. | 11. Click, "Save" The displays should all be blank, or displaying only the input channel. | ||
| − | [[file:VideoWallHowTo19.png]] | + | [[file:VideoWallHowTo19.png|550px]] |
12. Click on one of the displays, and then double click on the camera on the right hand side to add that camera to the display. | 12. Click on one of the displays, and then double click on the camera on the right hand side to add that camera to the display. | ||
| − | [[file:VideoWallHowTo21.png]][[file:VideoWallHowTo22.png]] | + | [[file:VideoWallHowTo21.png|550px]][[file:VideoWallHowTo22.png|550px]] |
13. Click, "Save" The video wall should now be displaying 1 channel on the first display. | 13. Click, "Save" The video wall should now be displaying 1 channel on the first display. | ||
| − | [[file:VideoWallHowTo23.png]] | + | [[file:VideoWallHowTo23.png|550px]] |
14. Repeat this process for each of the other channels, and click, "Save" | 14. Repeat this process for each of the other channels, and click, "Save" | ||
| − | [[file:VideoWallHowTo24.png]] | + | [[file:VideoWallHowTo24.png|550px]] |
[[Category:Video Wall]] | [[Category:Video Wall]] | ||
Revision as of 21:30, 16 February 2016
How to Setup Video Wall
1. Begin by identifying your monitors based on what input they are connected to currently.
For this example we will use the following: 6 Displays, stacked 2x3.
| Display 1, Input 2.1 | Display 2, Input 2.2 |
| Display 3, Input 2.3 | Display 4, Input 2.4 |
| Display 5, Input 1.2 | Display 6, Input 1.3 |
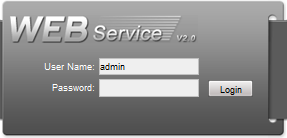
2. Login to your Video Wall server. For these instructions we used a M70 server.
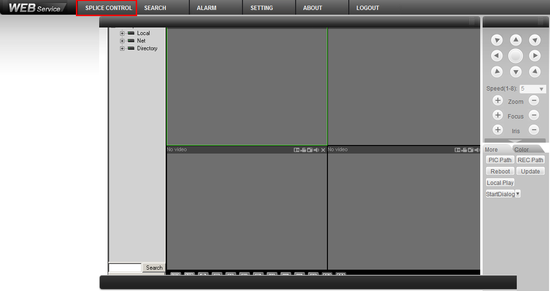
3. Click, "Splice Control"
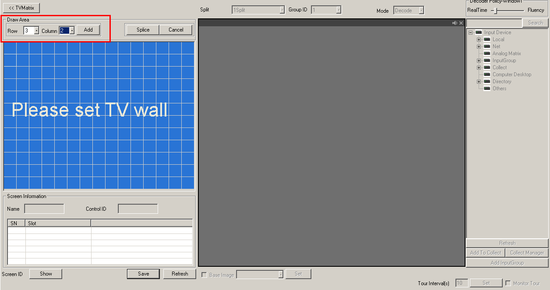
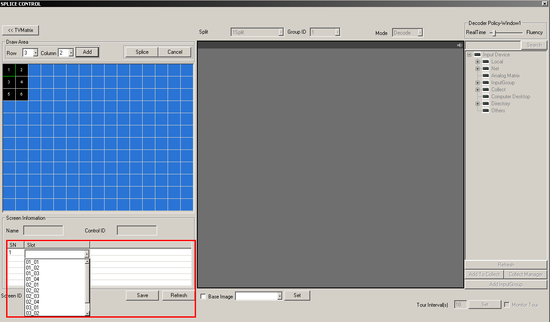
4. Input the number of rows and columns to be used. For this example we use, 3 Rows, and 2 Columns. At this time the displays should be blank or identifying just the Screen ID.
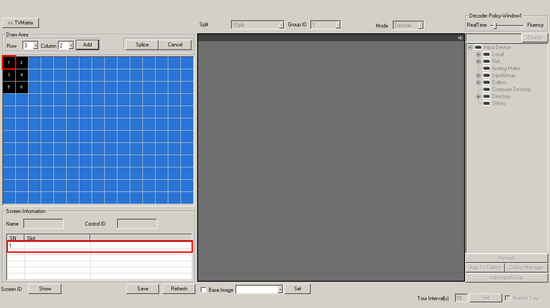
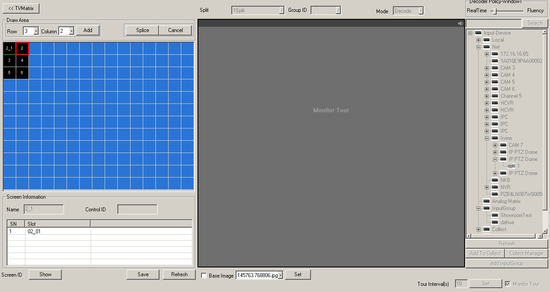
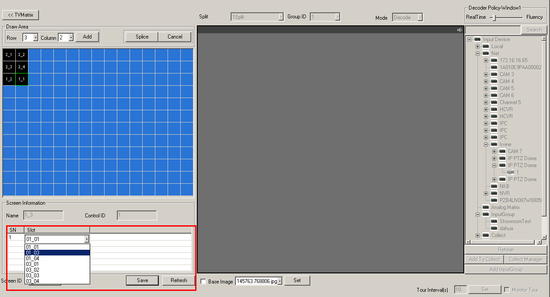
5. Click, "1" and then click the slot. For this display we would select, "2.1"
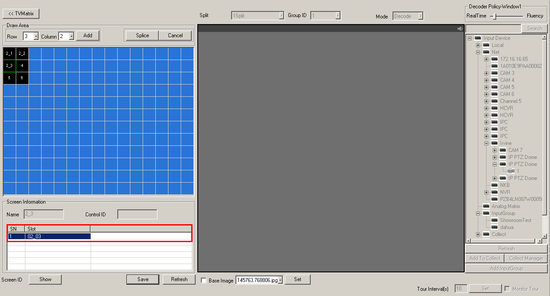
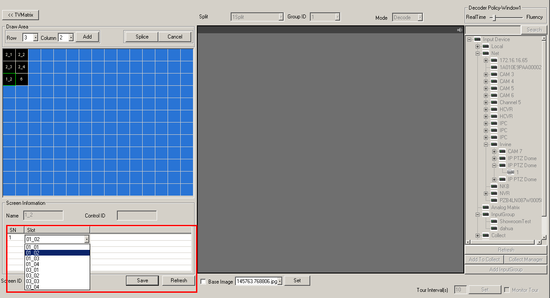
6. Click, "2" and then click the slot. For this display we would select, "2.2"
7. Click, "3" and then click the slot. For this display we would select, "2.3"
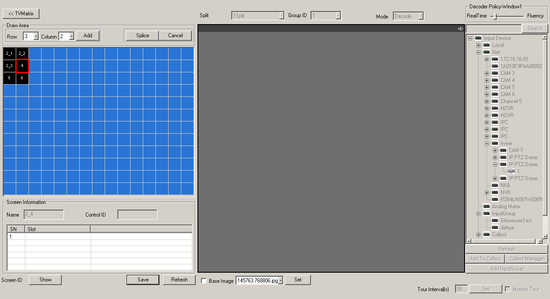
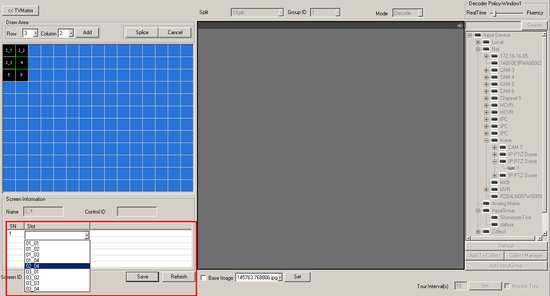
8. Click, "4" and then click the slot. For this display we would select, "2.4"
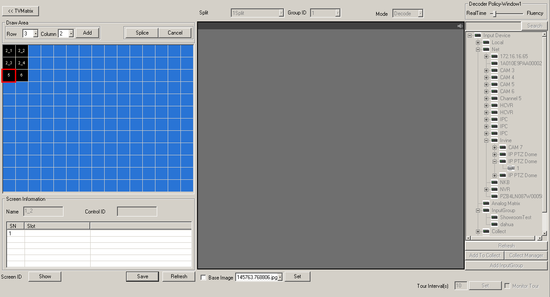
9. Click, "5" and then click the slot. For this display we would select, "1.2"
10. Click, "6" and then click the slot. For this display we would select, "1.2"
11. Click, "Save" The displays should all be blank, or displaying only the input channel.
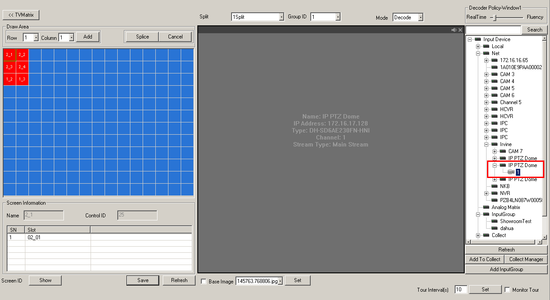
12. Click on one of the displays, and then double click on the camera on the right hand side to add that camera to the display.
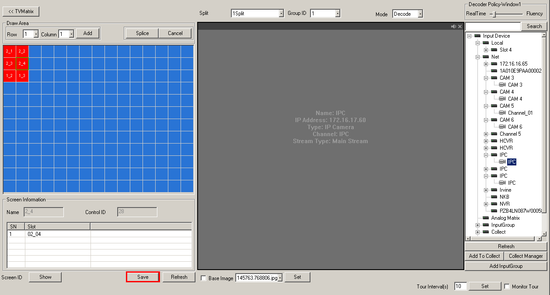
13. Click, "Save" The video wall should now be displaying 1 channel on the first display.
14. Repeat this process for each of the other channels, and click, "Save"
