Difference between revisions of "Template:Fire Warning WebUI New"
| Line 36: | Line 36: | ||
'''''The larger the sensitivity is, the easier a fire will be triggered.''''' | '''''The larger the sensitivity is, the easier a fire will be triggered.''''' | ||
| − | [[File:Fire_Warning_Setup_-_WebUI_-_5.jpg]] | + | [[File:Fire_Warning_Setup_-_WebUI_-_5.jpg|500px]] |
7. | 7. | ||
| + | |||
| + | [[File:Fire_Warning_Setup_-_WebUI_-_6.jpg|500px]] | ||
| + | |||
| + | [[File:Fire_Warning_Setup_-_WebUI_-_7.jpg|500px]] | ||
Revision as of 22:30, 8 April 2020
Video Instructions
Step by Step Instructions
1. Enter the IP of the device into a browser (default 192.168.1.108)
At the Web Login
Enter the Username and Password
Click Login
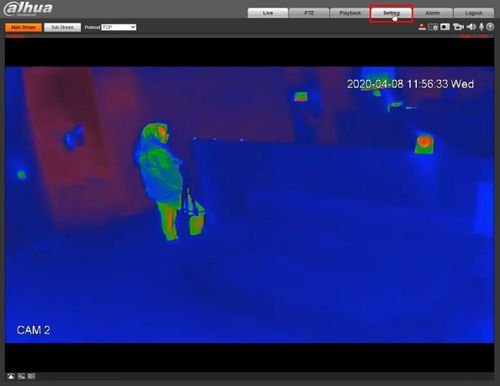
2.
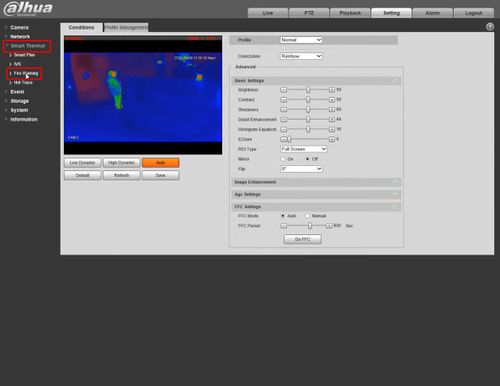
3.
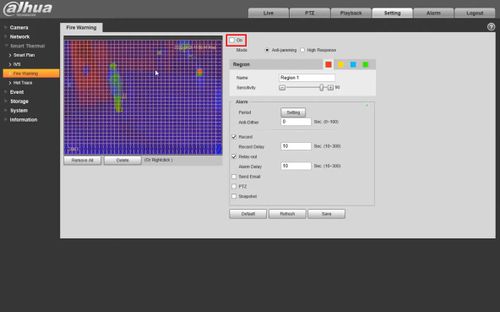
4.
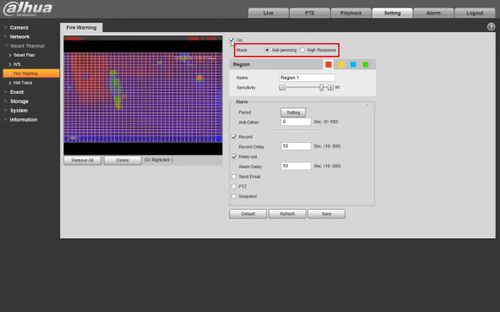
5. Select the desired Fire Warning mode:
- Anti-jamming: The camera will only detect those objects that are newly high temperature and send off alarms. That means under Anti-jamming mode, a constantly high-temperature object (a boiler/water heater, for example) is excluded
- High Response: The camera will detect any hidden fire danger and send off alarm
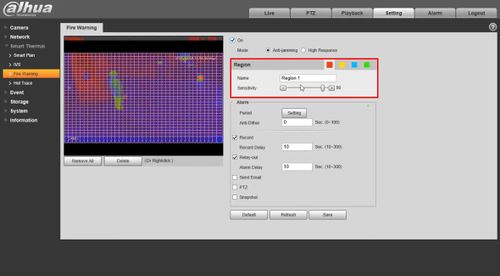
6. Region settings
Select a color in ![]() Each color represents a certain area which you can draw with your left mouse button. You can also give a name to the area you have drawn and set it's sensitivity.
Each color represents a certain area which you can draw with your left mouse button. You can also give a name to the area you have drawn and set it's sensitivity.
The larger the sensitivity is, the easier a fire will be triggered.
7.
