Difference between revisions of "Intrusion"
| Line 2: | Line 2: | ||
[[File:Perimeter_Protection_example.jpg|500px]] | [[File:Perimeter_Protection_example.jpg|500px]] | ||
</center> | </center> | ||
| − | {| class="wikitable" | + | {| class="wikitable" style="background-color:#000000;" |
|- | |- | ||
! [[file:IVSIconIntrusion.png]] | ! [[file:IVSIconIntrusion.png]] | ||
Revision as of 18:50, 29 October 2020
| |
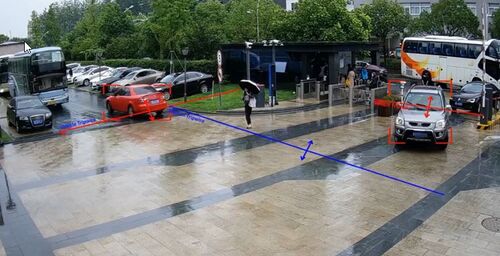
Intrusion is used to detect areas can’t be casually entered, exited or crossed in the monitoring scenario, it will trigger device alarm if the target object touches the detection line. |
|---|
Contents
Instructions
Description
This article will cover how to configure an IVS Tripwire Alarm on a Dahua recorder with the Old SystemUI
Prerequisites
IP Camera with IVS added to an NVR, with the Old SystemUI, or an HDCVI Camera that is connected to a HDCVI DVR, with the Old SystemUI, that has IVS
Video Instructions
Step By Step Instructions
1. From the Main Menu select "Event" in the "Setting" section
2. Select "Smart Plan" on the left. Then select the camera channel at the top. Select and highlight "IVS" (You may need to deselect any other options). Select "Apply" and then "OK"
3. Select "IVS" on the left. Then choose the channel number at the top. Select "Add" at the bottom to create a new IVS alarm rule. Click on the drop-down menu under "Type" for the new rule you created and change set it to "Tripwire". Select the Pencil icon under "Draw"
4. Left click anywhere on the camera view to start the tripwire line. Left click anywhere else on the camera view to complete the segment of the line. Continue moving your mouse and left clicking to continue making multiple segments of the tripwire line. When done drawing the line segments, right click to finish the line. Give this rule a name by selecting the text box next to "Name" and typing in a name. Select the drop-down menu next to "Direction" to choose if the IVS alarm is triggered in both directions ("Both") or just one direction ("A To B" or "B To A")
5. When you are done configuring the Tripwire rules, select "OK".
6. Select the Gear icon under "Trigger" to configure what happens when the tripwire alarm is triggered: Period - Sets the time and days of the week this alarm can be triggered Alarm Out - Sets alarm outputs that will be activate when this alarm is triggered Latch - Sets how long the alarm outputs will stay activated when the alarm is triggered Send Email - Sends an email, via the settings set in the Email section of the Network settings on the recorder, when the alarm is triggered Record Channel - Sets which channels are recorded when the alarm is triggered PTZ Activation - Sets the behavior of a PTZ camera connected to the same recorder when the alarm is triggered Post-Record - Sets the amount of seconds that are recorded after the alarm event is done being triggered, if "Record Channel" is enabled Tour - Enables a tour when the alarm is triggered Buzzer - Makes the recorder emit an audible beeping noise when the alarm is triggered Log - Records the event information in the system log when the alarm is triggerd
Select "Apply" to save the settings
7. Select "Apply" to save the Tripwire IVS alarm settingsHow To Setup Intrusion Detection
Description
This article will show you how to setup the Intrusion IVS feature on a supported device
Prerequisites
- Supported device with Intrusion feature
Video Instructions
Step by Step Instructions
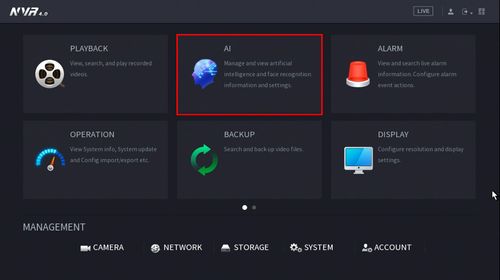
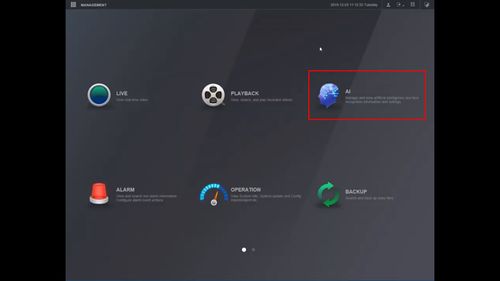
1. From the Main Menu click AI
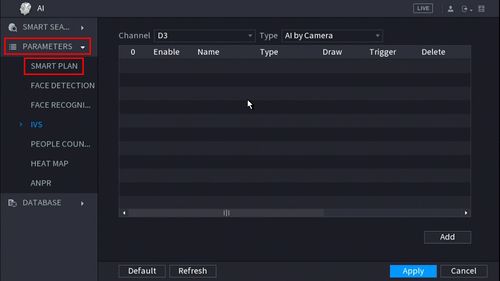
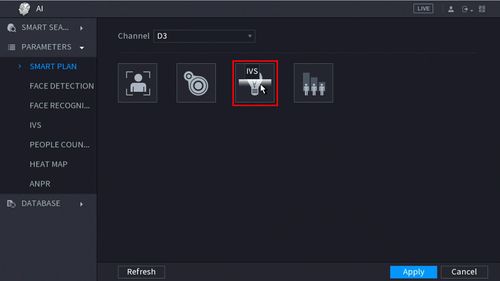
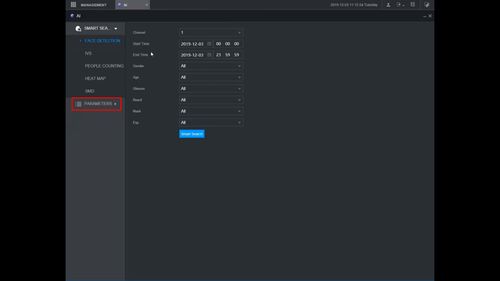
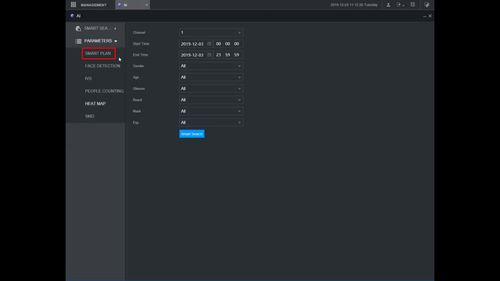
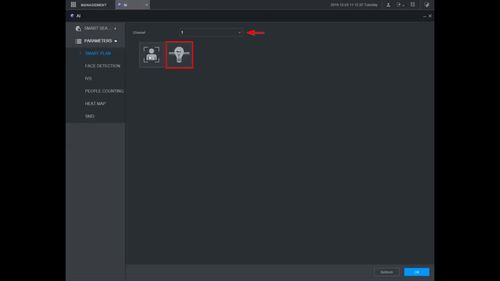
2. Click Parameters > Smart Plan
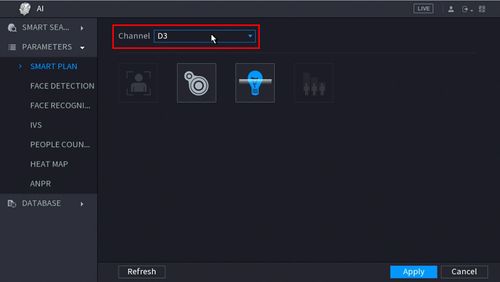
3. Use the drop down box to select the Channel
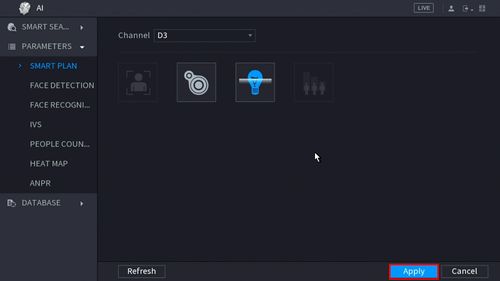
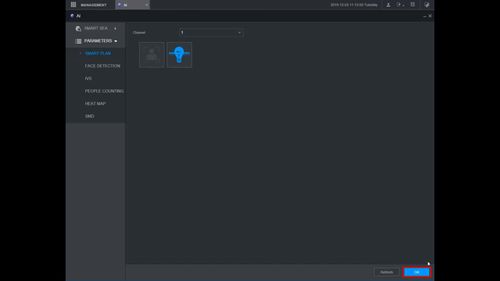
4. Click the IVS icon to enable.
The icon will highlight when selected.
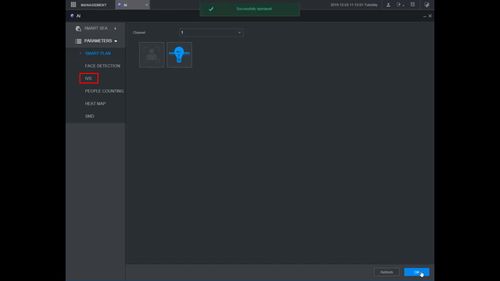
Click Apply
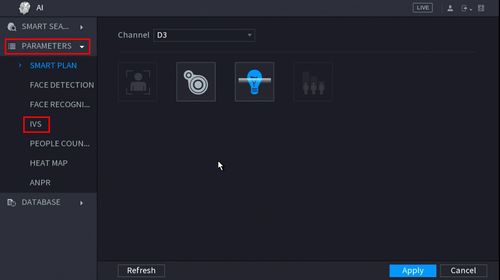
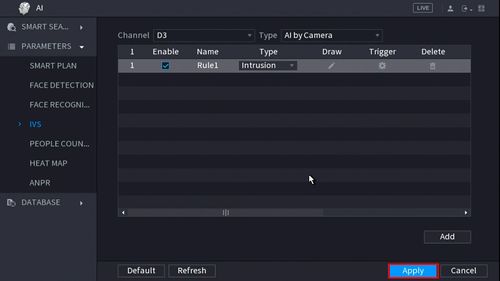
5. Click Parameters > IVS
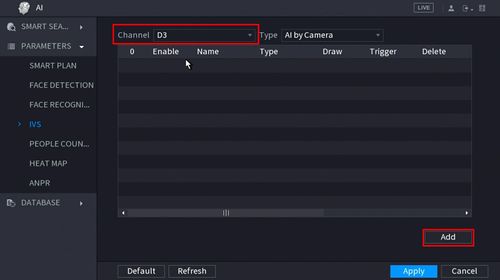
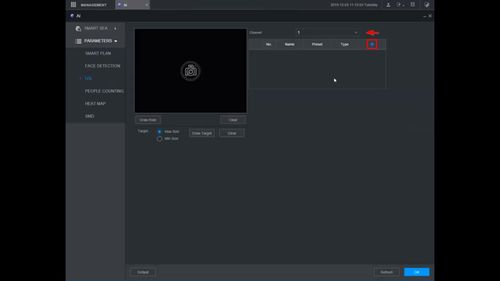
6. Use the drop-down box to select the Channel
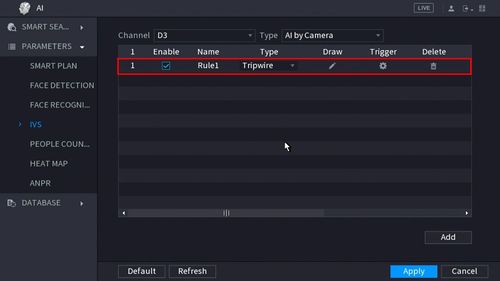
Then click Add in the lower right side of the screen to Add an IVS rule
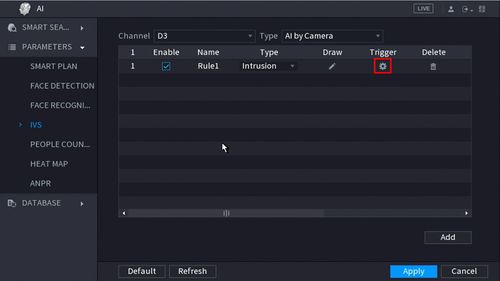
8. The created rule will appear in the list
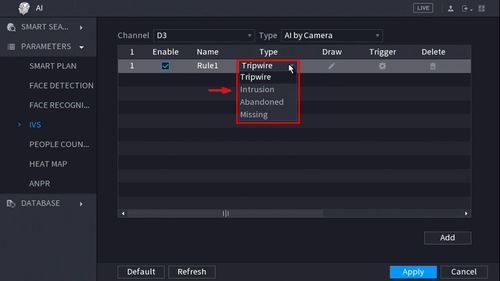
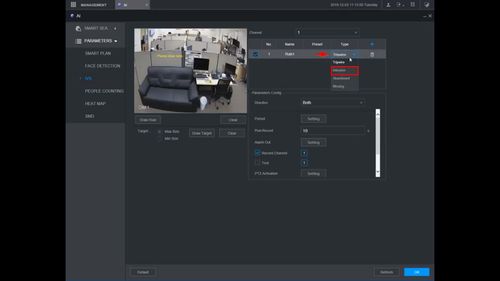
9. Use the dropdown box to change the Rule Type to "Intrusion"
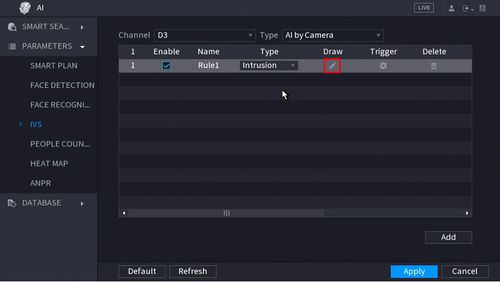
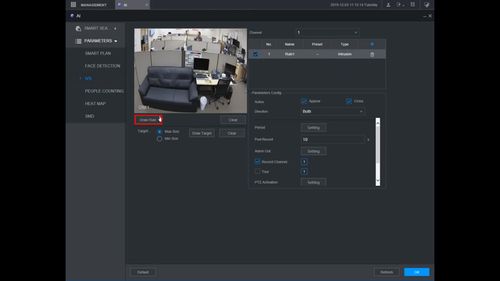
10. Click the Pencil icon to draw the Intrusion rule
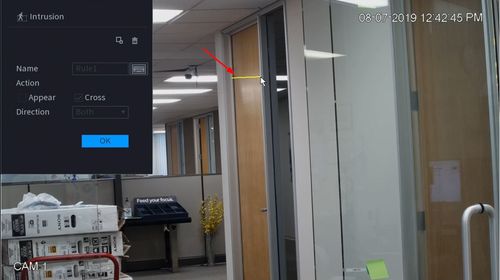
11. The Channel will fullscreen.
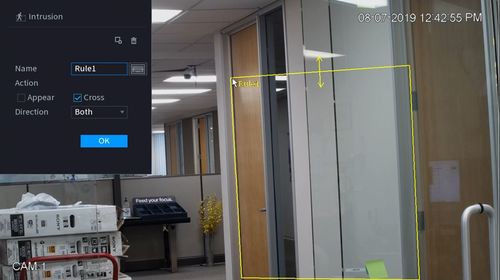
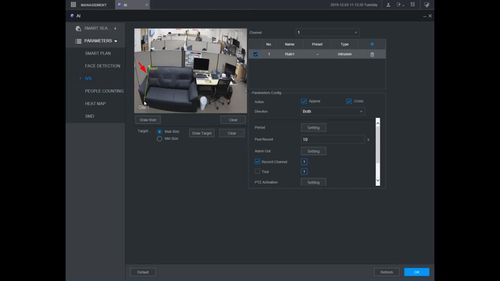
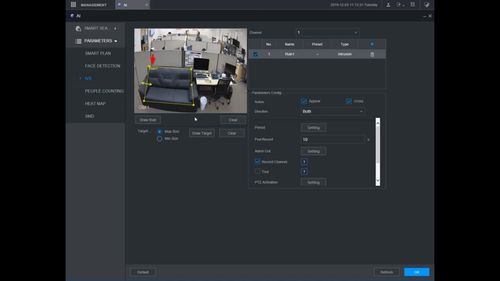
Left click anywhere inside the video frame to begin drawing the detection area for the Intrusion.
Right click to end drawing.
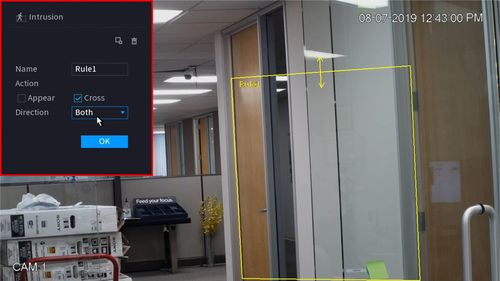
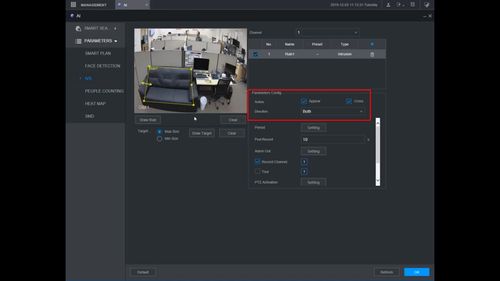
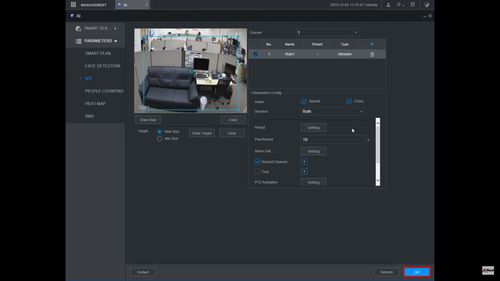
12. You can use the Intrusion menu that appears for additional rule settings:
- Name: A name can be applied to the rule
- Action
- Appear
- Cross
- Direction
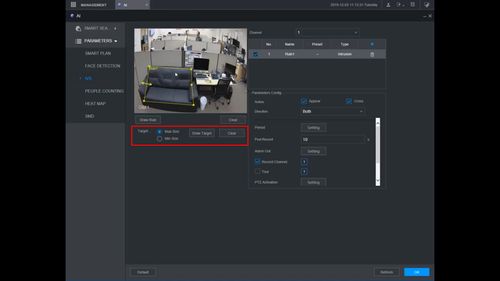
Click ![]() icon to set the Target Filter (maximum and minimum size size for Objects to follow rule)
icon to set the Target Filter (maximum and minimum size size for Objects to follow rule)
Click ![]() icon to clear the current rule
icon to clear the current rule
Once the Intrusion rule settings have been created click OK
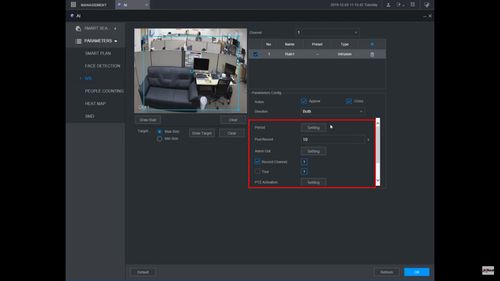
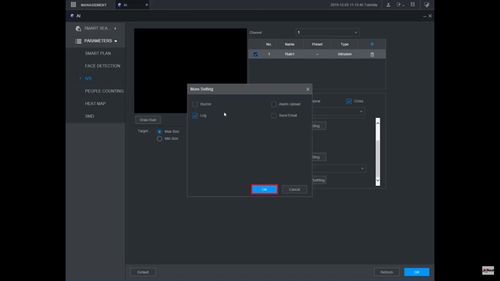
13. Click the ![]() icon to set the Trigger settings when the IVS Missing Object rule is engaged.
icon to set the Trigger settings when the IVS Missing Object rule is engaged.
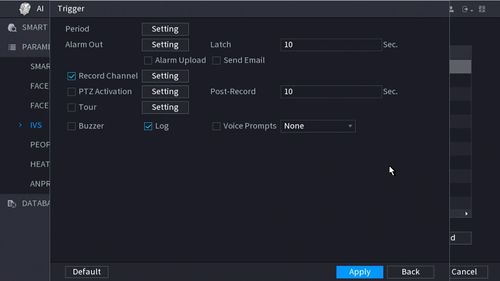
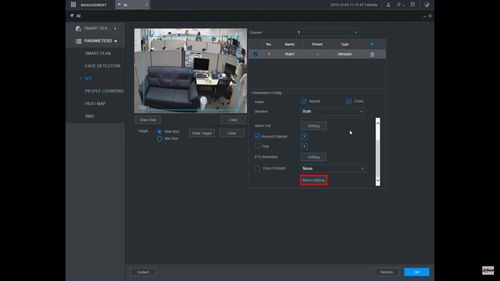
14. The Trigger menu will appear
Once the trigger rule settings have been created click Apply, then click Back to return to the previous menu
15. Once all Missing Object settings have been configured, Click Apply in the lower right of the screen to save all changes
16. The created Intrusion rule is now programmed
How To Setup Intrusion Detection
Description
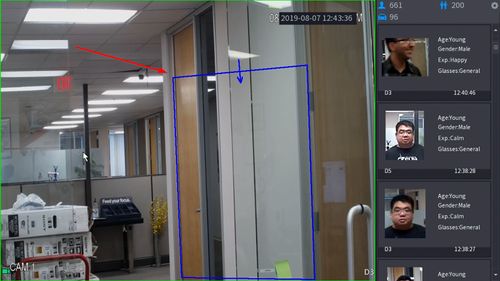
Intrusion Detection is to detect if there is any object entering or leaving the area, the rule will trigger when crossing the area perimeter. Supports enter, leave, and enter & leave three direction selection, it can activate record, snapshot, and alarm according to the judgment result.
Application Scene: It is similar to warning line. It needs to leave some space for target movement outside the perimeter if it is to detect enter and leave event; It can only be applied to the scene where the target is sparse and there is rarely any covering between the targets, such as the perimeter without any guard. It will trigger alarm when the target is entering or leaving the area.
Prerequisites
- Intelligent Network Camera or an HDCVI Camera that is connected to a HDCVI DVR that has intelligent features.
- Updated firmware that supports intelligent features.
- Internet Explorer.
Step By Step Instructions
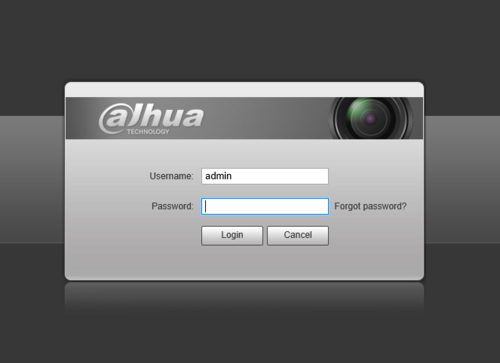
1. Log into device using the Web Service.
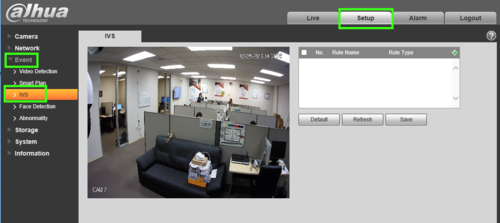
2. Select Setup -> Select Event -> IVS
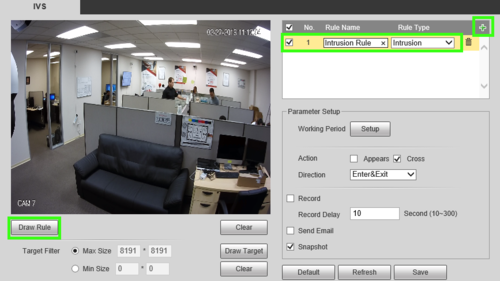
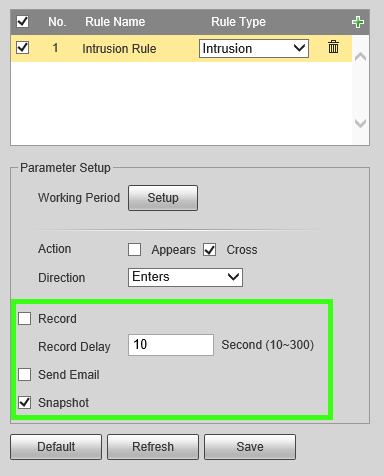
3. Under the IVS section, click the + and use the item that appears to set a name for your rule and in the drop down, define the rule type, in this case, "Intrusion" then select "Draw Rule.
4. Next, use your mouse to click and define the lines for the area you'd like to establish the rule for, then define the Action and Direction. In this example we'll use Cross and Enter to notify of entry into the region.
5. By default the schedule for the rule is set up for 24/7, to edit this go to 'Setup' by working period. Here you can make changes to the days and time periods in which it is active.
6. Next be sure to check any other options you may want such as Record & Record Delay, Snapshot, Relay out (1, 2, or both)alarm Delay and email. Note: For instructions on email setup see Email Setup
How To Setup Intrusion Detection
Description
This article will show you how to setup the Intrusion IVS feature on a supported device
Prerequisites
- Supported device with Intrusion feature
Video Instructions
Step by Step Instructions
1. From the Main Menu click AI
2. Click Parameters > Smart Plan
3. Use the drop down box to select the Channel
4. Click the IVS icon to enable.
The icon will highlight when selected.
Click Apply
5. Click Parameters > IVS
6. Use the drop-down box to select the Channel
Then click Add in the lower right side of the screen to Add an IVS rule
8. The created rule will appear in the list
9. Use the dropdown box to change the Rule Type to "Intrusion"
10. Click the Pencil icon to draw the Intrusion rule
11. The Channel will fullscreen.
Left click anywhere inside the video frame to begin drawing the detection area for the Intrusion.
Right click to end drawing.
12. You can use the Intrusion menu that appears for additional rule settings:
- Name: A name can be applied to the rule
- Action
- Appear
- Cross
- Direction
Click ![]() icon to set the Target Filter (maximum and minimum size size for Objects to follow rule)
icon to set the Target Filter (maximum and minimum size size for Objects to follow rule)
Click ![]() icon to clear the current rule
icon to clear the current rule
Once the Intrusion rule settings have been created click OK
13. Click the ![]() icon to set the Trigger settings when the IVS Missing Object rule is engaged.
icon to set the Trigger settings when the IVS Missing Object rule is engaged.
14. The Trigger menu will appear
Once the trigger rule settings have been created click Apply, then click Back to return to the previous menu
15. Once all Missing Object settings have been configured, Click Apply in the lower right of the screen to save all changes
16. The created Intrusion rule is now programmed

