Difference between revisions of "AcuPick"
(→Step by Step Instructions) |
(→How to Guides) |
||
| Line 52: | Line 52: | ||
===How to use Dahua AcuPick - Quick Search for Human target who took the missing object=== | ===How to use Dahua AcuPick - Quick Search for Human target who took the missing object=== | ||
| + | |||
| + | ====Description==== | ||
| + | This guide will show you how to use AcuPick to search for a human target, based on a missing object filter, from the recorded footage on an NVR | ||
| + | |||
| + | ====Prerequisites==== | ||
| + | * One or more Dahua Cameras with AcuPick | ||
| + | * A Dahua NVR with AcuPick | ||
| + | |||
| + | ====Video Instructions==== | ||
<embedvideo service="youtube">https://www.youtube.com/watch?v=7bMvfC9bci0</embedvideo> | <embedvideo service="youtube">https://www.youtube.com/watch?v=7bMvfC9bci0</embedvideo> | ||
| + | |||
| + | ====Step by Step Instructions==== | ||
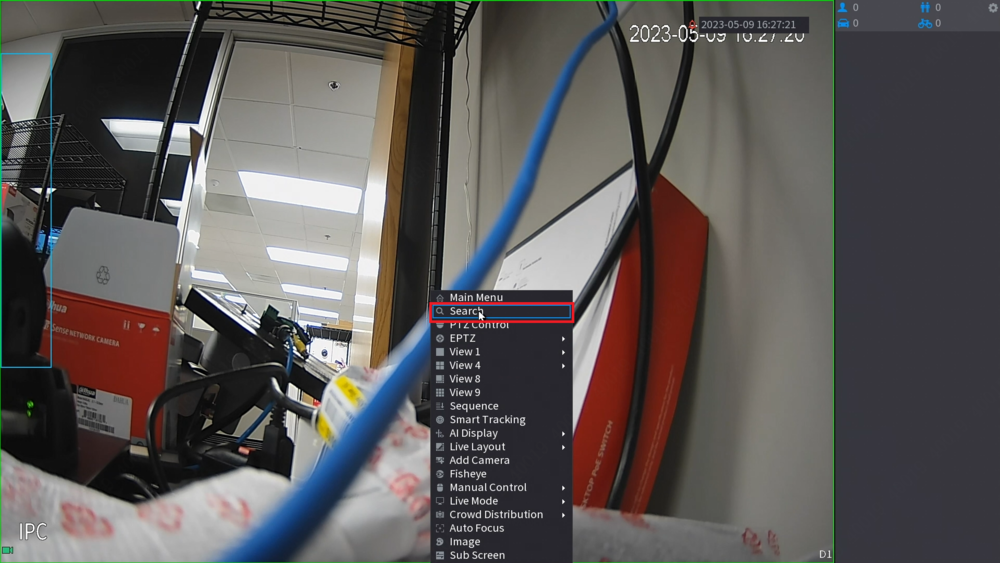
| + | 1. From the live view on the NVR's local interface, right click anywhere on the screen and select '''Search''' | ||
| + | |||
| + | [[file:AcuPickHumanTargetSearchMissingObject1.png|1000px]] | ||
| + | |||
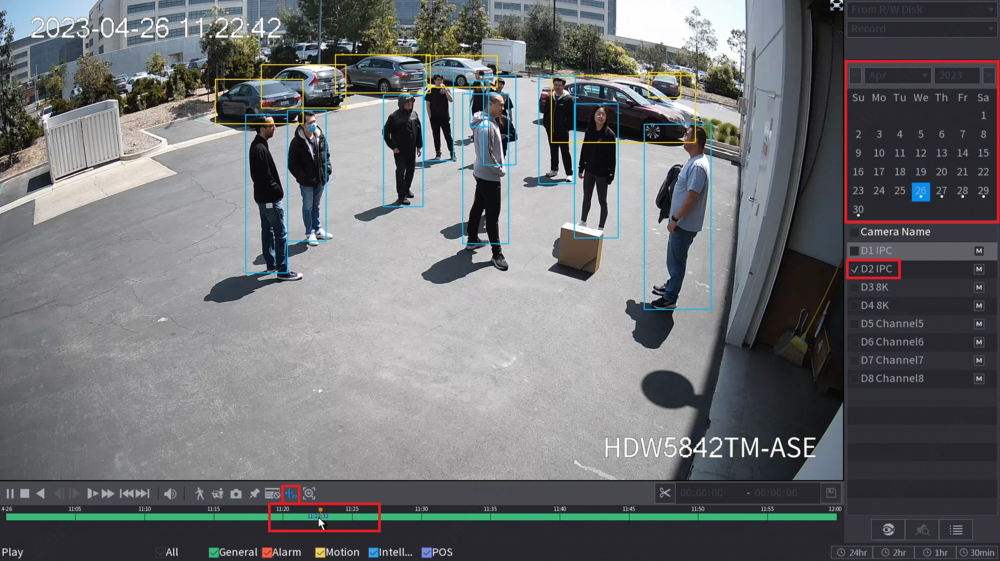
| + | 2. Check the box for a single camera on the right. ('''Please Note:''' AcuPick will only function if only 1 camera is selected.) | ||
| + | <br>Select a date at the top right that has a dot underneath it. | ||
| + | <br>Then click on the timeline to start playing recorded footage. | ||
| + | <br>Make sure the AI Data Icon is selected above the timeline | ||
| + | |||
| + | [[file:AcuPickHumanTargetSearchMissingObject2.png|1000px]] | ||
| + | |||
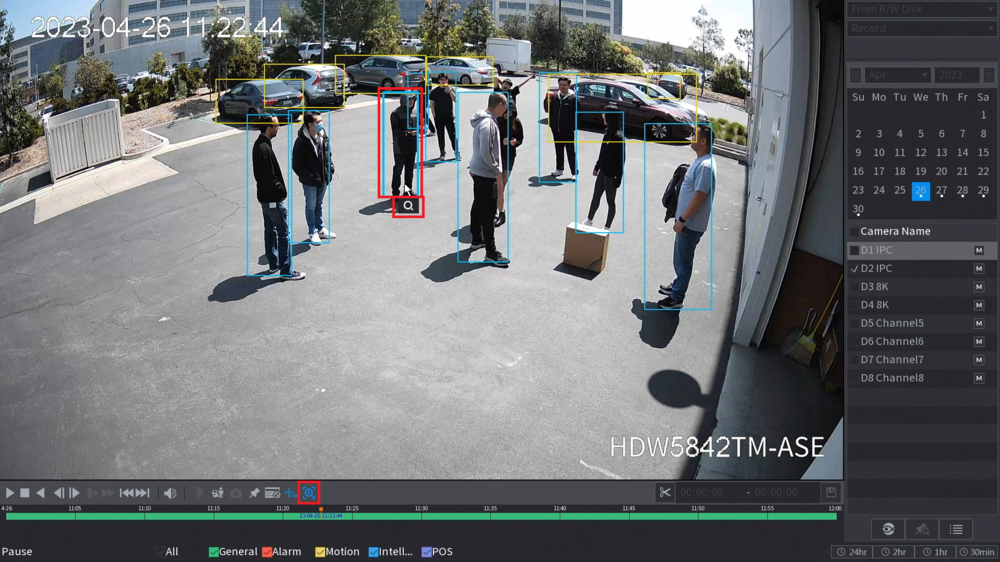
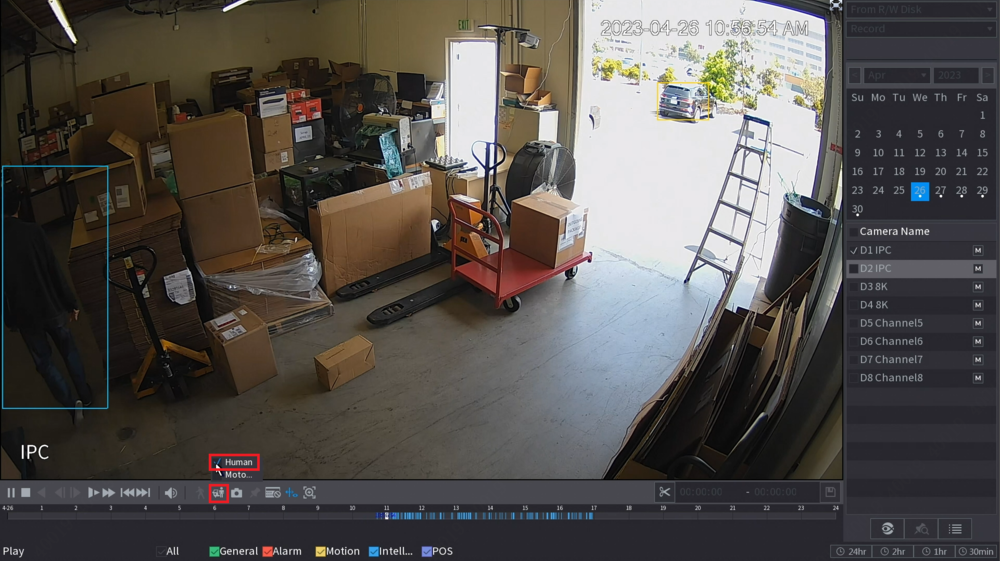
| + | 3. Once you find the object that went missing, click the AI Filter Icon above the timeline. | ||
| + | <br>Then check the '''Human''' box. | ||
| + | |||
| + | [[file:AcuPickHumanTargetSearchMissingObject3.png|1000px]] | ||
| + | |||
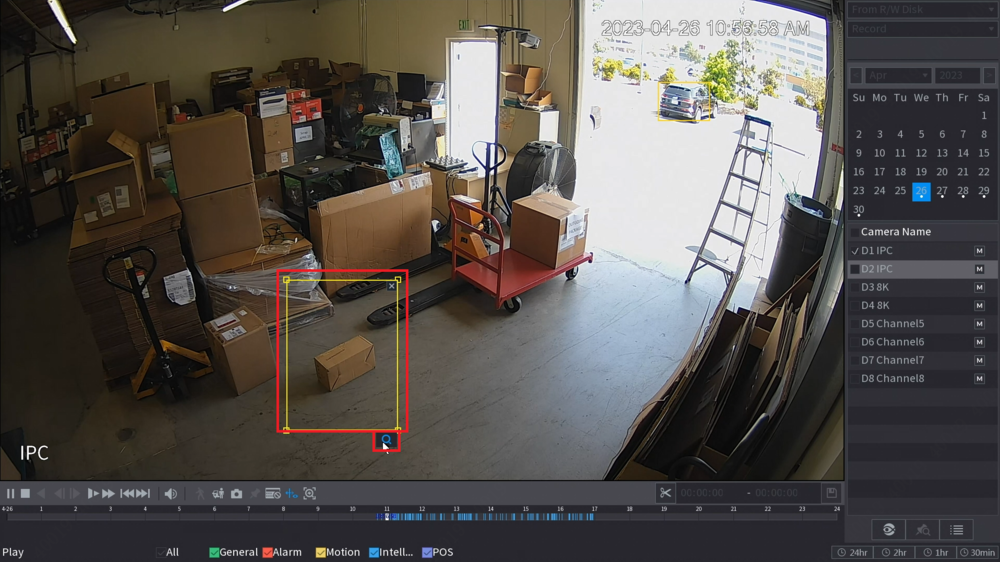
| + | 4. Draw a box around the object that went missing. | ||
| + | <br>Then click the Magnifying Glass Icon below the box you drew | ||
| + | |||
| + | [[file:AcuPickHumanTargetSearchMissingObject4.png|1000px]] | ||
| + | |||
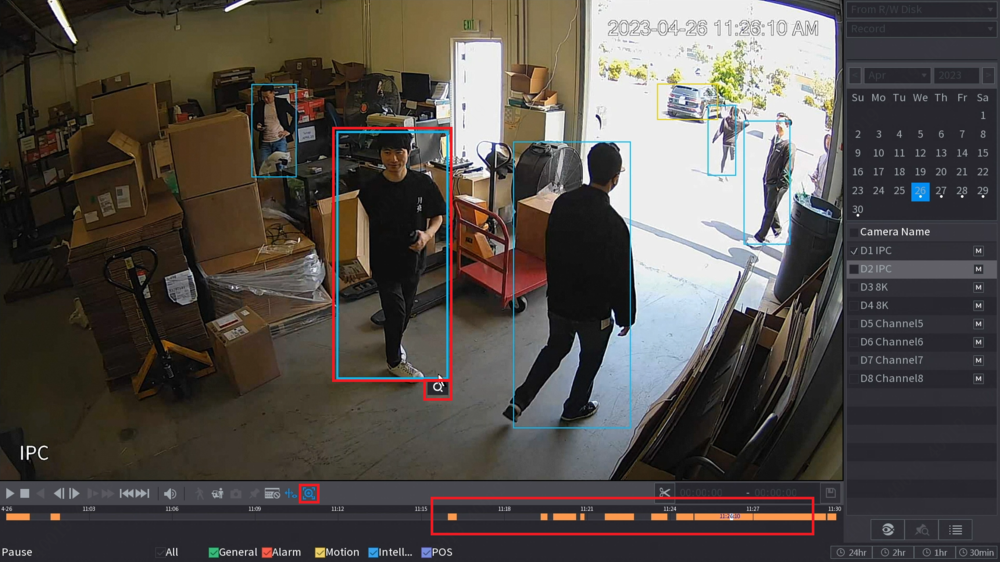
| + | 5. The timeline will change to show only when a person walked through the box you drew in the previous step. | ||
| + | <br>Click through the footage until you find the moment the object was taken. | ||
| + | <br>Once you find the person that took the object, press the AcuPick icon right above the timeline. | ||
| + | <br>Then click on the blue box around the person. | ||
| + | <br>And click on the Magnifying Glass icon below the blue box | ||
| + | |||
| + | [[file:AcuPickHumanTargetSearchMissingObject5.png|1000px]] | ||
| + | |||
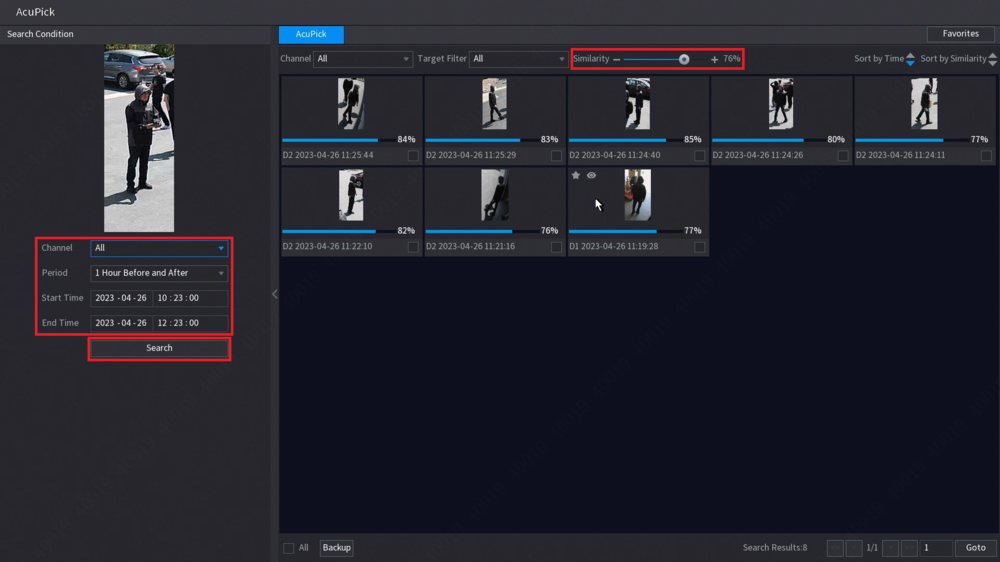
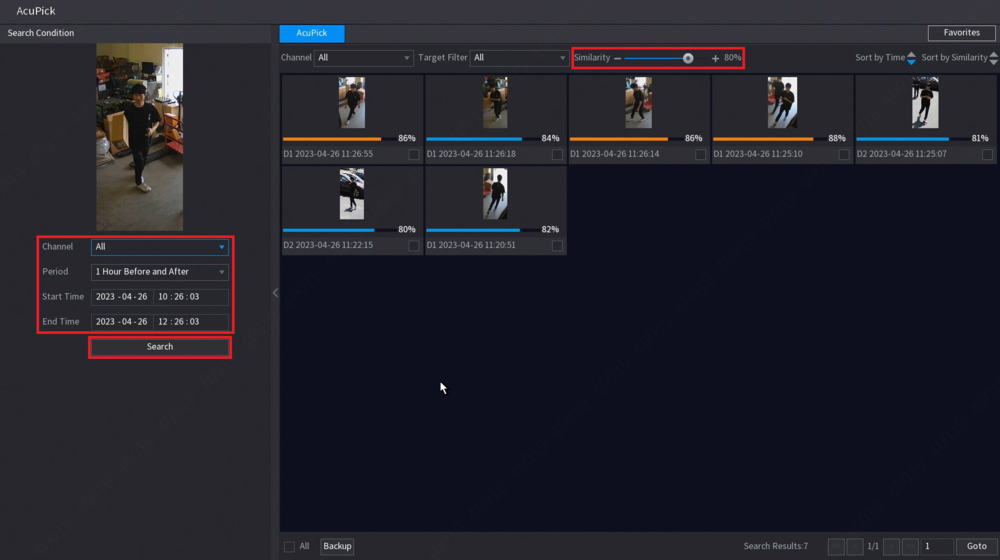
| + | 6. Select which channels you want to search from the '''Channel''' drop-down. | ||
| + | <br>Adjust the time period from the '''Period''', '''Start Time''', and '''End Time''' options. | ||
| + | <br>When you are done adjusting those settings, click on '''Search''' to refine the search results. | ||
| + | <br>Adjust the '''Similarity''' slider at the top to a value that shows the most accurate results for the person you are searching for | ||
| + | |||
| + | [[file:AcuPickHumanTargetSearchMissingObject6.png|1000px]] | ||
| + | |||
| + | 7. Double-click on any of the result images to play a recorded clip | ||
| + | <br>It will automatically play 10 seconds before and 10 seconds after the event. (This amount of time can be adjusted at the bottom right while the video is playing.) | ||
| + | |||
| + | [[file:AcuPickHumanTargetSearchMissingObject7.png|1000px]] | ||
| + | |||
| + | 8. Double-click on the video playback to make it fullscreen | ||
| + | |||
| + | [[file:AcuPickHumanTargetSearchMissingObject8.png|1000px]] | ||
==Devices== | ==Devices== | ||
Revision as of 00:36, 15 July 2023
Contents
Description
Save time and labor with just one pick with Dahua’s new game-changing AcuPick Search Technology! We are pleased to announce the release of Dahua’s NEW 4MP and 8MP AcuPick IP Camera Series.
Finding and tracking a specific person or vehicle of interest in security footage is a complex and laborious process. But, Dahua Technology’s AcuPick Search Technology is revolutionizing this process by making it quicker, easier, and more accurate to find targets. With just a single reference image, you can find, track, and identify a specific person or vehicle. The advanced AcuPick algorithm focuses on human body shape, clothing color, and other differentiators to find where a target has appeared in security footage captured by any AcuPick-enabled camera and NVR. Our new AI algorithm can find other instances of where the person or vehicle of interest was recorded based on a user-adjustable similarity setting.
How to Guides
How to use Dahua AcuPick - Quick Search for Human target
Description
This guide will show you how to use AcuPick to search for a human target from the recorded footage on an NVR
Prerequisites
- One or more Dahua Cameras with AcuPick
- A Dahua NVR with AcuPick
Video Instructions
Step by Step Instructions
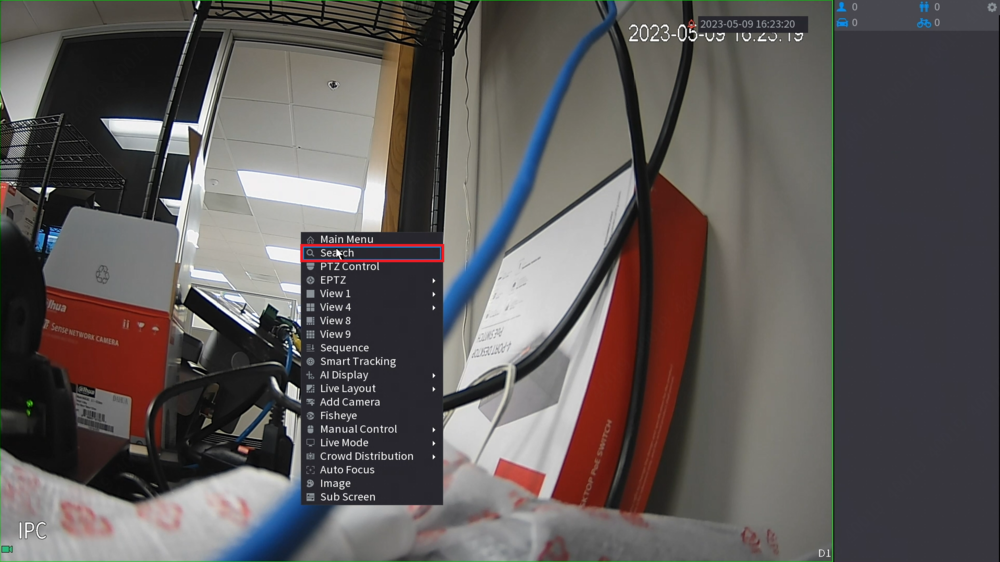
1. From the live view on the NVR's local interface, right click anywhere on the screen and select Search
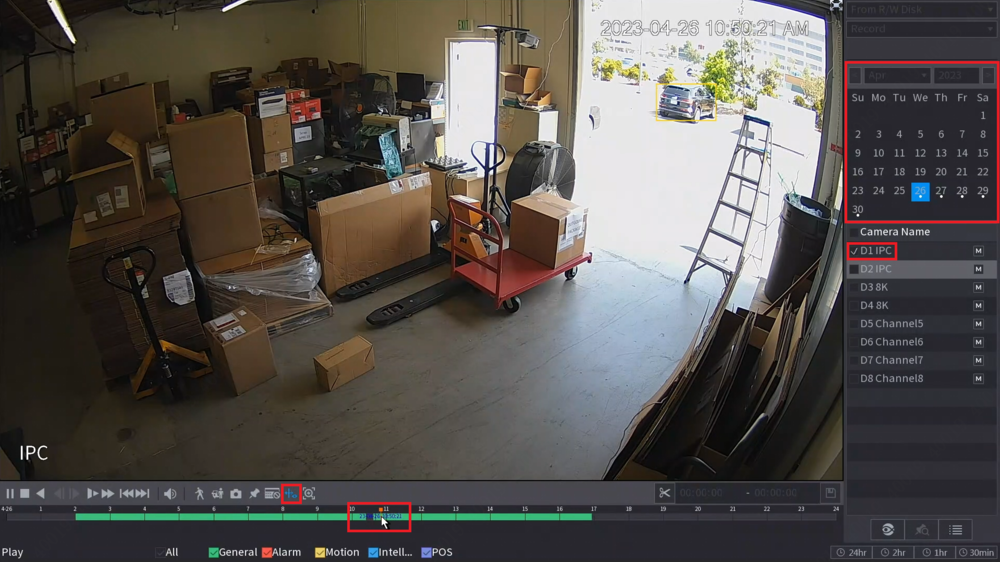
2. Check the box for a single camera on the right. (Please Note: AcuPick will only function if only 1 camera is selected.)
Select a date at the top right that has a dot underneath it.
Then click on the timeline to start playing recorded footage.
Make sure the AI Data Icon is selected above the timeline
3. Once you find the person you want to track, press the AcuPick icon right above the timeline.
Then click on the blue box around the person.
And click on the Magnifying Glass icon below the blue box
4. Select which channels you want to search from the Channel drop-down.
Adjust the time period from the Period, Start Time, and End Time options.
When you are done adjusting those settings, click on Search to refine the search results.
Adjust the Similarity slider at the top to a value that shows the most accurate results for the person you are searching for
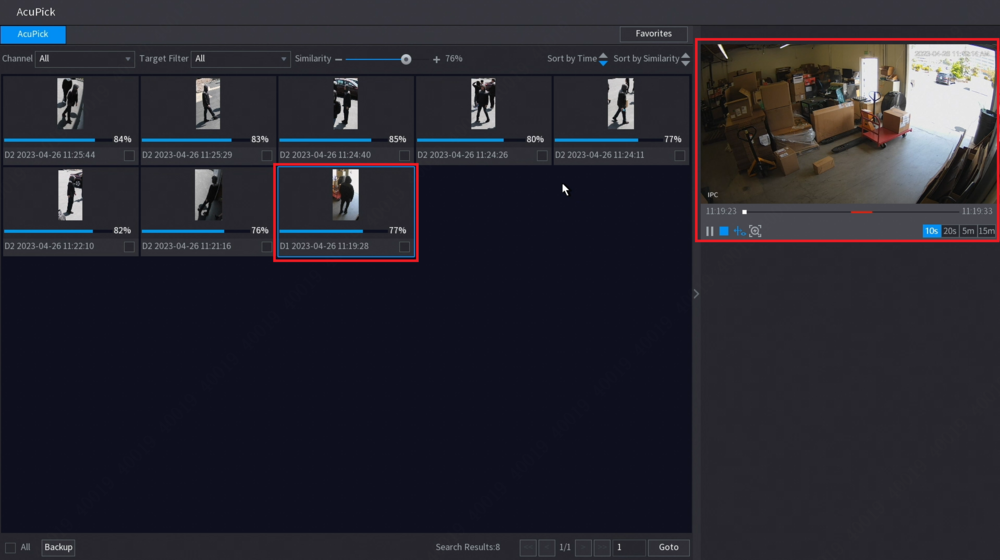
5. Double-click on any of the result images to play a recorded clip.
It will automatically play 10 seconds before and 10 seconds after the event. (This amount of time can be adjusted at the bottom right while the video is playing.)
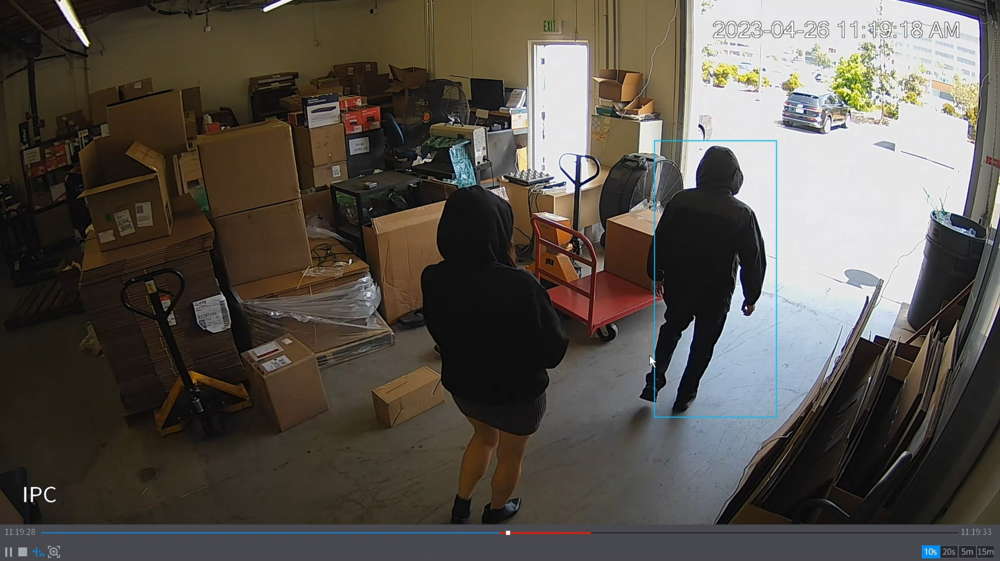
6. Double-click on the video playback to make it fullscreen
How to use Dahua AcuPick - Quick Search for Human target who took the missing object
Description
This guide will show you how to use AcuPick to search for a human target, based on a missing object filter, from the recorded footage on an NVR
Prerequisites
- One or more Dahua Cameras with AcuPick
- A Dahua NVR with AcuPick
Video Instructions
Step by Step Instructions
1. From the live view on the NVR's local interface, right click anywhere on the screen and select Search
2. Check the box for a single camera on the right. (Please Note: AcuPick will only function if only 1 camera is selected.)
Select a date at the top right that has a dot underneath it.
Then click on the timeline to start playing recorded footage.
Make sure the AI Data Icon is selected above the timeline
3. Once you find the object that went missing, click the AI Filter Icon above the timeline.
Then check the Human box.
4. Draw a box around the object that went missing.
Then click the Magnifying Glass Icon below the box you drew
5. The timeline will change to show only when a person walked through the box you drew in the previous step.
Click through the footage until you find the moment the object was taken.
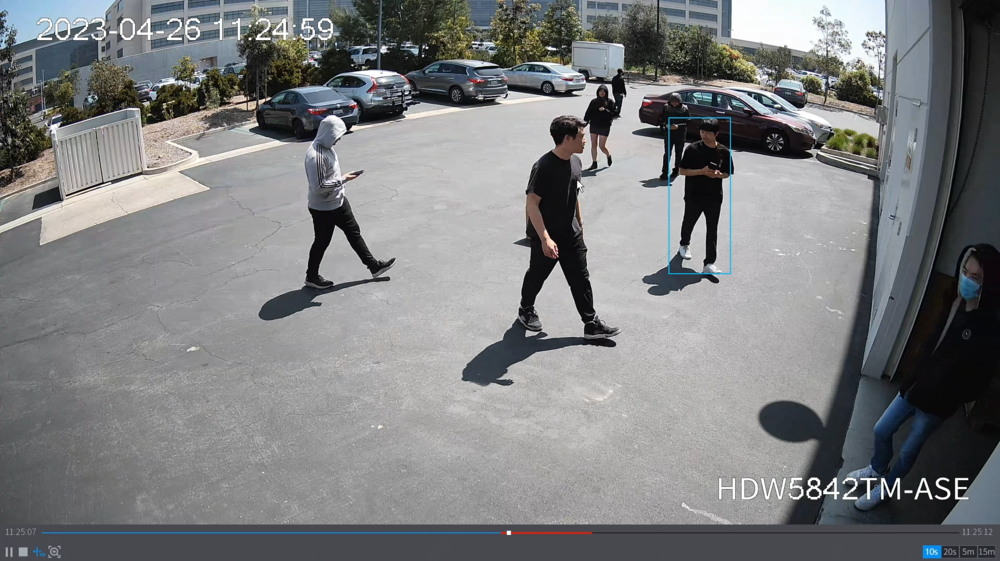
Once you find the person that took the object, press the AcuPick icon right above the timeline.
Then click on the blue box around the person.
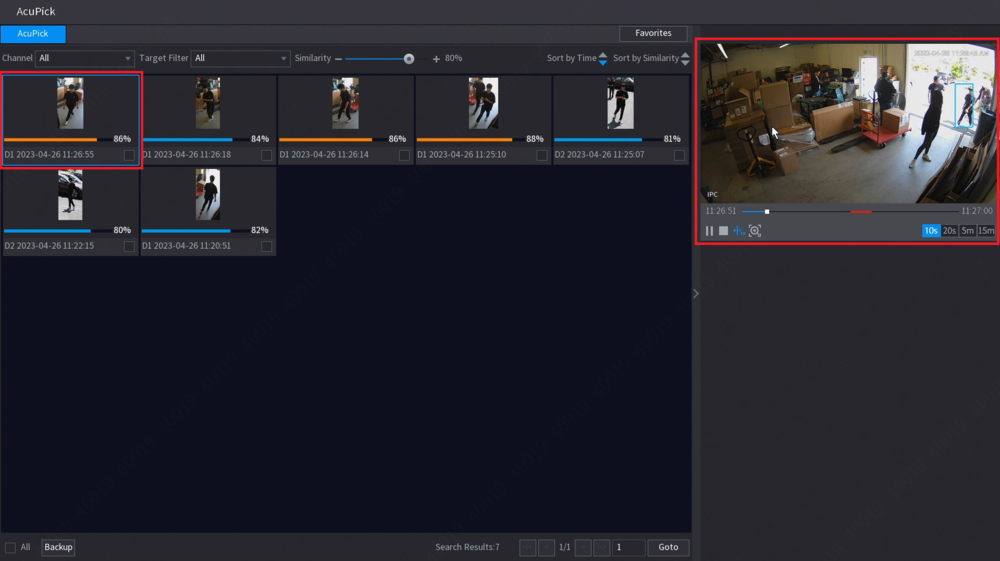
And click on the Magnifying Glass icon below the blue box
6. Select which channels you want to search from the Channel drop-down.
Adjust the time period from the Period, Start Time, and End Time options.
When you are done adjusting those settings, click on Search to refine the search results.
Adjust the Similarity slider at the top to a value that shows the most accurate results for the person you are searching for
7. Double-click on any of the result images to play a recorded clip
It will automatically play 10 seconds before and 10 seconds after the event. (This amount of time can be adjusted at the bottom right while the video is playing.)
8. Double-click on the video playback to make it fullscreen
Devices
| Models | Image | Series | Resolution | Body | Specifications | IP Camera How-to Page | Firmware |
|---|---|---|---|---|---|---|---|
| N85FL6Z4 | 
|
Pro | 8MP | Dome | Build Date: 12-21-2024
| ||
| N85FB6Z4 | 
|
Pro | 8MP | Bullet | Build Date: 12-21-2024
| ||
| N85FJ6Z | 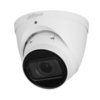
|
Pro | 8MP | Eyeball | Build Date: 12-21-2024
| ||
| N85FB7Z | 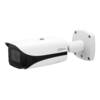
|
Pro | 8MP | Bullet | Build Date: 12-21-2024
| ||
| N45FJ62 | 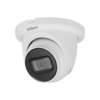
|
Pro | 4MP | Eyeball | Build Date: 12-21-2024
| ||
| N45FJ6Z | 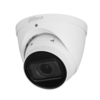
|
Pro | 4MP | Eyeball | Build Date: 12-21-2024
| ||
| N45FB7Z | 
|
Pro | 4MP | Bullet | Build Date: 12-21-2024
| ||
| N85FY62 | 
|
Pro | 8MP | Dome | Build Date: 12-21-2024
| ||
| N85FL7Z | 
|
Pro | 8MP | Dome | Build Date: 12-21-2024
| ||
| N85FJ62 | 
|
Pro | 8MP | Eyeball | Build Date: 12-21-2024
| ||
| N85FF62 | 
|
Pro | 8MP | Bullet | Build Date: 12-21-2024
| ||
| N45FL7Z | 
|
Pro | 4MP | Dome | Build Date: 12-21-2024
| ||
| N45FY62 | 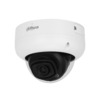
|
Pro | 4MP | Dome | Build Date: 12-21-2024
|
| Models | Image | Channels | Specifications | Manual | Firmware | Per Drive Capacity | Max HDD | EOL |
|---|---|---|---|---|---|---|---|---|
| N98A5N | 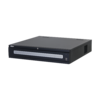
|
32 | Build Date: 01-17-2025
|
16TB | 8 | Active | ||
| N98A6N | 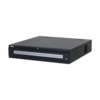
|
64 | Build Date: 01-17-2025
|
16TB | 8 | Active | ||
| N98A7N | 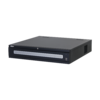
|
128 | Build Date: 01-17-2025
|
16TB | 8 | Active | ||
| N82B3P | 
|
8 | Build Date: 02-23-2024
|
16TB | 2 | Active | ||
| N82B2P | 
|
8 | Build Date: 02-23-2024
|
16TB | 2 | Active | ||
| N84B3N | 
|
16 | Build Date: 02-23-2024
|
16TB | 4 | Active | ||
| N84B3P | 
|
16 | Build Date: 02-23-2024
|
16TB | 4 | Active | ||
| N84B5N | 
|
32 | Build Date: 02-23-2024
|
16TB | 4 | Active | ||
| N82B5P | 
|
32 | Build Date: 02-23-2024
|
16TB | 2 | Active |
