Difference between revisions of "NKB3000 Display Live Feed"
| Line 80: | Line 80: | ||
17. Go back to the Main Menu and select Control | 17. Go back to the Main Menu and select Control | ||
| − | [[ | + | [[file:NKB3k1011.JPG|500px]] |
18. Select NetKeyboard, and double click/press the local preview. You can also setup how many windows you want to be displayed at a time on the bottom row of menu items, as well as full screen, and PTZ controls. | 18. Select NetKeyboard, and double click/press the local preview. You can also setup how many windows you want to be displayed at a time on the bottom row of menu items, as well as full screen, and PTZ controls. | ||
| − | [[file: | + | [[file:NKB3k1021.JPG|500px]] |
19. Now select the input tab that looks like a camera (upper right corner of the screen) and select the camera or NVR and channel you want to display. | 19. Now select the input tab that looks like a camera (upper right corner of the screen) and select the camera or NVR and channel you want to display. | ||
| − | [[file: | + | [[file:NKB3k1031.JPG|500px]] |
20. Now click or press and hold the camera and drag it to the area you want it to display in. | 20. Now click or press and hold the camera and drag it to the area you want it to display in. | ||
| − | [[file: | + | [[file:NKB3k1041.JPG|500px]] |
21. Wait a few moments and wait for the video to cache, and then you should have live video feed. | 21. Wait a few moments and wait for the video to cache, and then you should have live video feed. | ||
| − | [[file: | + | [[file:NKB3k1051.JPG|500px]] |
[[Category:Troubleshoot]][[Category:Network Keyboard]][[Category:Accessories]] | [[Category:Troubleshoot]][[Category:Network Keyboard]][[Category:Accessories]] | ||
Revision as of 19:26, 11 March 2016
How to Display Live Feed on NKB3000
Pre-Requisites
- NKB3000
- NVR or IP camera
- IP address of the NVR or IP camera
Step by Step Setup Instructions
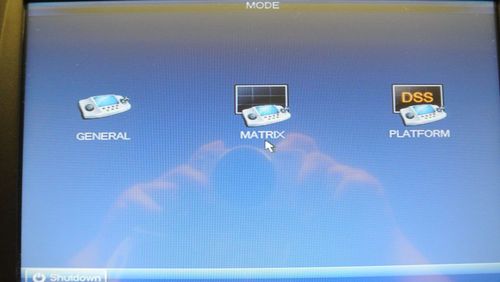
1. Connect a network, and power cable to your NKB3000. The screen should look like the below image once booted.
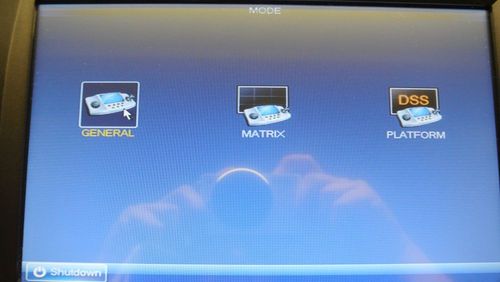
2. Hit General on the NKB3000.
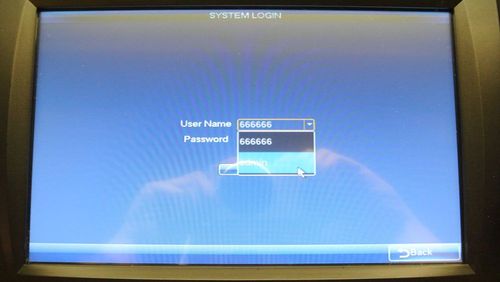
3. Input your NKB3000's password, and hit Enter.
Note: The default NKB3000 credentials are as follows: User Name: admin Password: admin
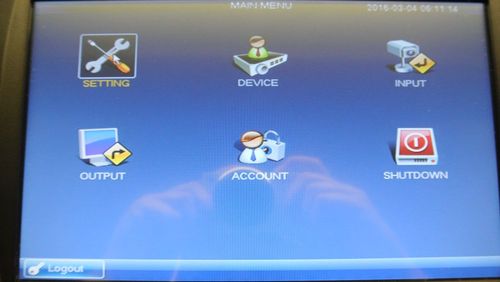
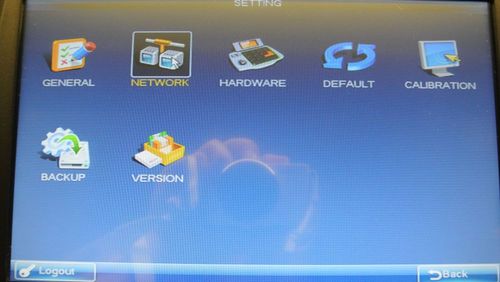
4. Using the joystick, navigate to "Settings" and press, "Enter"
5. Using the joystick, navigate to "Network" and press, "Enter"
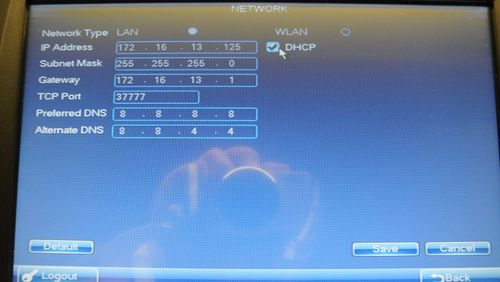
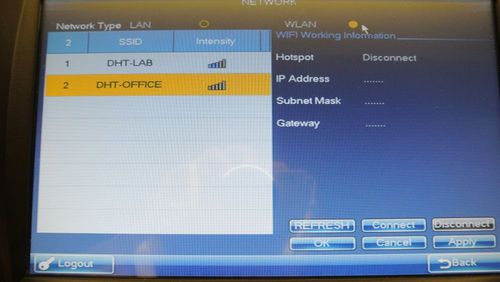
6. Check DHCP or connect to your wireless network and select save:
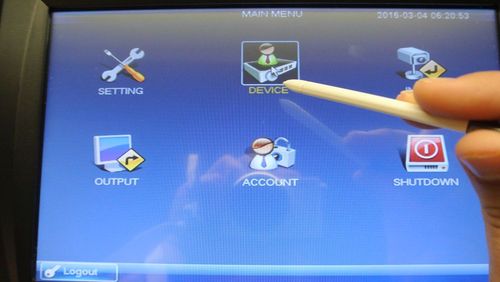
7. After connecting to a network go to the main menu and select Device:
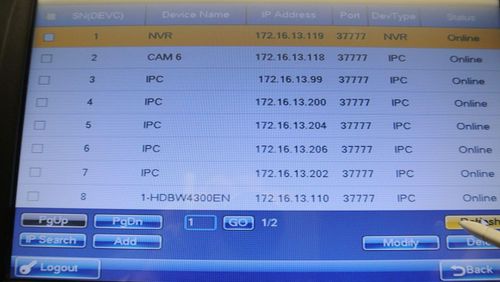
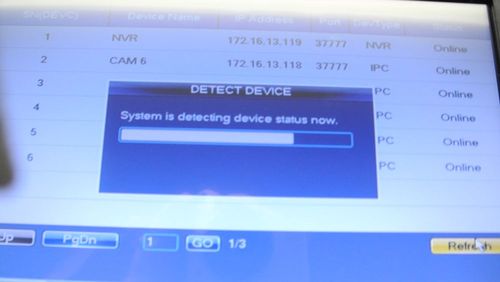
8. Select refresh and the page should populate IP cameras and NVRs on your network. Select the device(s) you want to display and select ADD
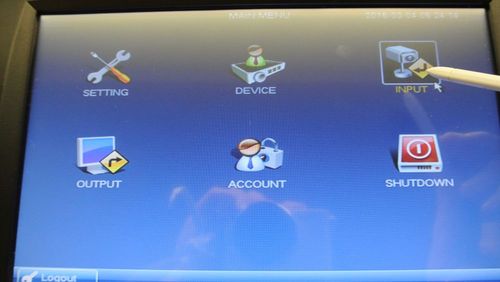
9. Go to the main menu and Select Input
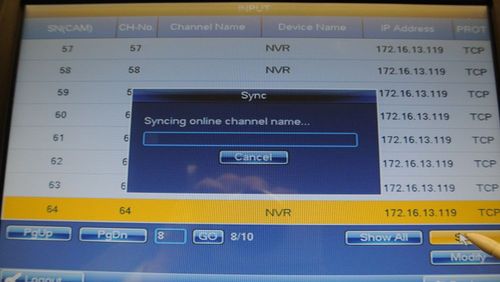
10. Select the Camera you want to add via any NVR that you've added and select sync.
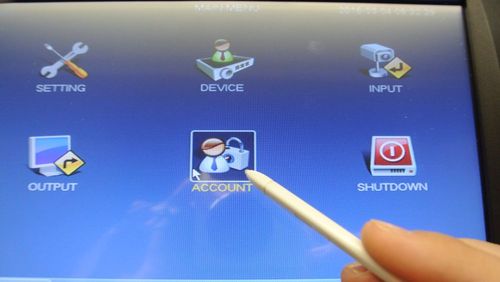
11. Now select Account on the Main Menu:
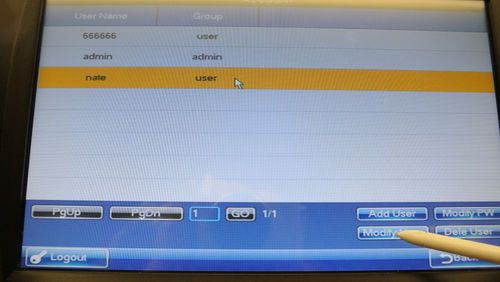
12. Now Modify or create a user account (or use 666666 - user)
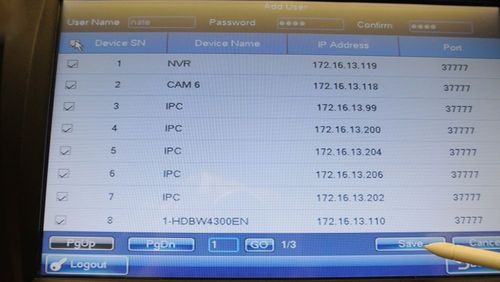
13. Also add the camera or NVR onto the user account
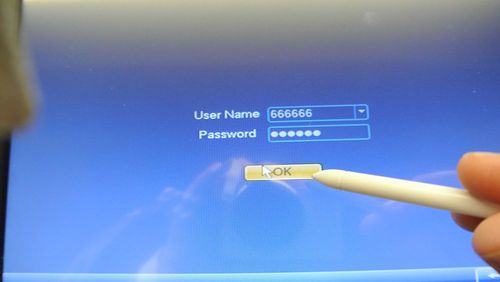
14. Logout and login to the user account
15. Select Device List
16. Make sure your Device (IPC or NVR) populates in this field.
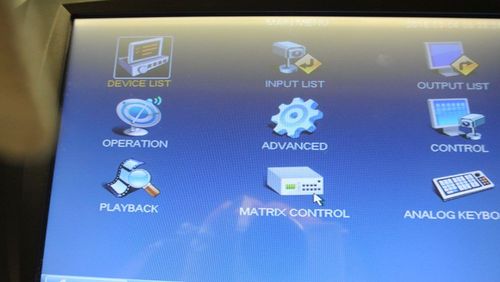
17. Go back to the Main Menu and select Control
18. Select NetKeyboard, and double click/press the local preview. You can also setup how many windows you want to be displayed at a time on the bottom row of menu items, as well as full screen, and PTZ controls.
19. Now select the input tab that looks like a camera (upper right corner of the screen) and select the camera or NVR and channel you want to display.
20. Now click or press and hold the camera and drag it to the area you want it to display in.
21. Wait a few moments and wait for the video to cache, and then you should have live video feed.
