Difference between revisions of "NVR/Recording Setup/Audio Recording Setup"
m (JP moved page Audio to NVR/Recording Setup/Audio Recording Setup) |
|||
| Line 15: | Line 15: | ||
[[Category:Record]] | [[Category:Record]] | ||
[[Category:NVR]] | [[Category:NVR]] | ||
| + | |||
| + | ===Links=== | ||
| + | <table> | ||
| + | <tr><th colspan="3"> Related Articles in [[:Category:Record]]</th></tr> | ||
| + | <tr><td> | ||
| + | |||
| + | <DynamicPageList> | ||
| + | category = Record | ||
| + | count=5 | ||
| + | </DynamicPageList> | ||
| + | </td> | ||
| + | <td> | ||
| + | <DynamicPageList> | ||
| + | category = Record | ||
| + | offset = 5 | ||
| + | count= 5 | ||
| + | </DynamicPageList> | ||
| + | </td> | ||
| + | <td> | ||
| + | |||
| + | <DynamicPageList> | ||
| + | category = Record | ||
| + | offset = 10 | ||
| + | count=5 | ||
| + | </DynamicPageList> | ||
| + | </td></tr></table> | ||
Revision as of 17:46, 12 May 2016
Setup Audio Recording
Note: These instructions only apply to systems capable of recording audio. You will need a power microphone and power speaker for the best results.
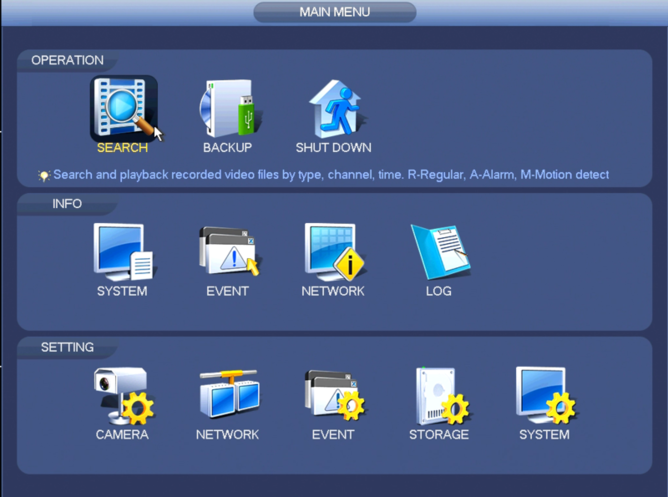
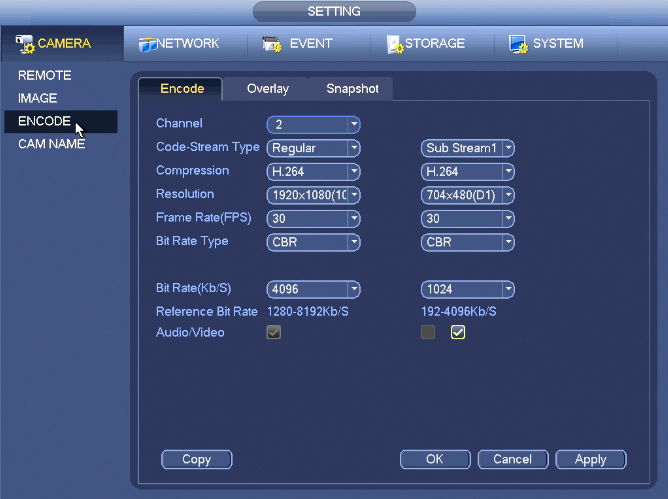
1. From the Main Menu, go to Setting->Camera->Encode
2. Click the box for, "Audio/Video"
3. Click, "Apply" and then, "OK"
Links
| Related Articles in Category:Record | ||
|---|---|---|
|
<DynamicPageList> category = Record count=5 </DynamicPageList> |
<DynamicPageList> category = Record offset = 5 count= 5 </DynamicPageList> |
<DynamicPageList> category = Record offset = 10 count=5 </DynamicPageList> |

