Difference between revisions of "SmartPSS/E-Map"
(→How to use E-Map) |
(→How to use E-Map) |
||
| Line 2: | Line 2: | ||
'''Emap''' | '''Emap''' | ||
| − | + | Step 1: Select E-Map from Home Page | |
[[File:emap_1.png|600px]] | [[File:emap_1.png|600px]] | ||
| − | + | Step 2: Select "Add Map" → Name Map → Find File of Map to be used → Map description → click "Save" and Map will be come into view. | |
[[File:emap_2.png|600px]] | [[File:emap_2.png|600px]] | ||
| Line 13: | Line 13: | ||
| − | + | Step 3: On the top left select the "Edit tab". This will allow to add cameras to the E-Map | |
[[File:emap_4.png|600px]] | [[File:emap_4.png|600px]] | ||
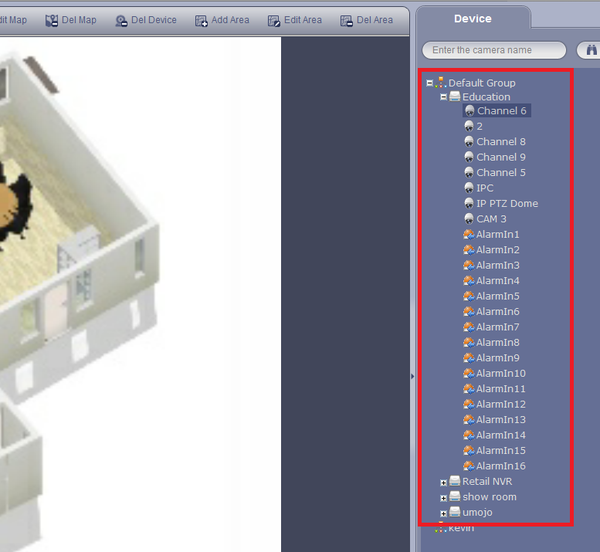
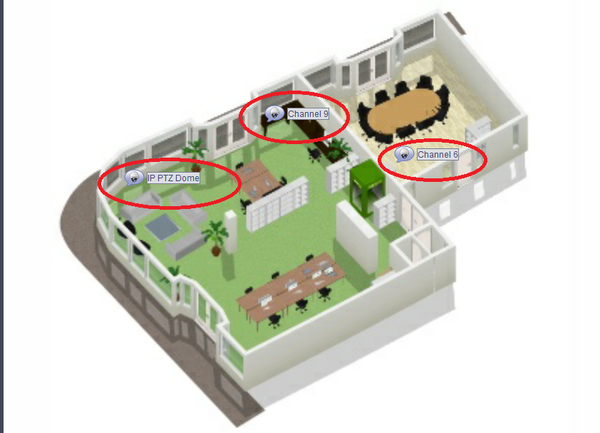
| − | + | Step 4: On the right-hand side you will see a list of recorders and cameras to select. Choose recorder → choose cameras → click on camera to highlight. You may now drag the chosen camera to any part of the map or floor plan. '''Note:''' you must be on the edit tab to select cameras to drag onto the map. | |
[[File:emap_5.png|600px]] | [[File:emap_5.png|600px]] | ||
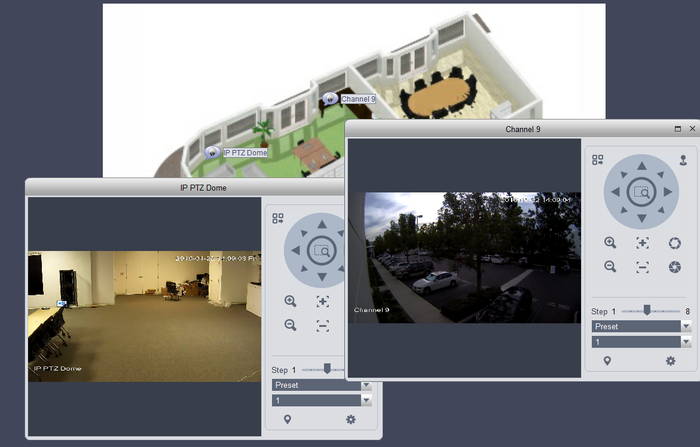
| − | + | Step 5: From the "Veiw" tab, on the map you can double click on the cameras to view live stream. You may view multiple cameras simultaneously. | |
[[File:emap_6.png|600px]] | [[File:emap_6.png|600px]] | ||
[[File:emap_7.png|700px]] | [[File:emap_7.png|700px]] | ||
Revision as of 18:00, 31 May 2016
How to use E-Map
Emap
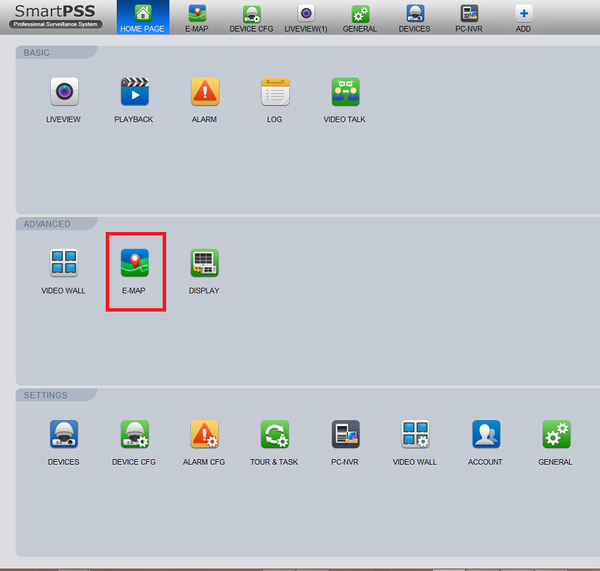
Step 1: Select E-Map from Home Page
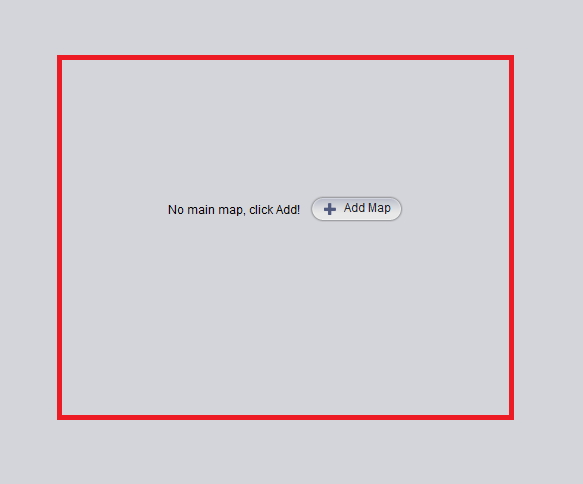
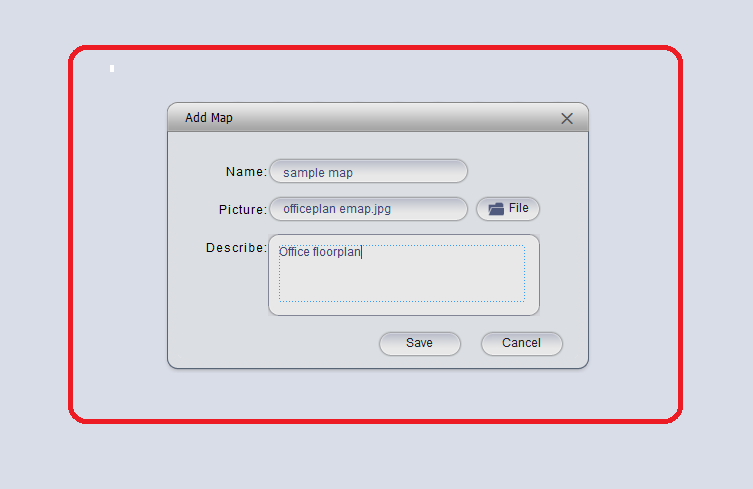
Step 2: Select "Add Map" → Name Map → Find File of Map to be used → Map description → click "Save" and Map will be come into view.
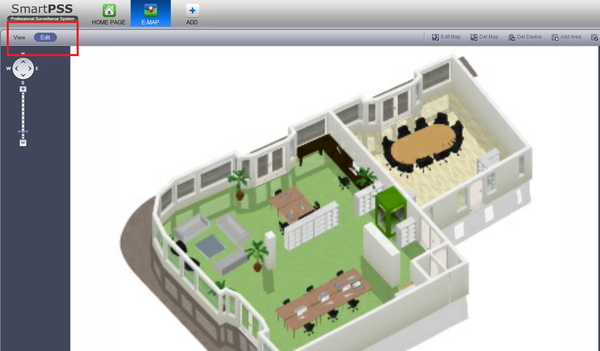
Step 3: On the top left select the "Edit tab". This will allow to add cameras to the E-Map
Step 4: On the right-hand side you will see a list of recorders and cameras to select. Choose recorder → choose cameras → click on camera to highlight. You may now drag the chosen camera to any part of the map or floor plan. Note: you must be on the edit tab to select cameras to drag onto the map.
Step 5: From the "Veiw" tab, on the map you can double click on the cameras to view live stream. You may view multiple cameras simultaneously.
