Difference between revisions of "SmartPSS/Menu/Device CFG"
(→Step by Step Instructions) |
(→Step by Step Instructions) |
||
| Line 10: | Line 10: | ||
===Step by Step Instructions=== | ===Step by Step Instructions=== | ||
| − | 1. | + | 1. Launch SmartPSS and on the home page click DEVICE CFG. |
| + | |||
| + | [[File:spssdevcfg0021.jpg|800px]] | ||
2. On the left column click your designated device to configure. | 2. On the left column click your designated device to configure. | ||
| − | + | [[File:spssdevcfg010.jpg|800px]] | |
| − | + | 3. Follow Each section below to access the specific Setting: | |
| − | + | ====General==== | |
| + | =====Network===== | ||
| + | *'''TCP/IP:''' Enter this section to configure the systems IPV4 and IPV6 network settings, you can also enable or disable DHCP here. | ||
| − | + | [[File:devicecfgpss001.jpg|800px]] | |
| + | *'''Connect:''' Enter this section to configure the Max connections and | ||
[[File:DeviceConfigConnect.png|800px]] | [[File:DeviceConfigConnect.png|800px]] | ||
| − | + | *'''PPPoE:'''' | |
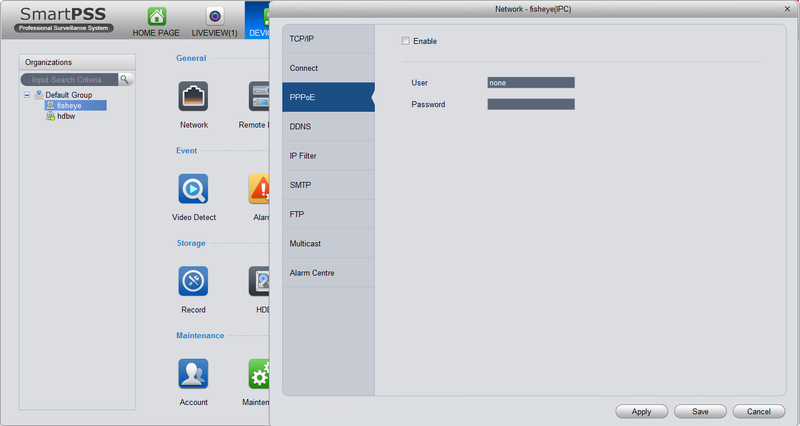
[[File:DeviceConfigPPPoE.png|800px]] | [[File:DeviceConfigPPPoE.png|800px]] | ||
| − | + | *'''DDNS''' | |
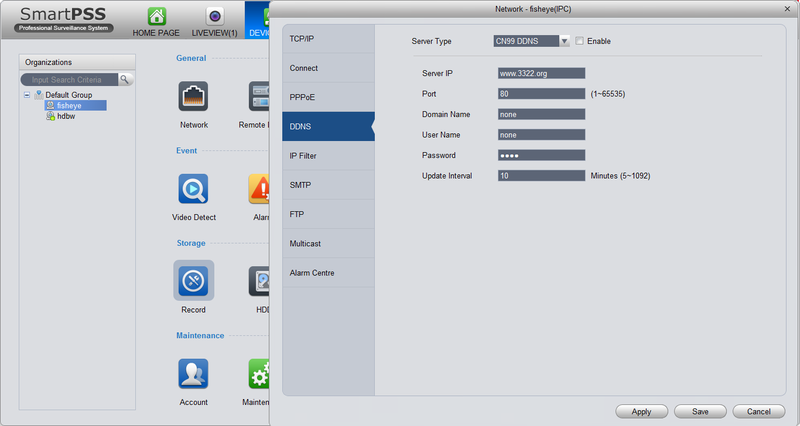
[[File:DeviceConfigDDNS.png|800px]] | [[File:DeviceConfigDDNS.png|800px]] | ||
| − | + | *'''IP Filter''' | |
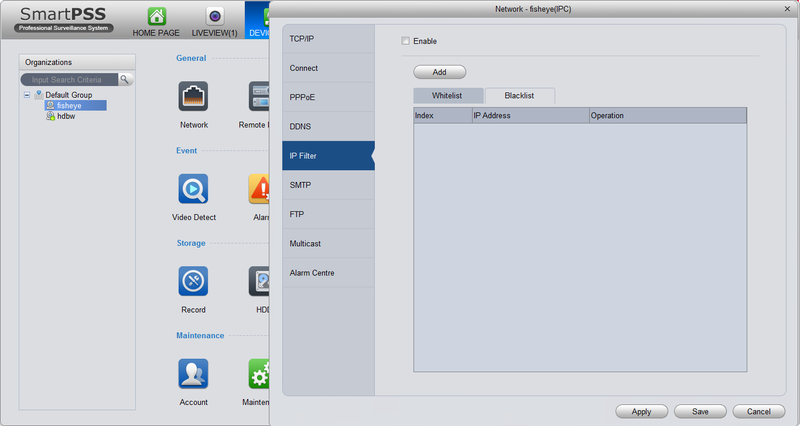
[[File:DeviceConfigIPFilter.png|800px]] | [[File:DeviceConfigIPFilter.png|800px]] | ||
| − | + | *'''SMTP''' | |
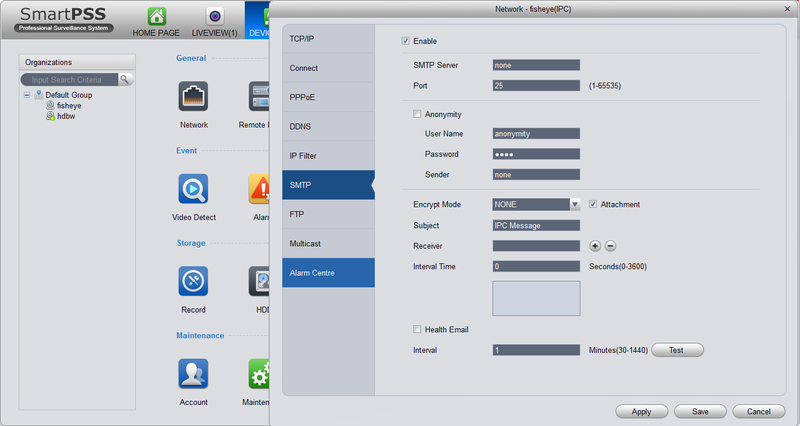
[[File:DeviceConfigSMTP.png|800px]] | [[File:DeviceConfigSMTP.png|800px]] | ||
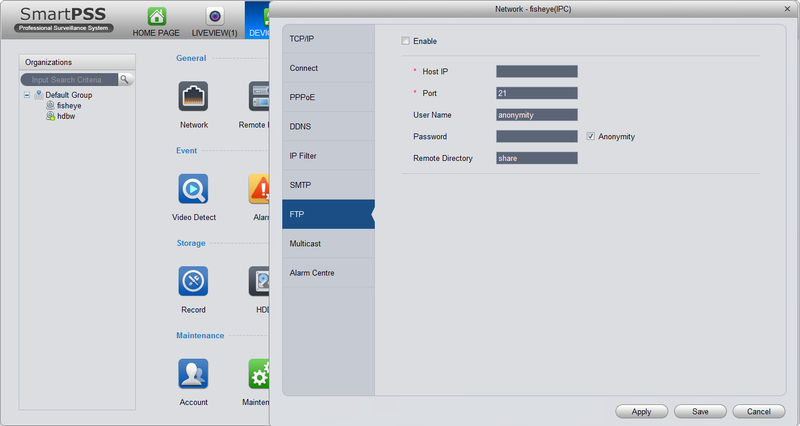
| − | + | *'''FTP''' | |
[[File:DeviceConfigFTP.png|800px]] | [[File:DeviceConfigFTP.png|800px]] | ||
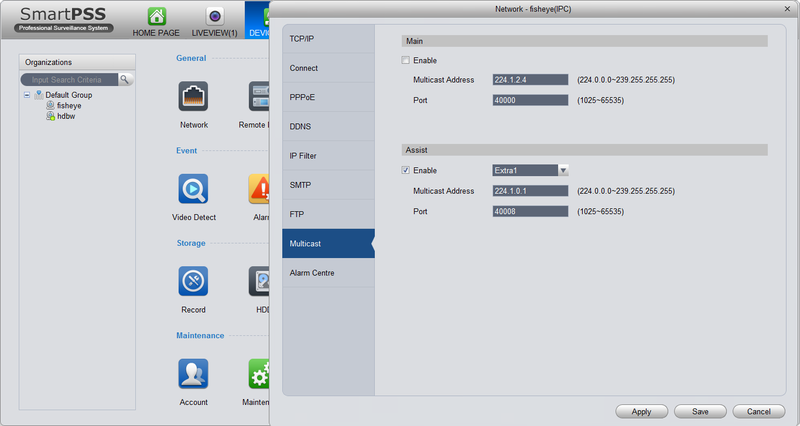
| − | + | *'''Multicast''' | |
[[File:DeviceConfigMulticast.png|800px]] | [[File:DeviceConfigMulticast.png|800px]] | ||
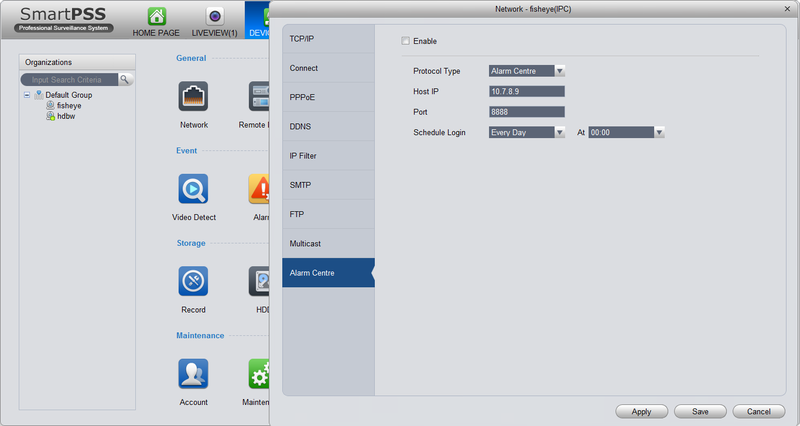
| − | + | *'''Alarm Centre''' | |
[[File:DeviceConfigAlarmCentre.png|800px]] | [[File:DeviceConfigAlarmCentre.png|800px]] | ||
Revision as of 16:18, 24 August 2016
Contents
SmartPSS Menu-Device Config
Description
The Device Config menu is used to change the settings on IP cameras and NVR's. Follow the instructions below to learn about device configuration through SmartPSS.
Prerequisites
- SmartPSS Installed on computer
- Connected device such as an IP camera or NVR
- Device added onto SmartPSS successfully
Video Instructions
Step by Step Instructions
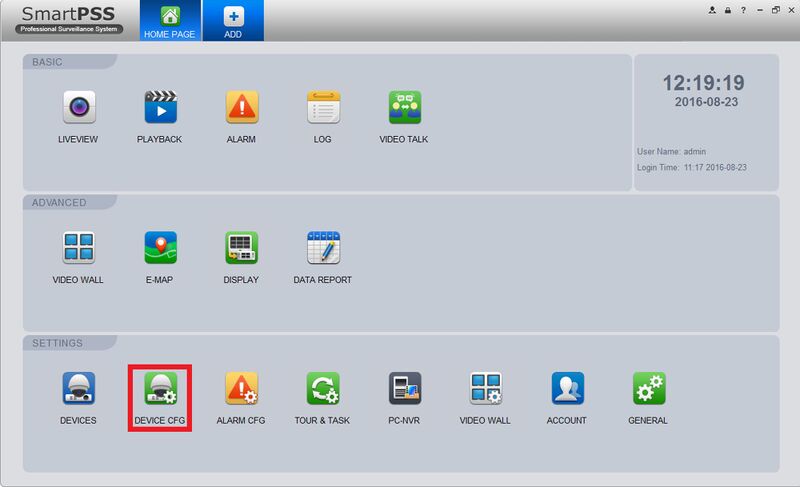
1. Launch SmartPSS and on the home page click DEVICE CFG.
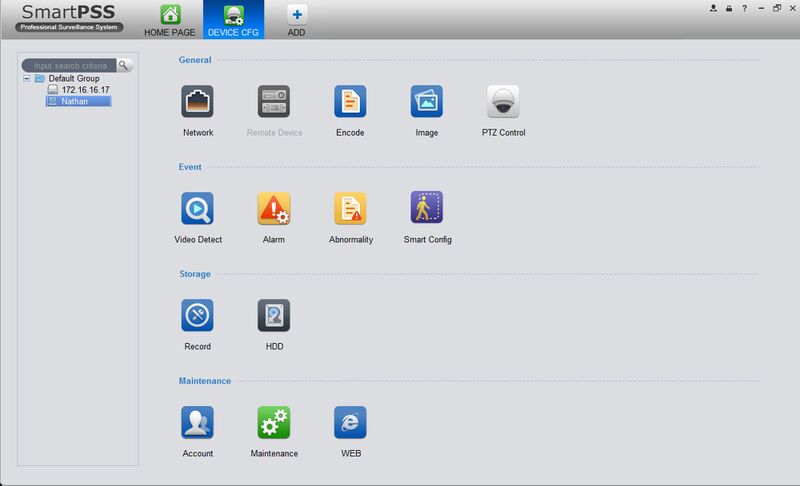
2. On the left column click your designated device to configure.
3. Follow Each section below to access the specific Setting:
General
Network
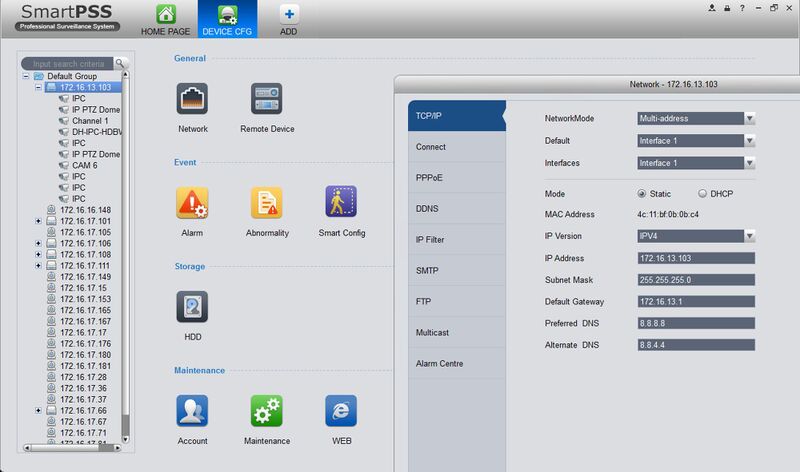
- TCP/IP: Enter this section to configure the systems IPV4 and IPV6 network settings, you can also enable or disable DHCP here.
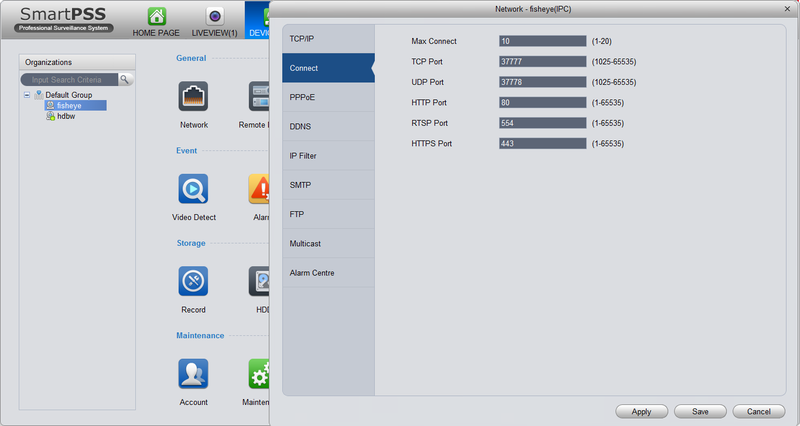
- Connect: Enter this section to configure the Max connections and
- PPPoE:'
- DDNS
- IP Filter
- SMTP
- FTP
- Multicast
- Alarm Centre
