Difference between revisions of ":People Counting"
(→Prerequisites) |
(→Step by Step Instructions for SmartPSS) |
||
| Line 88: | Line 88: | ||
====Step by Step Instructions for SmartPSS==== | ====Step by Step Instructions for SmartPSS==== | ||
| − | + | 1. Login into SmartPSS and select Live. | |
| − | 1. Login into SmartPSS and select Live. | ||
[[File:peoplecount1.png|600px]] | [[File:peoplecount1.png|600px]] | ||
| Line 97: | Line 96: | ||
[[File:peoplecount2.png|600px]] | [[File:peoplecount2.png|600px]] | ||
| − | 3. Select People Counting -> Select Next. | + | 3. Select People Counting -> Select Next. |
[[File:peoplecount3.png|600px]] | [[File:peoplecount3.png|600px]] | ||
| Line 105: | Line 104: | ||
[[File:peoplecount4.png|600px]] | [[File:peoplecount4.png|600px]] | ||
| − | 5. Draw a rule | + | 5. Draw a rule |
| − | [[File: | + | [[File:peoplecount51.png|600px]] |
6. Select Config. Here you can change the enter direction, enter number exit number and remaining number. | 6. Select Config. Here you can change the enter direction, enter number exit number and remaining number. | ||
| Line 113: | Line 112: | ||
[[File:peoplecount6.png|600px]] | [[File:peoplecount6.png|600px]] | ||
| − | 7. Select Arming Schedule to set schedule. | + | 7. Select Arming Schedule to set schedule. |
[[File:peoplecount7.png|600px]] | [[File:peoplecount7.png|600px]] | ||
| − | 8. Select Aalarm to set type of alarm -> select save. | + | 8. Select Aalarm to set type of alarm -> select save. |
[[File:peoplecount8.png|600px]] | [[File:peoplecount8.png|600px]] | ||
| − | 9. Apply and save to save settings. | + | 9. Apply and save to save settings. |
[[File:peoplecount9.png|600px]] | [[File:peoplecount9.png|600px]] | ||
| − | 10. Go back to the main menu and select People Counting. | + | 10. Go back to the main menu and select People Counting. |
[[File:peoplecount10.png|600px]] | [[File:peoplecount10.png|600px]] | ||
| − | 11. Select Device -> Select Search | + | 11. Select Device -> Select Search |
[[File:peoplecount11.png|600px]] | [[File:peoplecount11.png|600px]] | ||
| − | 12. Here you can see the generated report. | + | 12. Here you can see the generated report. |
[[File:peoplecount12.png|600px]] | [[File:peoplecount12.png|600px]] | ||
Revision as of 17:48, 3 February 2017
Contents
People Counting
Description
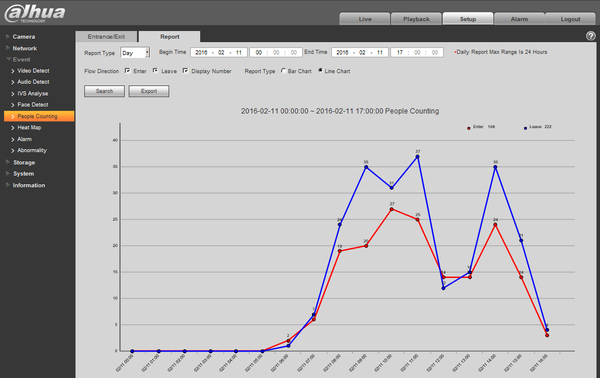
It is to make statistics of enter and leave people in the specific area of the image, and finally it comes out the statistics data, providing kinds of data reports such as day report, month report and year report. There are two ways to present: line chart and bar chart, providing data exporting function.
Note: People counting supports max half year data, it will operate auto overwrite according to hour when surpassing one year.
Prerequisites
- Internet Explorer
- IP Address of Device
- IVS capable devices
- Current Firmware
Video Instructions
Step by Step Instructions
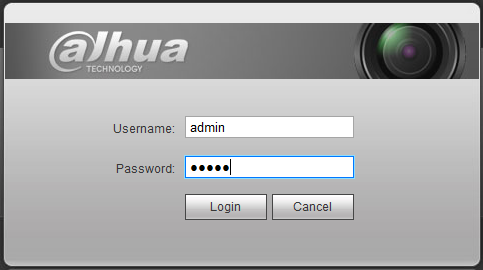
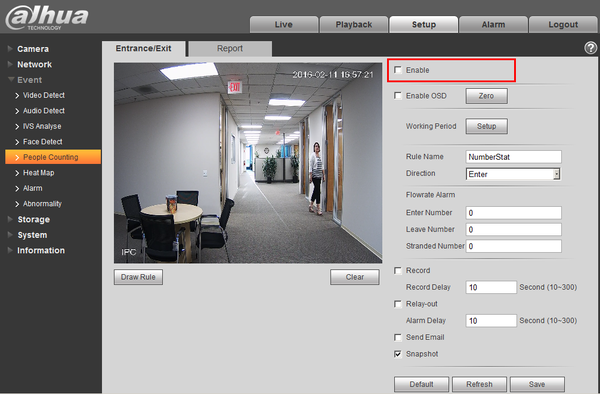
1. Login to the camera you wish to enable People Counting on.
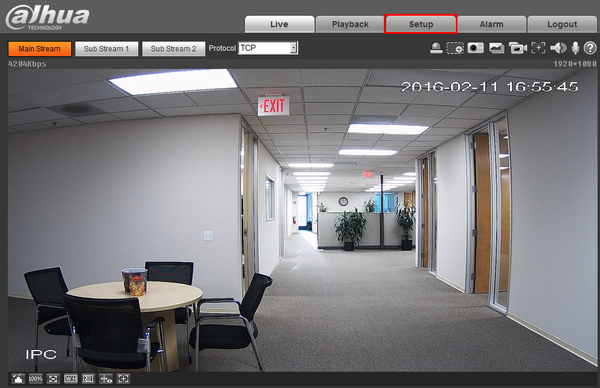
2. Click, "Setup"
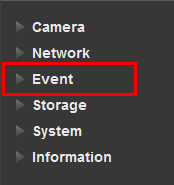
3. Then click, "Event"
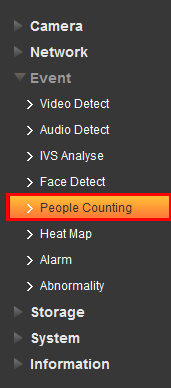
4. Click, "People Counting"
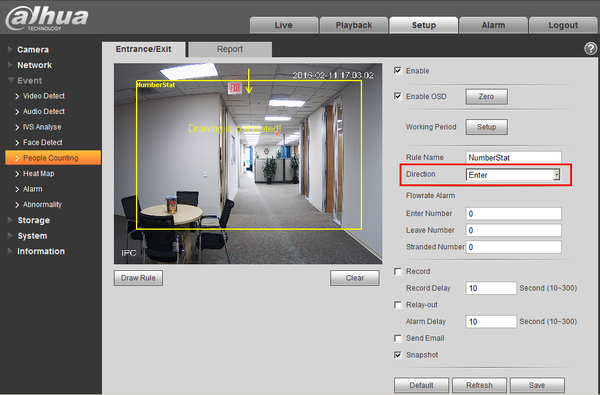
5. Check the box for, "Enable"
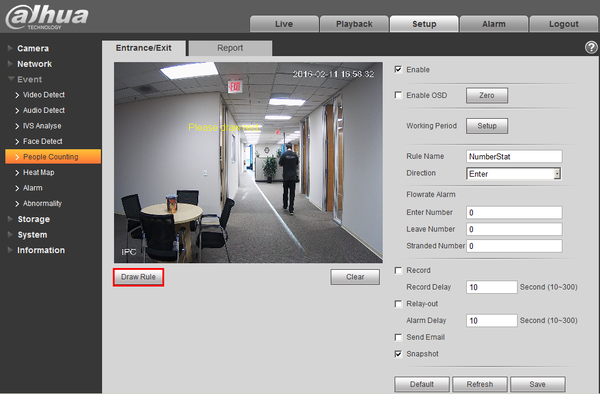
6. Click, "Draw Rule"
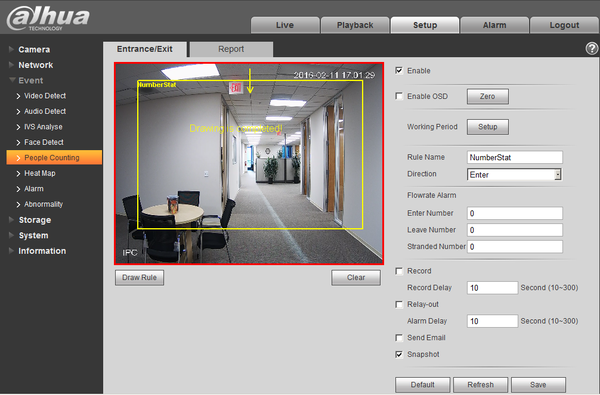
7. Left click, and draw a region for where you want the camera to count people.
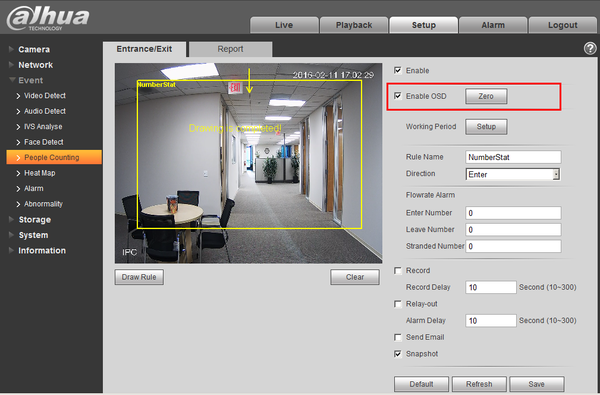
8. Check the box for, "Enable OSD"
9. Specify under what condition you want people to be counted by clicking the drop down to the right of, "Direction"
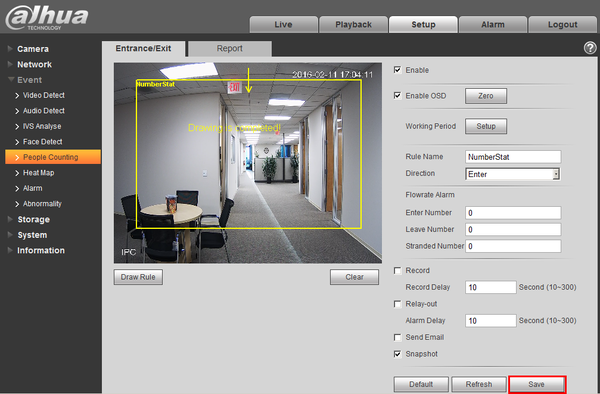
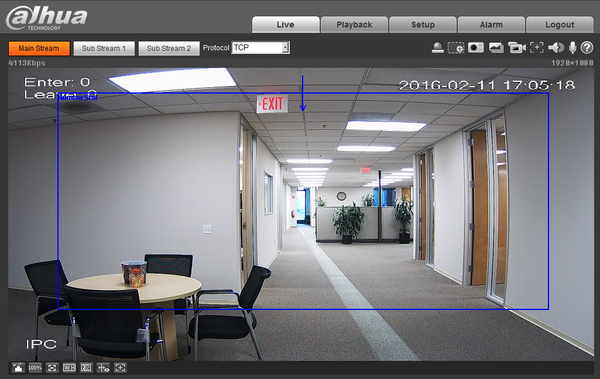
10. Click, "Save" and then, "Live"
11. If successful, your live feed should look like this.
Line Chart
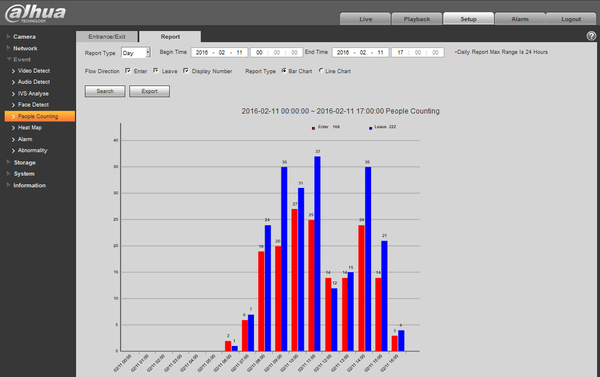
Bar Chart
Operation Steps:
- Enter report interface, select report type, such as day report, month report and year report.
- Select the time of statistics report.
- Select people counting direction of statistics and ways to present of the report including bar chart or line chart.
- Click Search button to view the report presentation.
- Click export to save report as CSV format or picture format.
System Interface Setup
Prerequisites
Video Instructions
Step by Step Instructions
SmartPSS Setup
Prerequisites
- SmartPSS 2.0
- IVS capable device
- Upgraded devices to latest firmware
Step by Step Instructions for SmartPSS
1. Login into SmartPSS and select Live.
2. Select People Counting capable device and rigct click to show IVS Channel Config.
3. Select People Counting -> Select Next.
4. Select Lens Direction. For this tutorial we are using vertical -> click on down arrow which will bring up Rules Details.
5. Draw a rule
6. Select Config. Here you can change the enter direction, enter number exit number and remaining number.
7. Select Arming Schedule to set schedule.
8. Select Aalarm to set type of alarm -> select save.
9. Apply and save to save settings.
10. Go back to the main menu and select People Counting.
11. Select Device -> Select Search
12. Here you can see the generated report.
Step by Step Instructions
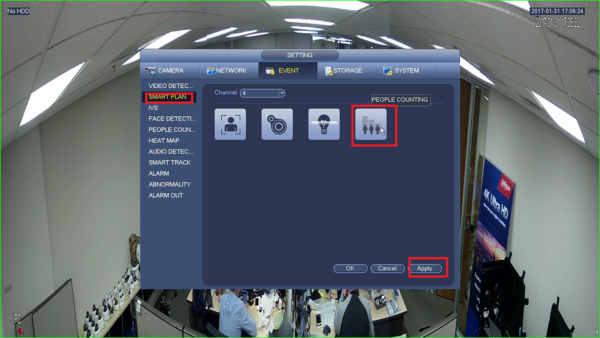
1. Go to Events.
2. Under Smart plan, select people counting and click apply.
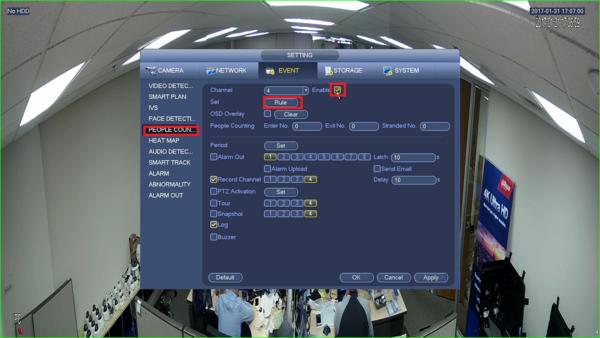
3. Under People counting, select enable then select Rules.
4. Click on number stat, draw rules, and then click ok.
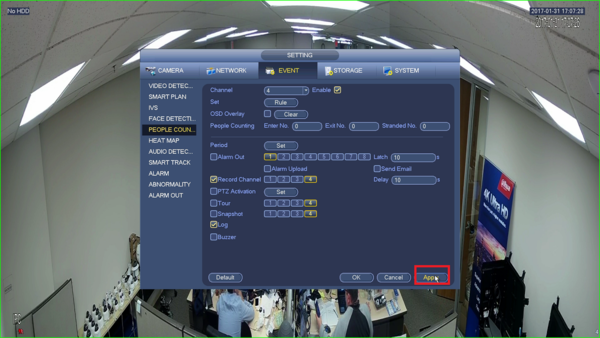
5. Click apply.
