Difference between revisions of "Software/Dahua Toolbox/Product Selector"
| Line 14: | Line 14: | ||
===Step by Step Instructions=== | ===Step by Step Instructions=== | ||
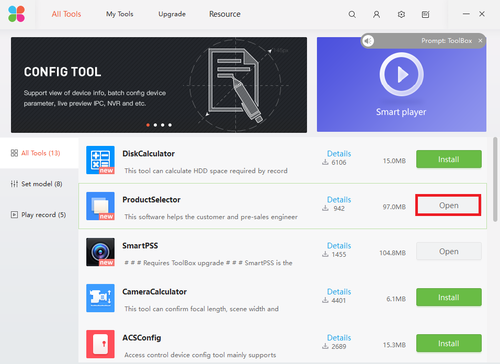
| − | 1. Go to the toolbox and install the Product Selector. | + | 1. Go to the toolbox and install the Product Selector if you haven't and select it. |
| + | |||
| + | [[File:Product_Selector1.png|500px]] | ||
| + | |||
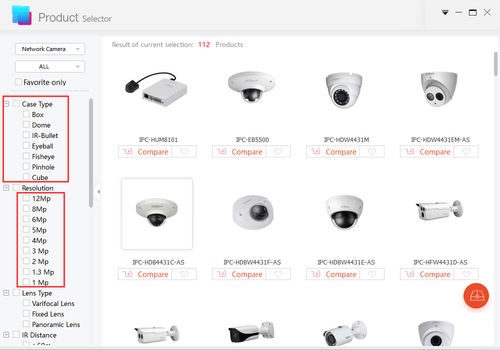
| + | 2. Select lens, camera type, etc if you wish. | ||
| + | |||
| + | [[File:Product_Selector2.png|500px]] | ||
| + | |||
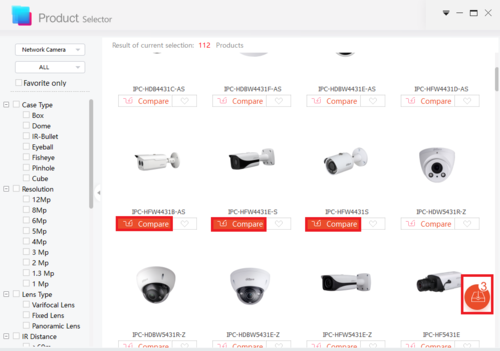
| + | 3. Select the Camera you wish to compare and click on the compare icon on bottom right. | ||
| + | |||
| + | [[File:Product_Selector3.png|500px]] | ||
| + | |||
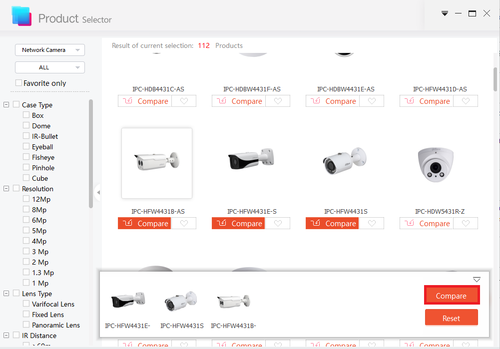
| + | 4. Select the compare on the bottom. | ||
| + | |||
| + | [[File:Product_Selector4.png|500px]] | ||
| + | |||
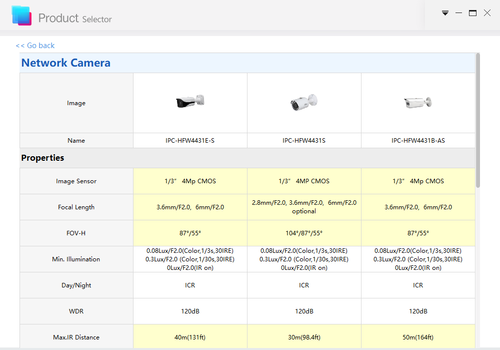
| + | 5. You may now see all the different specs of the cameras you selected. | ||
| + | |||
| + | [[File:Product_Selector5.png|500px]] | ||
Revision as of 18:37, 16 August 2017
Contents
How to Use Product Selector on Dahua Toolbox
Description
This is a guide for the Product Selector on Dahua toolbox.
Prerequisites
- Dahua Toolbox
- Here to Download Dahua Toolbox
Video Instructions
Step by Step Instructions
1. Go to the toolbox and install the Product Selector if you haven't and select it.
2. Select lens, camera type, etc if you wish.
3. Select the Camera you wish to compare and click on the compare icon on bottom right.
4. Select the compare on the bottom.
5. You may now see all the different specs of the cameras you selected.
