Difference between revisions of "NVR/Backup/Backup Browser"
| Line 12: | Line 12: | ||
3. Click, "File List" | 3. Click, "File List" | ||
| − | [[file:BackupviaBrowser3.jpg]] | + | [[file:BackupviaBrowser3.jpg|800px]] |
4. Click, "More" | 4. Click, "More" | ||
| − | [[file:BackupviaBrowser4.jpg]] | + | [[file:BackupviaBrowser4.jpg|800px]] |
5. Input the following: | 5. Input the following: | ||
Revision as of 01:58, 8 December 2015
Backup via Web Browser
Please Note: If you are on a Windows PC, please make sure you disable UAC and reboot your PC before attempting these steps.
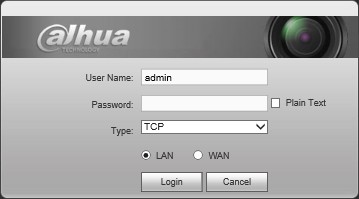
1. Login to your NVR or DVR via Internet Explorer.
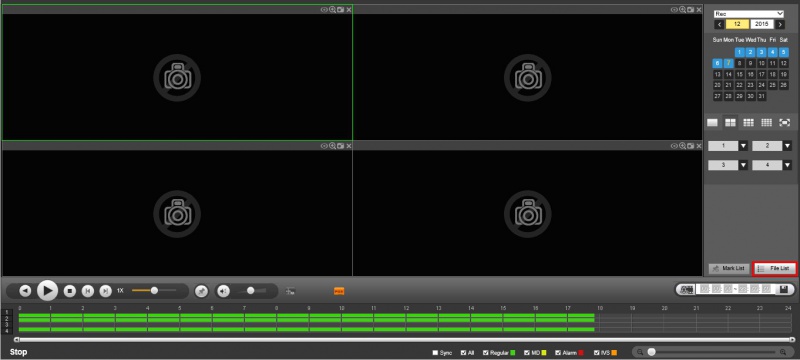
2. Click, "Playback"
3. Click, "File List"
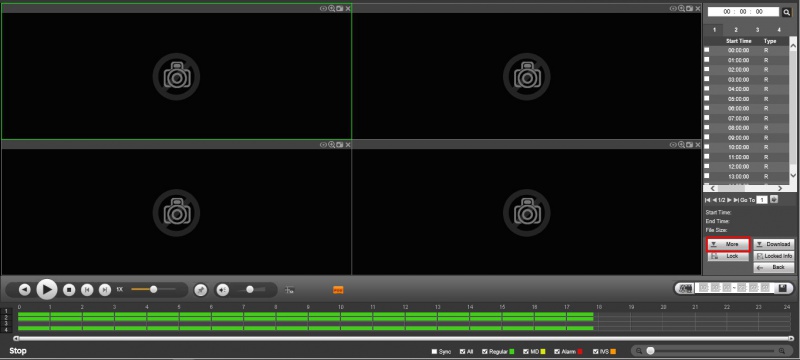
4. Click, "More"
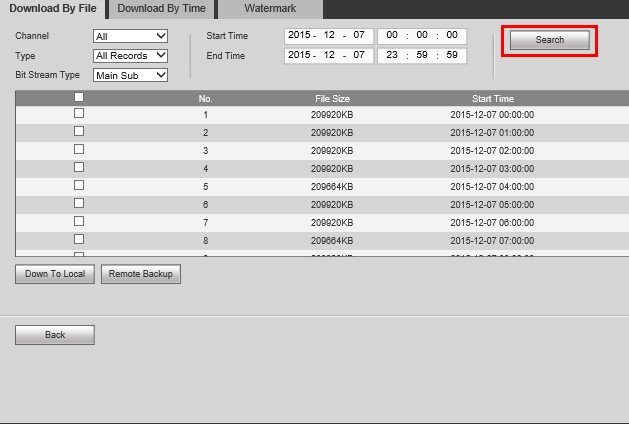
5. Input the following:
- Channel
- Type
- Bit Stream Type
- Start Time
- End Time
6. Click, ""Search"
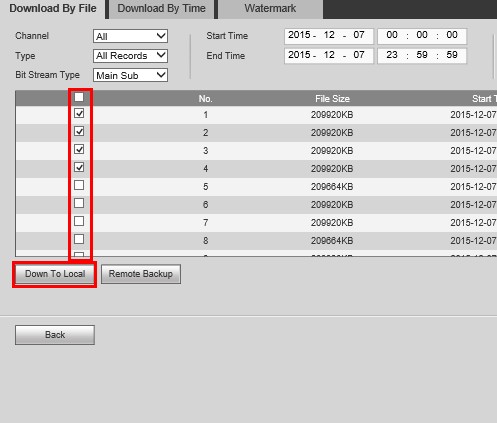
7. Check the boxes for each of the files you wish to back up, and click, "Down to Local"
8. Change the, "Record Format" to "ASF"
9. Select the location you wish to save the files, and click "OK"
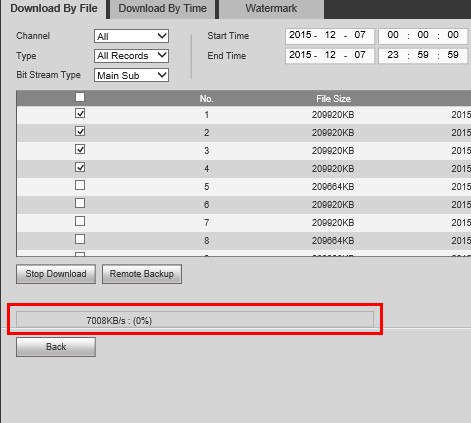
10. Progress will be displayed towards the bottom of this page.
