Difference between revisions of "DSS Windows/Pro/Group"
| Line 11: | Line 11: | ||
3. Select the '''Root''' organization, and then click '''+Add''' | 3. Select the '''Root''' organization, and then click '''+Add''' | ||
| − | Enter name for new organization, then press Enter. | + | Enter name for new organization, then press Enter. For example: NewGroup1. |
[[file:Group3.PNG|700px]] | [[file:Group3.PNG|700px]] | ||
| Line 21: | Line 21: | ||
[[file:Group4.PNG|700px]] | [[file:Group4.PNG|700px]] | ||
| − | Note: | + | '''Note:''' |
| + | |||
You can click on the pencil icon next to organization name to rename it. | You can click on the pencil icon next to organization name to rename it. | ||
| + | |||
Select the organization and click on Delete to remove the organization. | Select the organization and click on Delete to remove the organization. | ||
Revision as of 15:52, 3 July 2018
The first level organization defaults to Root, newly added organizations will be place on the next subordinated to Root.
1. Click + on the right side of Home. All functional menu will be display on the menu interface.
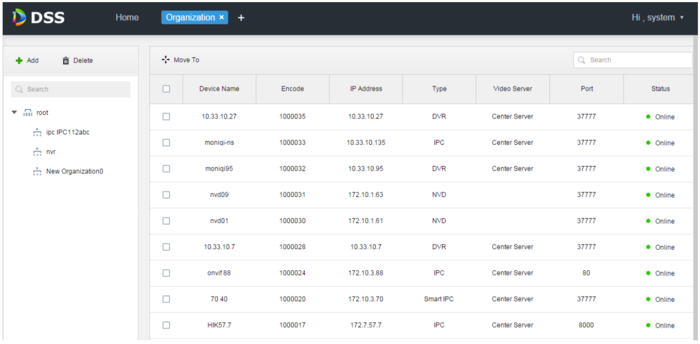
2. Click on Organization. The organization page will displayed as below:
3. Select the Root organization, and then click +Add Enter name for new organization, then press Enter. For example: NewGroup1.
4. Check the devices under the root organization, click Move To, Choose NewGroup1, then click OK.
Devices then will be added under new organization.
Note:
You can click on the pencil icon next to organization name to rename it.
Select the organization and click on Delete to remove the organization.


