Difference between revisions of "New GUI/Instructions/Backup"
(→Step by Step Instructions) |
(→Step by Step Instructions) |
||
| Line 17: | Line 17: | ||
1. From the main menu, go to the second menu page, and click on '''Backup'''. | 1. From the main menu, go to the second menu page, and click on '''Backup'''. | ||
| − | [[file:SecondPage.png| | + | [[file:SecondPage.png|800px]] |
2. Backup page will launch as shown below: | 2. Backup page will launch as shown below: | ||
| + | |||
| + | [[file:NewUIBackup2.png|800px]] | ||
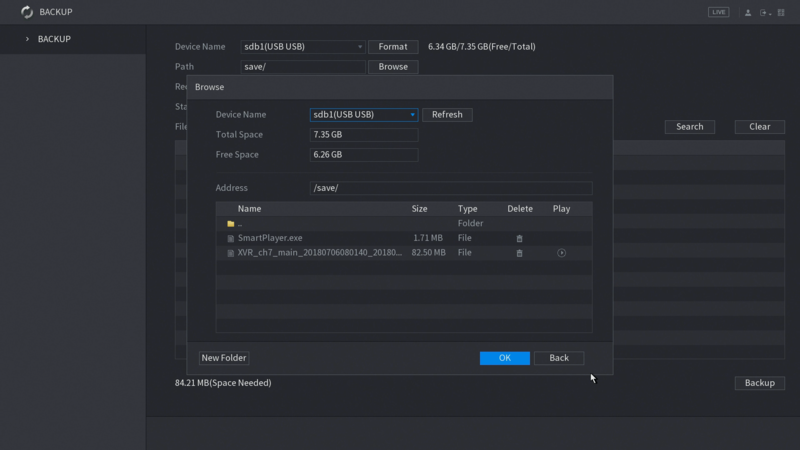
3. You must plug in an external drive to save your downloaded file. Select the path where you want to save the file at. | 3. You must plug in an external drive to save your downloaded file. Select the path where you want to save the file at. | ||
From this pop-up screen, you have an option to create new folder. After you select, click '''OK'''. | From this pop-up screen, you have an option to create new folder. After you select, click '''OK'''. | ||
| + | |||
| + | [[file:NewUIBackup3.png|800px]] | ||
4. Select the '''Record Channel''' you like to search. You can only search 1 channel at a time. | 4. Select the '''Record Channel''' you like to search. You can only search 1 channel at a time. | ||
| + | |||
| + | [[file:NewUIBackup4.png|800px]] | ||
5. Select the Recording Type you like to search. | 5. Select the Recording Type you like to search. | ||
| + | |||
| + | [[file:NewUIBackup5.png|800px]] | ||
6. Set the start and end time for searching. Then click '''Search'''. All recorded files that meets your search criteria will shown on the list. | 6. Set the start and end time for searching. Then click '''Search'''. All recorded files that meets your search criteria will shown on the list. | ||
| + | |||
| + | [[file:NewUIBackup6.png|800px]] | ||
7. Select the files, and click '''Backup'''. | 7. Select the files, and click '''Backup'''. | ||
| + | |||
| + | [[file:NewUIBackup7.png|800px]] | ||
8. Downloading process start. | 8. Downloading process start. | ||
| + | |||
| + | [[file:NewUIBackup8.png|800px]] | ||
9. Once finished, the folder information will pop up, then click '''OK'''. | 9. Once finished, the folder information will pop up, then click '''OK'''. | ||
| + | |||
| + | [[file:NewUIBackup9.png|800px]] | ||
Revision as of 17:31, 13 July 2018
Contents
=How to back up video files on new UI
Description
This article is to show you how to back up the video file from new system UI.
Prerequisites
- Dahua North America device with new latest firmware
- Monitor connected to the device itself
- USB mouse to control system UI
Video Instructions
Step by Step Instructions
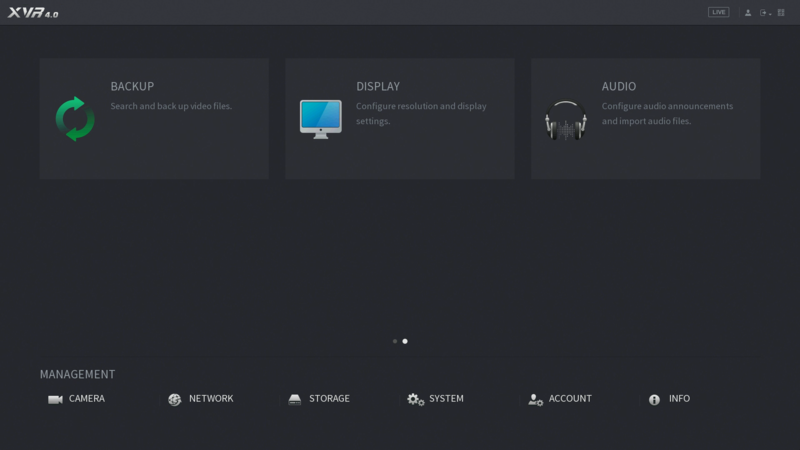
1. From the main menu, go to the second menu page, and click on Backup.
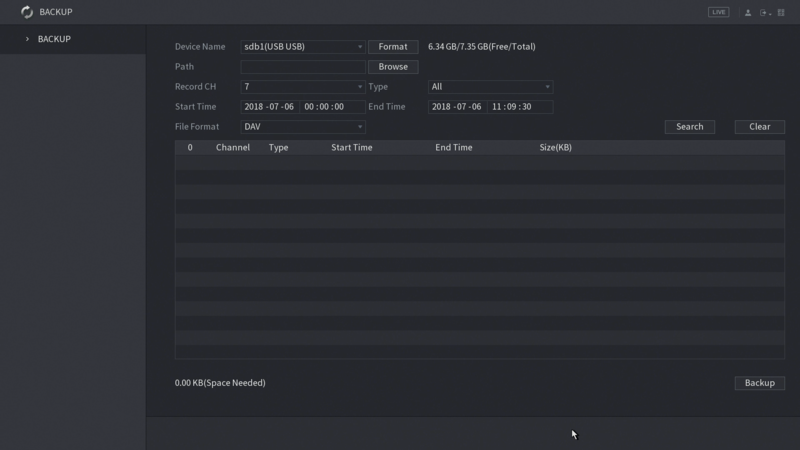
2. Backup page will launch as shown below:
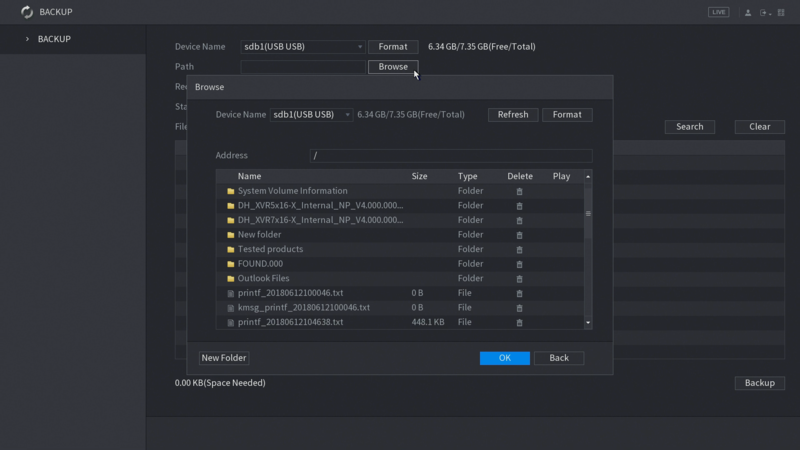
3. You must plug in an external drive to save your downloaded file. Select the path where you want to save the file at. From this pop-up screen, you have an option to create new folder. After you select, click OK.
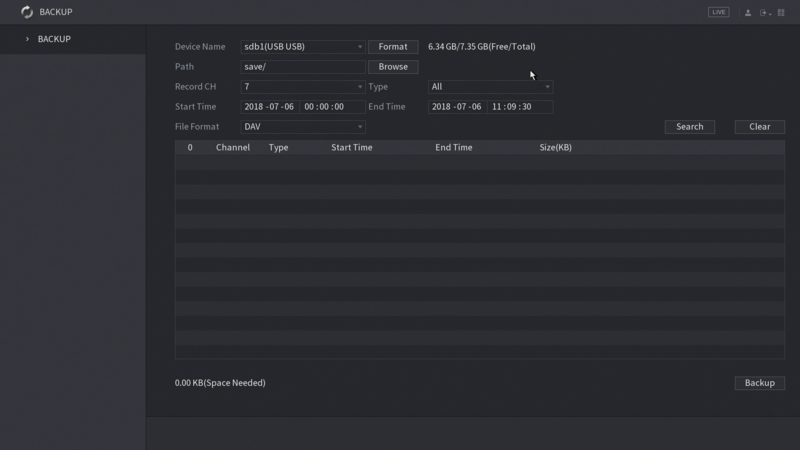
4. Select the Record Channel you like to search. You can only search 1 channel at a time.
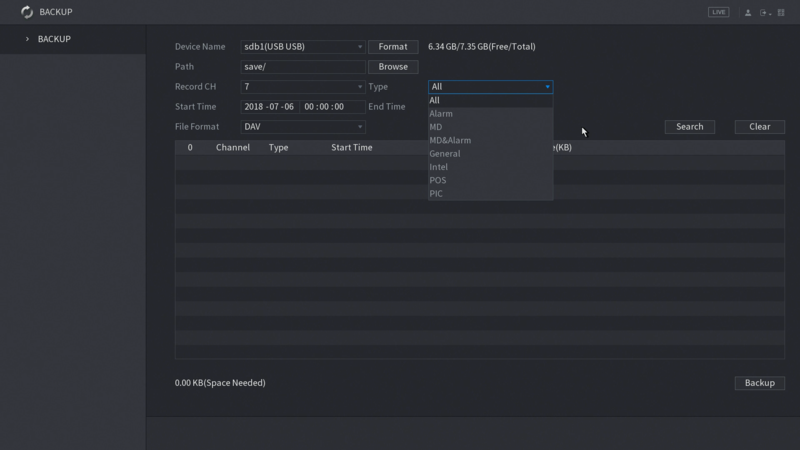
5. Select the Recording Type you like to search.
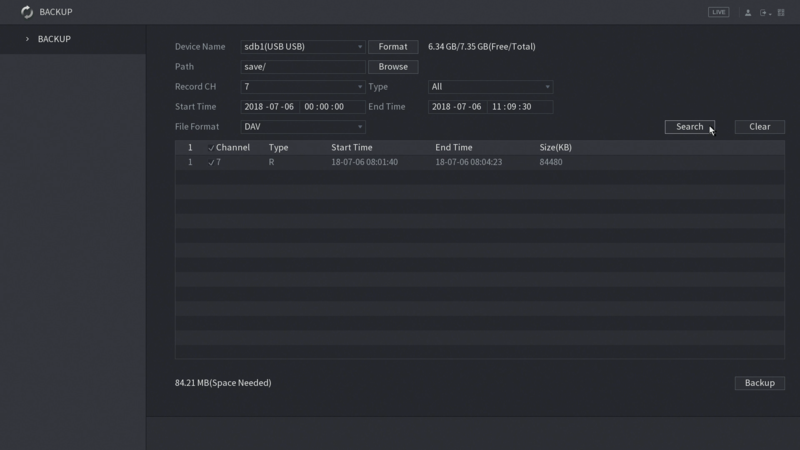
6. Set the start and end time for searching. Then click Search. All recorded files that meets your search criteria will shown on the list.
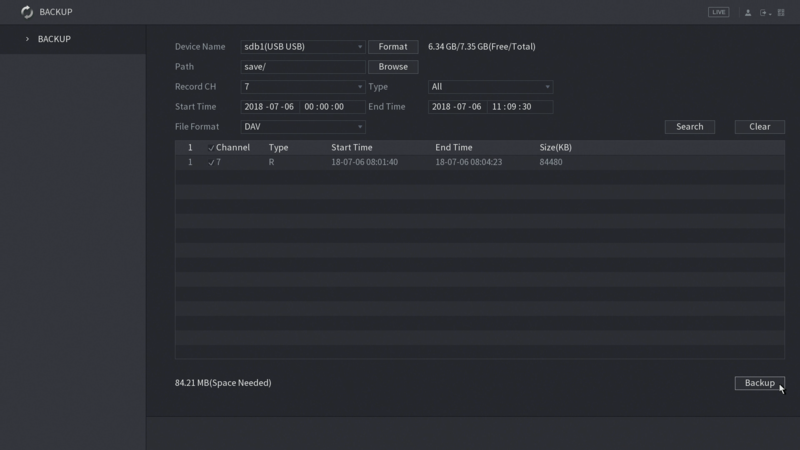
7. Select the files, and click Backup.
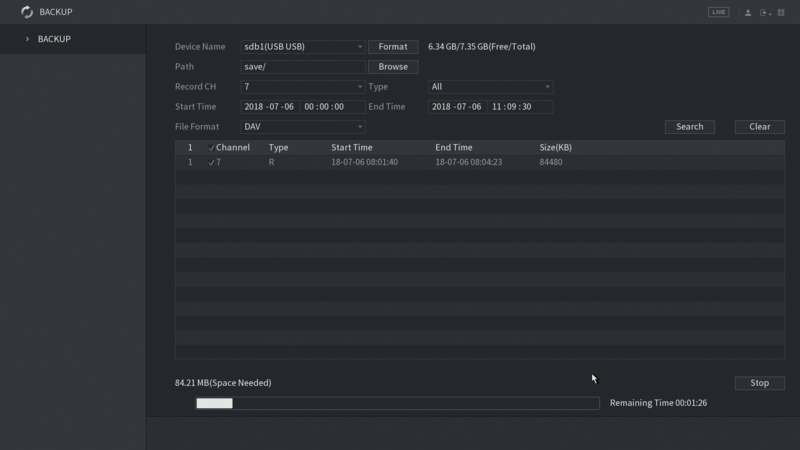
8. Downloading process start.
9. Once finished, the folder information will pop up, then click OK.
