Difference between revisions of "SmartPSS/Add Device P2P"
| Line 38: | Line 38: | ||
*Password: admin (Your NVR's Password) | *Password: admin (Your NVR's Password) | ||
| + | [[file:SmartPSSP2P9.png]] | ||
| + | 6. Click, "Get Info" | ||
| + | |||
| + | [[file:SmartPSSP2P10.png]] | ||
| + | |||
| + | 7. Click, "Save and Continue" | ||
| + | |||
| + | [[file:SmartPSSP2P11.png]] | ||
| − | + | 8. After a few moments, SmartPSS will connect to the NVR and display as, "Online" | |
| + | |||
| + | [[file:SmartPSSP2P12.png]] | ||
Revision as of 01:27, 15 December 2015
Setup Remote Access via P2P using SmartPSS
1. Locate the serial number of your NVR or DVR. The serial number can be found at the following locations:
- On the underside or side of the unit
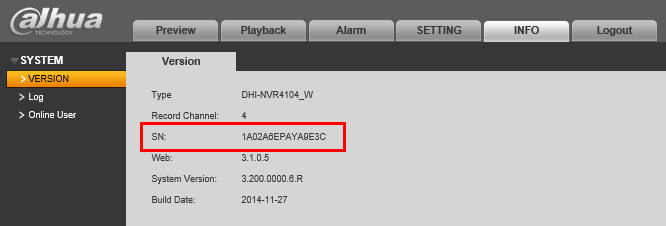
- In the web interface, under Info->Version
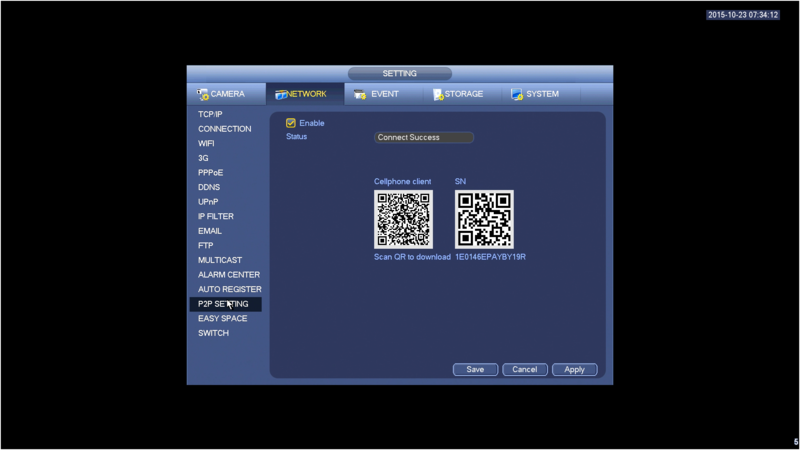
- On the system interface under Main Menu->Settings->Network->P2P
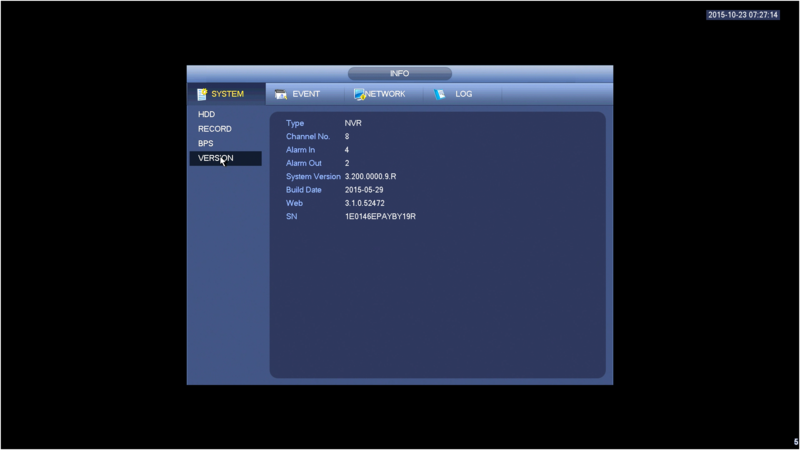
- On the system interface under Main Menu->Info->System->Version
2. Launch SmartPSS. (Default SmartPSS credentials are admin:admin)
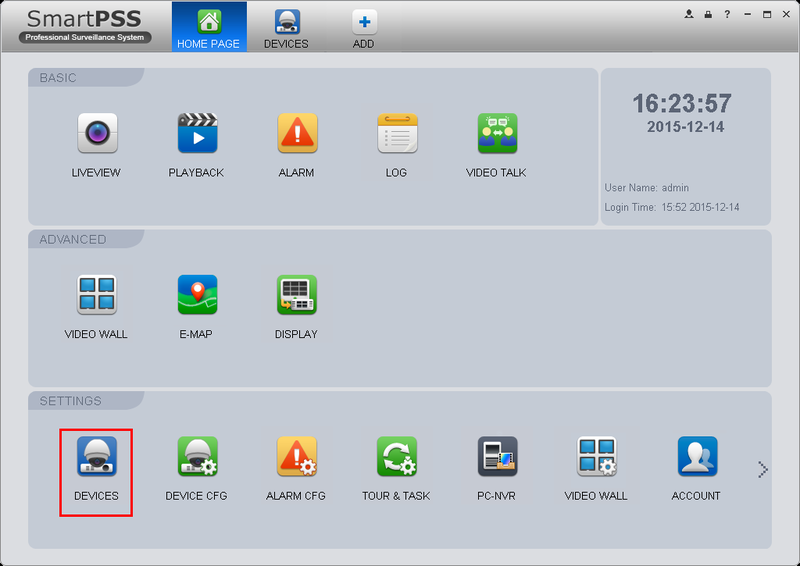
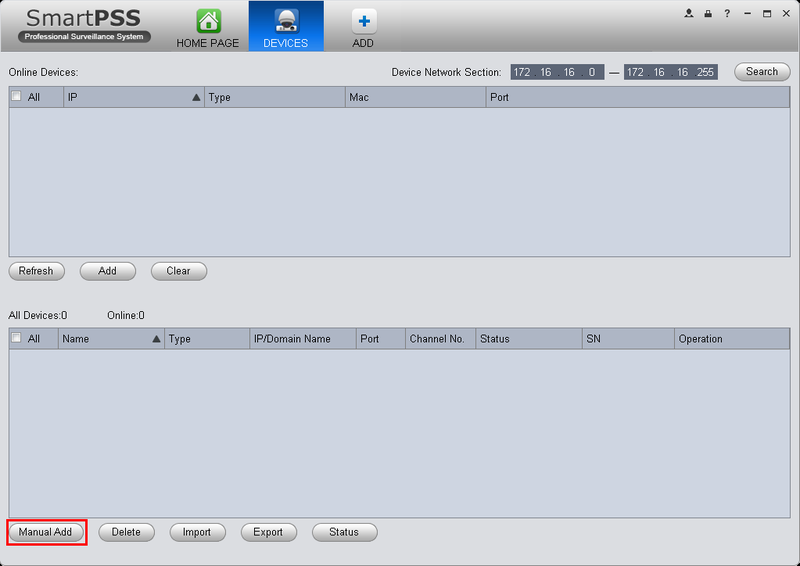
3. Click, "Devices"
4. Click, "Manual Add"
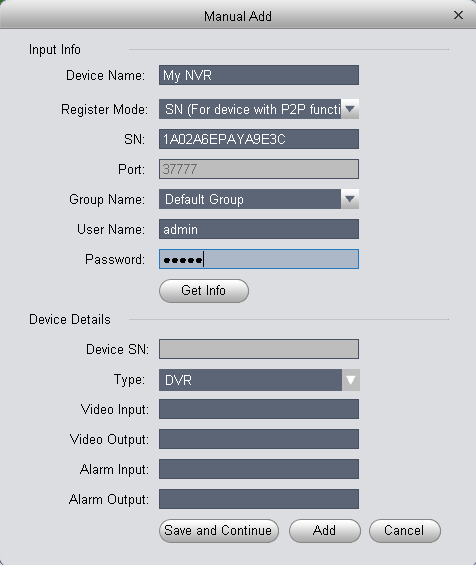
5. Input the following:
- Device Name:(Any Name)
- Register Mode: SN
- SN: (Your Device's Serial)
- Group Name: (Any Group)
- User Name: admin
- Password: admin (Your NVR's Password)
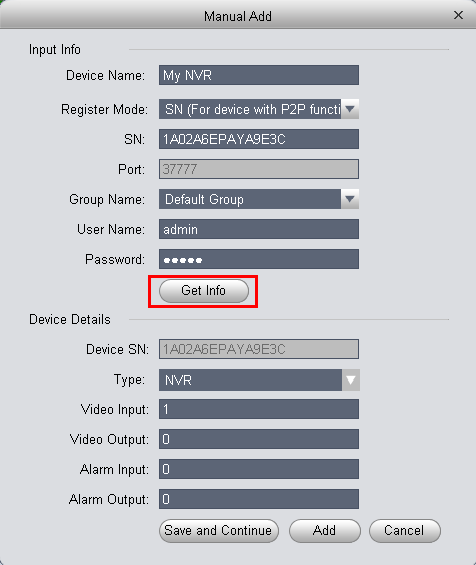
6. Click, "Get Info"
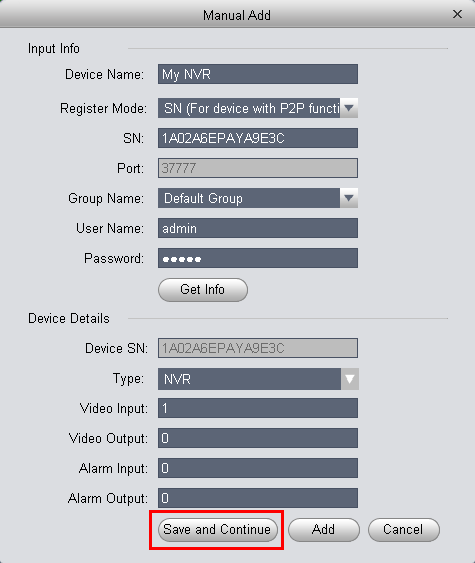
7. Click, "Save and Continue"
8. After a few moments, SmartPSS will connect to the NVR and display as, "Online"
