Difference between revisions of "SmartPSS/How To Export Device Record"
(→How To Export Device Record In SmartPSS) |
(→How To Export Device Record In SmartPSS) |
||
| Line 2: | Line 2: | ||
===Description=== | ===Description=== | ||
| − | This article will show you how to export | + | This article will show you how to export recordings from a device in SmartPSS 2.0 |
===Prerequisites=== | ===Prerequisites=== | ||
| Line 25: | Line 25: | ||
3. The Playback window will open | 3. The Playback window will open | ||
| − | [[File: | + | [[File:How_To_Export_Device_Record_-_2.jpg|600px]] |
Use the Device Tree on the left to select the device you wish to export from. | Use the Device Tree on the left to select the device you wish to export from. | ||
| − | + | You can configure the parameters of the search using the drop down box: | |
| − | + | * Record Type | |
| + | * Stream Type - Main Stream, Sub Stream | ||
| + | * Time | ||
Click 'Search' to begin a search based on the parameters. | Click 'Search' to begin a search based on the parameters. | ||
| − | 4. Once the | + | 4. Once the Search is complete recorded footage will appear in the timeline. Press the 'Play' icon to begin playback. |
| − | [[File: | + | [[File:How_To_Export_Device_Record_-_3.jpg|600px]] |
| − | + | 5. Use the Playback tools to navigate to a starting point for the clip. You can use the playback buttons below the timeline or drag the timeline scrubber | |
| − | + | [[File:How_To_Export_Device_Record_-_4.jpg|600px]] | |
| − | + | 6. Click the Time Clip icon to select a start point. | |
| − | + | [[File:How_To_Export_Device_Record_-_5.jpg|600px]] | |
| − | + | 7. Once clicked, a draggable window will appear in the timeline. Use this tool to select the length of the clip to export. The window will show you the Start and Time time of the clip as well as the Duration. | |
| − | [[File: | + | [[File:How_To_Export_Device_Record_-_6.jpg|600px]] |
| − | + | 8. Click the Time Clip icon again to select an end point | |
| − | + | [[File:How_To_Export_Device_Record_-_7.jpg|600px]] | |
| − | + | 9. The Export Setup menu will appear. | |
| + | |||
| + | [[File:How_To_Export_Device_Record_-_8.jpg|600px]] | ||
| + | |||
| + | The menu gives several options for export: | ||
| + | |||
| + | * Path: Click browse to select a file location to save the exported footage | ||
| + | * Export Format: Select which video format for the clip (ASF, AVI, MP4, or Original Format) | ||
| + | * Export SmartPlayer Player: Check the box to include the playback software with the export | ||
| + | |||
| + | Once the export settings have been configured, click Ok to begin Export. | ||
| + | |||
| + | 10. The Export Progress window will appear. | ||
| + | |||
| + | [[File:How_To_Export_Device_Record_-_9.jpg|600px]] | ||
| + | |||
| + | This window will give you a live update of the export process. | ||
| + | |||
| + | |||
| + | You can Pause, Start, or Delete exports in progress by using the icons at the top of the screen | ||
| + | |||
| + | [[File:How_To_Export_Device_Record_-_10.jpg|600px]] | ||
| + | |||
| + | 11. Once the Export is complete, it will appear in the 'Exported' tab | ||
| + | |||
| + | [[File:How_To_Export_Device_Record_-_11.jpg|600px]] | ||
| + | |||
| + | |||
| + | Click the Trash icon to delete | ||
| + | |||
| + | Click the Folder icon to open the directory the file was exported to | ||
Revision as of 21:25, 27 March 2019
Contents
How To Export Device Record In SmartPSS
Description
This article will show you how to export recordings from a device in SmartPSS 2.0
Prerequisites
- SmartPSS
- Supported device with recorded footage
- Device with recorded footage added to SmartPSS Device List - How To Add Device to SmartPSS
Video Instructions
Coming Soon
Step by Step Instructions
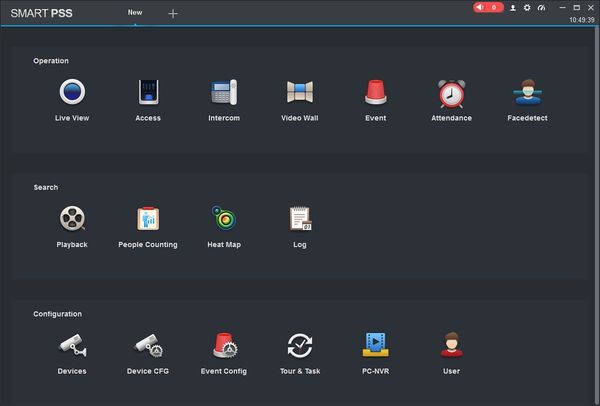
1. Launch SmartPSS.
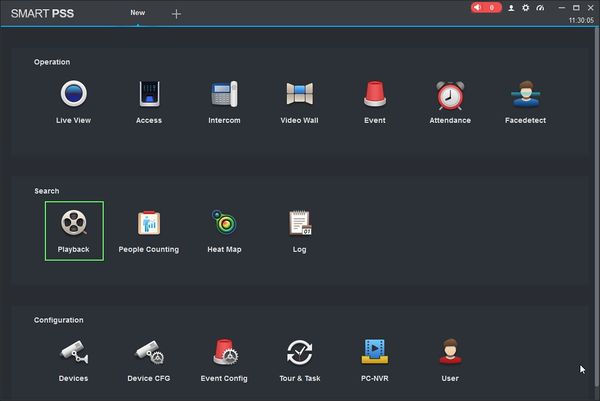
2. Click 'Playback'
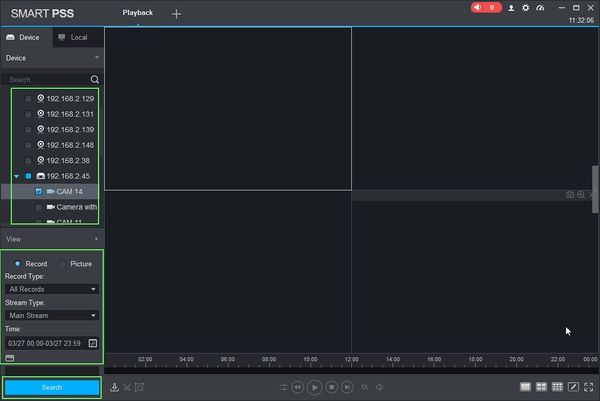
3. The Playback window will open
Use the Device Tree on the left to select the device you wish to export from.
You can configure the parameters of the search using the drop down box:
- Record Type
- Stream Type - Main Stream, Sub Stream
- Time
Click 'Search' to begin a search based on the parameters.
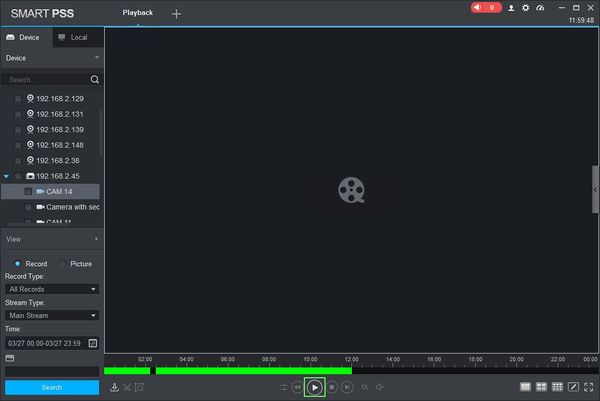
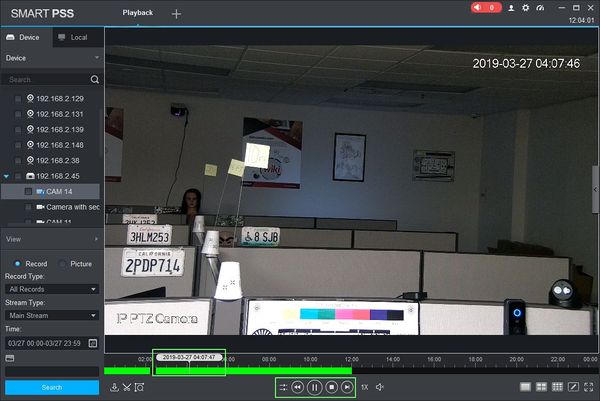
4. Once the Search is complete recorded footage will appear in the timeline. Press the 'Play' icon to begin playback.
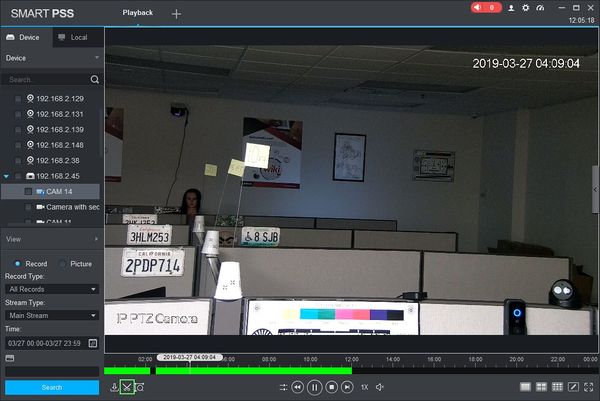
5. Use the Playback tools to navigate to a starting point for the clip. You can use the playback buttons below the timeline or drag the timeline scrubber
6. Click the Time Clip icon to select a start point.
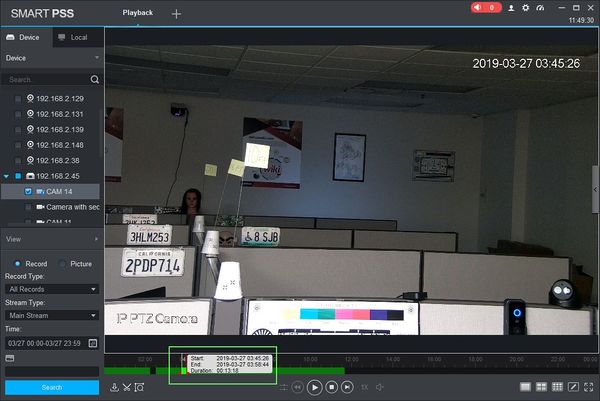
7. Once clicked, a draggable window will appear in the timeline. Use this tool to select the length of the clip to export. The window will show you the Start and Time time of the clip as well as the Duration.
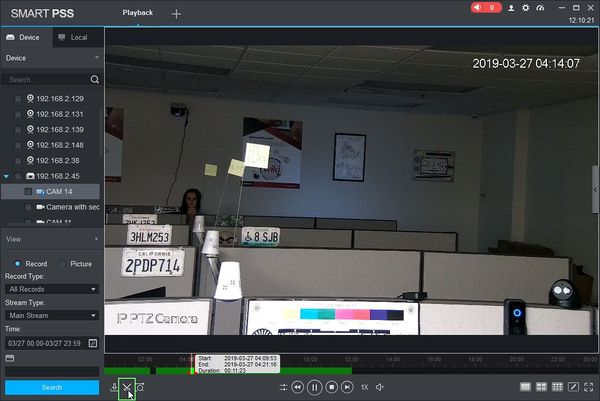
8. Click the Time Clip icon again to select an end point
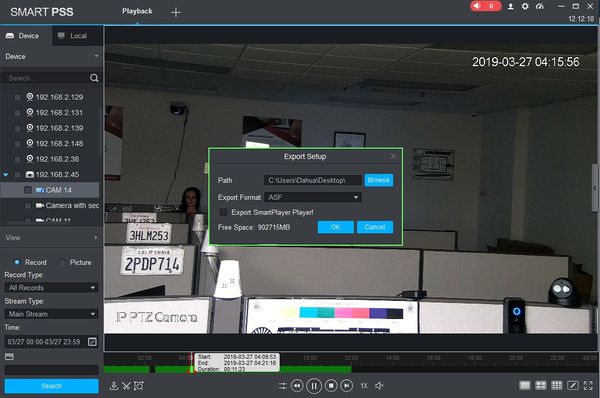
9. The Export Setup menu will appear.
The menu gives several options for export:
- Path: Click browse to select a file location to save the exported footage
- Export Format: Select which video format for the clip (ASF, AVI, MP4, or Original Format)
- Export SmartPlayer Player: Check the box to include the playback software with the export
Once the export settings have been configured, click Ok to begin Export.
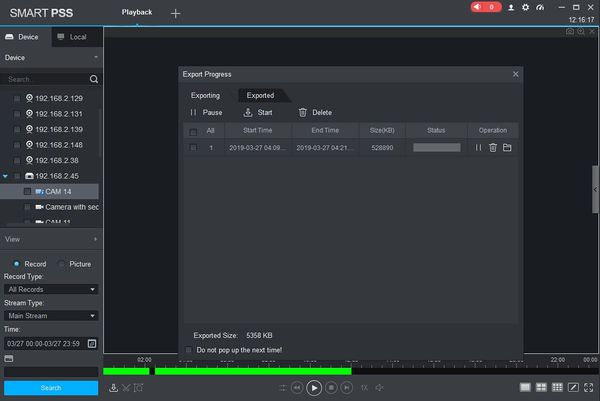
10. The Export Progress window will appear.
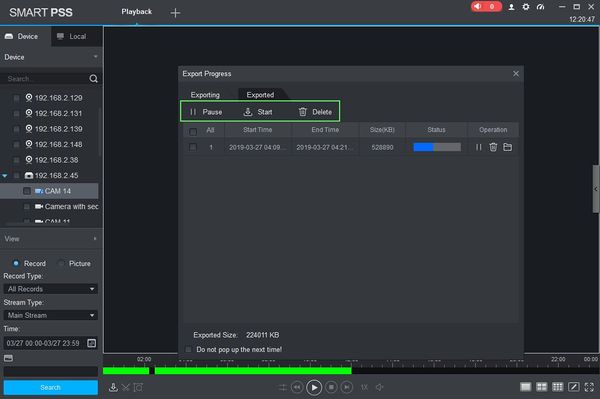
This window will give you a live update of the export process.
You can Pause, Start, or Delete exports in progress by using the icons at the top of the screen
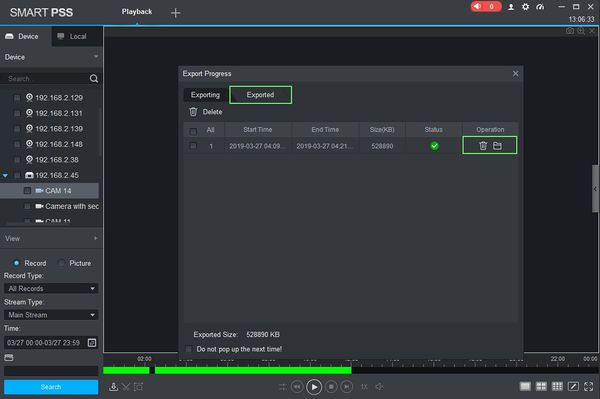
11. Once the Export is complete, it will appear in the 'Exported' tab
Click the Trash icon to delete
Click the Folder icon to open the directory the file was exported to
