Difference between revisions of "SmartPSS/How To Create User"
(→How To Create Users In SmartPSS) |
|||
| Line 63: | Line 63: | ||
The User will be created | The User will be created | ||
| + | |||
| + | |||
| + | [[Category:UI/SmartPSS_2.0]] | ||
| + | [[Category:SmartPSS_2.0]] | ||
| + | [[Category:How_To]] | ||
Revision as of 21:28, 8 August 2019
Contents
How To Create Users In SmartPSS
Description
This article will show you how to create users and roles in SmartPSS 2.0
Prerequisites
Video Instructions
Step by Step Instructions
Creating a Role
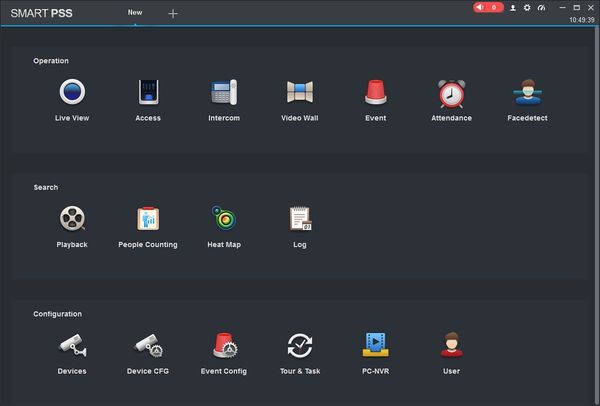
1. Launch SmartPSS.
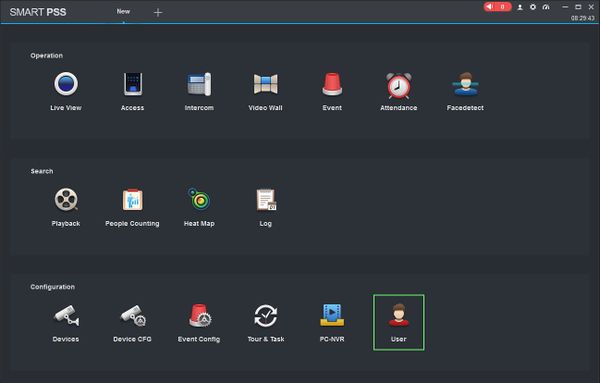
2. Click User
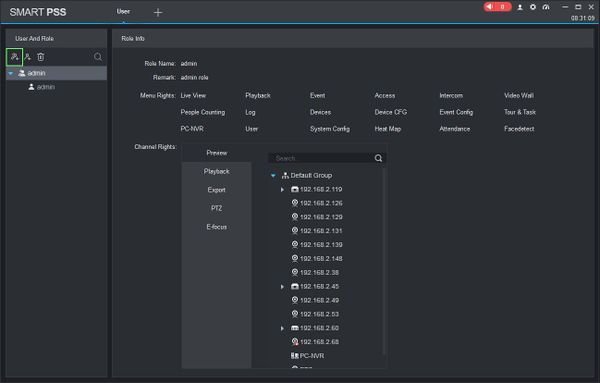
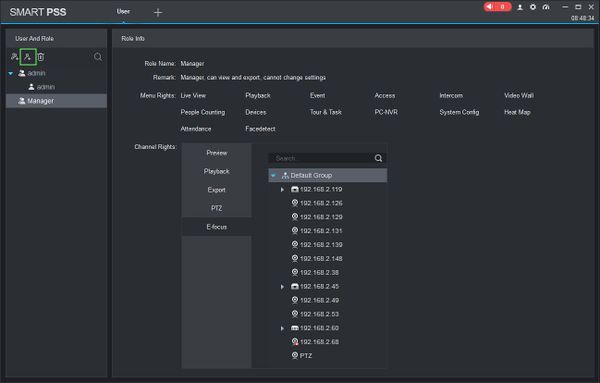
3. Click 'Add Role'
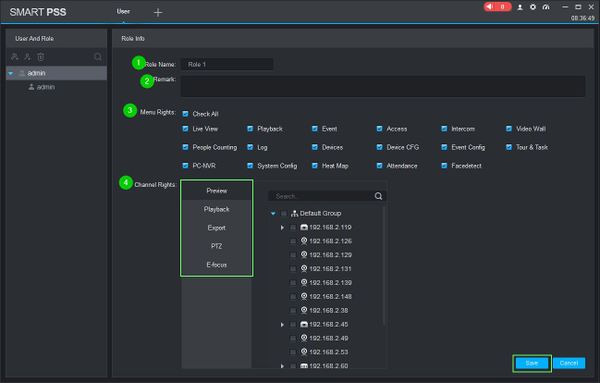
4. The Role Info menu will appear. Use the fields to enter the parameters of the role:
- Role Name: Name for the role
- Remark: Description of role for reference
- Menu Rights: Use the checkbox to select which menu rights you wish to allow for this role
- Channel Rights: Specific per device user rights can be set to the role for already added devices
After filling out the parameters for the role, click Save
The Role will be created
Creating a User
1. Click User
2. Click 'Add User'
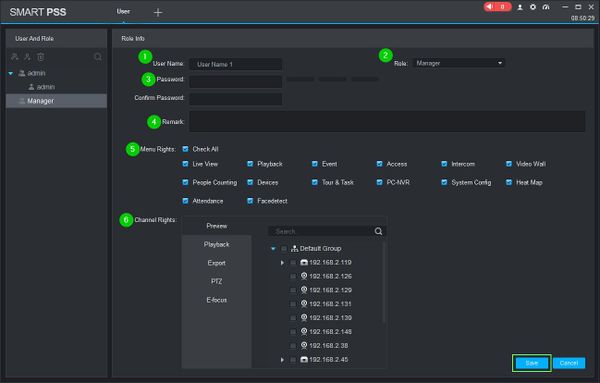
3. The User Info menu will appear. Use the fields to enter the parameters of the role:
- User Name: Name for the role. This name must be unique
- Role: Use the drop-down box to select the Role for this user
- Password: Enter a password for the user and confirm. The 3 bar meter next to the field will denote the password complexity
- Remark: Description of user for reference
- Menu Rights: Use the checkbox to select which menu rights you wish to allow for this user
- Channel Rights: Specific per device rights can be set to the user for already added devices
After filling out the parameters for the role, click Save
The User will be created
