Difference between revisions of "Template:IVS Abandoned Missing Object WebUI Old"
| Line 11: | Line 11: | ||
===Prerequisites=== | ===Prerequisites=== | ||
| − | * | + | * Dahua device with Abandoned / Missing IVS feature |
| − | |||
| − | |||
===Video Instructions=== | ===Video Instructions=== | ||
Latest revision as of 20:53, 3 December 2019
Description
Application Scene: It can be applied to the scene where the target is sparse and there is no obvious or frequent light change. Missing alarm will increase in the scene where target density is high and there is frequent covering; false alarm will increase in the scene where there are too many people. As for the detection area, it needs to be simple; it is not suitable for the too complicated area.
Description: object abandoned means that it is to detect if there is any object abandoned in the designated detection area and surpass the set time. It will activate record, snapshot and alarm according to the judgment result. Object missing means that it is to detect if there is any object moved in the designated area and surpass the set time. It will activate record, snapshot and alarm according to the judgment result.
Prerequisites
- Dahua device with Abandoned / Missing IVS feature
Video Instructions
Missing Object
Abandoned Object
Step By Step Instructions
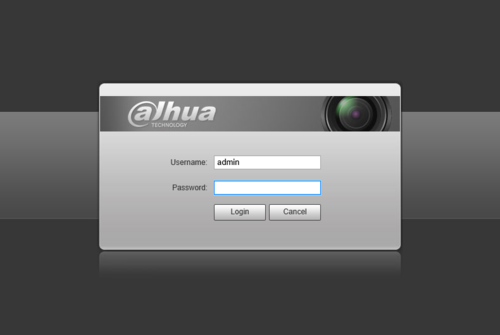
1.Log into device using the Web Service.
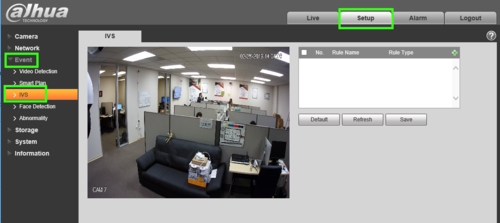
2.Select Setting -> Event -> IVS.
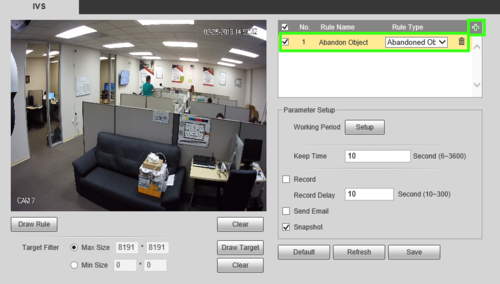
3. Next to Rule Type click "+" in the new rule that shows below, define the Rule Name and in the drop down select Abandon Object or Missing Object as the rule type. In this example we'll be using Abandon Object.
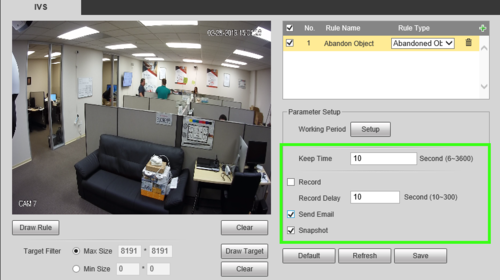
4. Once the Rule type and name have been set, Define your Keep time (The time it takes until an object is flagged) and whether you want to save a recording/snapshot or have an email notification sent out for it. In this example email and snapshot will be used. For instructions on setting up email functionality see Email Setup
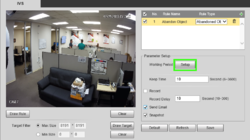
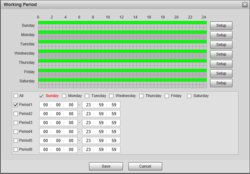
5. By default the rule will be active on a 24/7 basis, if you need to modify the schedule, use the Setup button next to "Working Period" in the window that appears, you can define the time periods (up to 6 per day) for the rule to be active.
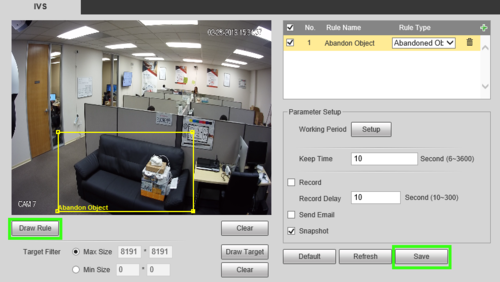
6. To define the area of the rule, use "Draw Rule" to set the area; left click and use your mouse to draw your region. Once Finished click save to commit your settings.

