Difference between revisions of "LincX2PRO/Setup PIR Sensor"
(Created page with "=Setup PIR Sensor= ==Description== ==Prerequisites== ==Instructions== <div class="toccolours mw-collapsible mw-collapsed"> 250px<span...") |
(→Instructions) |
||
| Line 5: | Line 5: | ||
==Instructions== | ==Instructions== | ||
<div class="toccolours mw-collapsible mw-collapsed"> | <div class="toccolours mw-collapsible mw-collapsed"> | ||
| − | [[File: | + | [[File:xxx.png|250px]]<span style="font-size:180%;">'''Mobile:iDMSS Plus & gDMSS Plus '''</span> |
| − | <div class="mw-collapsible-content">{{Template: | + | <div class="mw-collapsible-content">{{Template:LincX2PRO_PIR_Setup_MobileUI_DMSS}}</div> |
</div> | </div> | ||
Revision as of 18:33, 9 December 2019
Contents
Setup PIR Sensor
Description
Prerequisites
Instructions
250pxMobile:iDMSS Plus & gDMSS Plus
Prerequisites
- L26 or C26 LincX2Pro Device
- iDMSS / gDMSS installed, device setup and added to app
Video Instructions
Step by Step Instructions
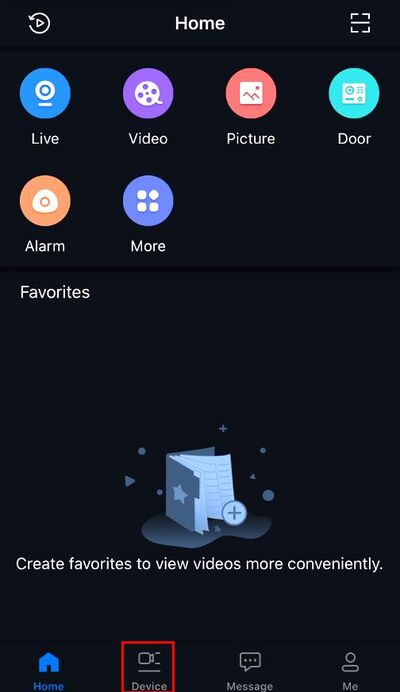
1. From the home screen select Device
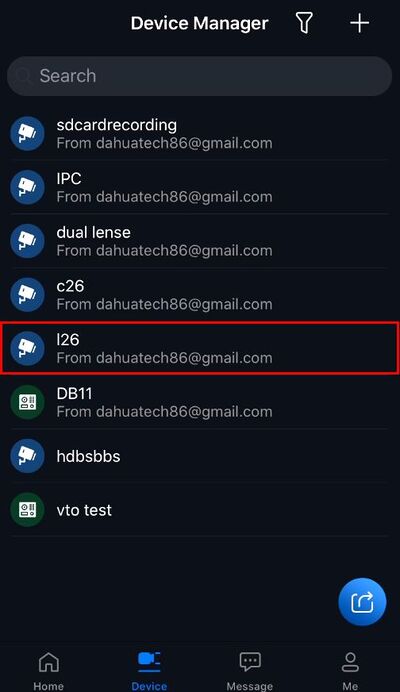
2. Select the device from the list
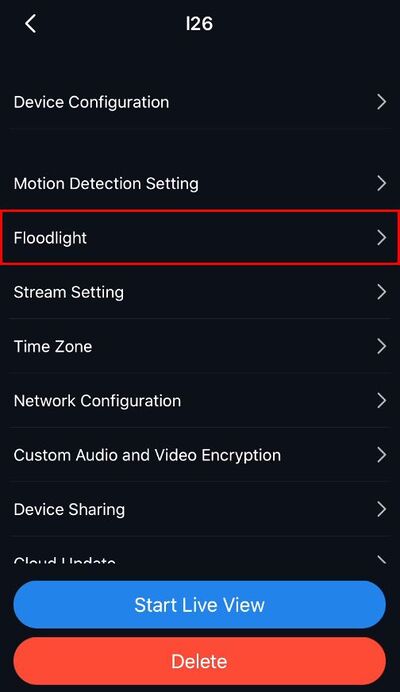
3. Select Floodlight
4. Select PIR Region
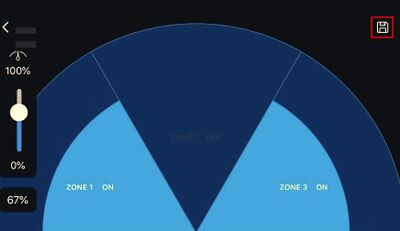
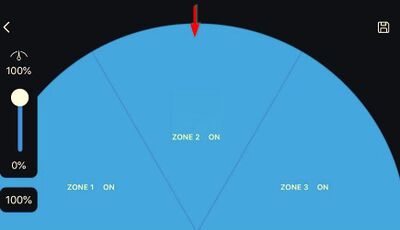
5. Tap a Zone to disable/enable
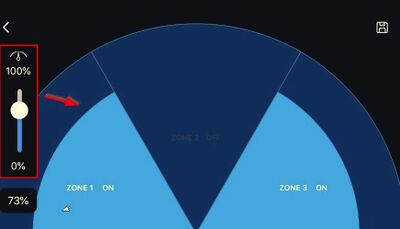
6. Use the slide to adjust the range of the Zones
7. Press the Save icon in the top right to save settings
