Difference between revisions of "USA/IPCamera/Ultra/DH IPC HCBW8442/Install Guide"
(→Step by Step Instructions) |
(→Step by Step Instructions) |
||
| Line 16: | Line 16: | ||
[[File:DSC_0172_3.JPG|500x500px]] | [[File:DSC_0172_3.JPG|500x500px]] | ||
| + | |||
| + | |||
| + | *Introduction 1. | ||
| + | [[File:8442_1.JPG|1000x1000px]] | ||
| + | |||
| + | *Introduction 2. | ||
| + | [[File:8442_2.JPG|1000x1000px]] | ||
| + | |||
| + | *Introduction 3. | ||
| + | [[File:8442_3.JPG|1000x1000px]] | ||
| + | |||
| + | *Introduction 4. | ||
| + | [[File:8442_4.JPG|1000x1000px]] | ||
| + | |||
| + | *Introduction 5. | ||
| + | [[File:8442_5.JPG|1000x1000px]] | ||
| + | |||
| + | *Introduction 6. | ||
| + | [[File:8442_6.JPG|1000x1000px]] | ||
| + | |||
| + | *Introduction 7. | ||
| + | [[File:8442_7.JPG|1000x1000px]] | ||
| + | |||
| + | *Introduction 8. | ||
| + | [[File:8442_8.JPG|1000x1000px]] | ||
| + | |||
| + | *Introduction 9. | ||
| + | [[File:8442_9.JPG|1000x1000px]] | ||
| + | |||
| + | *Introduction 10. | ||
| + | [[File:8442_10.JPG|1000x1000px]] | ||
| + | |||
| + | *Introduction 11. | ||
| + | [[File:8442_11.JPG|1000x1000px]] | ||
| + | |||
| + | *Introduction 12. | ||
| + | [[File:8442_12.JPG|1000x1000px]] | ||
Revision as of 22:47, 11 December 2019
Contents
Physical Install Guide for IPC-HCBW8442
Description
Prerequisites
- IPC-HCBW8442
- Drill
- Screwdriver
- T15 Hex Driver
- Hammer
Step by Step Instructions
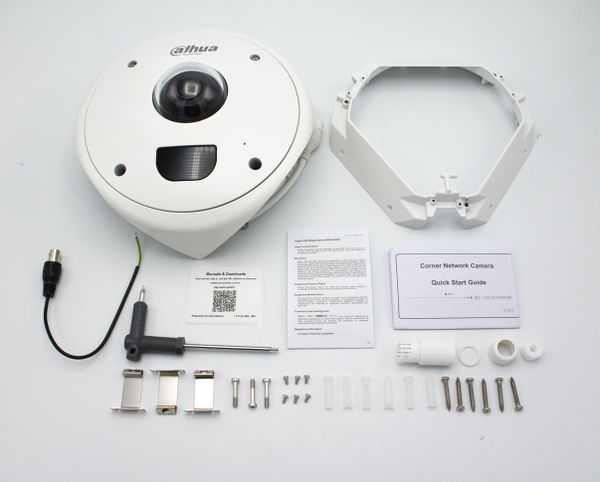
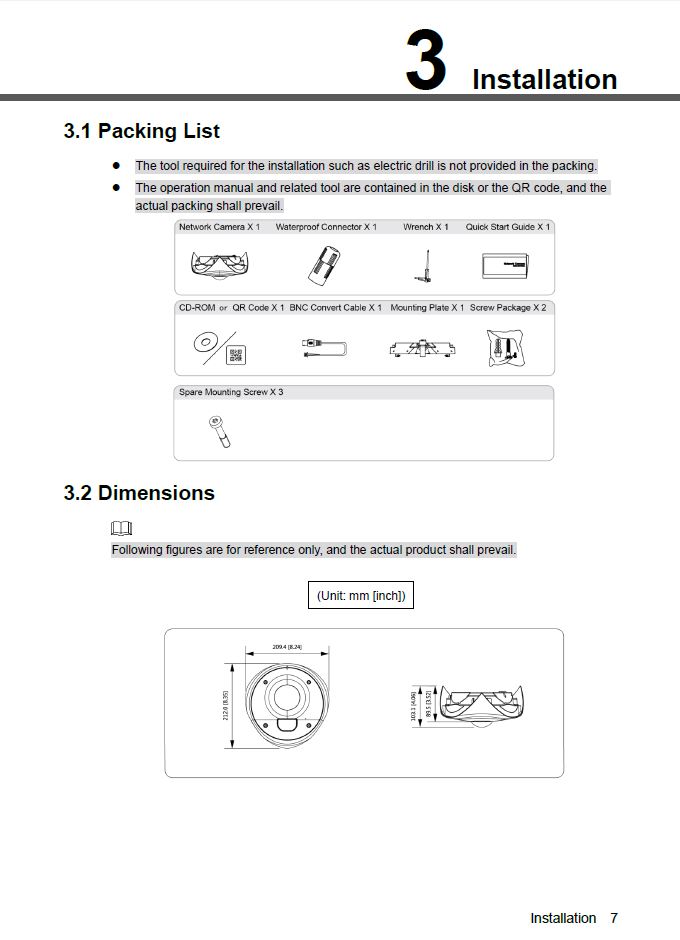
- What is in the BOX - HCBW8442N.
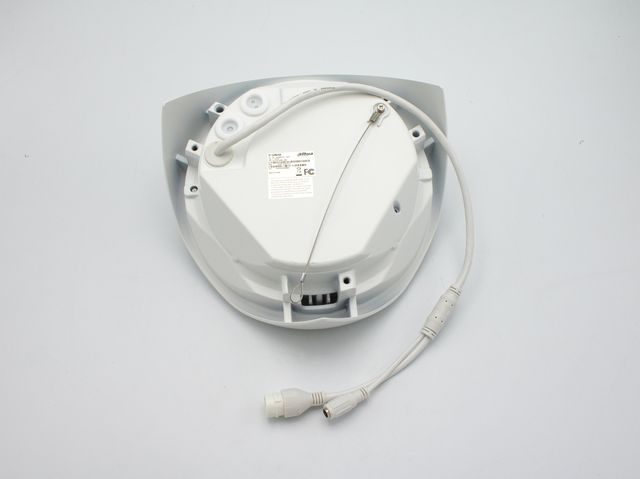
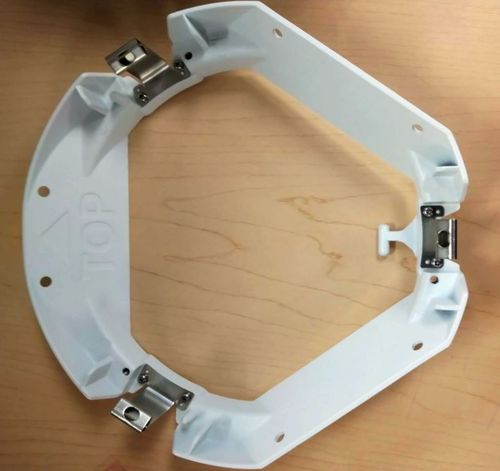
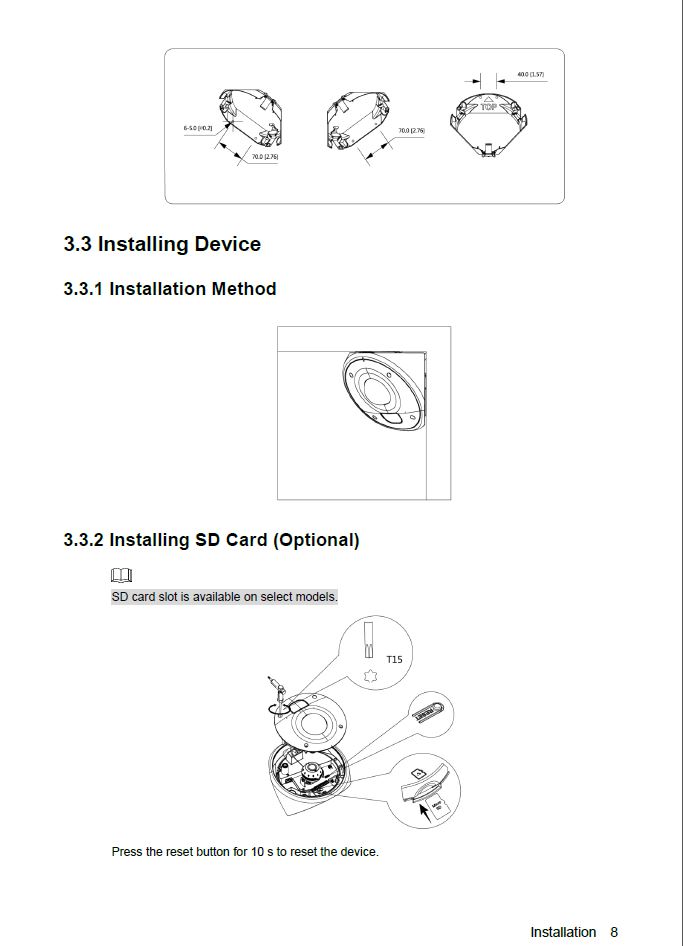
- Removed the dome and screw the silver snap to the base of the camera.
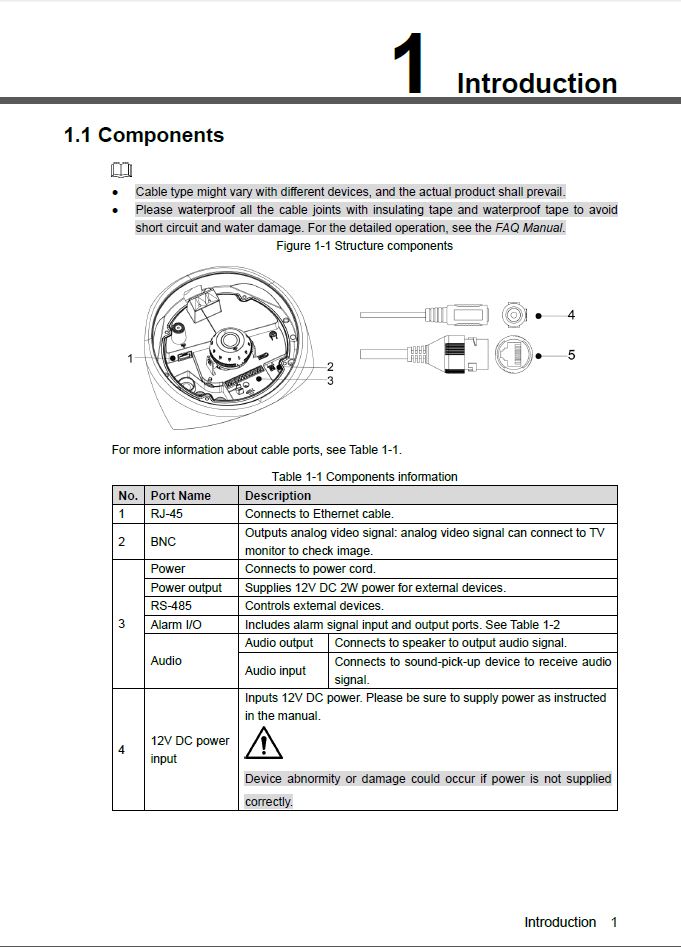
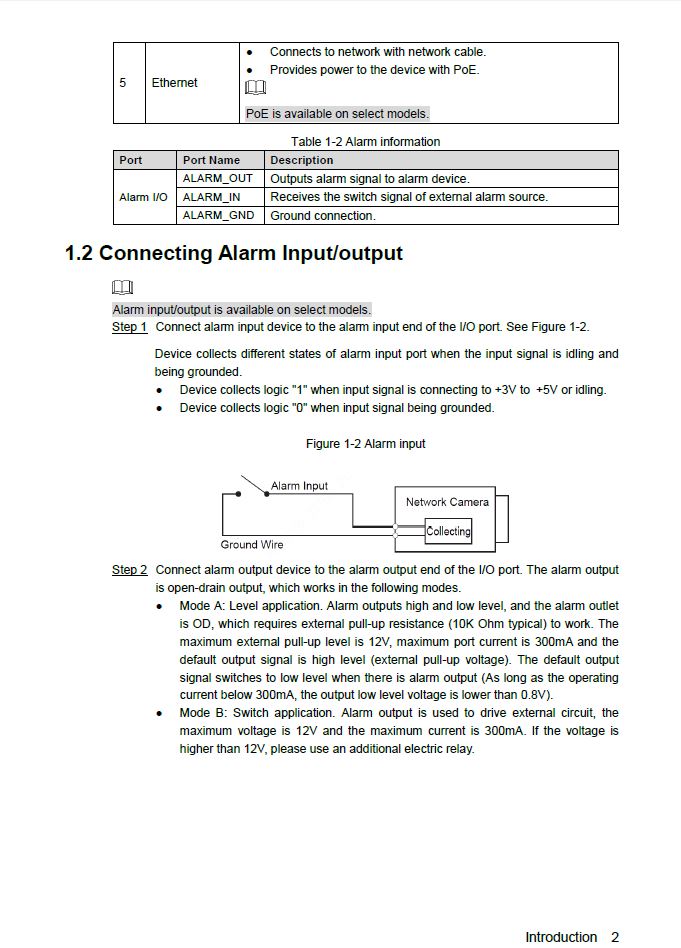
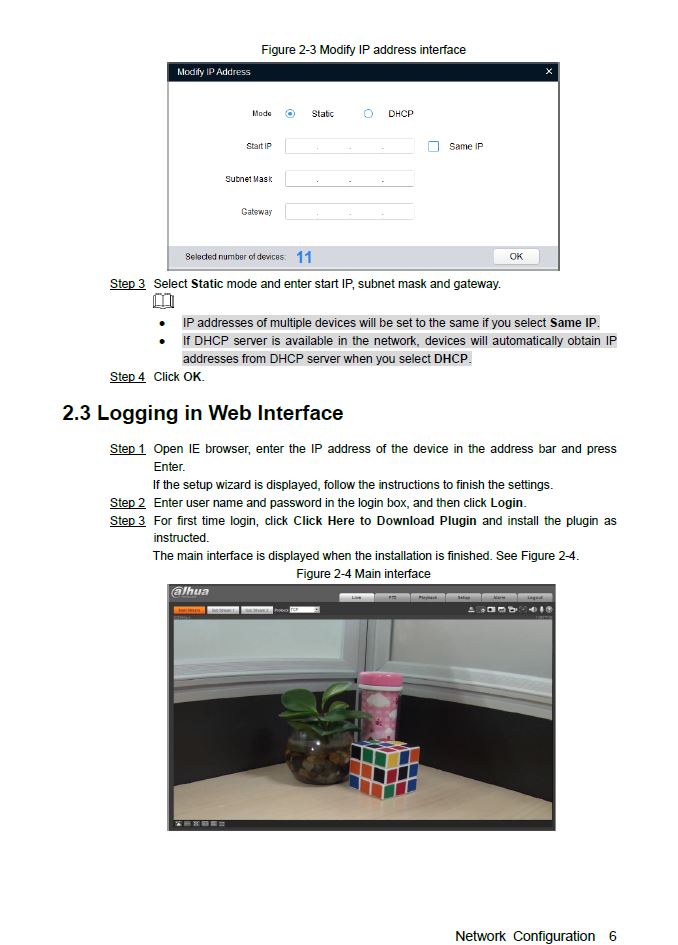
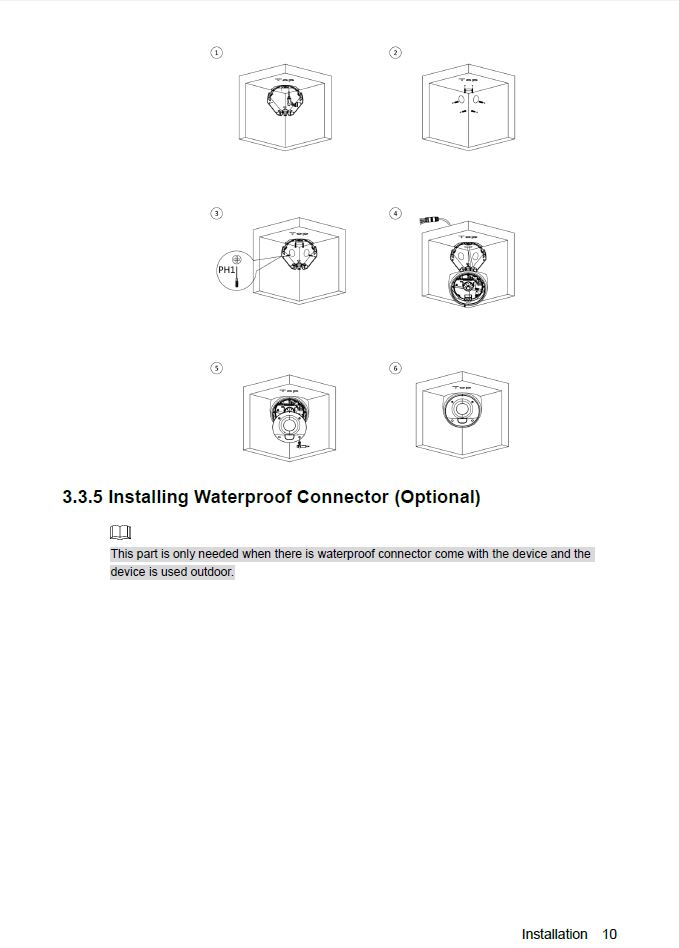
- Introduction 1.
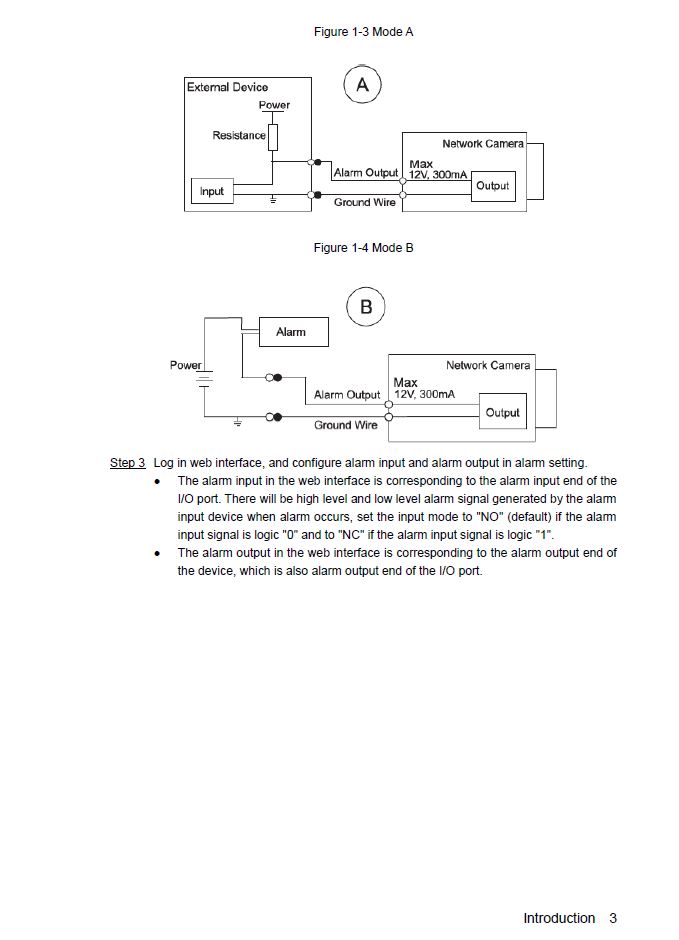
- Introduction 2.
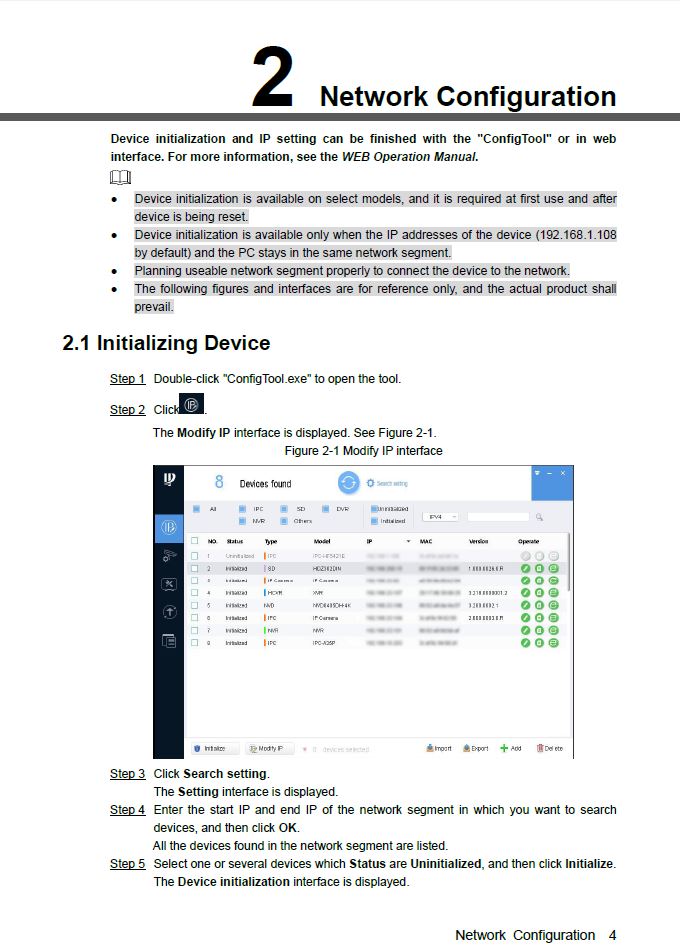
- Introduction 3.
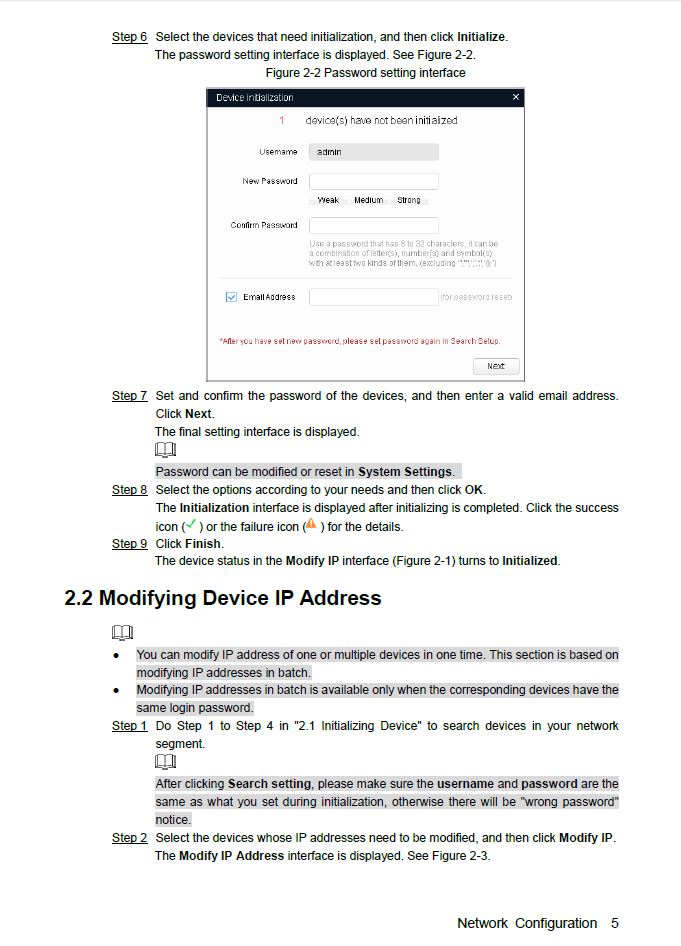
- Introduction 4.
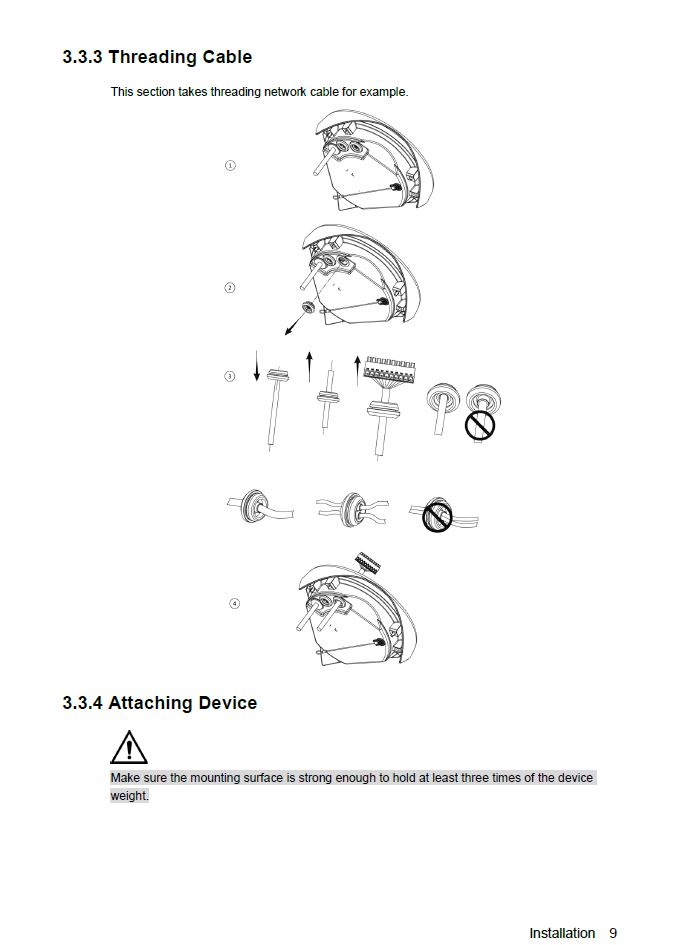
- Introduction 5.
- Introduction 6.
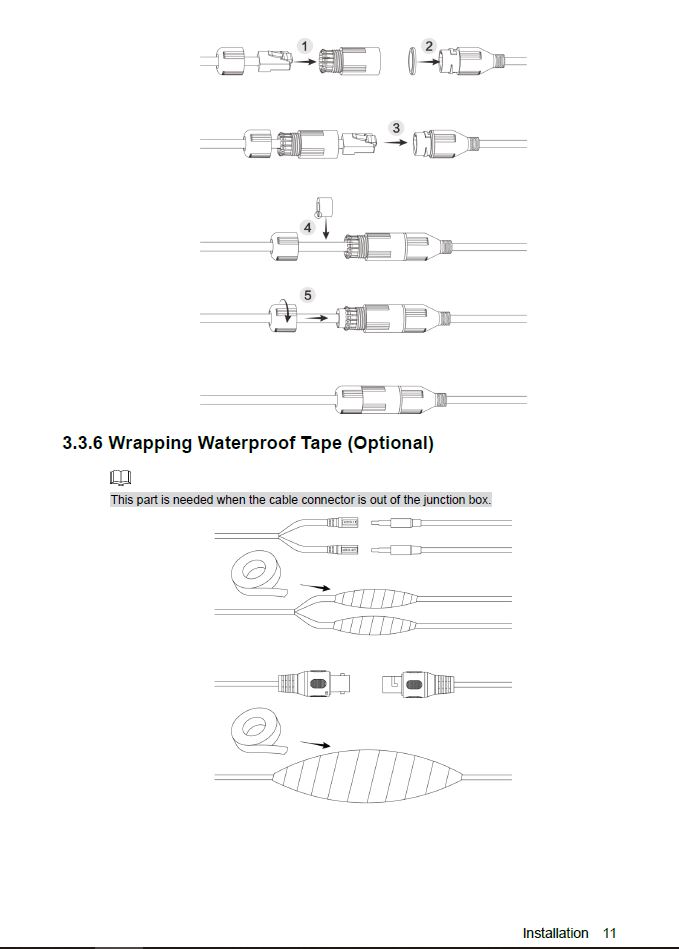
- Introduction 7.
- Introduction 8.
- Introduction 9.
- Introduction 10.
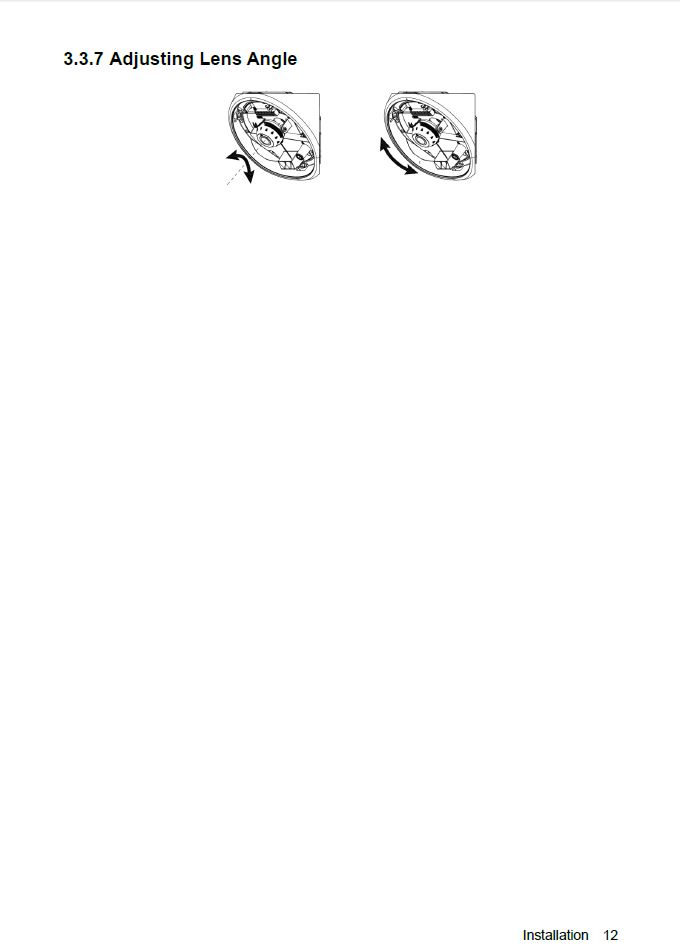
- Introduction 11.
- Introduction 12.
