Difference between revisions of "Record/Advanced/SFTP Setup Using FreeNAS"
(→Instructions:Part 3 Download from SFTP via Filezilla Client) |
(→Instructions:Part 3 Download from SFTP via Filezilla Client) |
||
| Line 278: | Line 278: | ||
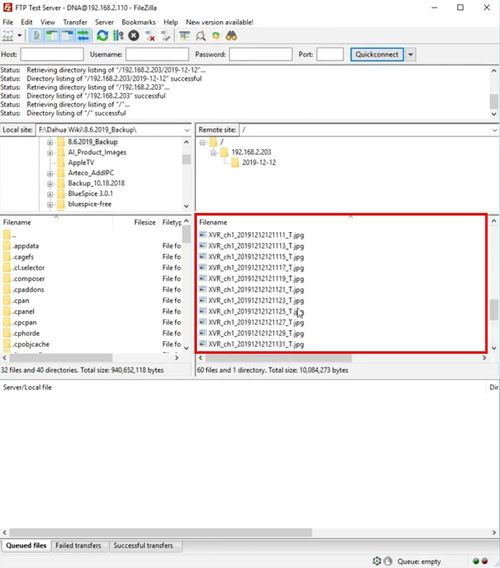
[[File:SFTP_Setup_Using_FreeNAS_-_Download_From_SFTP_-_8.jpg|500px]] | [[File:SFTP_Setup_Using_FreeNAS_-_Download_From_SFTP_-_8.jpg|500px]] | ||
| + | |||
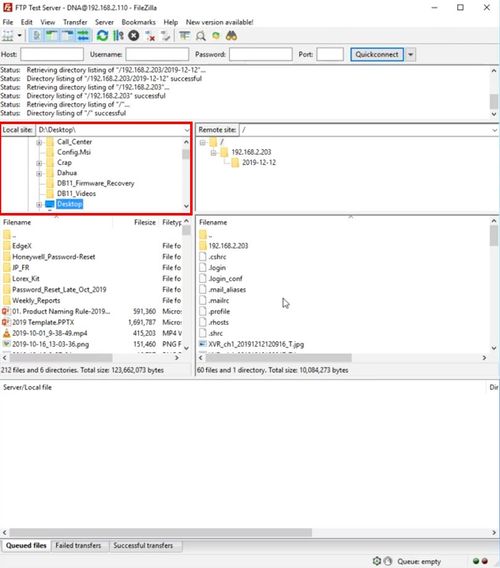
| + | [[File:SFTP_Setup_Using_FreeNAS_-_Download_From_SFTP_-_8-1.jpg|500px]] | ||
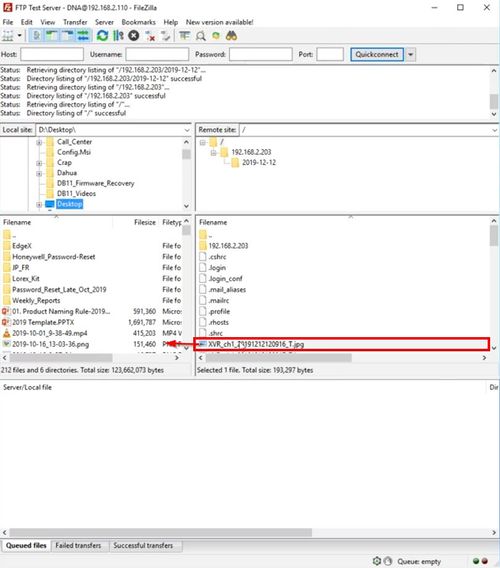
[[File:SFTP_Setup_Using_FreeNAS_-_Download_From_SFTP_-_9.jpg|500px]] | [[File:SFTP_Setup_Using_FreeNAS_-_Download_From_SFTP_-_9.jpg|500px]] | ||
Revision as of 23:55, 12 December 2019
Contents
SFTP Setup Using FreeNAS
Description
This guide will show how to use the FTP function on a Dahua recorder. Recorded footage can be sent via FTP from the recorder to a destination FTP server based on schedule or alarm type
The FTP server for this guide will be setup using FreeNAS
This involves a 3 step guide:
- FTP server setup (using FreeNAS)
- Dahua recorder setup
- How to retrieve files from FTP server
Prerequisites
- Dedicated PC or VM running FreeNAS
- Dahua Recorder with FTP Function
- FileZilla Client
Instructions:Part 1 FreeNAS Setup
FreeNAS server should be already installed and setup on the network.
This guide will show how to create a Hard Disk pool in the FreeNAS server which will be the destination for files sent from the Dahua recorder.
This guide also covers how to create a user in FreeNAS that will be used by the recorder to log into the server
Video Instructions
Step by Step Instructions
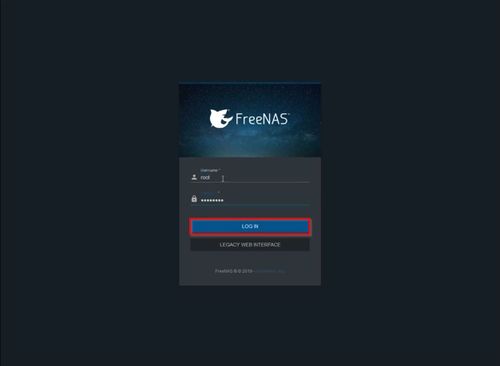
1. Log into the FreeNas web interface
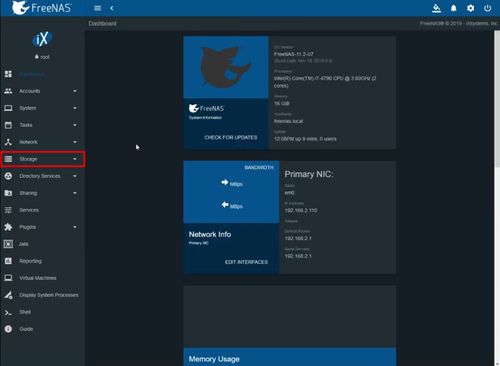
2. Click Storage
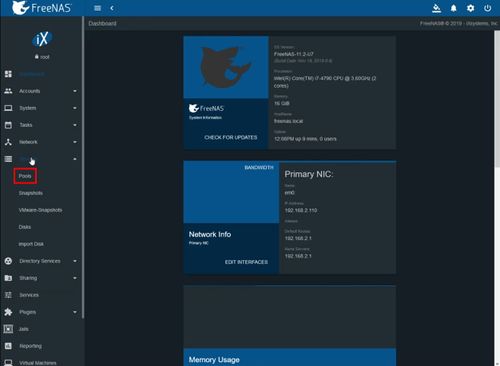
3. Click Pools
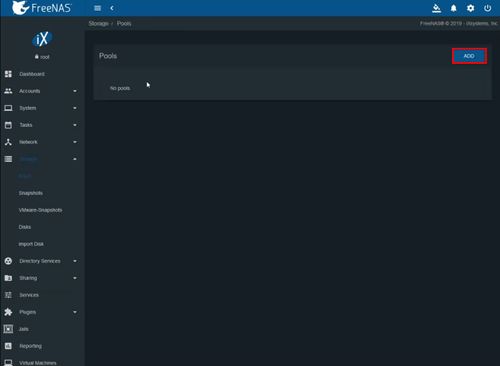
4. Click Add to create a new Pool
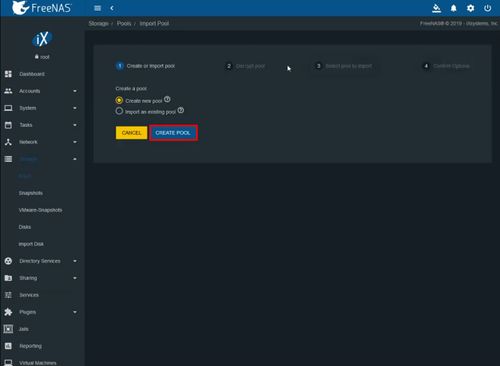
5. Select Create new pool
Click Create Pool
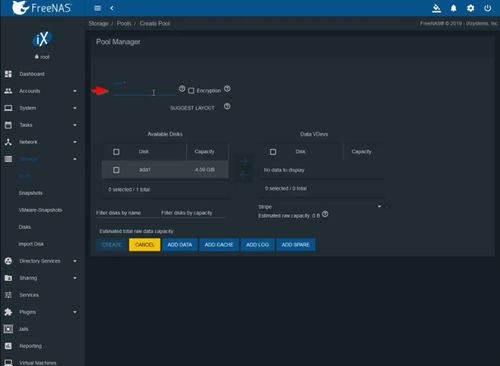
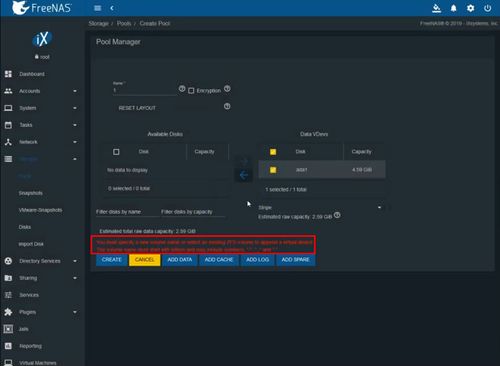
6. Enter a name for the pool
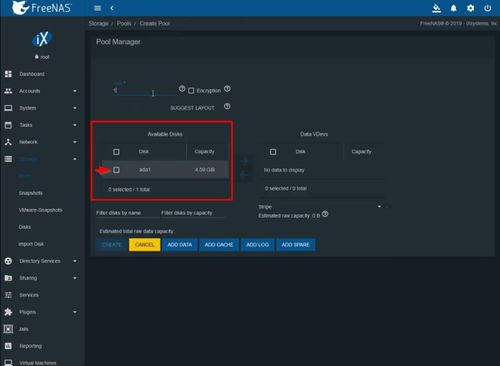
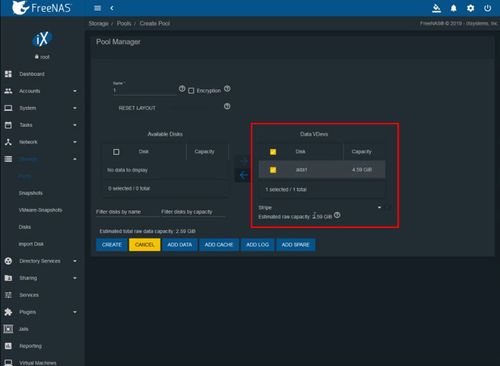
7. A list of hard disks that are available will be listed
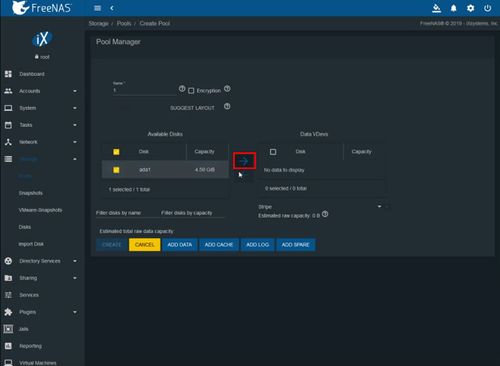
To add a hard disk to the pool
Click the checkbox next to the disk in the list
Click the arrow to add
The disk will be added to the pool
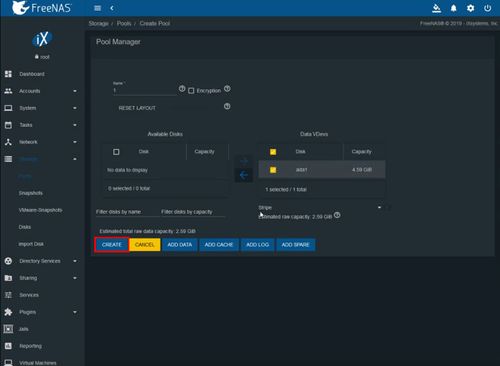
8. Click Create
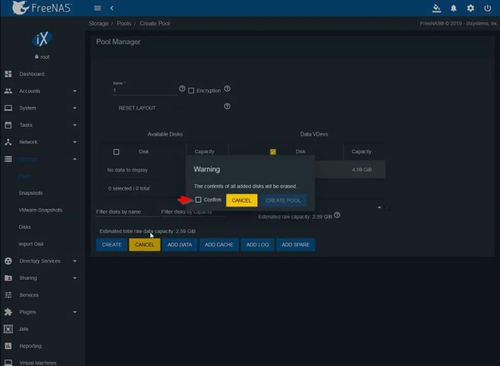
9. A prompt will appear to confirm
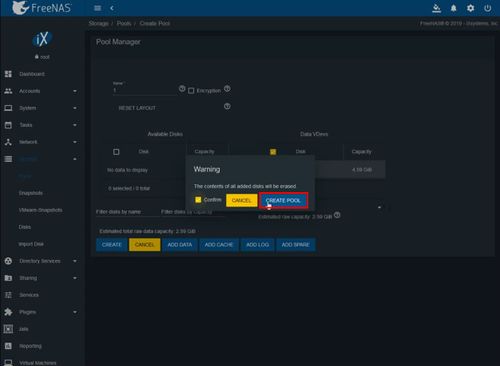
Check the box to Confirm
Click Create Pool
If there are any errors a message will appear. After resolving any errors make sure to click Create
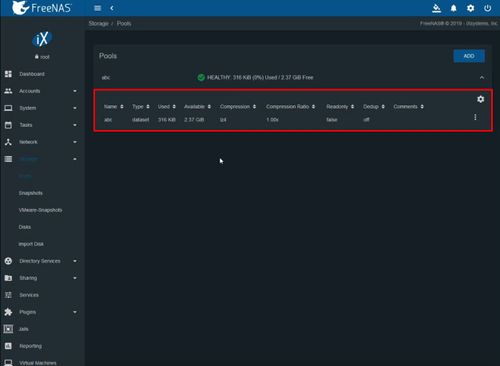
10. The created Pool will appear in the list
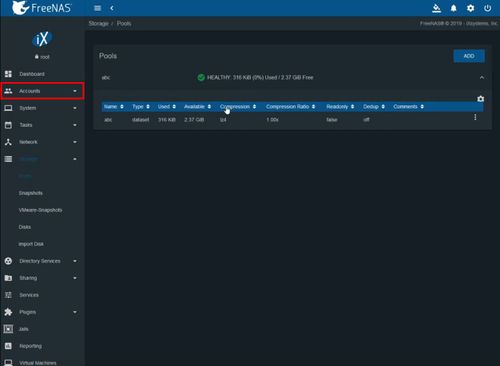
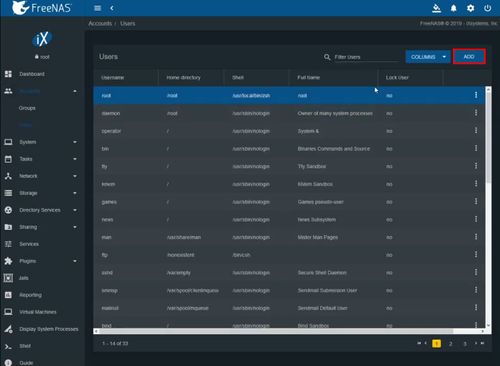
11. Click Accounts
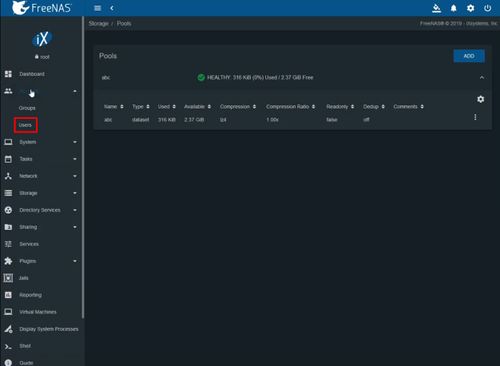
12. Click Users
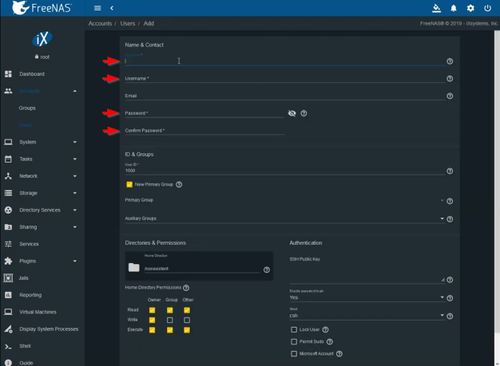
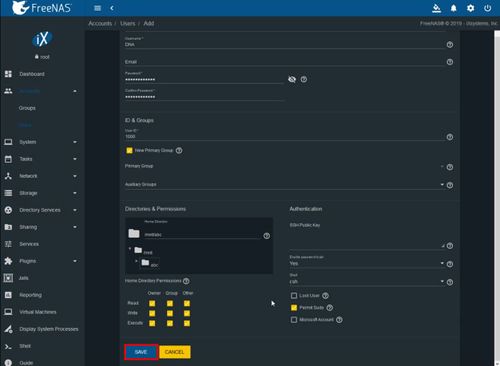
13. Click Add to create a new user
14. Enter the required information for the user:
- Full Name
- Username
- Password
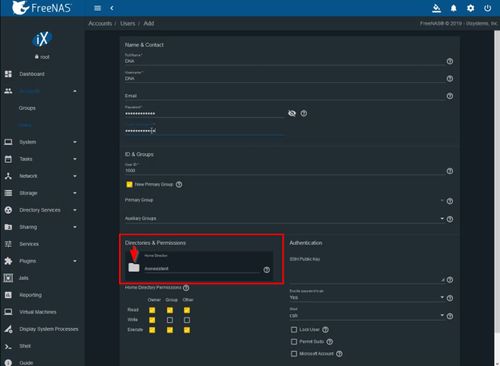
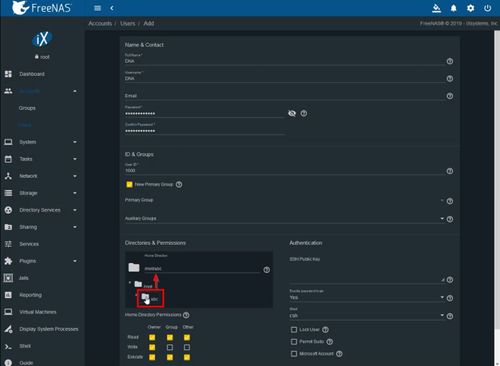
15. Under Directories & Permissions
The directory that was created in the previous steps must be assigned to the new user
Click the folder icon
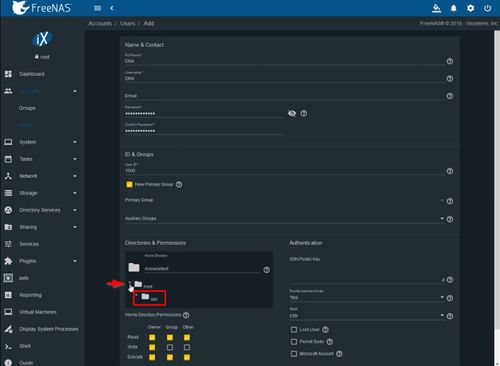
The file tree will expand
Find the directory created in the last step (in this example 'abc')
Click the folder icon next to the directory and the Home Directory will update
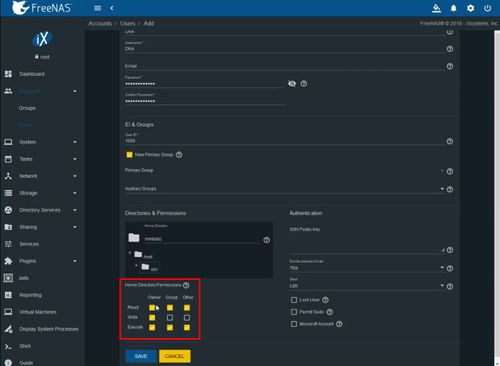
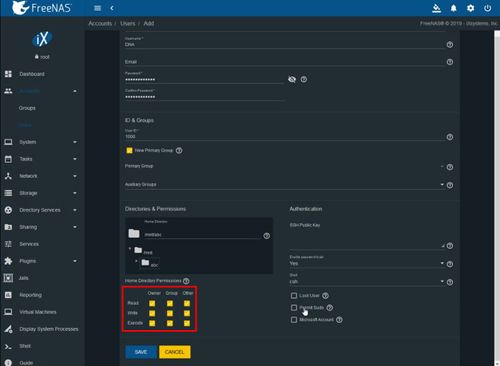
16. Under Home Directory Permissions
Make the following permissions changes for the user:
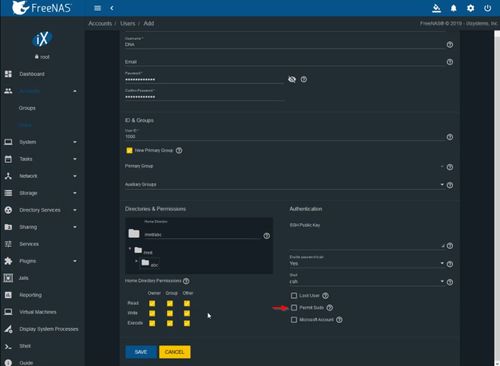
17. Check the box next to 'Permit Sudo'
18. Click Save to save all settings
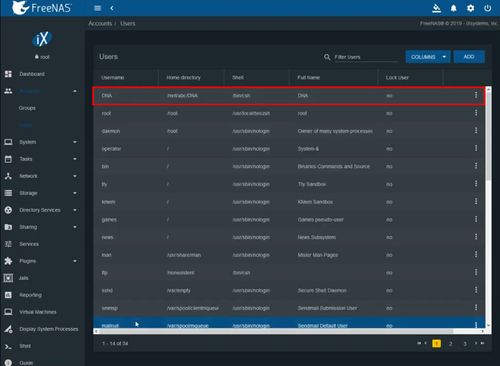
19. The created user will appear in the list
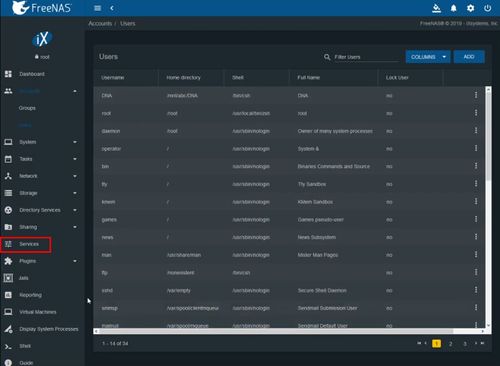
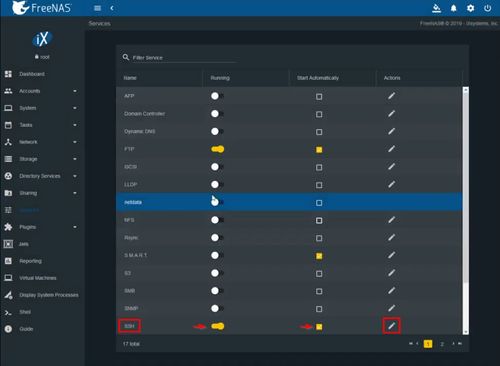
20. Click Services
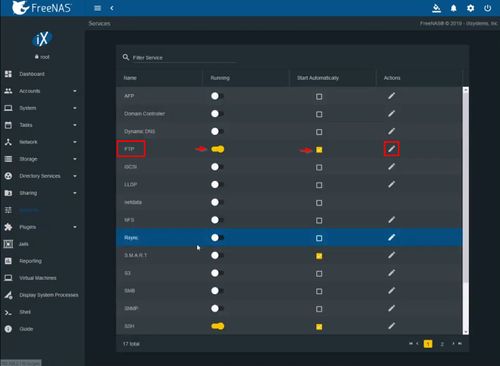
21. Find FTP in the Services list
Make sure the feature is enabled and set to run automatically
Click the Pencil icon under Actions to make advanced settings changes
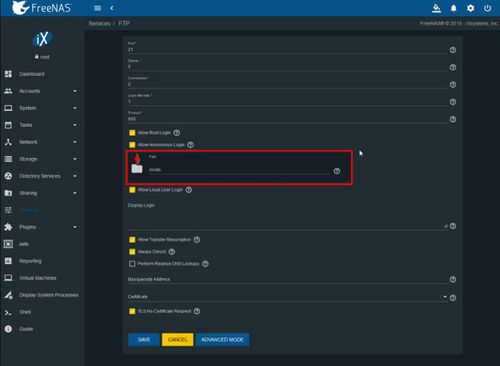
22. The created directory/pool must be selected
Click the folder icon
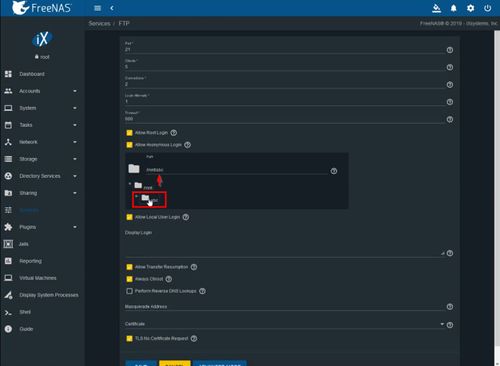
The file tree will expand
Click the folder icon next to the directory and the Home Directory will update
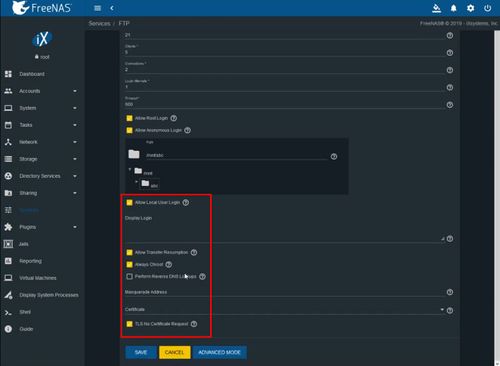
23. Make the following settings changes for FTP:
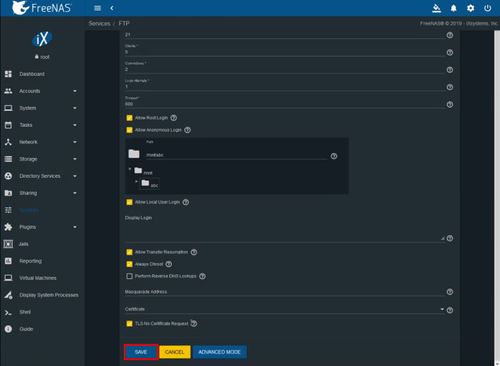
24. Click Save to save all settings
25. Find SSH in the Services list
Make sure the feature is enabled and set to run automatically
Click the Pencil icon under Actions to make advanced settings changes
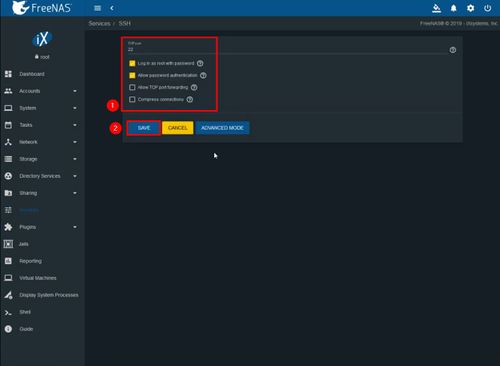
26. Make the following settings changes for SSH:
Click Save to save all settings
FreeNAS setup is complete
Instructions:Part 2 Configure Dahua Recorder
This guide shows how to configure the Dahua recorder to be able to send files to the FTP server set up in the previous step
Video Instructions
Step by Step Instructions
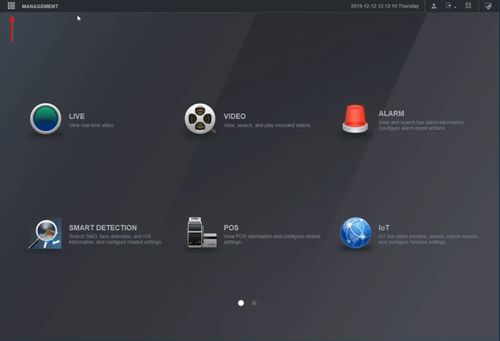
1. At the WebUI of the recorder
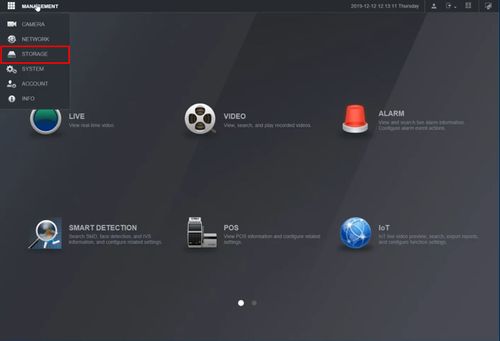
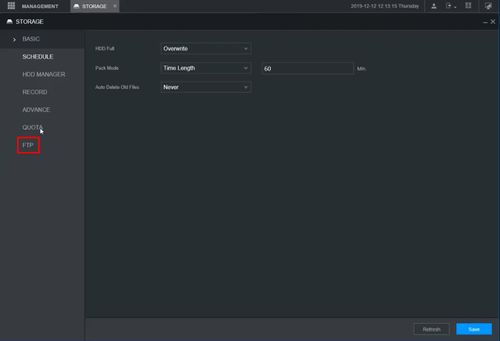
Click the icon next to Management to expand the options
Click Storage
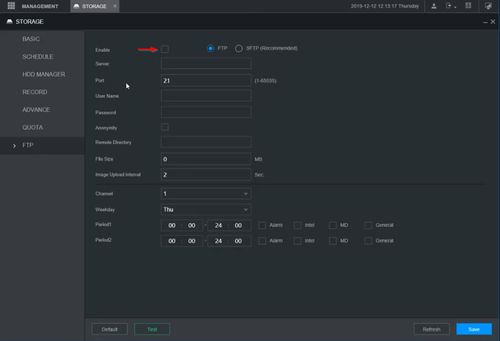
2. Click FTP
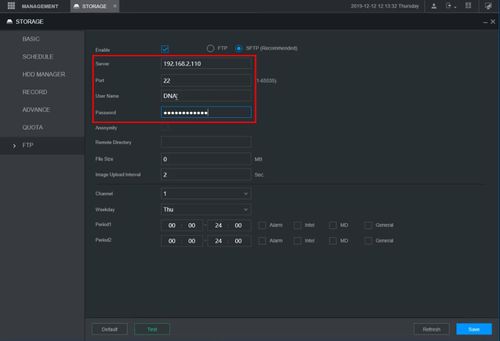
3. Check the box to enable FTP
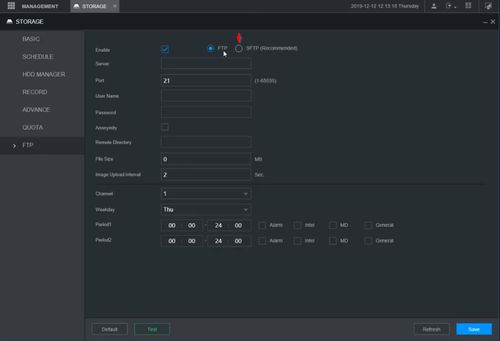
4. Click the radio button to enable SFTP
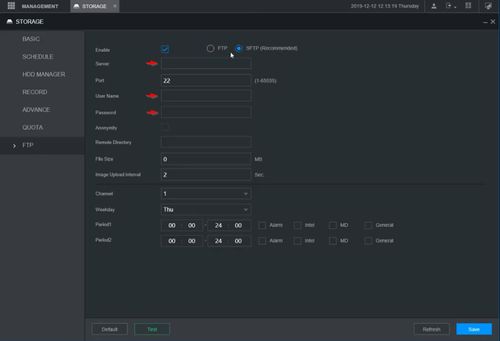
5. Enter the required information for the server:
- Server - IP of FreeNAS server
- Port - 22 (by default)
- User Name - user name created in previous steps
- Password - password for user created in previous steps
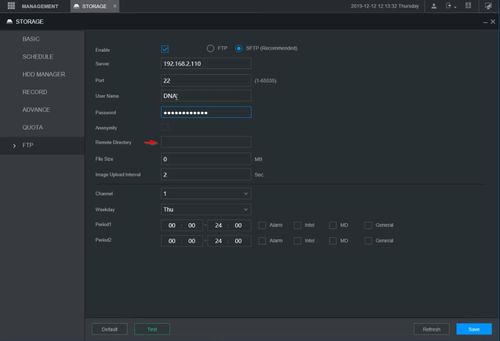
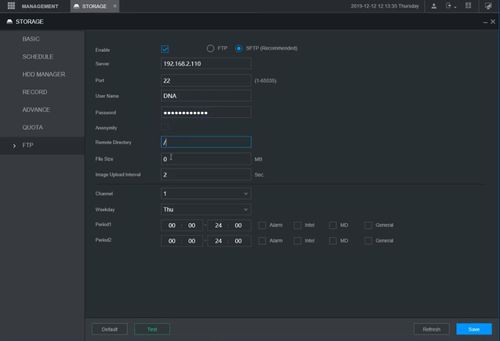
6. In the Remote Directory field
Enter '/'
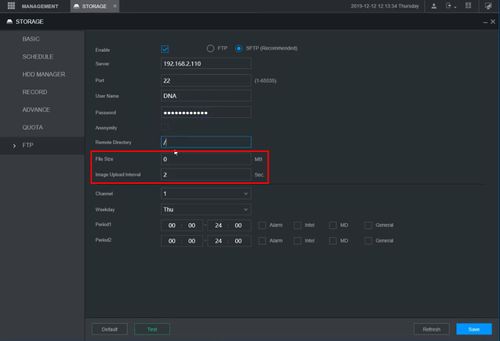
Use the fields to adjust the parameters for the files that will be uploaded to the server (size and interval)
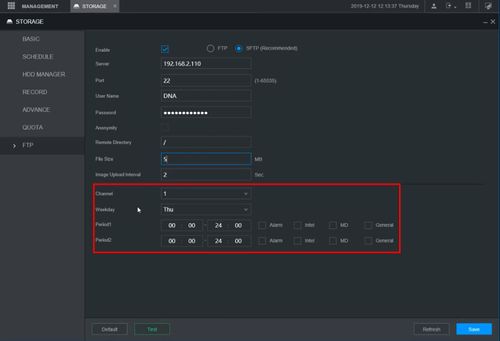
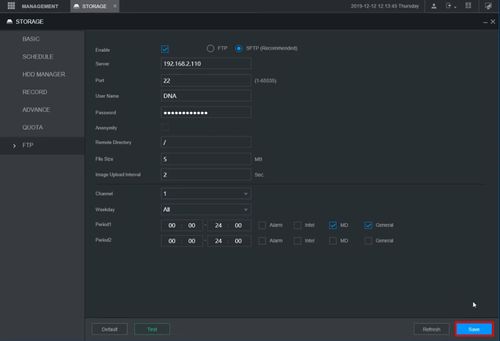
7. Use the interface to set the parameters for the FTP function
- Channel
- Schedule for FTP
- Type of Recording (Alarm, Intelligence, Motion Detect, General)
8. Click Save to save all settings
Instructions:Part 3 Download from SFTP via Filezilla Client
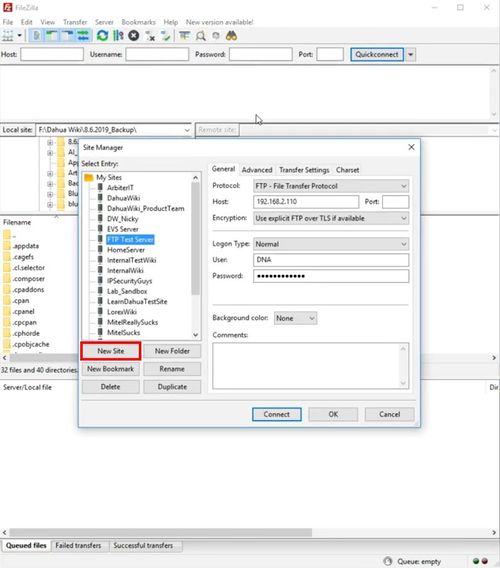
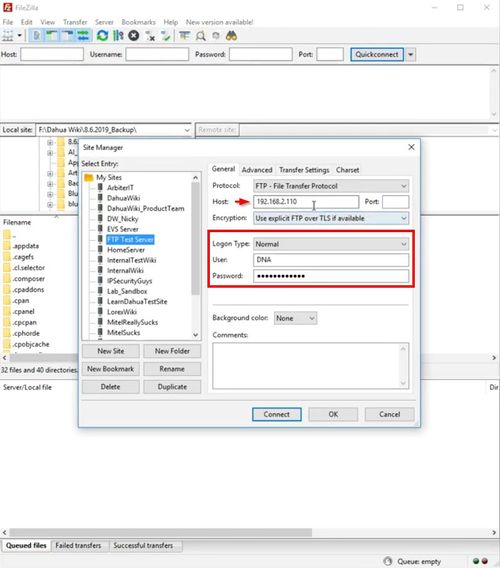
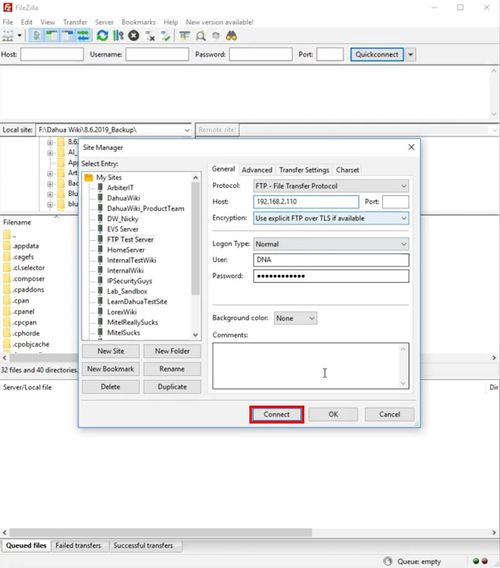
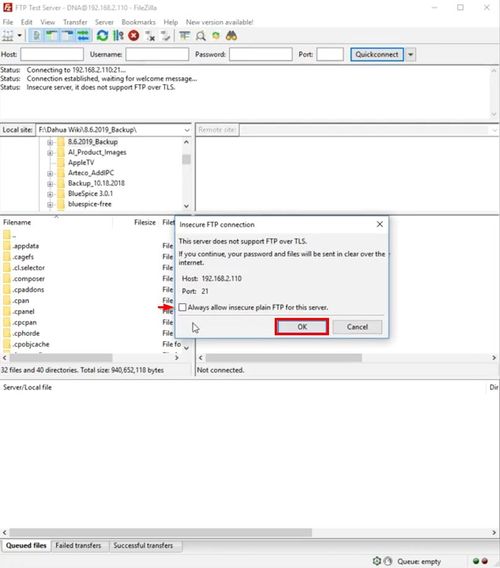
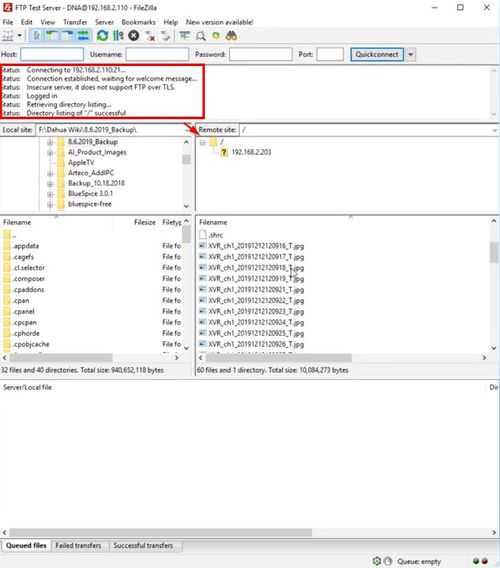
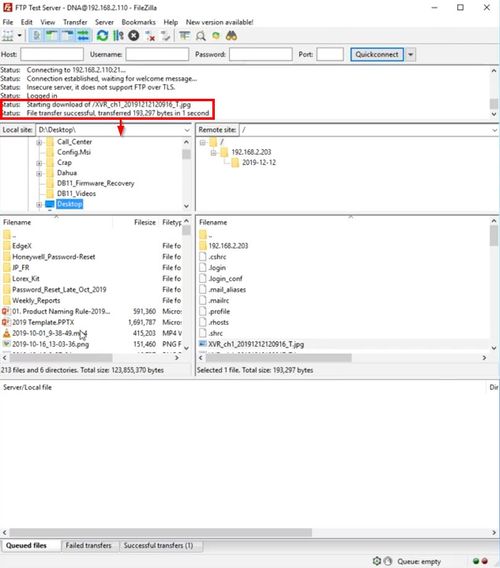
This guide will show how to download files from the FTP server that have been sent form the Dahua recorder
Video Instructions
Step by Step Instructions
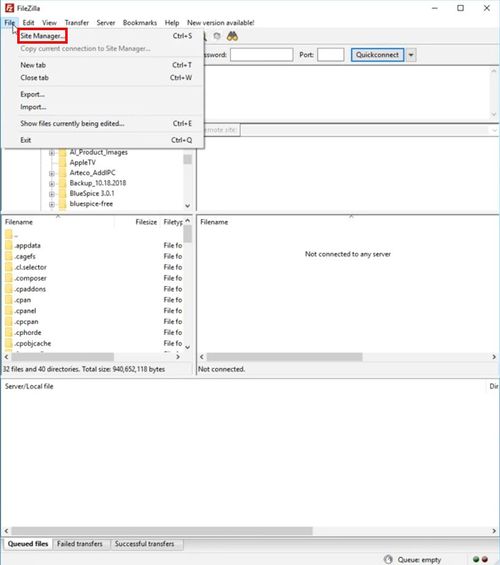
1.
