Difference between revisions of "Template:PTZ Preset WebUI New"
| Line 1: | Line 1: | ||
| + | |||
| + | ==Description== | ||
| + | |||
| + | To Show the steps required to create a preset using the new web UI | ||
| + | |||
| + | ==Prerequisites== | ||
| + | |||
| + | 1. Computer with web browser access to Dahua camera/recorder | ||
==Video Instructions== | ==Video Instructions== | ||
| Line 6: | Line 14: | ||
==Step by Step Instructions== | ==Step by Step Instructions== | ||
| − | 1. Open | + | 1. Open Internet Explorer and login to your Recorder |
2. Select Live View | 2. Select Live View | ||
Revision as of 16:29, 10 January 2020
Description
To Show the steps required to create a preset using the new web UI
Prerequisites
1. Computer with web browser access to Dahua camera/recorder
Video Instructions
Step by Step Instructions
1. Open Internet Explorer and login to your Recorder
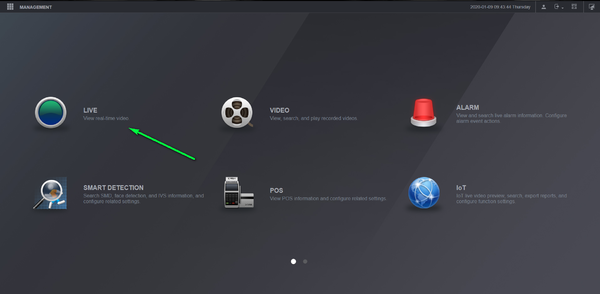
2. Select Live View
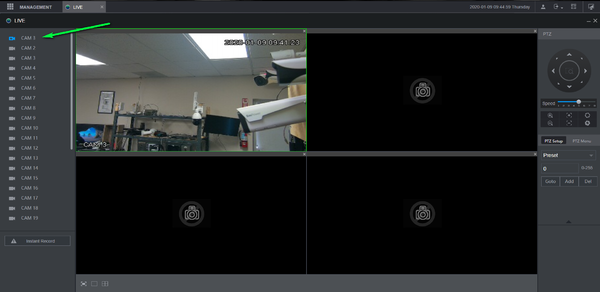
3. Double click your camera from the list to pull up live view
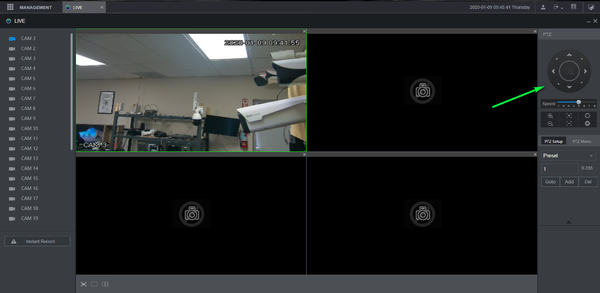
4. Use the Directional arrows to locate the desired preset location
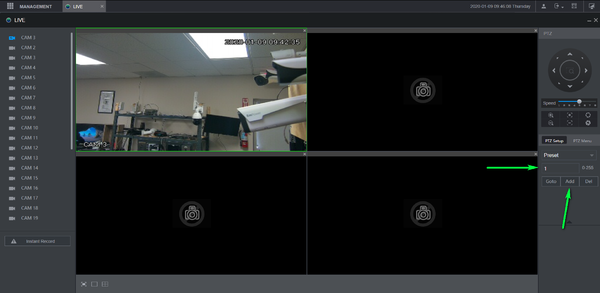
5. Enter Desired Preset number and select add
You can now select go to and the PTZ will move to the set location


