Difference between revisions of "Template:Motion Record SmartPSS"
(→How To Setup Motion Record) |
|||
| Line 98: | Line 98: | ||
[[File:Motion_-_SmartPSS_-_17.jpg|600px]] | [[File:Motion_-_SmartPSS_-_17.jpg|600px]] | ||
| − | |||
| − | |||
| − | |||
| − | |||
| − | |||
| − | |||
| − | |||
| − | |||
| − | |||
| − | |||
| − | |||
| − | |||
| − | |||
| − | |||
| − | |||
| − | |||
| − | |||
| − | |||
| − | |||
| − | |||
| − | |||
| − | |||
| − | |||
| − | |||
| − | |||
| − | |||
| − | |||
| − | |||
| − | |||
| − | |||
| − | |||
| − | |||
| − | |||
| − | |||
| − | |||
| − | |||
| − | |||
| − | |||
| − | |||
| − | |||
| − | |||
| − | |||
| − | |||
| − | |||
| − | |||
| − | |||
| − | |||
| − | |||
| − | |||
| − | |||
| − | |||
| − | |||
| − | |||
| − | |||
| − | |||
| − | |||
| − | |||
| − | |||
| − | |||
| − | |||
| − | |||
| − | |||
| − | |||
| − | |||
| − | |||
| − | |||
| − | |||
| − | |||
Latest revision as of 01:08, 7 February 2020
Contents
How To Setup Motion Record
Prerequisites
- SmartPSS 2.0
- Dahua recorder (with camera added) added to SmartPSS
Video Instructions
Step By Step Instructions
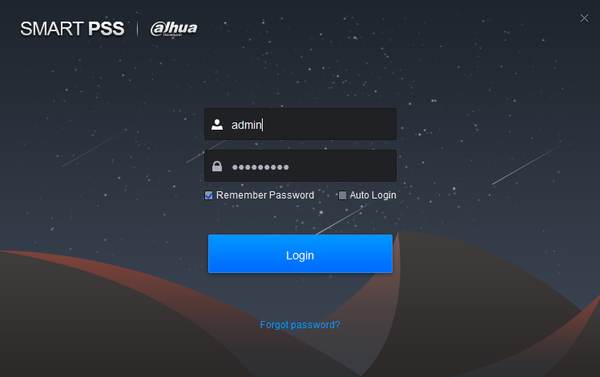
1. Open and login to SmartPSS
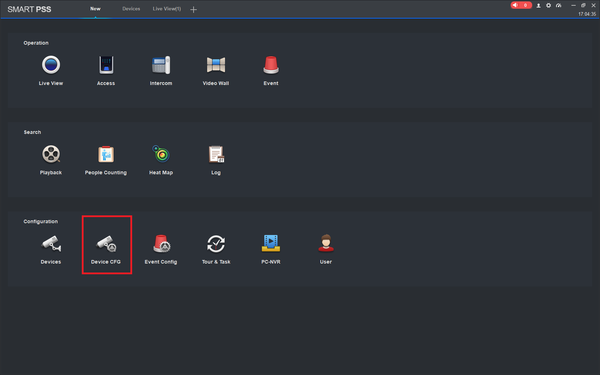
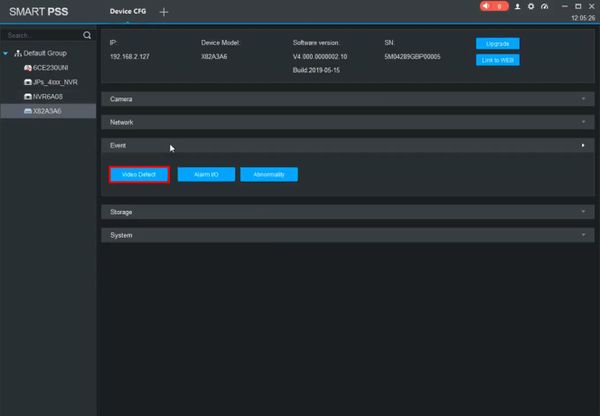
From the Menu of SmartPSS
Click Device CFG
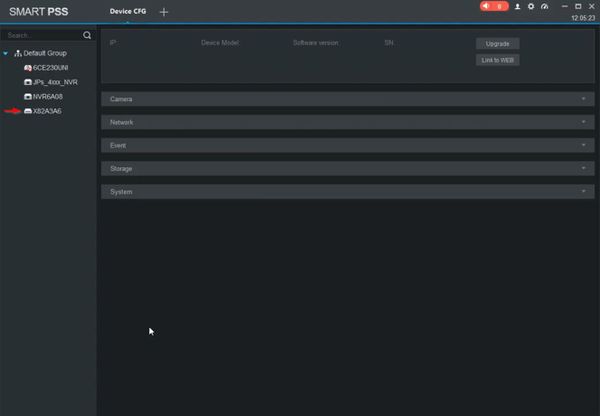
2. Select the device from the list on the left
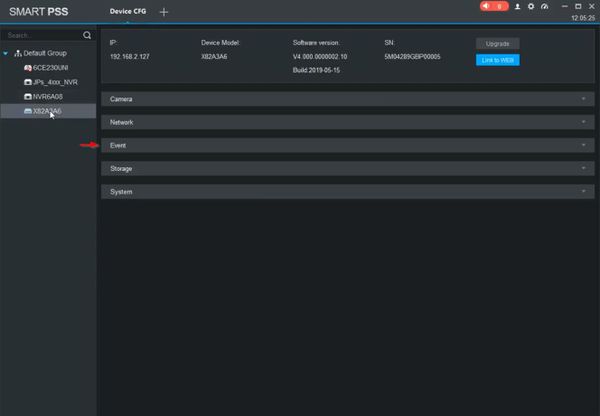
3. Click Event
4. Click Video Detect
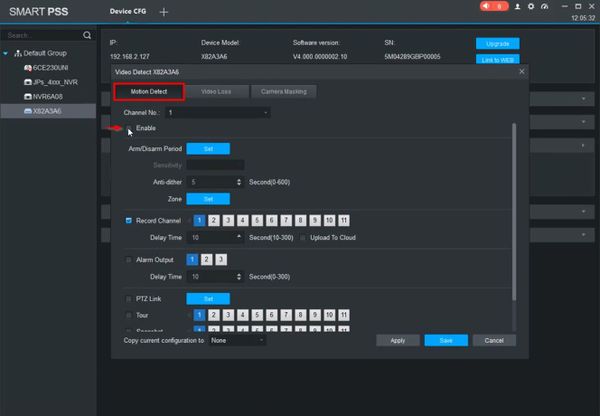
5. Under Motion Detect
Use the dropdown box to select the Channel
Check the box to enable Motion Detect
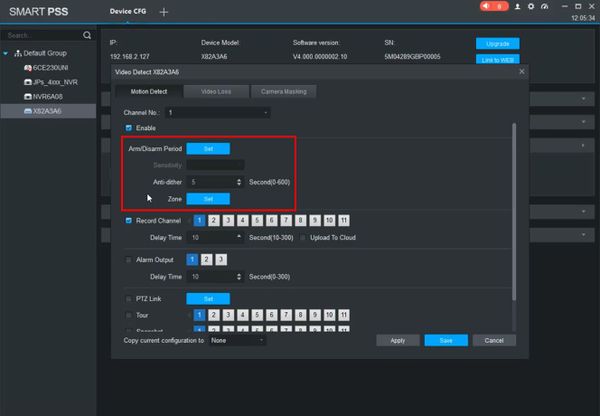
6. Use the interface to set the parameters for the Motion Detection:
- Arm/Disarm Period - set a schedule for motion record
- Zone - set specific areas in the camera's video for motion detection
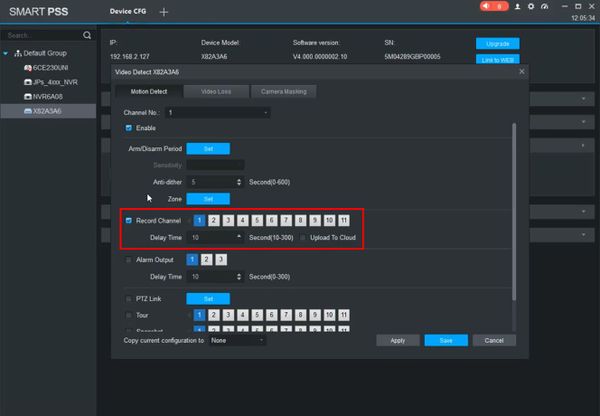
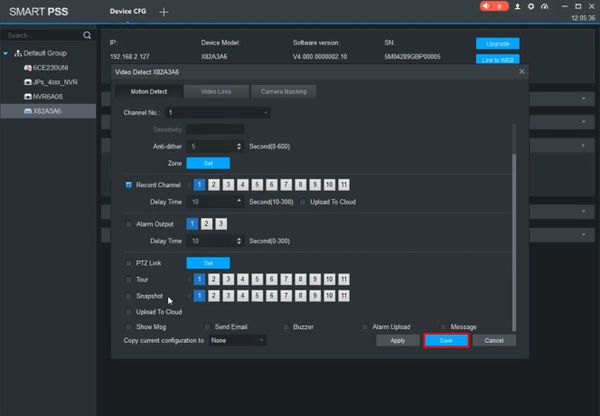
7. Check the box next to Record Channel, select the channel(s) you wish to record when Motion is detected
8. Click Save
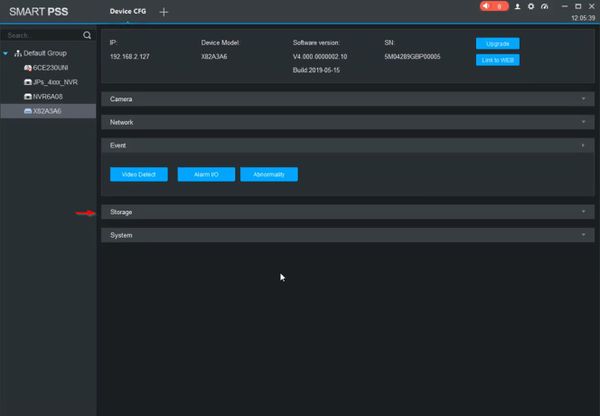
9. Click Storage
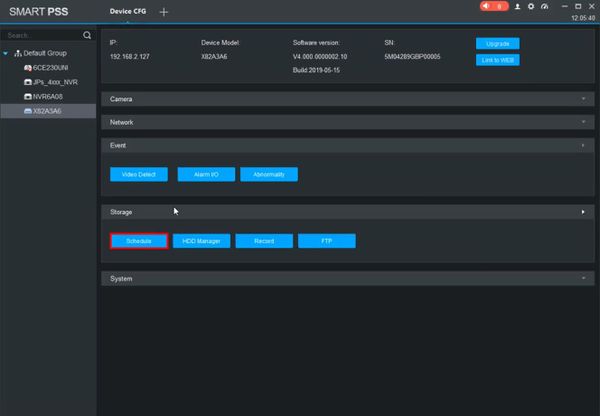
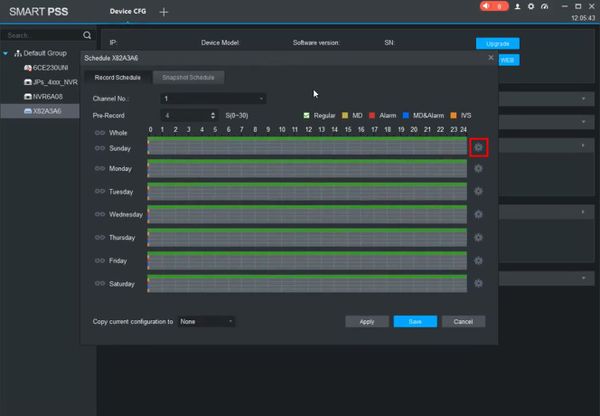
10. Click Schedule
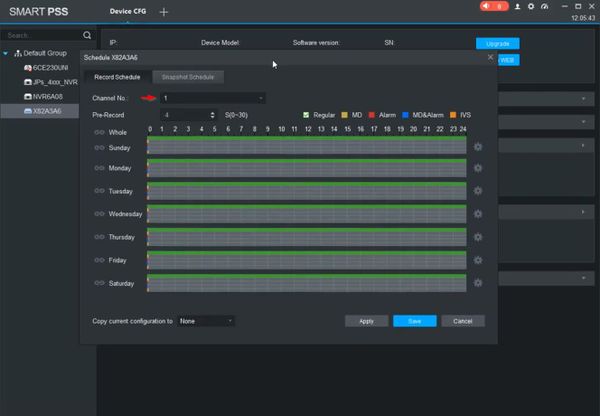
11. Use the dropdown box to select the Channel
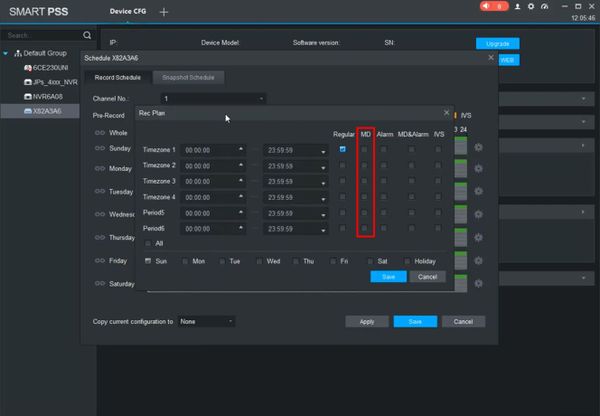
12. Click the icon next to the schedule to edit
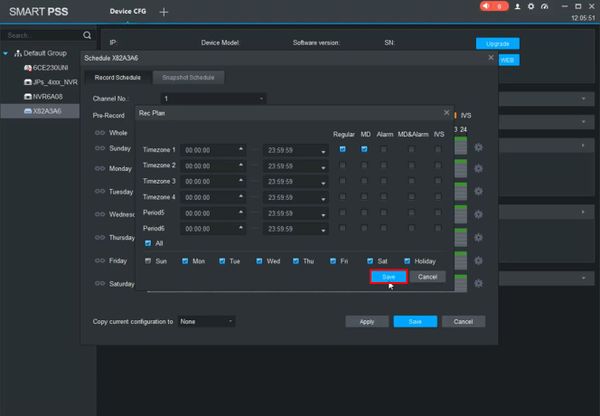
13. Use the interface to create the desired schedule for Motion Detection, making sure to enable/check 'MD' for Motion Detection
Check the box next to which days to add to the schedule
Click Save
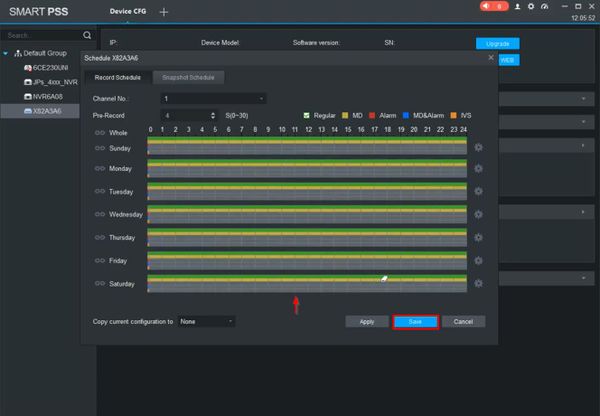
14. The schedule will be updated with the changes
Click Save
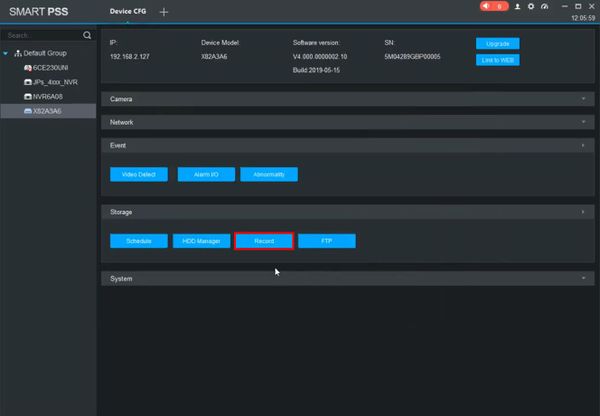
15. Click Record
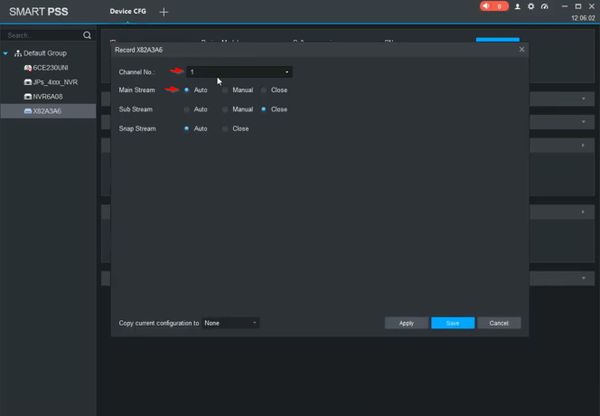
16. Use the dropdown box to select the Channel
Select 'Auto' for each stream type you wish to record
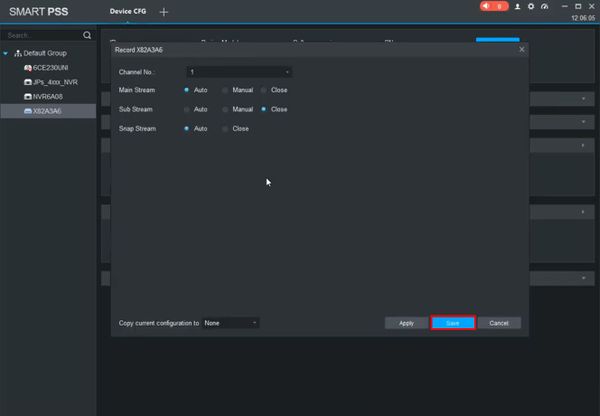
17. Click Save
