Difference between revisions of "Backup/Instructions"
(Created page with "=How to Backup Recorded Video= <div class="toccolours mw-collapsible mw-collapsed"> 250px<span style="font-size:180%;">'''SystemUI Old...") |
(No difference)
|
Revision as of 17:17, 10 March 2020
Contents
How to Backup Recorded Video
Prerequisites
- FAT32 USB flash drive or FAT32 USB storage.
- Monitor or display connected to NVR or DVR
- USB Mouse
Video Instructions
Step by Step Instructions
Note: This is for local back up on physical recorder.
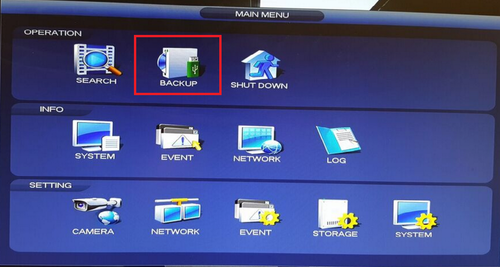
1. From the Main Menu select "Back Up"
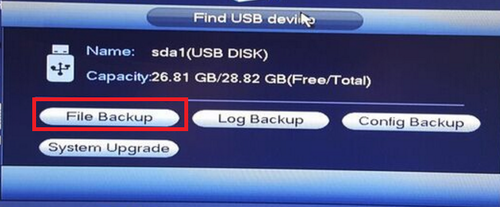
2. Plug in USB device such as a flash drive in to one of the USB ports of the recorder.
3. A pop up will show → Select "File Back up"
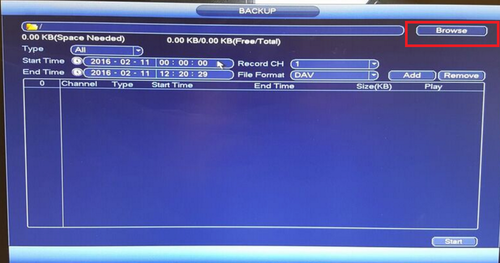
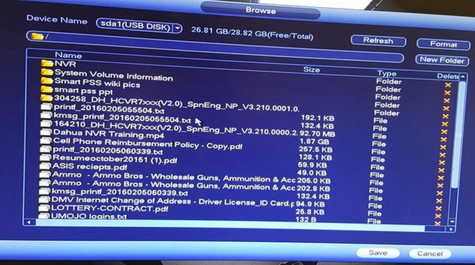
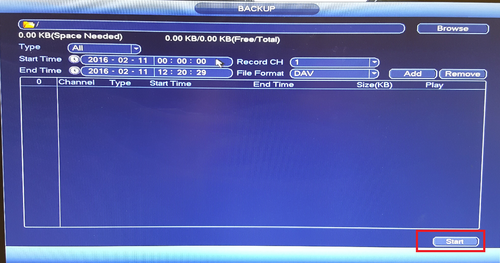
4. Select "Browse" → Select folder to save back file in or create new folder to save back up.
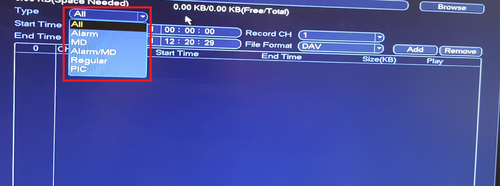
5. Select "Type" such as Alarm or MD (Motion Detect).
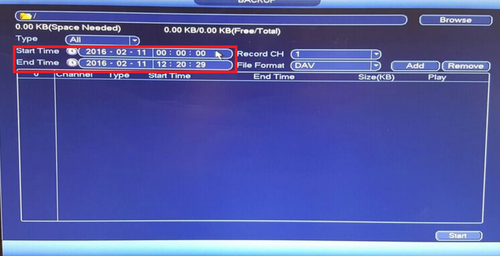
6. Select "Start Time" and "End Time".
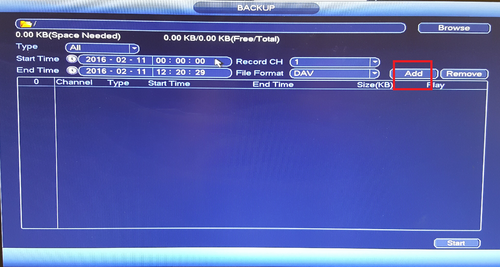
7. Select "Channel" → "Add" to add what you have selected. What you added will be in list form.
8. Select "Start" to start back up.
Prerequisites
- SmartPSS installed on a Windows or Mac computer
- Dahua NVR with a stored recording
- Established network connection with the NVR
- The NVR added to SmartPSS
- Enough drive space for the video backup
Video Instructions
Step by Step Instructions
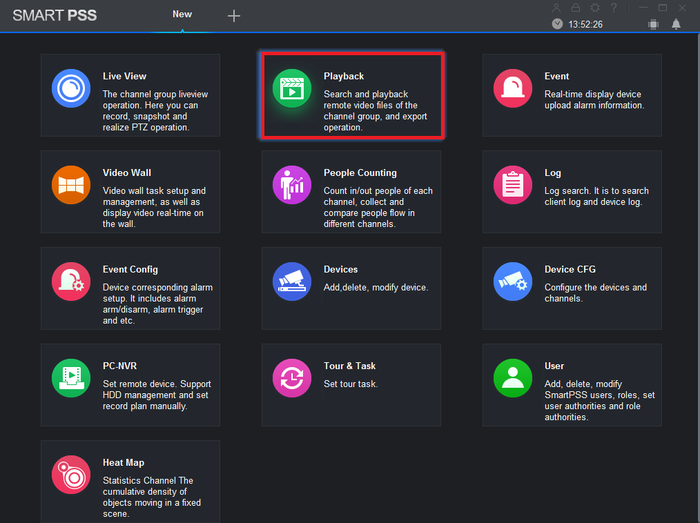
1. From the home menu select "Playback".
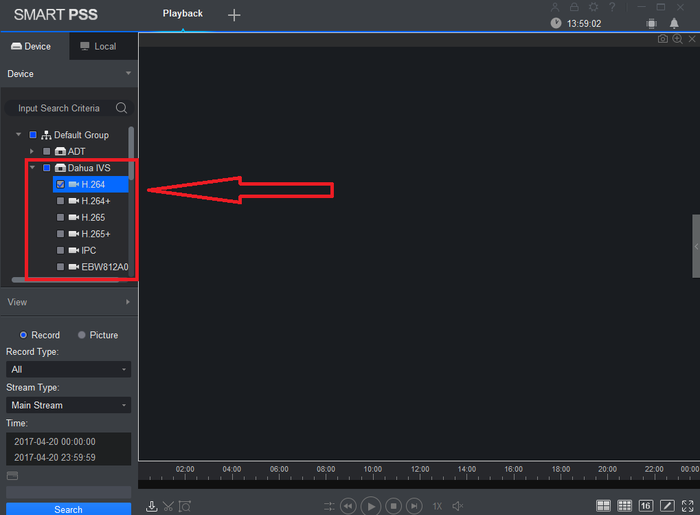
2. From the left hand side select device -> camera or cameras. More than one maybe selected.
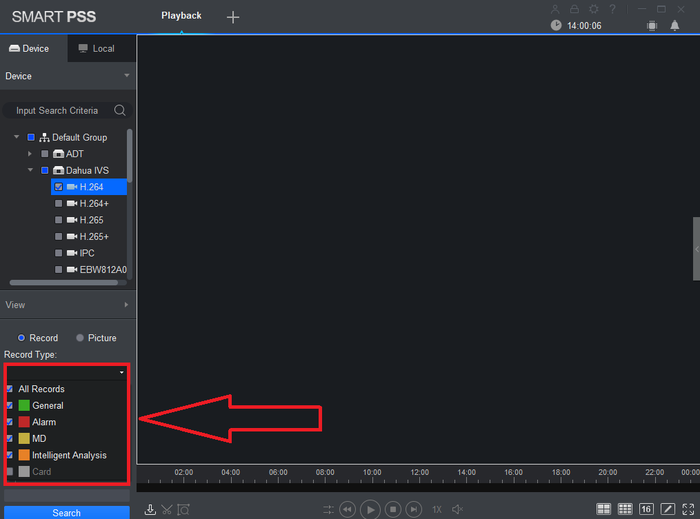
3. Select Record type. Drop down menu allows to select All Records, General, Alarm, MD (Motion Detection), and Intelligent Analysis.
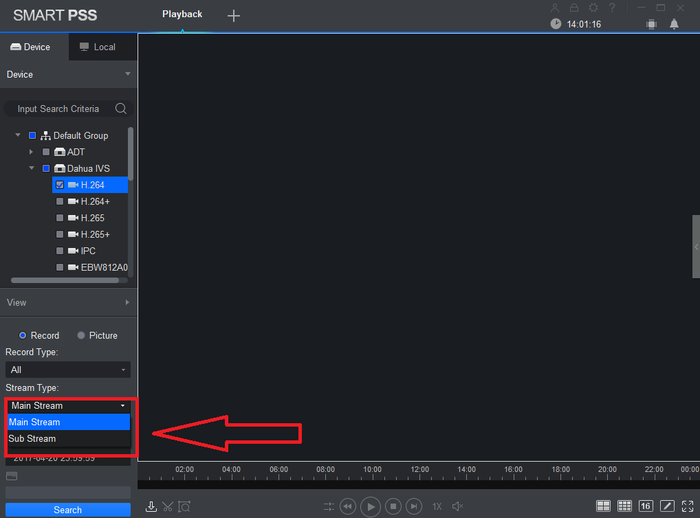
4. Select Stream Type (Main Stream or Sub Stream).
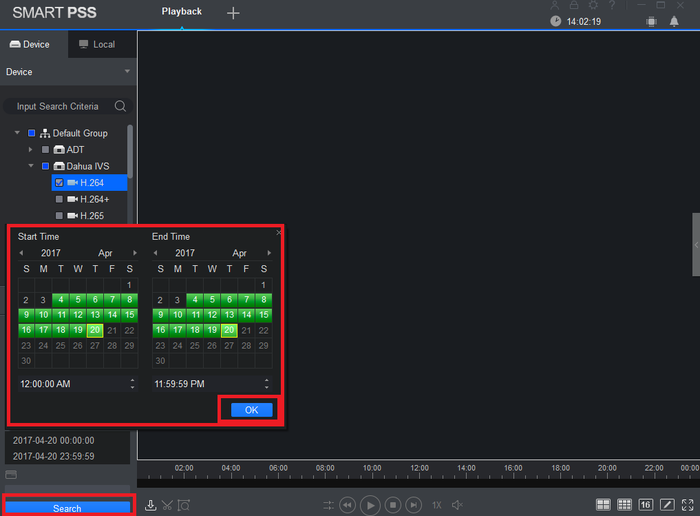
5. Select Date and time -> Select OK -> Select Search.
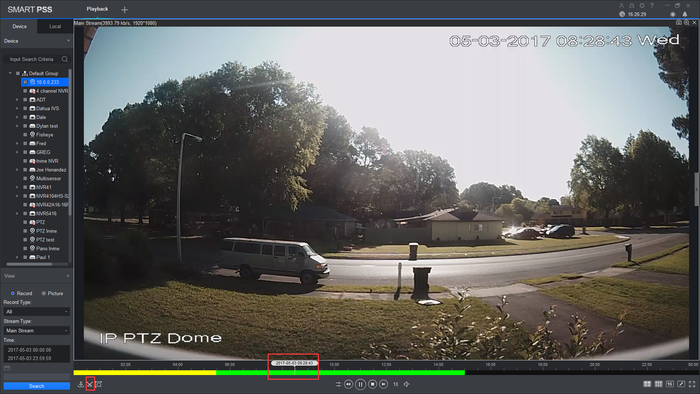
6. Choose a time frame and click on time clip.
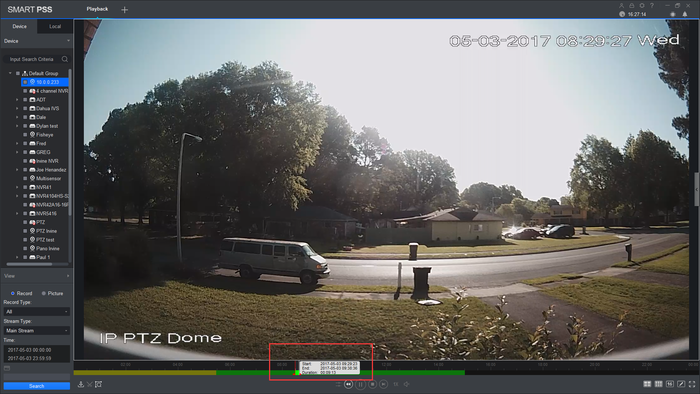
7. Choose the beginning and end of time clip you want to backup.
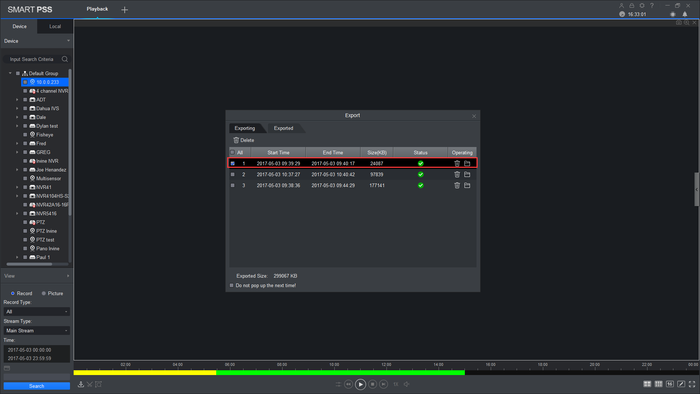
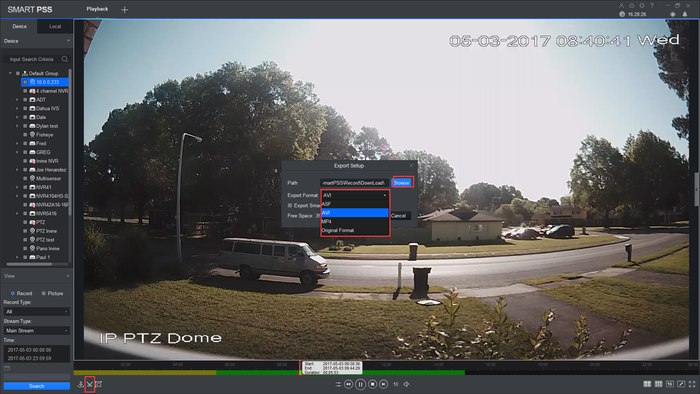
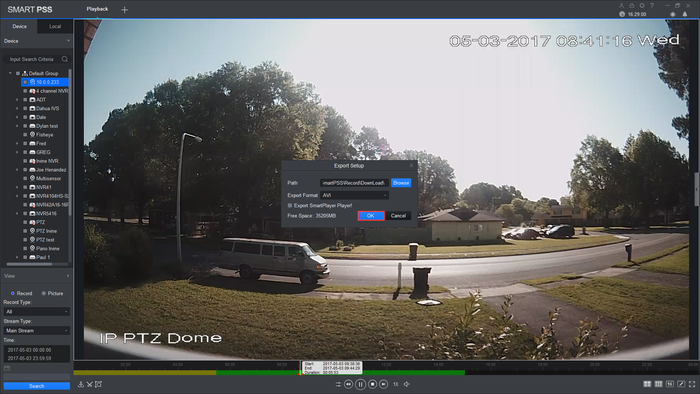
8. Click on time clip again and select the folder to back up to and select the exported file type.
9. Click ok
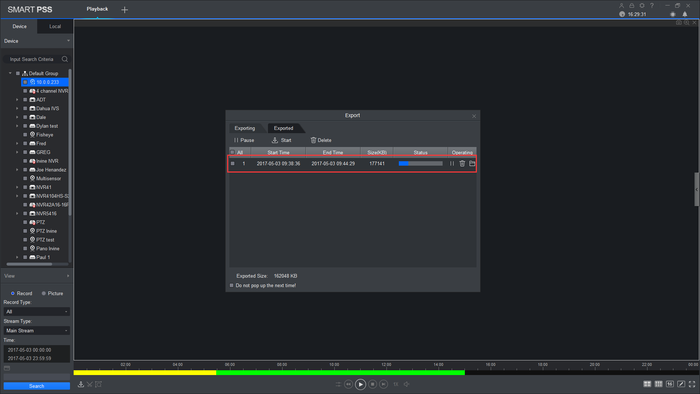
10. It should start downloading the back.
11. You should now have the file backed up at the specified folder.
