Difference between revisions of "Template:Holiday Schedule SmartPSS"
(Created page with "==Step by Step Instructions== 1. Open SmartPSS and select "Access" from the main menu 800px 2. Select the Upload Users to Devices...") |
|||
| Line 58: | Line 58: | ||
<br>Repeat Steps 9 and 10 for each door | <br>Repeat Steps 9 and 10 for each door | ||
| − | [[File:AccessControlHolidaySchedule12.png| | + | [[File:AccessControlHolidaySchedule12.png|400px]] |
Revision as of 22:33, 22 May 2020
Step by Step Instructions
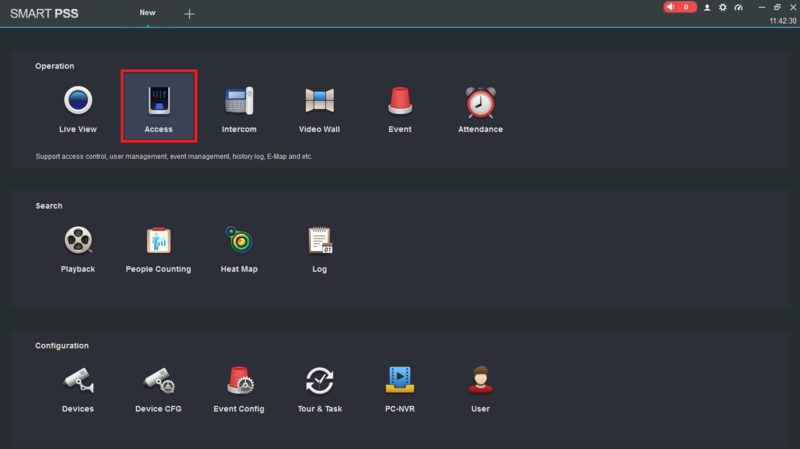
1. Open SmartPSS and select "Access" from the main menu
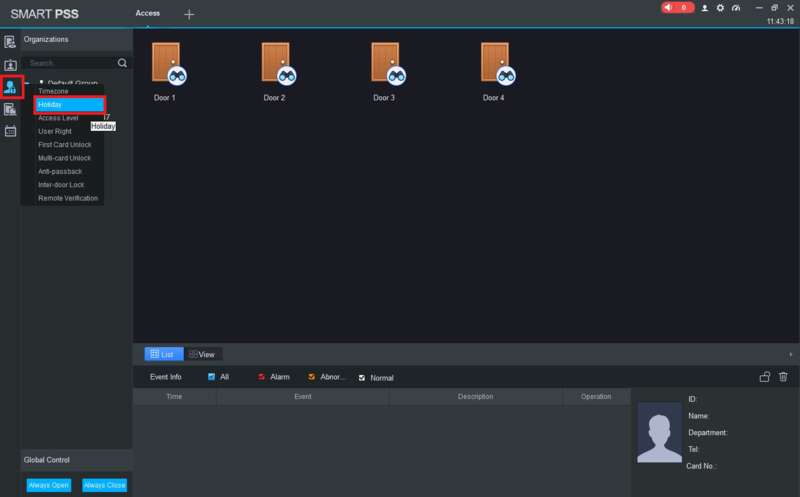
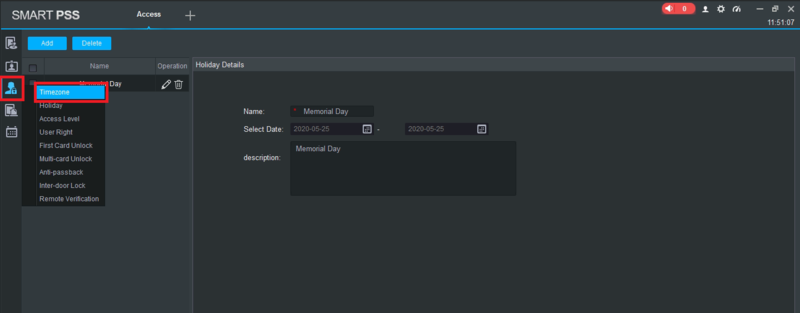
2. Select the Upload Users to Devices icon on the left (it looks like a person with a lock).
Select "Holiday" from the drop-down list
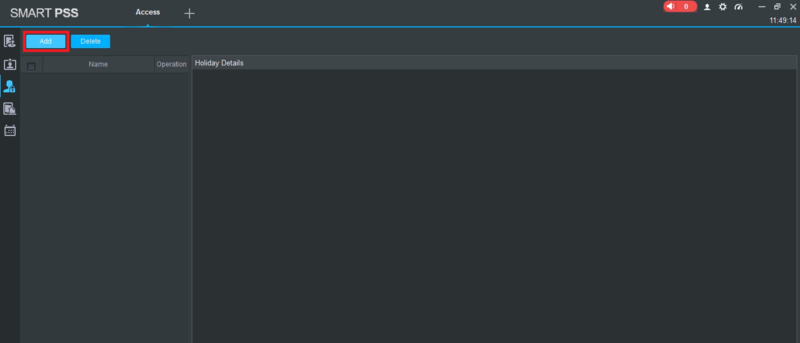
3. Select the "Add" button at the top left
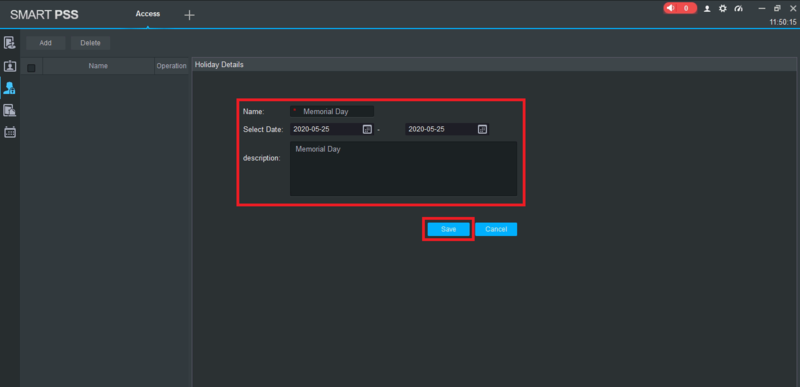
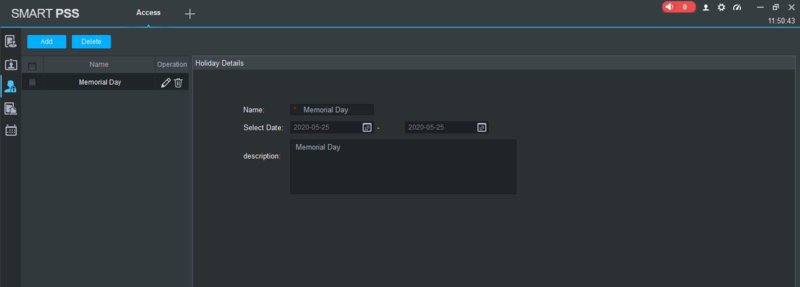
4. Fill in the name of the Holiday in the "Name" field.
Select the starting and ending dates in the fileds next to "Select Date".
Fill in a description of the Holiday in the "Description" field.
Select "Save" at the bottom
You will see your newly created Holiday in the list on the left.
You can add more Holidays by repeating Steps 3 and 4 for each Holiday
5. Select the Upload Users to Device icon on the left
Select "Timezone" from the drop-down list
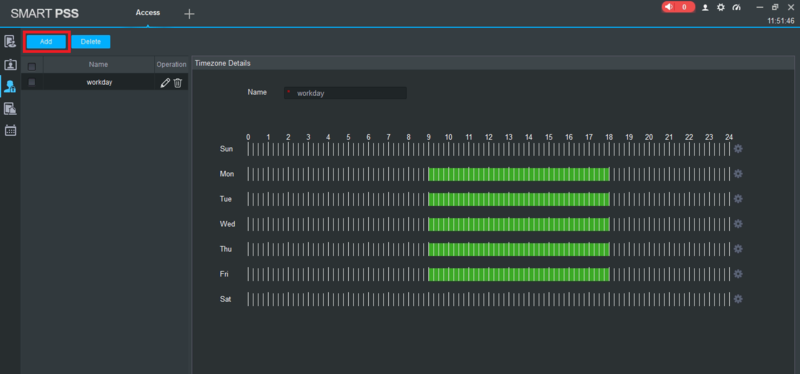
6. Select the "Add" button on the top left
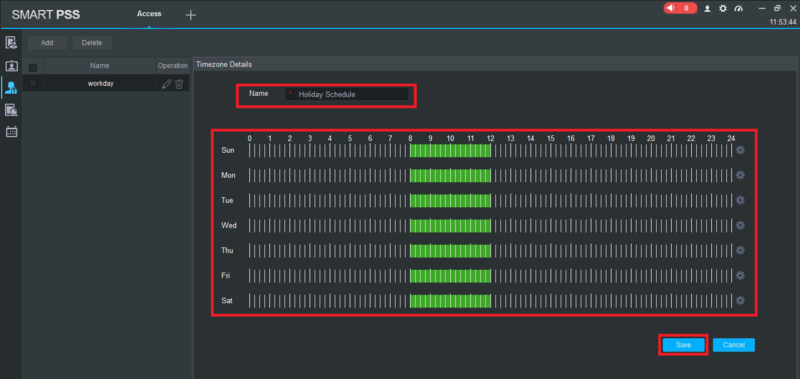
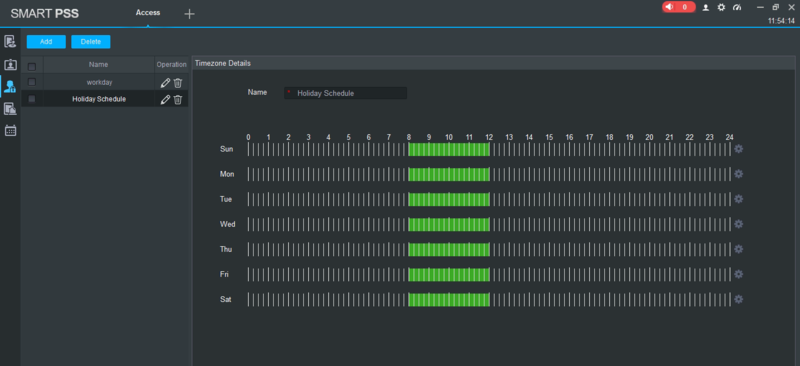
7. Fill in the name of the Schedule in the "Name" field.
Modify the schedule for all days of the week.
Select "Save" at the bottom
You will see your newly created Schedule in the list on the left
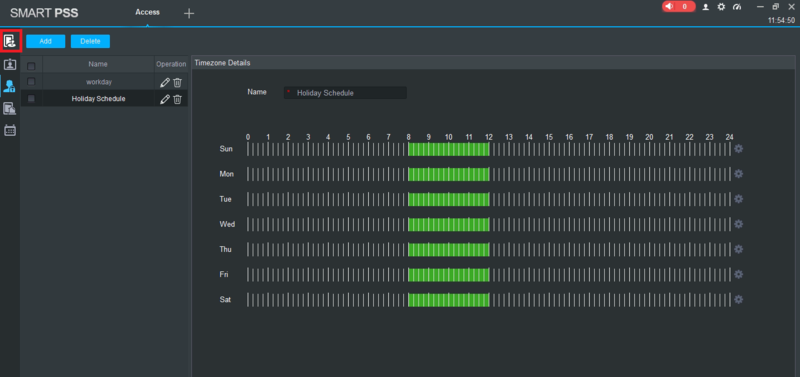
8. Select the Console icon on the left (it looks like a door with a joystick)
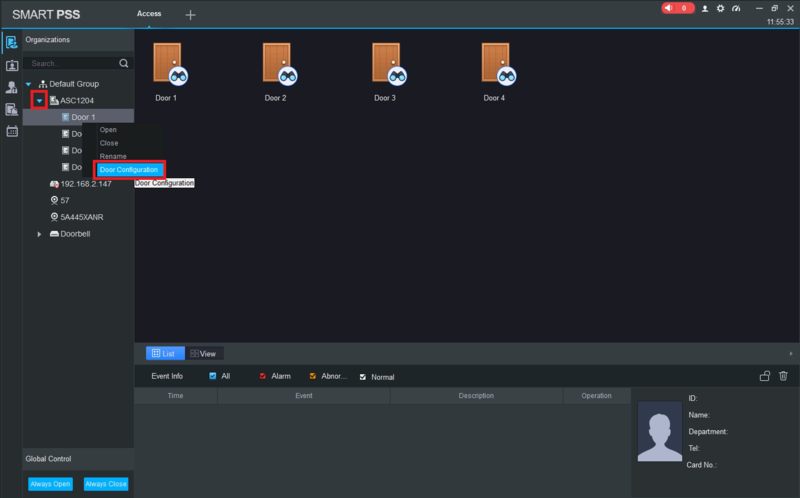
9. Expand the list for the access controller on the left.
Right click one of the doors and select "Door Configuration"
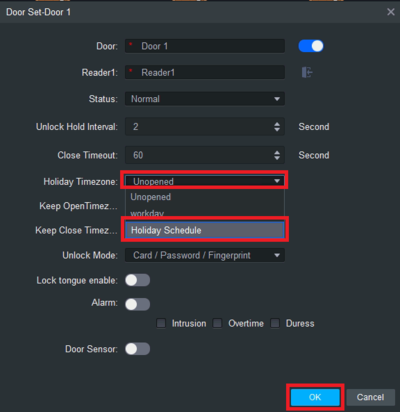
10. Select the field next to "Holiday Timezone".
Select the Holiday Schedule you created in Step 7 from the drop-down list.
Select "OK" at the bottom to save your changes.
Repeat Steps 9 and 10 for each door
