Difference between revisions of "Recording Setup/Custom Audio Recording Setup"
(→Step by Step Instructions) |
(→Step by Step Instructions) |
||
| Line 9: | Line 9: | ||
==Step by Step Instructions== | ==Step by Step Instructions== | ||
| − | 1. Login to the camera's webUI | + | 1. Login to the camera's webUI by entering the IP into a browser |
| + | |||
| + | Enter the username/password | ||
| + | |||
| + | Click Login | ||
[[File:Thermal_-_Add_Custom_Audio_Alert_-_7.jpg|600px]] | [[File:Thermal_-_Add_Custom_Audio_Alert_-_7.jpg|600px]] | ||
| − | Click Setting | + | Click Setting tab |
| + | |||
| + | Then click Camera > Audio | ||
Confirm the Audio is enabled for both streams | Confirm the Audio is enabled for both streams | ||
Revision as of 22:38, 26 August 2020
Contents
Custom Audio Recording Setup
Description
This guide will show how to record/create a custom audio alert for a Dahua camera using the camera's built-in microphone
Prerequisites
- Dahua camera with built-in mic/speaker and custom audio record feature, for example N55DY82
- Local computer
Step by Step Instructions
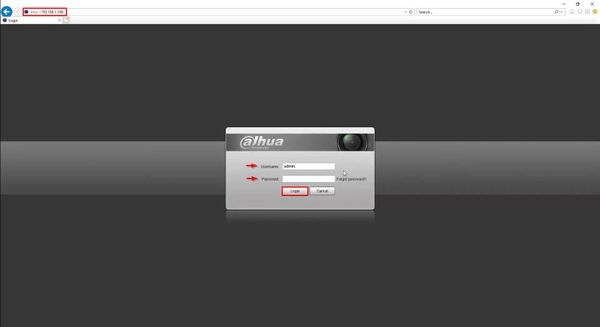
1. Login to the camera's webUI by entering the IP into a browser
Enter the username/password
Click Login
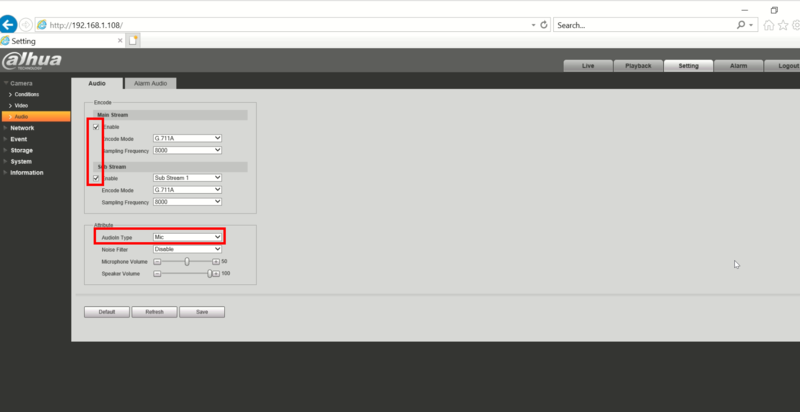
Click Setting tab
Then click Camera > Audio
Confirm the Audio is enabled for both streams
Confirm AudioIn type is set to Mic
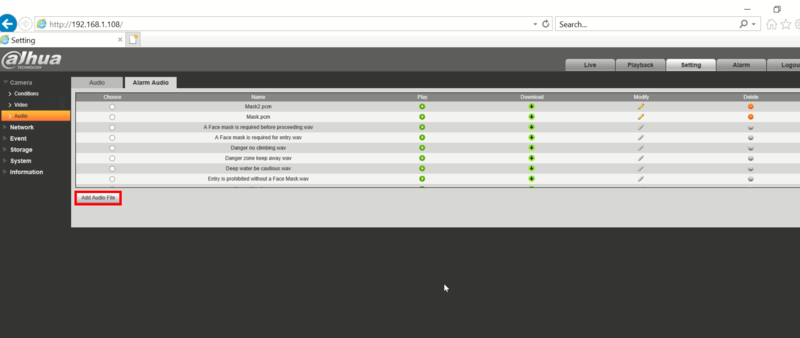
2. Click the Alarm Audio tab
Click Add Audio File
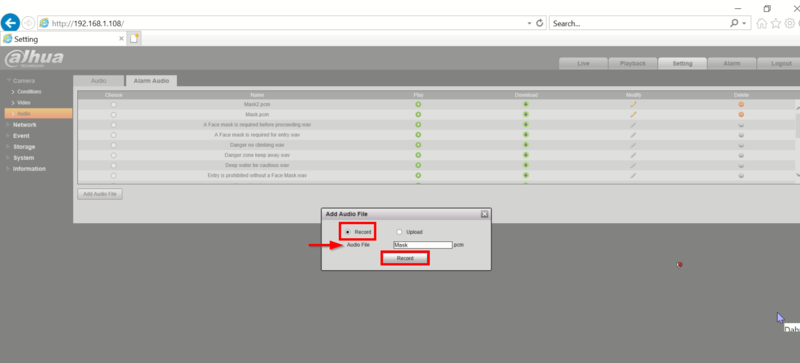
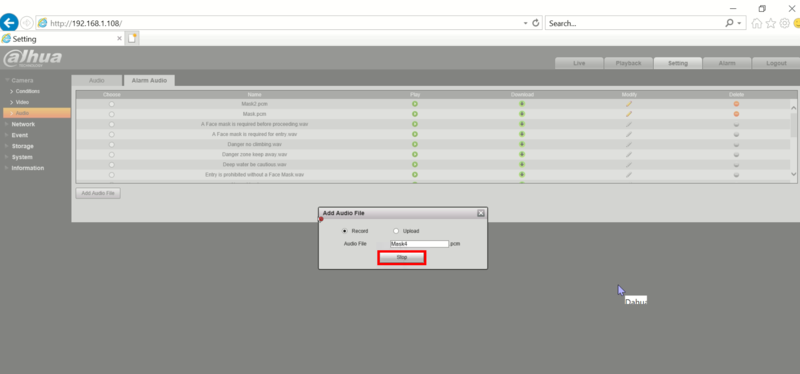
3. Select Record
Enter a name for the recording/file
Click Record to begin recording
4. Click Stop to end recording
The created audio file will appear in the list of Alarm Audio files for use
