Difference between revisions of "Record/Basic/Advanced/FTP"
| Line 4: | Line 4: | ||
==Physical Setup Instructions== | ==Physical Setup Instructions== | ||
<div class="toccolours mw-collapsible mw-collapsed"> | <div class="toccolours mw-collapsible mw-collapsed"> | ||
| − | [[File: | + | [[File:Filezilalogo.png|150px]]<span style="font-size:180%;">'''FileZila Server'''</span> |
<div class="mw-collapsible-content">{{Template:Filezilla_FTP_Setup}}</div> | <div class="mw-collapsible-content">{{Template:Filezilla_FTP_Setup}}</div> | ||
</div> | </div> | ||
Latest revision as of 22:13, 15 October 2020
Contents
FTP
Description
Physical Setup Instructions
How to Host an FTP Server on Windows with FileZilla
Description
This article will show you steps to setup a folder on your windows computer as an FTP repository, using a program called FileZilla.
Prerequisites
- Windows Computer
- FileZilla Server program installed
Step by Step Instructions
FileZilla installation
1. Download FileZilla server from this link, Click Here.
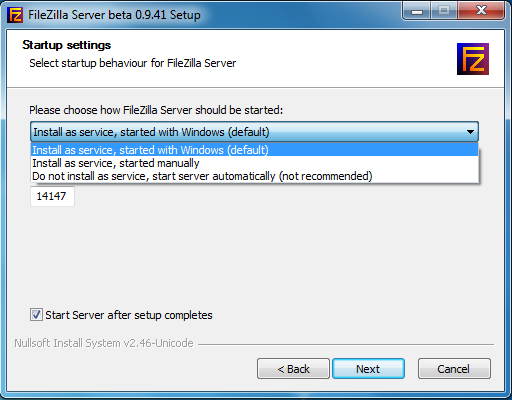
2. After downloading the program, you can install it with all of the default settings. FileZilla will install a service that runs whenever Windows boots up, so if you would rather only run the FTP server manually, select the appropriate option from the drop down menu.
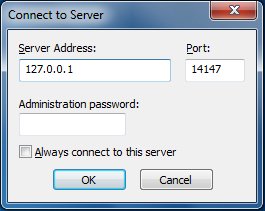
3. Apart from that setting, everything else can be left at the defaults for the purpose of this tutorial. Once installation is complete, the FileZilla interface will open. Just click OK when this window pops up right after installation:
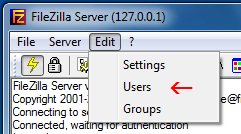
4. Once the FTP server interface has loaded, we are ready to specify a directory as an FTP repository. If the directory you want to use isn’t already created, minimize the interface and create a folder where you want the FTP share to be. In this tutorial, we are going to use the folder ‘FTP’ on our desktop. Its exact location will be “C:\Users\geek\Desktop\FTP”. Click on Edit, then Users.
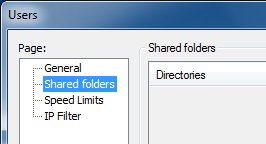
5. On the left side of the window that comes up, click on Shared folders.
6. Once there, click on Add underneath Users. Enter the username for an account that another computer will be using to access the repository we’re setting up.
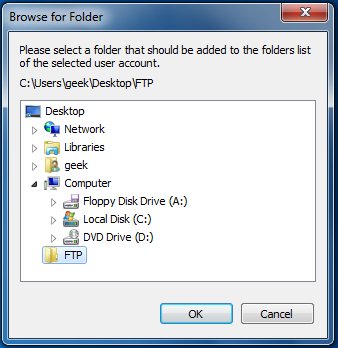
7. Click OK once you’re done entering the account name, and then click on Add underneath the Shared folders section. Once you’ve done that, a window like the one below will pop up, use it to select the directory you would like to share as an FTP repository.
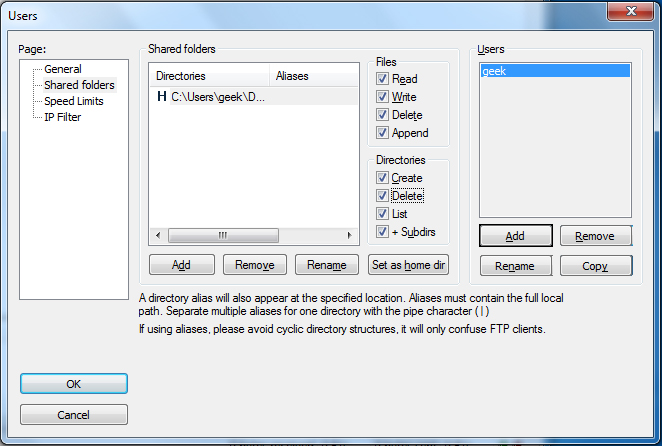
8. Click OK. Now we need to assign the user permissions for this repository. By default, the user we’ve created is able to read files, list directories, and list sub directories. To give the user further permissions, such as the ability to copy files to this repository, check the boxes beneath ‘Files’ and ‘Directories.’
9. Click OK once you’re done setting the user permissions.
Windows Firewall Exception
1. Go to your Start menu and type Windows Firewall, then click on Windows Firewall with Advanced Security.
2. Click on Inbound Rules in the left column, and then New Rule… in the right column. We’ll be allowing a port through the firewall, so select Port when the wizard asks “What type of rule would you like to create” and then click next.
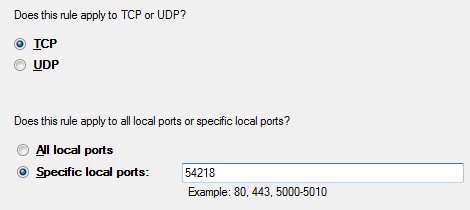
3. Type in the port you have chosen for your FTP server to run on (default is 21, but in this guide we chose 54218).
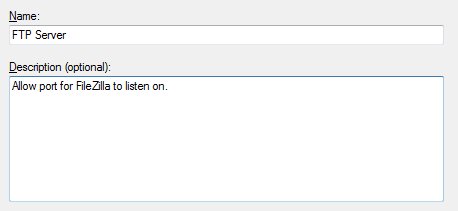
4. Click next three times after entering your port number. Put in a name and description for this exception so it’s easy to find in the future, and then click Finish.
How to Setup FTP to Record Snapshots and Sub-Stream
1. Download SmallFTPD from the following link: http://sourceforge.net/projects/smallftpd/
2. In the root of one of your hard drives, create a folder titled, "FTP"
3. Locate the file you downloaded and extract the contents of the zipped file to the FTP folder you just created in the root of your hard drive.
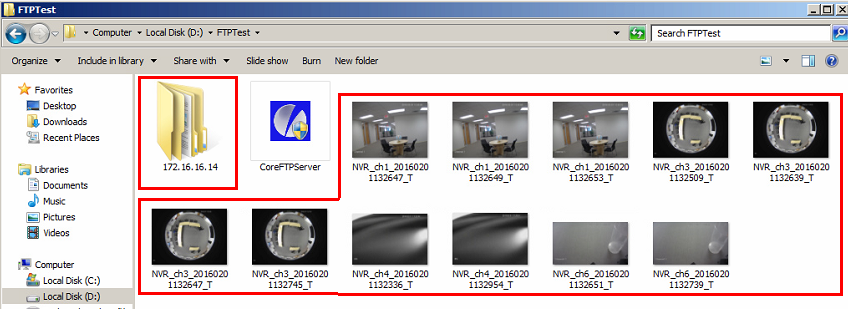
Your computer should look similar to the image above.
4. Double click, "smallftpd.exe"
5. Click, "Settings" and then, "General"
6. Note the port, and click, "OK"
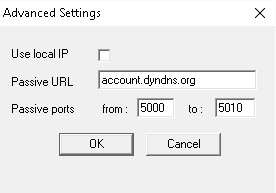
7. Click, "Settings" and then, "Advanced"
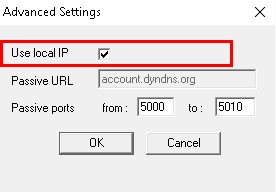
8. Click the box next to, "Use local IP" and click, "OK"
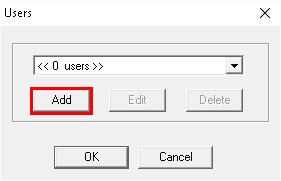
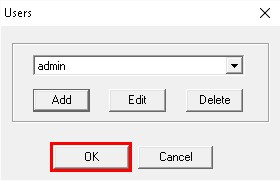
9. Click, "Settings" and then, "Users"
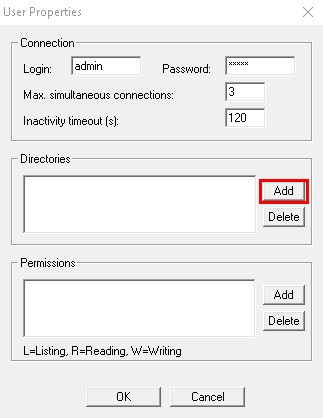
10. Click, "Add"
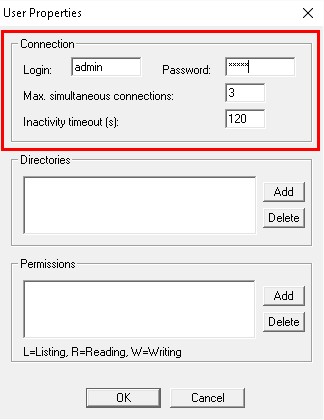
11. Input the following:
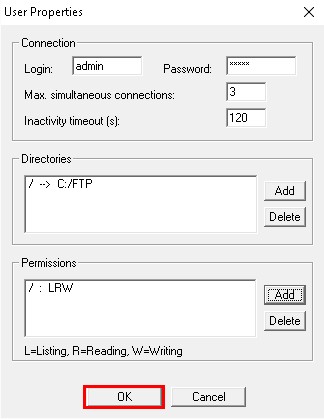
Login: admin
Password: admin
Max. simultaneous connections:3-100
Inactivity timeout(s): 999
12. Under Directories click, "Add"
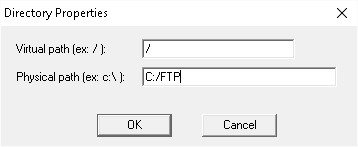
13. Leave Virtual Path set to, "/" and set the Physical path to, "C:/FTP" and click, "OK"
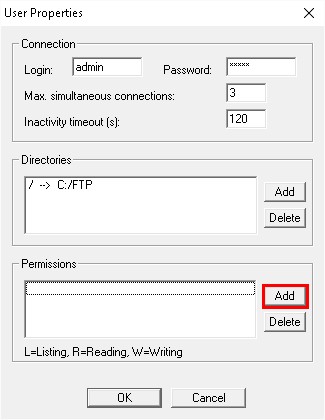
14. Under Permissions click, "Add"
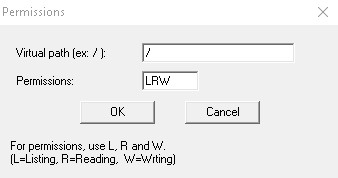
15. Leave Virtual Path set to, "/" and set the Permissions to, "LRW" and click, "OK"
16. Click, "OK" to exit the User Properties.
17. Click, "OK" to exit the User Menu.
18. Click the, "Play" button to start the FTP server.
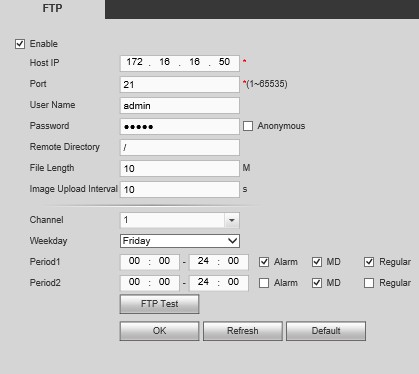
19A. For a NVR or DVR, go to Main Menu-> Settings -> Network -> FTP, and input the following: NVR or DVR
Host IP: (Your PC's IP address)
Port: 21 or the port you setup earlier in SmallFTPD
User Name: admin
Password: admin
Remote Directory: /
File Length: 10-512
Image Upload Interval: 10-60
Channel: (any)
Period: (any)
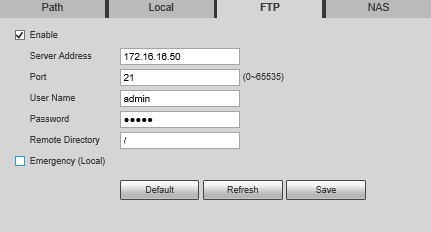
19B. For an IP Camera, login to the IP Camera via web browser and navigate to, Setup-> Storage -> Destination -> FTP, and input the following:
IP Camera
Server Address:(Your PC's IP address)
Port: 21 or the port you setup earlier in SmallFTPD
User Name: admin
Password: admin
Remote Directory: /
Once complete click, "Save" or "OK"
20. Once complete, check the SmallFTPD and the "C:/FTP" folder. They should look like the below images:
 and
and 
FTP Setup Core FTP Server
1. Download and install Core FTP Server 32-bit from this link: http://www.coreftp.com/server/index.html
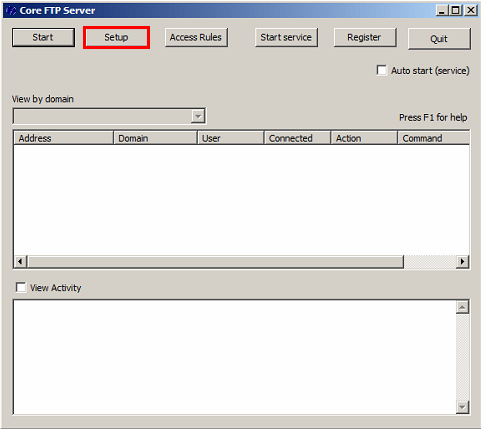
2. Click, "Setup"
3. Click, "New"
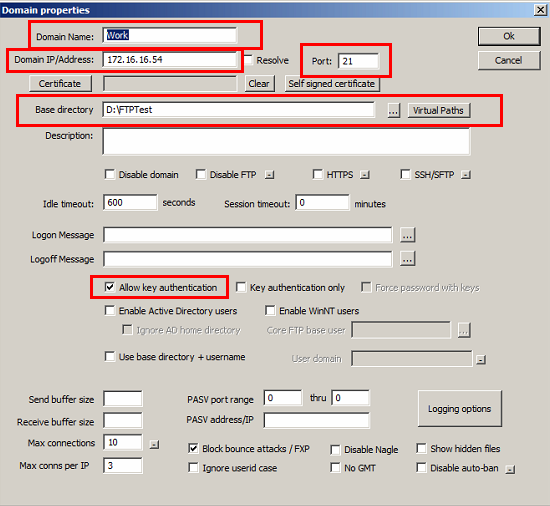
4. Input the following, and click, "OK":
Domain Name: (Any)
Domain IP/Address: (Your LAN IP Address. From Command Prompt input, "ipconfig")
Port: 21 by default can be changed to any other port if needed.
Base Directory: (This will be where the files are stored.)
Allow key authentication: (Checked)
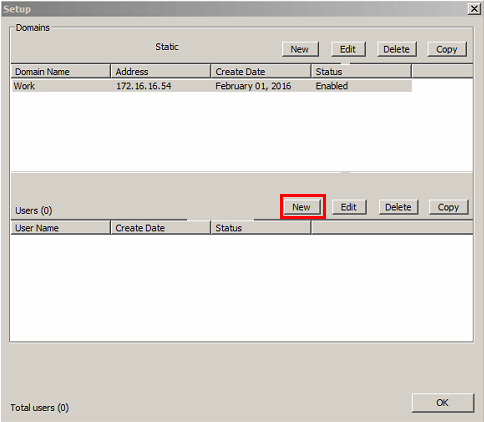
5. Click, "New" and input the following:
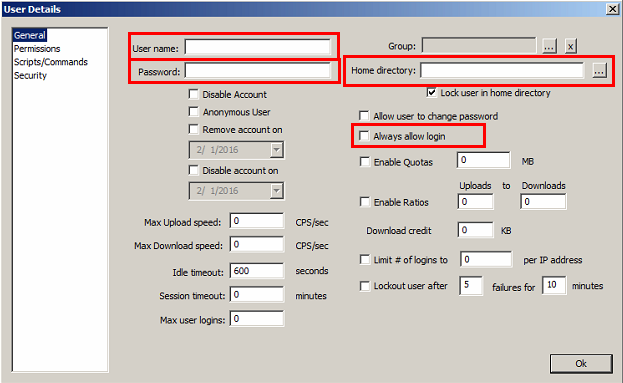
User name: (Any)
Password: (Any)
Home Directory: (Where you want the files to be stored)
Always allow login: (Checked)
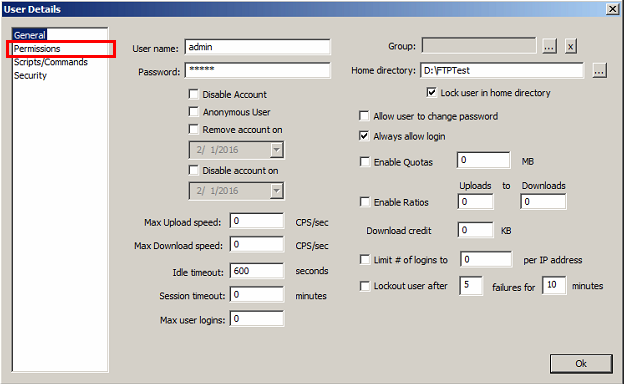
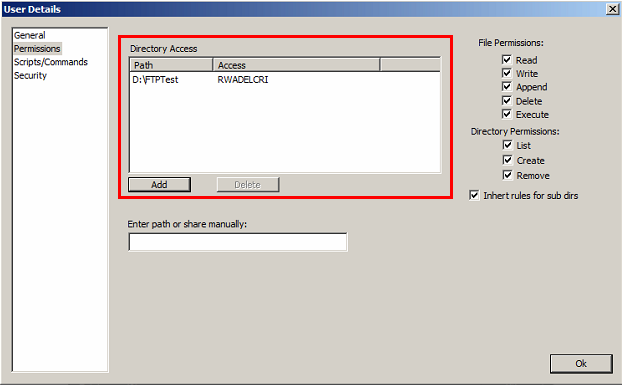
6. Click, "Permissions"
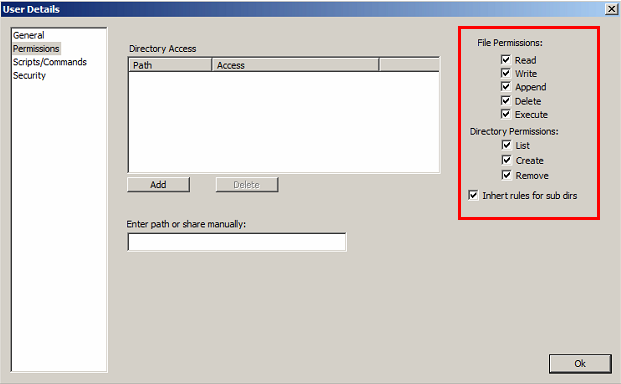
7. Check all the boxes on the right hand side.
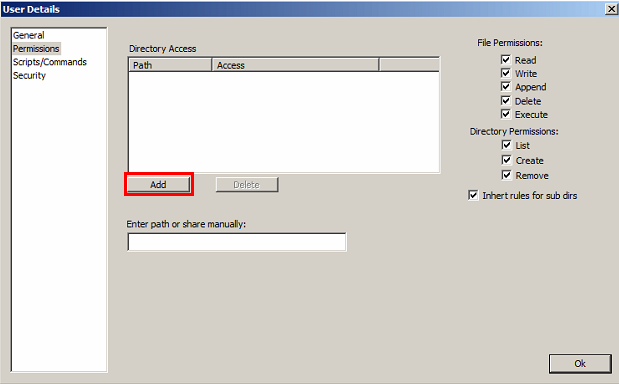
8. Click "Add" to select the directory you wish to use for FTP storage.
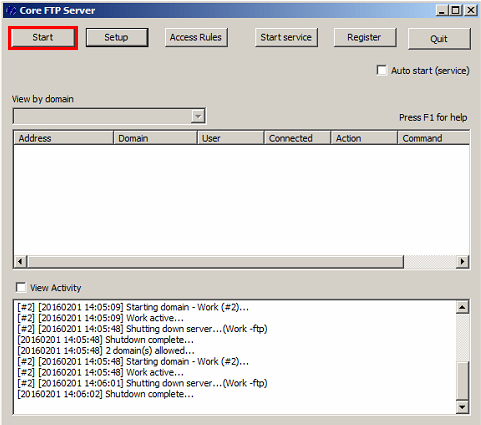
9. Click, "OK" twice to exit back to the main page. Then click, "Start"
10. Input your server's IP address into Internet Explorer to verify that the FTP is setup properly.
Example: ftp://172.16.16.54/
11. If everything is working properly, you should see a login box pop up. Input the credentials you created earlier and press, "Enter"
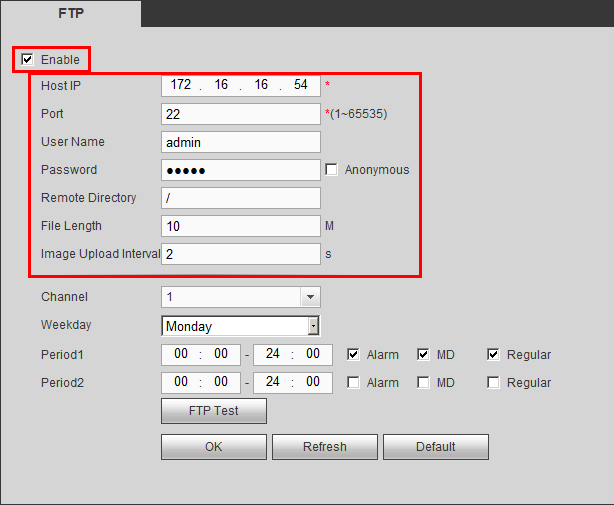
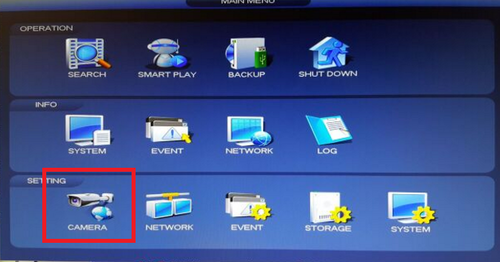
12. Log into an NVR or DVR and on the NVR or DVR, go to Main Menu -> Settings -> Network -> FTP and input the following:
Host IP: (Your FTP server's IP address)
User: (Your FTP server's user name)
Password: (Your FTP server's password)
Remote Directory: /
Check the boxes for each channel you wish to enable FTP recording on, and press, "OK"
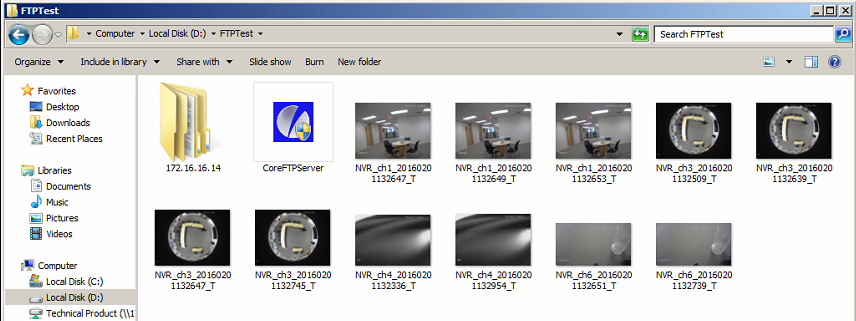
13. On the FTP server, go to the folder you specified when you setup CoreFTP and check that there are snapshots in that folder or subfolder.
Instructions
How To Setup FTP Snapshot
Please Note You must have an FTP currently set up for this to work.
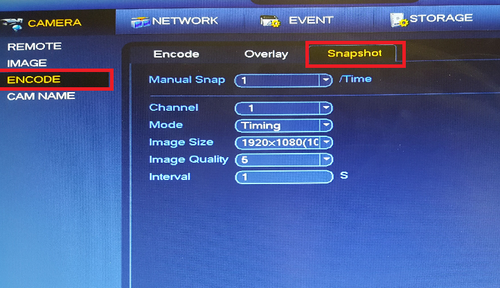
Step 1. From the Main Menu Select Camera > Encode > Snapshot
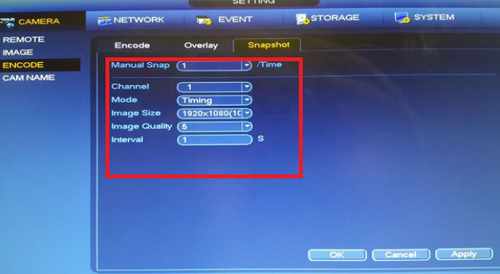
Step 2. Select Manual Snap Time. This selection will determine how many snapshots are taken at a time.> Select Channel you want snapshot enabled for > Select Mode Trigger or Timing. Trigger is for events such as motion detect or alarm. You can use timing to set periods for which day of the week and or time you want to snapshot > Select image size > select image quality > select interval > Select "Apply" > Select "OK"
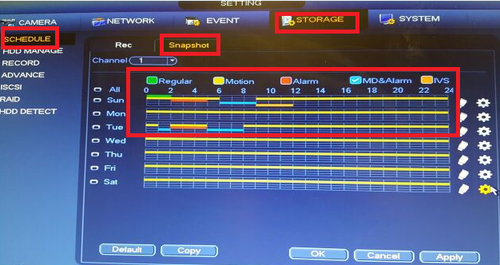
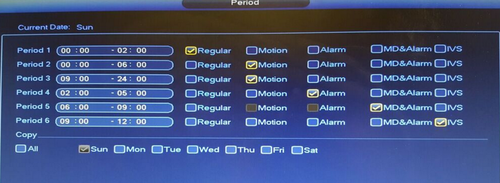
• For Timing Go to the Storage tab > Select Schedule Select Snapshot > Choose which type of event snap shot such as motion, alarm and or IVS if model has IVS capabilities. > Set schedule for which event for the periods, days and hours you wany snapshots set for.
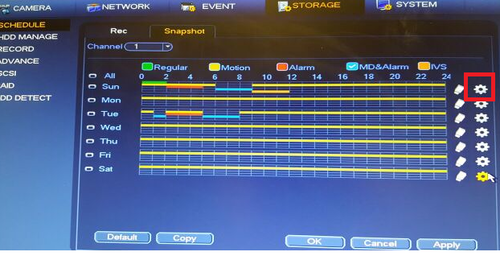
• You can also set the schedule by selecting the settings icon.
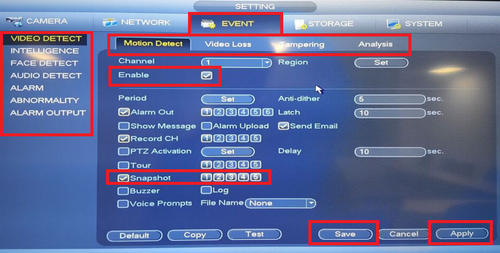
•For Trigger Go to Event tab > Choose event type > Check Enable > Check Snapshot and channels > Repeat process for the different types of events > Apply > Save
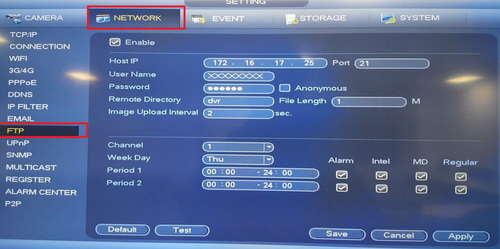
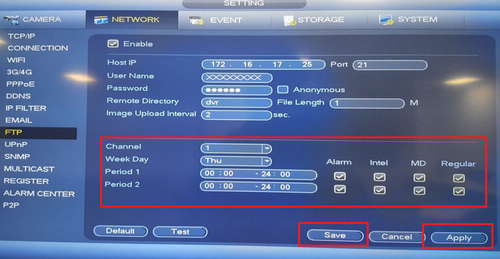
Step 3. Select Network Tab > Select FTP
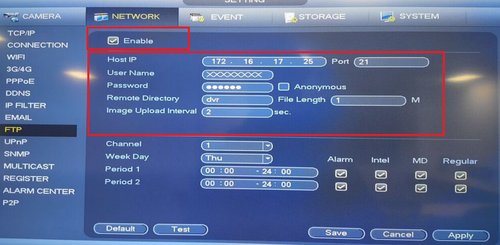
Step 4. Check Enable > FTP Server address > Input Username > Input Password
Step 5.Select Channel or all channels > Select Day or all Days > Input period times > Check off event types such as Alarm or Intel > Click "Apply" > Click "Save"
How to Setup DSS Express FTP Settings
Description
Enable FTP, device uploads alarm snapshot to FTP. FTP is provided by platform, you also can set FTP created by FTP.
Alarm picture uploaded to FTP will be saved 30 days by default.
If free space is below 10G, the system auto clears space until space is over 10G.
Prerequisites
- DSS Express S
Video Instructions
Step by Step Instructions
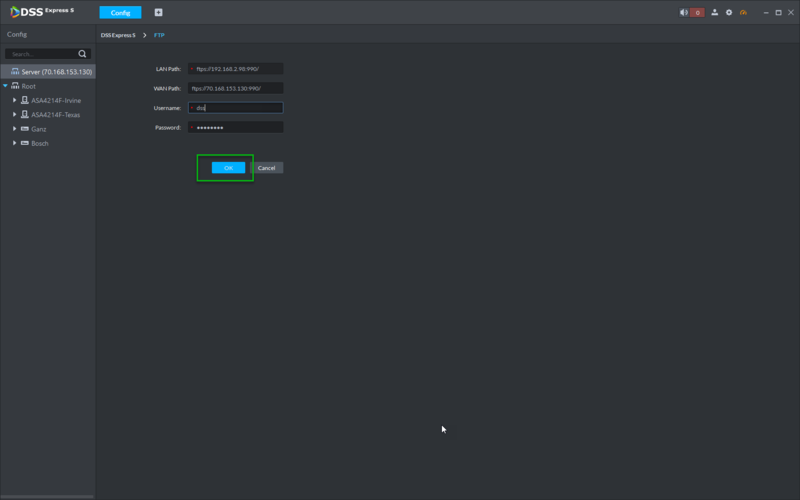
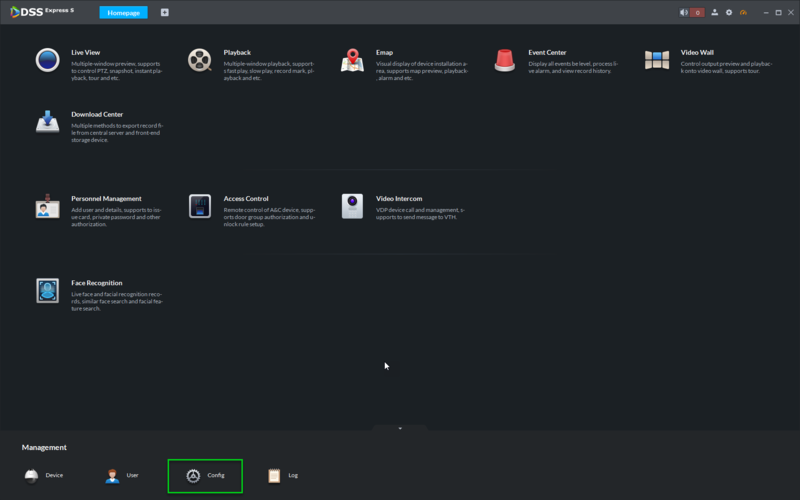
1. From the DSS Express Client, click, "Config"
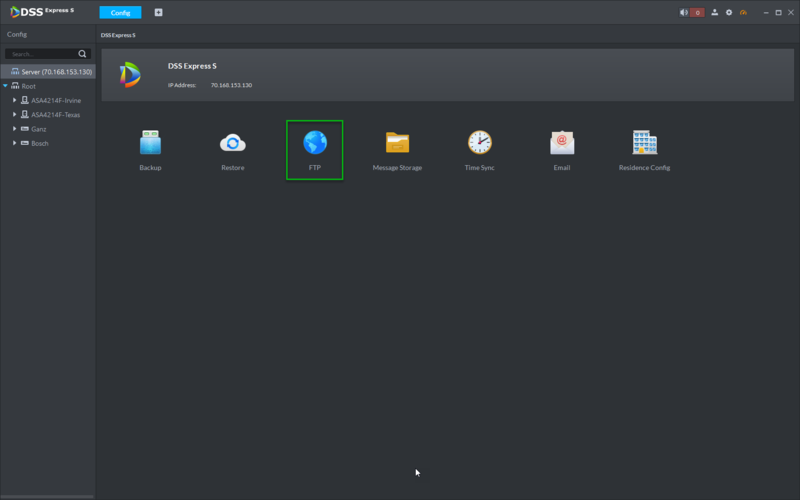
2. Click, "FTP"
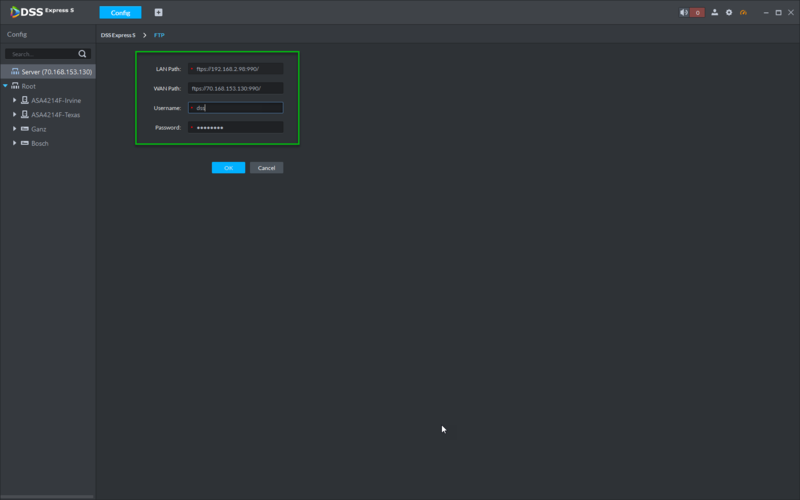
3. Here you can specify the FTP server information.
4. Click, "OK" to save your changes.
