Difference between revisions of "Auto Track"
| Line 17: | Line 17: | ||
|- style="font-weight:bold; font-size:large;" | |- style="font-weight:bold; font-size:large;" | ||
| Set Up | | Set Up | ||
| − | |||
| − | |||
|- style="font-size:small;" | |- style="font-size:small;" | ||
| Set Up PTZ Auto Tracking on your device using various interfaces. <br /><br />[[Abandoned_Missing_Object#Instructions|> How To Set Up PTZ Auto Track]] | | Set Up PTZ Auto Tracking on your device using various interfaces. <br /><br />[[Abandoned_Missing_Object#Instructions|> How To Set Up PTZ Auto Track]] | ||
| − | |||
| − | |||
|} | |} | ||
</center> | </center> | ||
Revision as of 22:16, 3 November 2020
| PTZ Auto Tracking | ||
|---|---|---|
| Set Up | ||
| Set Up PTZ Auto Tracking on your device using various interfaces. > How To Set Up PTZ Auto Track |
Contents
Instructions
Description
This article will cover how to configure an IVS Tripwire Alarm on a Dahua recorder with the Old SystemUI
Prerequisites
IP Camera with IVS added to an NVR, with the Old SystemUI, or an HDCVI Camera that is connected to a HDCVI DVR, with the Old SystemUI, that has IVS
Video Instructions
Step By Step Instructions
1. From the Main Menu select "Event" in the "Setting" section
2. Select "Smart Plan" on the left. Then select the camera channel at the top. Select and highlight "IVS" (You may need to deselect any other options). Select "Apply" and then "OK"
3. Select "IVS" on the left. Then choose the channel number at the top. Select "Add" at the bottom to create a new IVS alarm rule. Click on the drop-down menu under "Type" for the new rule you created and change set it to "Tripwire". Select the Pencil icon under "Draw"
4. Left click anywhere on the camera view to start the tripwire line. Left click anywhere else on the camera view to complete the segment of the line. Continue moving your mouse and left clicking to continue making multiple segments of the tripwire line. When done drawing the line segments, right click to finish the line. Give this rule a name by selecting the text box next to "Name" and typing in a name. Select the drop-down menu next to "Direction" to choose if the IVS alarm is triggered in both directions ("Both") or just one direction ("A To B" or "B To A")
5. When you are done configuring the Tripwire rules, select "OK".
6. Select the Gear icon under "Trigger" to configure what happens when the tripwire alarm is triggered: Period - Sets the time and days of the week this alarm can be triggered Alarm Out - Sets alarm outputs that will be activate when this alarm is triggered Latch - Sets how long the alarm outputs will stay activated when the alarm is triggered Send Email - Sends an email, via the settings set in the Email section of the Network settings on the recorder, when the alarm is triggered Record Channel - Sets which channels are recorded when the alarm is triggered PTZ Activation - Sets the behavior of a PTZ camera connected to the same recorder when the alarm is triggered Post-Record - Sets the amount of seconds that are recorded after the alarm event is done being triggered, if "Record Channel" is enabled Tour - Enables a tour when the alarm is triggered Buzzer - Makes the recorder emit an audible beeping noise when the alarm is triggered Log - Records the event information in the system log when the alarm is triggerd
Select "Apply" to save the settings
7. Select "Apply" to save the Tripwire IVS alarm settingsDescription
- Disclaimer - Auto Tracking and Panoramic view will not work simultaneously
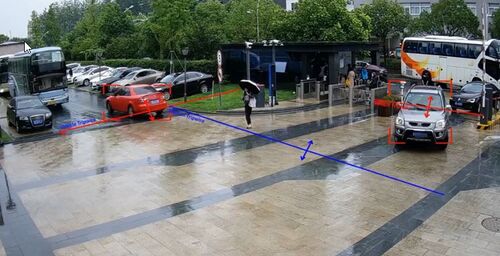
PTZ tracking is an innovative feature that transforms manually controlled PTZ cameras into automated tracking systems that keep an moving object in focus and centered in the frame. It follows the object where stationary cameras would lose the object once out of the fixed cameras field of view.
Prerequisites
- IVS and Auto-Tracking Capable PTZ -Model will end with an, "I" Example: SD6AE230F-HNI
Video Instructions
Step by Step Instructions
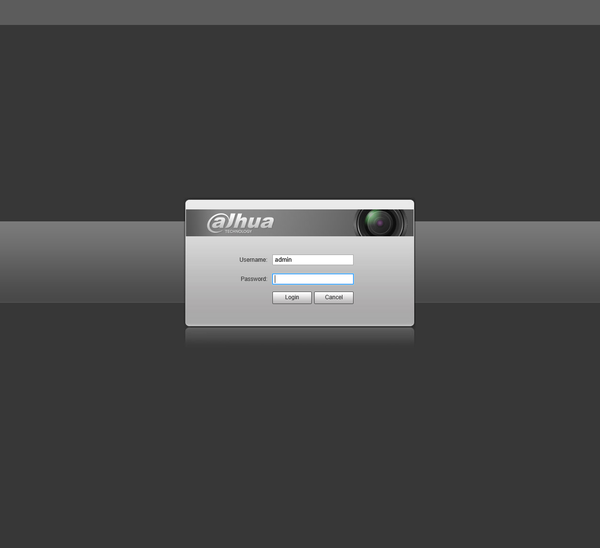
1. Login to your PTZ's web interface.
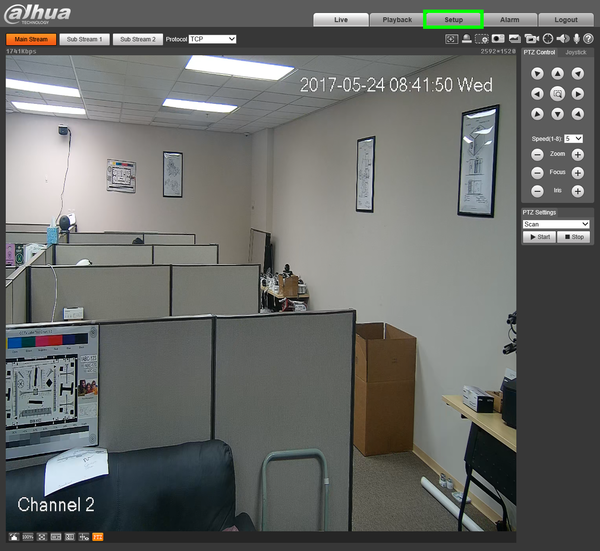
2. Click, "Setup"
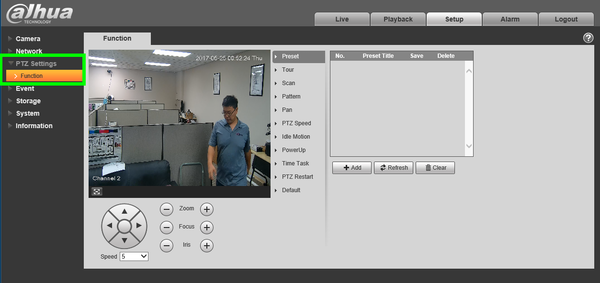
3. Click, "PTZ Settings" then, "Function"
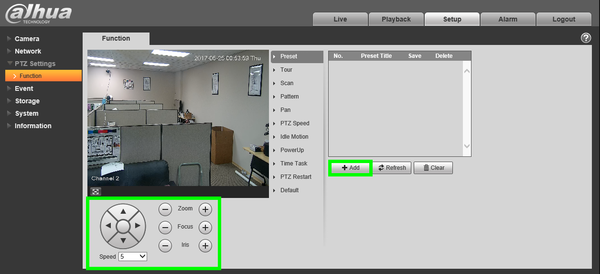
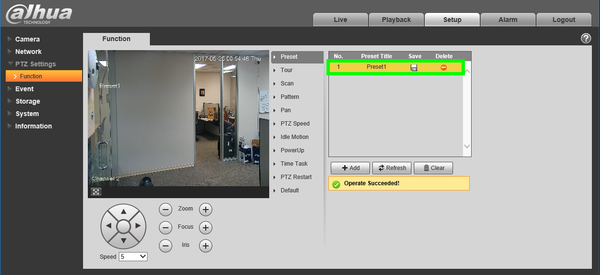
4. Click, "Preset" and use the arrows to position the camera in the desired position for your first preset, click, "Add" then click the save icon. Repeat for as many preset locations as you wish.
5. Click, "Save"
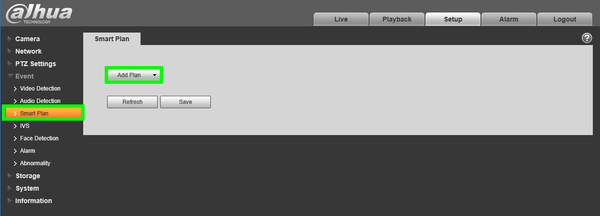
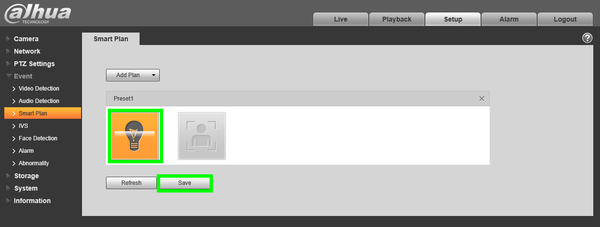
6. Click, "Event" then click, "Smart Plan"
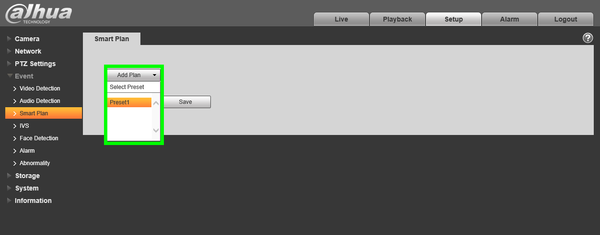
7. Click, "Add Plan" and select the preset you wish to establish with an IVS rule.
8. Select, "IVS" for the corresponding presets, and click, "Save"
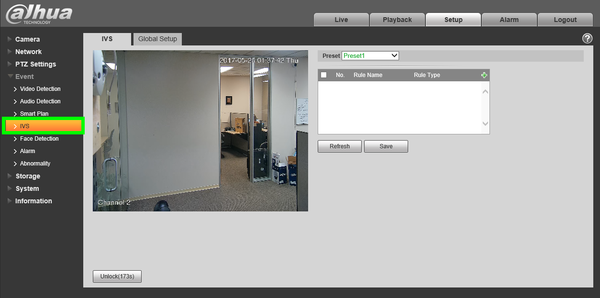
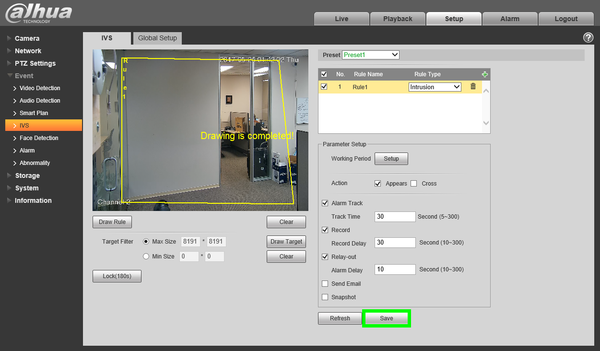
9. Under, "Event" click, "IVS"
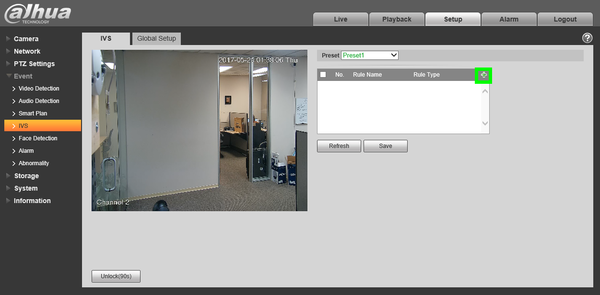
10. Click the plus sign in the upper right to add the IVS rule.
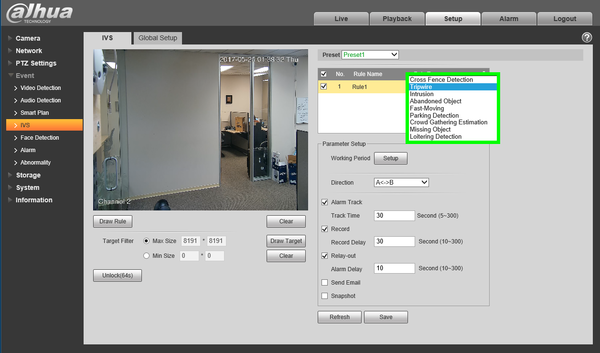
11. Select the rule type in the drop down menu.
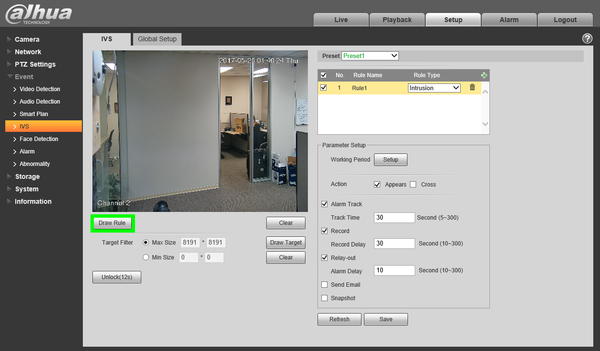
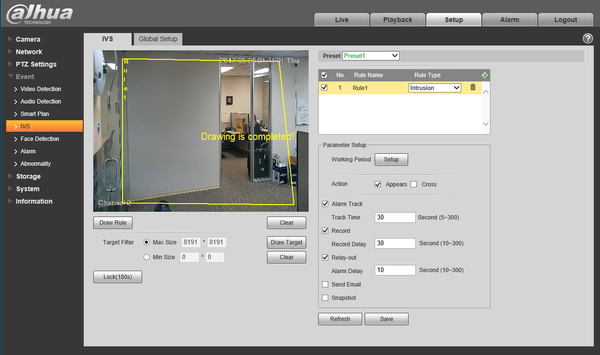
12. Click, "Draw Rule" and, using left-click, draw the region you wish to establish for the IVS rule. To finish drawing the rule, right click.
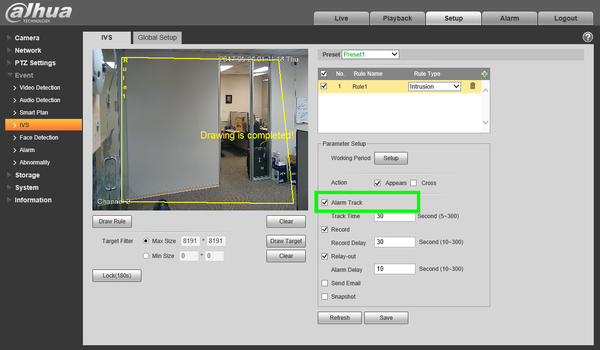
13. Check the box next to, "Alarm Track"
14. Click, "Save"
Description
This Article will cover the setup of IVS Auto Tracking using an N52B3P and a 59430UNI Network PTZ.
Prerequisites
- An NVR using the new Black interface.
- a PTZ Model that supports IVS Auto Tracking.
- Established Presets in the PTZ.
- A Windows PC on the same network as the NVR.
Video Instructions
Step By Step Instructions
Note: In order to set up IVS auto Tracking a preset will need to be created in the camera prior to set up. In in this guide it will be assumed that a preset exists already, for assistance on how to set up a preset, visit PTZ Setup
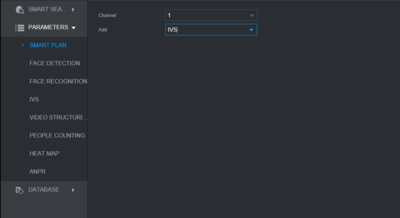
1. From the main page of the recorder web UI, select AI as shown in the image below, and choose Parameters in the left-hand menu.
2. Under Parameters, select Smart Plan in this section define the PTZ channel as well as the preset which can be set through the Add drop down. Once camera and preset have been set, be sure to click OK in the bottom right to save.
3. Next, select IVS under parameters and use the + to add a rule, this example will be using Intrusion with both Appear and Cross selected. Direction will be set to both which will use both options of Enter & Exit. Click OK to save.
