Difference between revisions of "NVR/Recording Setup/Time Lapse"
(→Configure Snapshot Recording) |
|||
| Line 1: | Line 1: | ||
=Time Lapse Recording= | =Time Lapse Recording= | ||
==Description== | ==Description== | ||
| − | This guide will show how to set up continuous Snapshot recording for a Dahua recorder to enable the ability to export snapshot images and create a time lapse video. | + | This guide will show how to set up continuous Snapshot recording for a Dahua recorder and camera to enable the ability to export snapshot images and create a time lapse video. |
==Prerequisites== | ==Prerequisites== | ||
| − | * Dahua recorder | + | * Dahua recorder with camera added |
* PC running Windows | * PC running Windows | ||
| Line 17: | Line 17: | ||
[[File:Time Lapse Video Using Snapshot Guide - 1.jpg|800px]] | [[File:Time Lapse Video Using Snapshot Guide - 1.jpg|800px]] | ||
| + | |||
| + | 2. Click Encode | ||
| + | |||
| + | Select the Snapshot tab | ||
[[File:Time Lapse Video Using Snapshot Guide - 2.jpg|800px]] | [[File:Time Lapse Video Using Snapshot Guide - 2.jpg|800px]] | ||
| + | |||
| + | 3. Use the drop-down box to select the Channel/camera to record | ||
[[File:Time Lapse Video Using Snapshot Guide - 3.jpg|800px]] | [[File:Time Lapse Video Using Snapshot Guide - 3.jpg|800px]] | ||
| + | |||
| + | 4. Use the drop-down box next to Interval to select Custom | ||
[[File:Time Lapse Video Using Snapshot Guide - 4.jpg|800px]] | [[File:Time Lapse Video Using Snapshot Guide - 4.jpg|800px]] | ||
| + | |||
| + | 5. Enter a time range, in seconds from 8-3600 in the field. | ||
| + | |||
| + | This will be the interval snapshots are taken. | ||
[[File:Time Lapse Video Using Snapshot Guide - 5.jpg|800px]] | [[File:Time Lapse Video Using Snapshot Guide - 5.jpg|800px]] | ||
| + | |||
| + | Click OK to save | ||
[[File:Time Lapse Video Using Snapshot Guide - 6.jpg|800px]] | [[File:Time Lapse Video Using Snapshot Guide - 6.jpg|800px]] | ||
| + | |||
| + | 6. Click Setting > Storage | ||
[[File:Time Lapse Video Using Snapshot Guide - 7.jpg|800px]] | [[File:Time Lapse Video Using Snapshot Guide - 7.jpg|800px]] | ||
| + | |||
| + | 7. Select Schedule | ||
| + | |||
| + | Select the Snapshot tab | ||
[[File:Time Lapse Video Using Snapshot Guide - 8.jpg|800px]] | [[File:Time Lapse Video Using Snapshot Guide - 8.jpg|800px]] | ||
| + | |||
| + | 8. Use the drop-down box to select the channel/camera | ||
| + | |||
| + | Click Setting | ||
[[File:Time Lapse Video Using Snapshot Guide - 9.jpg|800px]] | [[File:Time Lapse Video Using Snapshot Guide - 9.jpg|800px]] | ||
| + | |||
| + | 9. Select the days and time to record (all) and General record type selected | ||
| + | |||
| + | Click OK to save | ||
[[File:Time Lapse Video Using Snapshot Guide - 10.jpg|800px]] | [[File:Time Lapse Video Using Snapshot Guide - 10.jpg|800px]] | ||
| + | |||
| + | Click OK to save | ||
[[File:Time Lapse Video Using Snapshot Guide - 11.jpg|800px]] | [[File:Time Lapse Video Using Snapshot Guide - 11.jpg|800px]] | ||
| + | |||
| + | 10. Select Record Mode | ||
| + | |||
| + | Enable the Snapshot for the Channel/camera number | ||
| + | |||
| + | Toggle to On | ||
| + | |||
| + | Click OK | ||
[[File:Time Lapse Video Using Snapshot Guide - 12.jpg|800px]] | [[File:Time Lapse Video Using Snapshot Guide - 12.jpg|800px]] | ||
Revision as of 23:35, 5 February 2021
Contents
Time Lapse Recording
Description
This guide will show how to set up continuous Snapshot recording for a Dahua recorder and camera to enable the ability to export snapshot images and create a time lapse video.
Prerequisites
- Dahua recorder with camera added
- PC running Windows
Video Instructions
Step by Step Instructions
Configure Snapshot Recording
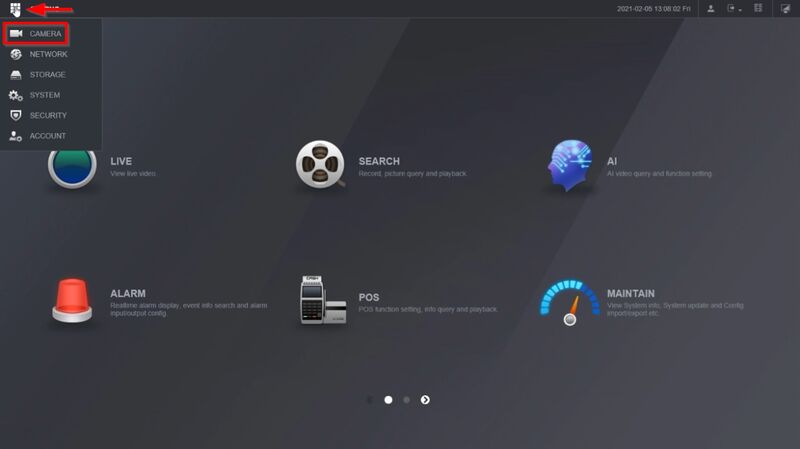
1. Log into the NVR
Select the Camera menu
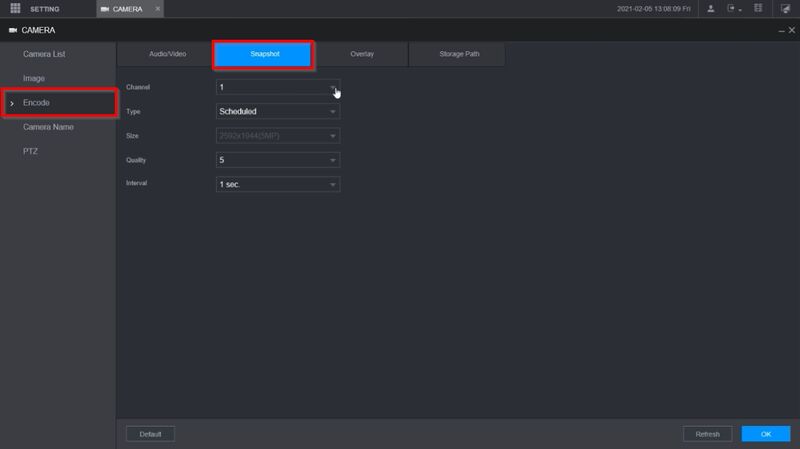
2. Click Encode
Select the Snapshot tab
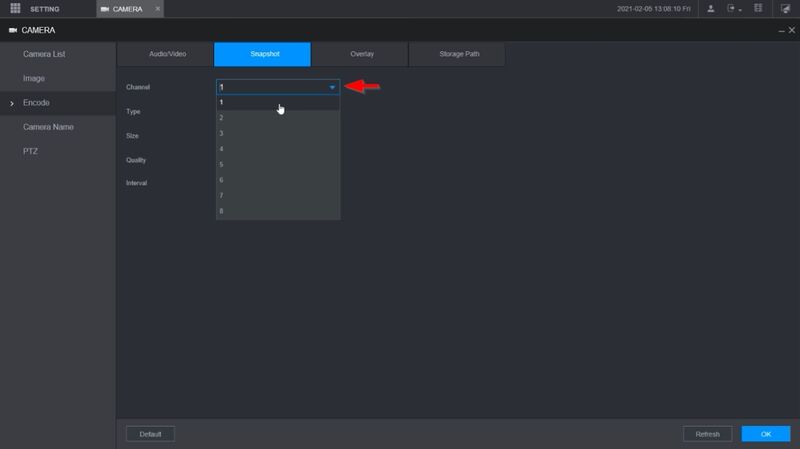
3. Use the drop-down box to select the Channel/camera to record
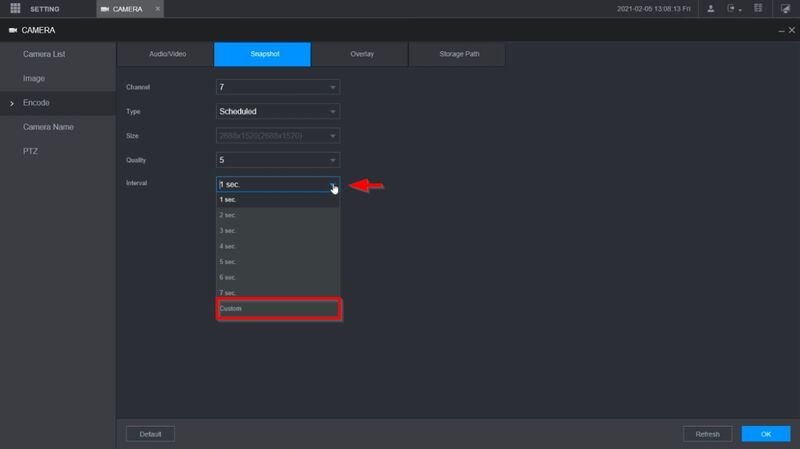
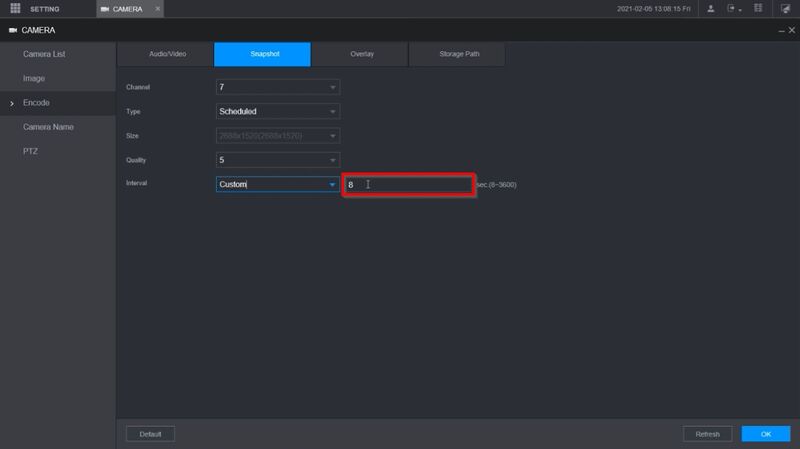
4. Use the drop-down box next to Interval to select Custom
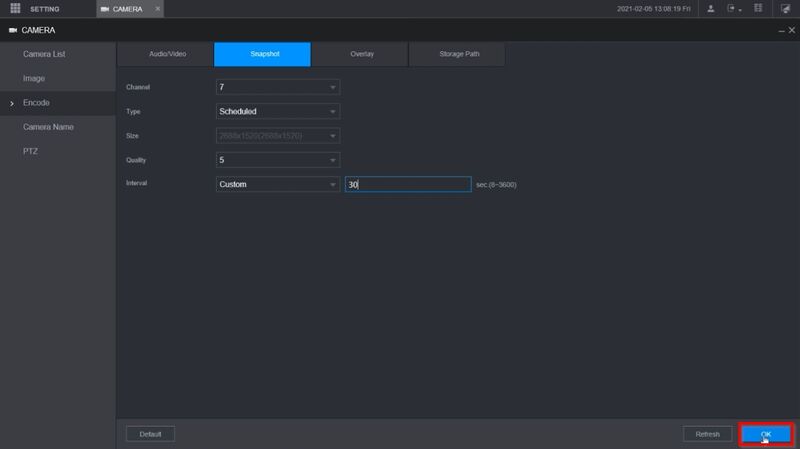
5. Enter a time range, in seconds from 8-3600 in the field.
This will be the interval snapshots are taken.
Click OK to save
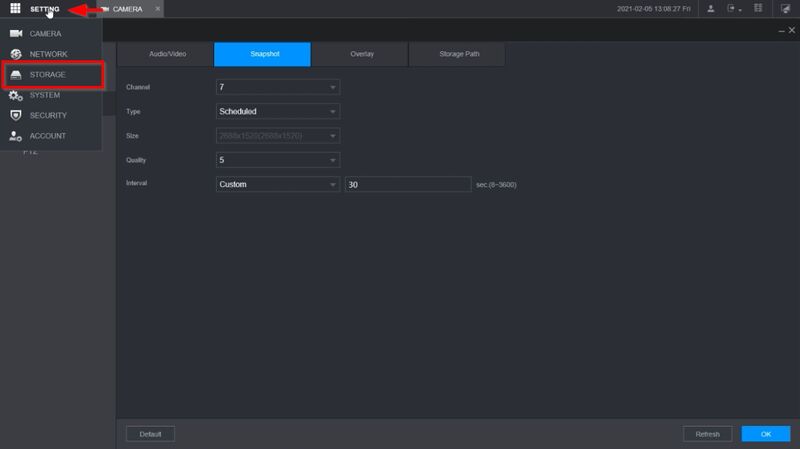
6. Click Setting > Storage
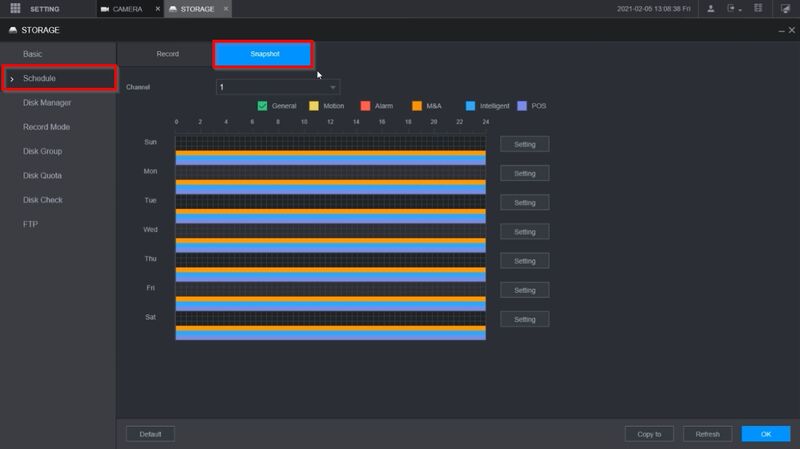
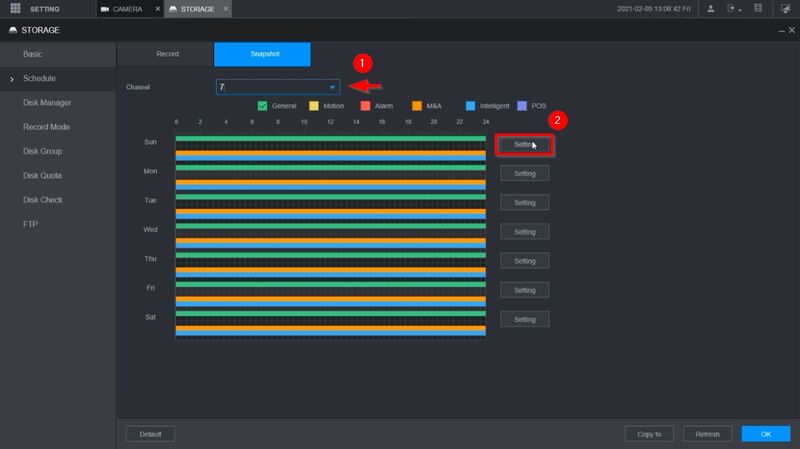
7. Select Schedule
Select the Snapshot tab
8. Use the drop-down box to select the channel/camera
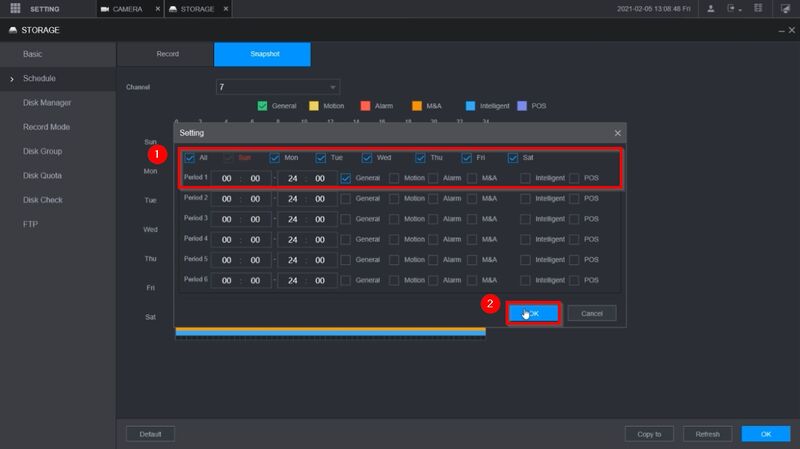
Click Setting
9. Select the days and time to record (all) and General record type selected
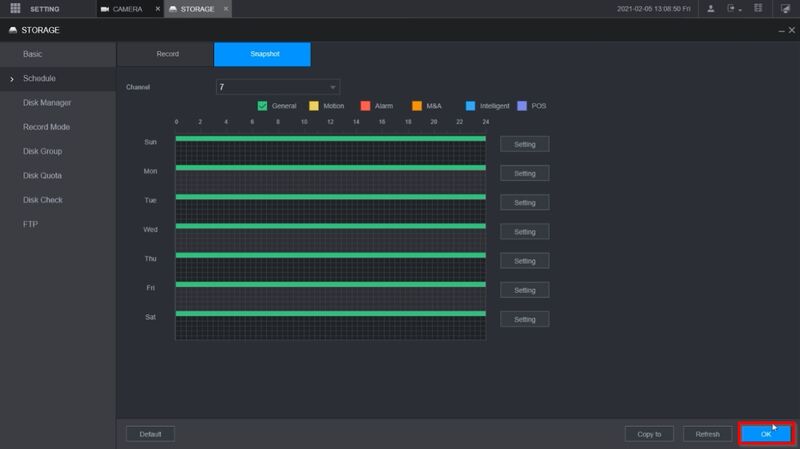
Click OK to save
Click OK to save
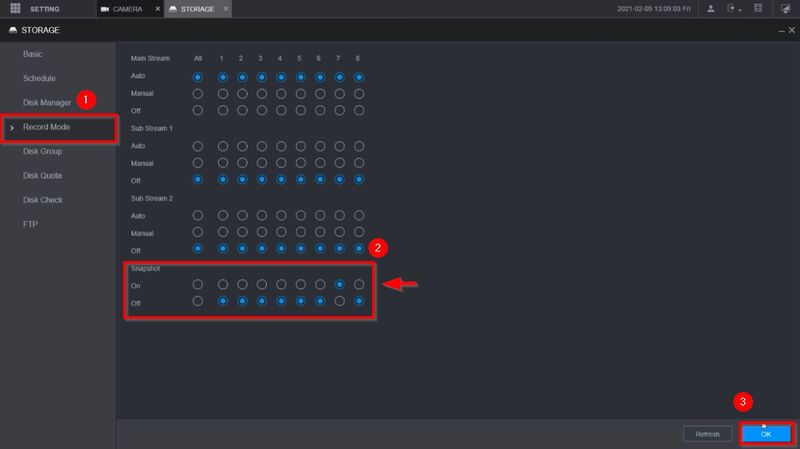
10. Select Record Mode
Enable the Snapshot for the Channel/camera number
Toggle to On
Click OK
