Difference between revisions of "Solution Delivery/Integrating Video Intercom with Acccess Control"
| Line 14: | Line 14: | ||
===Physical Wiring=== | ===Physical Wiring=== | ||
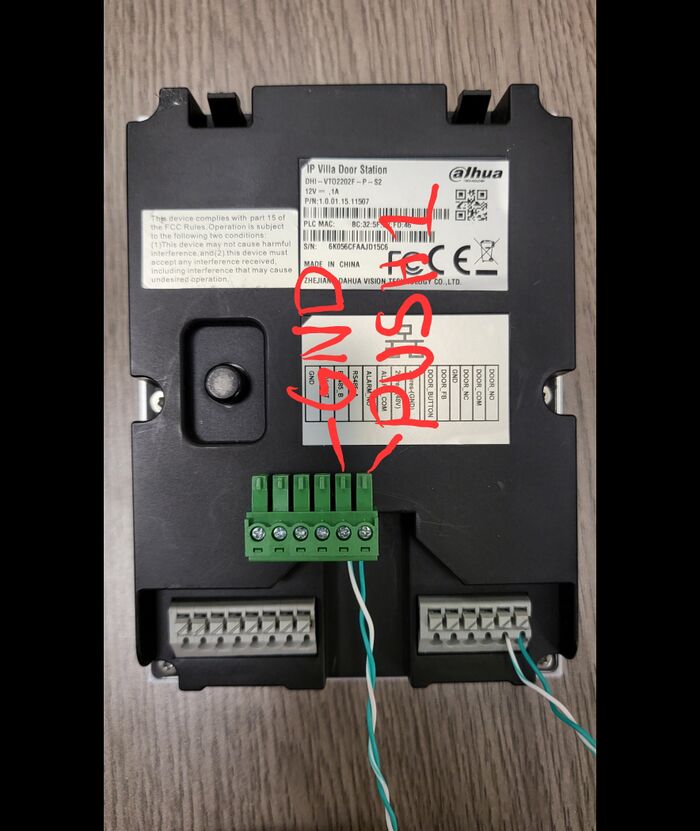
| − | 1. | + | 1. Wire the '''Door_NO''' relay to the PUSH1 of the Access control and Wire the '''Door_COM''' |
[[File:How to integrate video intercom with access control-1.jpg|700px]] | [[File:How to integrate video intercom with access control-1.jpg|700px]] | ||
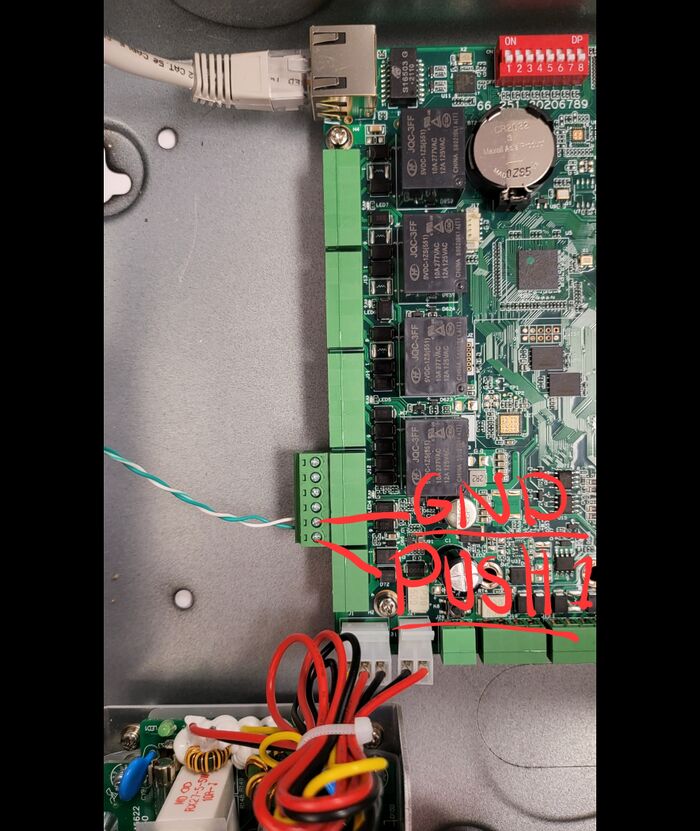
| − | 2. | + | 2. Insert the connector to the Access Control |
[[File:How to integrate video intercom with access control-2.jpg|700px]] | [[File:How to integrate video intercom with access control-2.jpg|700px]] | ||
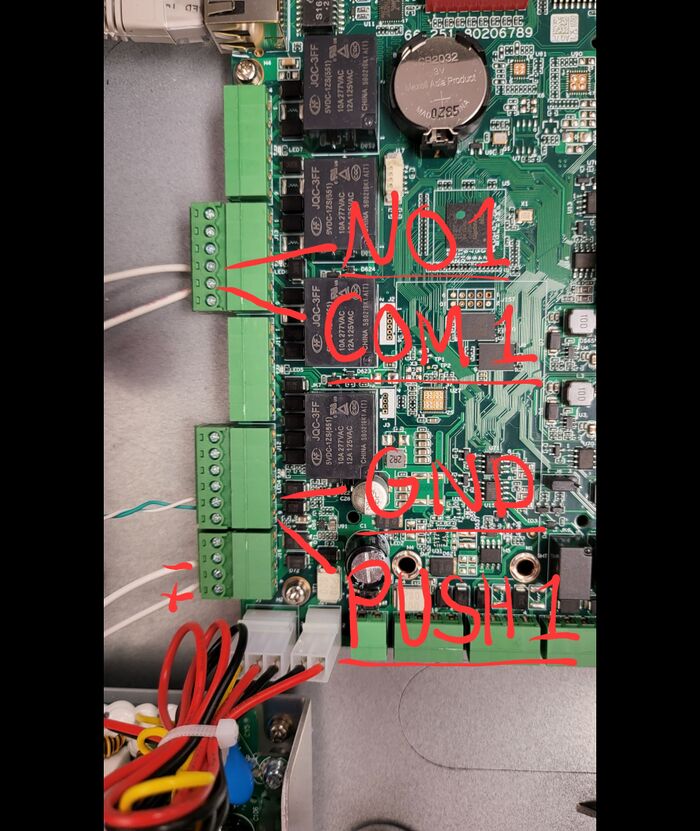
| − | 3. | + | 3. Then Wire your door to your controller. Our "Door" is a Normally Opened device so we will wire the Door to '''NO1''' and '''COM1''' |
[[File:How to integrate video intercom with access control-3.jpg|700px]] | [[File:How to integrate video intercom with access control-3.jpg|700px]] | ||
Revision as of 15:36, 8 October 2021
Contents
Description
This article will show how to wire the Normally Opened relay on the Video Intercom to the PUSH connection on our Access Control. This will act as a Request to Exit button when the door on the Video intercom is triggered.
The Video Intercom relays can be triggered from a VTH or through DMSS. In this tutorial we'll be using a siren/light to act as a door activating on Normally Open relay 1. We will be wiring the Normally Open Relay from the Video Intercom to "PUSH1" to act as a REX for NO1/NC1 on the access Controller
Prerequisites
- Access Controller
- Dahua Video Intercom Setup
Step by Step Instructions
Physical Wiring
1. Wire the Door_NO relay to the PUSH1 of the Access control and Wire the Door_COM
2. Insert the connector to the Access Control
3. Then Wire your door to your controller. Our "Door" is a Normally Opened device so we will wire the Door to NO1 and COM1


