Difference between revisions of "IVSS/IVSS Recording Plan"
(Created page with "=IVSS Recording Plan= ==Description== This article will cover how to setup the Recording Plan on an IVSS Recorder ==Prerequisites== *A Dahua IVSS Recorder with at least 1 HD...") |
(No difference)
|
Revision as of 19:31, 29 March 2022
IVSS Recording Plan
Description
This article will cover how to setup the Recording Plan on an IVSS Recorder
Prerequisites
- A Dahua IVSS Recorder with at least 1 HDD installed and configured:
How to Initialize HDDs for Recording
Step by Step Instructions
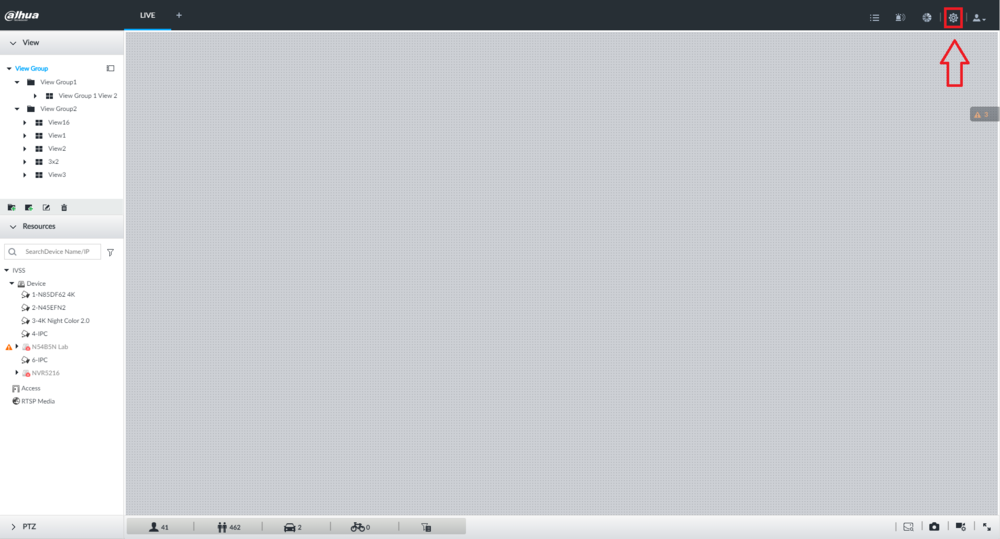
1. From the main screen of the IVSS system, select the gear icon at the top right.
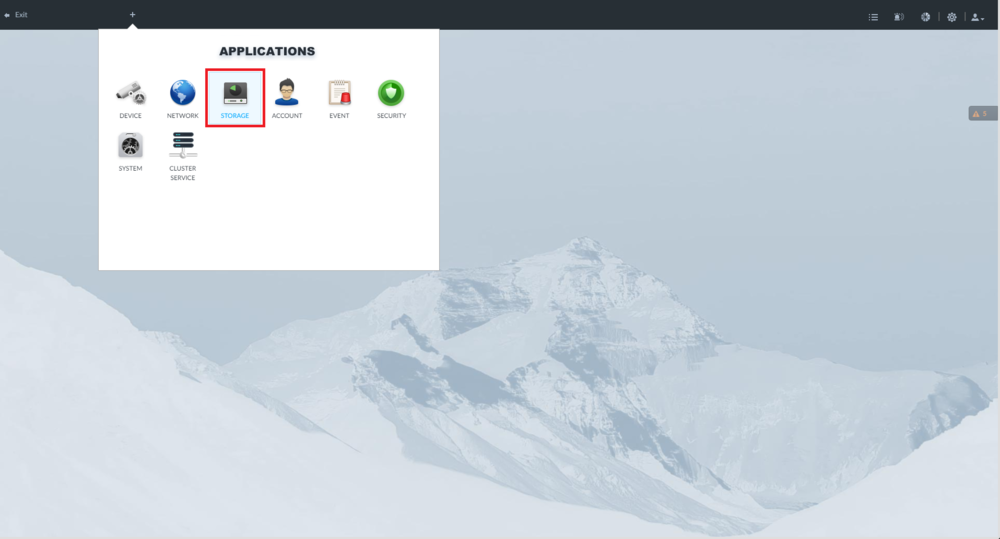
2. Select "Storage" from the Applications page.
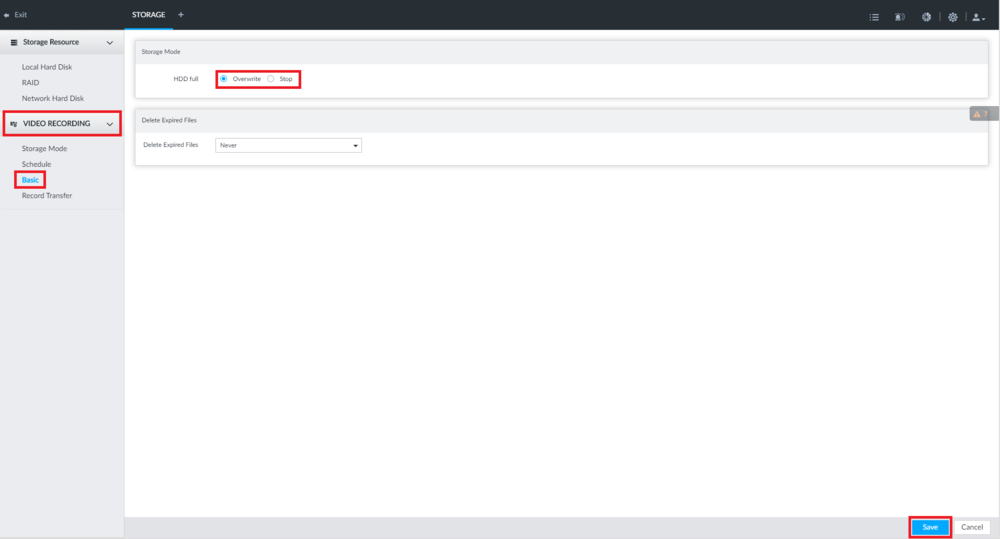
3. Select "Video Recording" on the left, then select "Basic".
You can choose what happens to recorded files when the HDDs fill up.
Either select "Overwrite" to have the oldest files deleted and written over when the HDDs fill up
or select "Stop" to have recordings stop saving when all the HDDs are full.
After finishing changes, select "Save" at the bottom right.
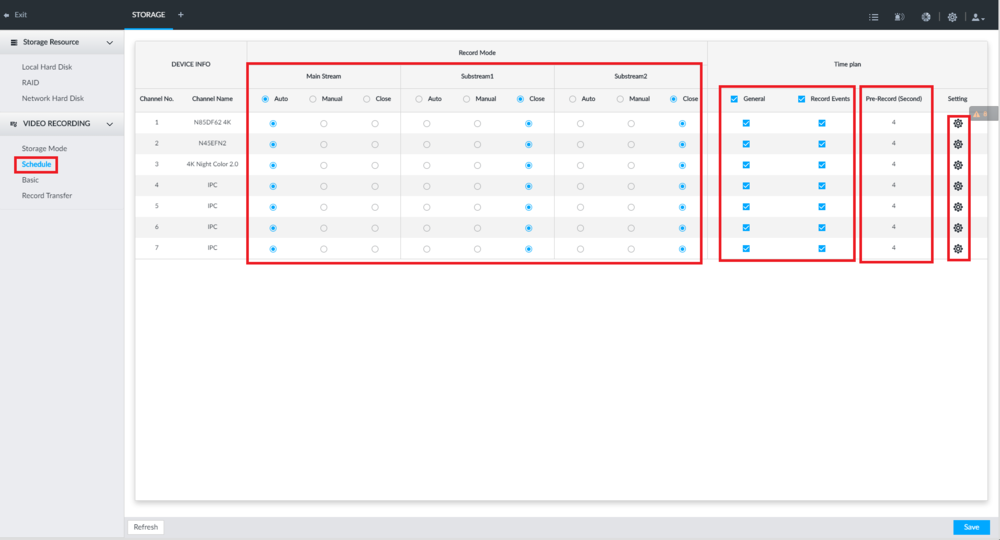
4. Select "Schedule" on the left.
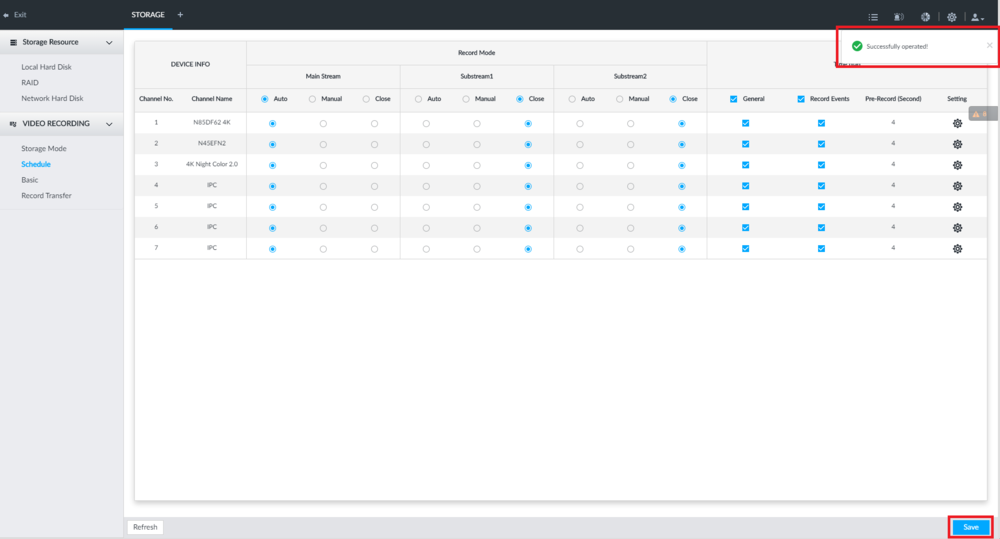
You can adjust which streams of each camera record to the IVSS by setting each stream, under "Record Mode", to either "Auto" to make it follow the schedule and events or "Close" to stop recording at all.
To set if a specific camera records on the General schedule and/or via Events, check the boxes under "Time Plan" for either "Genearl", "Record Events", or both.
You can also adjust the pre-record time for events by double clicking on the amount of seconds under "Pre-Record (Second)" and typing in the preferred number of seconds.
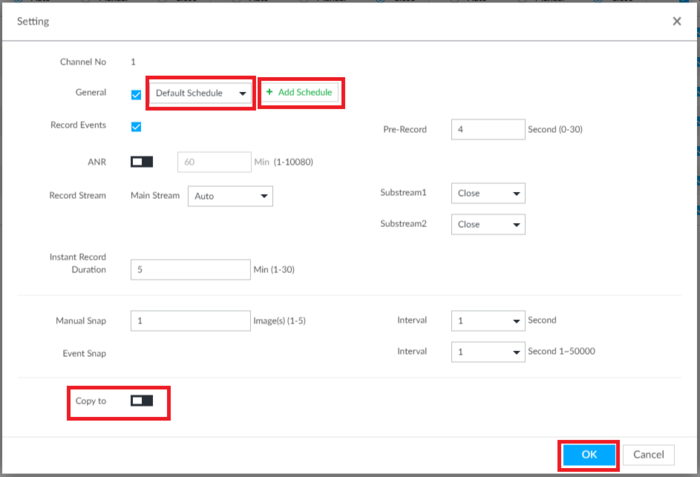
To adjust more recording settings for a camera click on the Gear icon on the right under "Setting".
5. To adjust the General schedule for this camera, click the drop-down to the right of "General". Then select the schedule you want the camera to record on.
Additionally if you want to create a new schedule for recording, select "Add Schedule".
When you are done making changes, if you want to copy them to any other camera, enable the slider next to "Copy to" and then select the channels to copy the settings to.
To save all your changes, select "OK" at the bottom.
6. Select "Save" at the bottom right.
Once you see "Successfully Operated" at the top, you changes will be saved.
