|
|
| Line 5: |
Line 5: |
| | ==How to Guides== | | ==How to Guides== |
| | | | |
| − | ===How to use Dahua AcuPick - Quick Search for Human target===
| + | [[NVR/Instructions/AcuPick_Search_LocalUI | AcuPick Search on Local UI]] |
| − | | |
| − | ====Description====
| |
| − | This guide will show you how to use AcuPick to search for a human target from the recorded footage on an NVR
| |
| − | | |
| − | ====Prerequisites====
| |
| − | * One or more Dahua Cameras with AcuPick
| |
| − | * A Dahua NVR with AcuPick
| |
| − | | |
| − | ====Video Instructions====
| |
| − | <embedvideo service="youtube">https://www.youtube.com/watch?v=AAF0WZLmEag</embedvideo>
| |
| − | | |
| − | ====Step by Step Instructions====
| |
| − | 1. From the live view on the NVR's local interface, right click anywhere on the screen and select '''Search'''
| |
| − | | |
| − | [[file:AcuPickHumanTargetSearch1.png|1000px]]
| |
| − | | |
| − | 2. Check the box for a single camera on the right. ('''Please Note:''' AcuPick will only function if only 1 camera is selected.)
| |
| − | <br>Select a date at the top right that has a dot underneath it.
| |
| − | <br>Then click on the timeline to start playing recorded footage.
| |
| − | <br>Make sure the AI Data Icon is selected above the timeline
| |
| − | | |
| − | [[file:AcuPickHumanTargetSearch2.png|1000px]]
| |
| − | | |
| − | 3. Once you find the person you want to track, press the AcuPick icon right above the timeline.
| |
| − | <br>Then click on the blue box around the person.
| |
| − | <br>And click on the Magnifying Glass icon below the blue box
| |
| − | | |
| − | [[file:AcuPickHumanTargetSearch3.png|1000px]]
| |
| − | | |
| − | 4. Select which channels you want to search from the '''Channel''' drop-down.
| |
| − | <br>Adjust the time period from the '''Period''', '''Start Time''', and '''End Time''' options.
| |
| − | <br>When you are done adjusting those settings, click on '''Search''' to refine the search results.
| |
| − | <br>Adjust the '''Similarity''' slider at the top to a value that shows the most accurate results for the person you are searching for
| |
| − | | |
| − | [[file:AcuPickHumanTargetSearch4.png|1000px]] | |
| − | | |
| − | 5. Double-click on any of the result images to play a recorded clip.
| |
| − | <br>It will automatically play 10 seconds before and 10 seconds after the event. (This amount of time can be adjusted at the bottom right while the video is playing.)
| |
| − | | |
| − | [[file:AcuPickHumanTargetSearch5.png|1000px]]
| |
| − | | |
| − | 6. Double-click on the video playback to make it fullscreen
| |
| − | | |
| − | [[file:AcuPickHumanTargetSearch6.png|1000px]]
| |
| − | | |
| − | ===How to use Dahua AcuPick - Quick Search for Human target who took a missing object===
| |
| − | | |
| − | ====Description====
| |
| − | This guide will show you how to use AcuPick to search for a human target, based on a missing object filter, from the recorded footage on an NVR
| |
| − | | |
| − | ====Prerequisites====
| |
| − | * One or more Dahua Cameras with AcuPick
| |
| − | * A Dahua NVR with AcuPick
| |
| − | | |
| − | ====Video Instructions====
| |
| − | <embedvideo service="youtube">https://www.youtube.com/watch?v=7bMvfC9bci0</embedvideo>
| |
| − | | |
| − | ====Step by Step Instructions====
| |
| − | 1. From the live view on the NVR's local interface, right click anywhere on the screen and select '''Search'''
| |
| − | | |
| − | [[file:AcuPickHumanTargetSearchMissingObject1.png|1000px]]
| |
| − | | |
| − | 2. Check the box for a single camera on the right. ('''Please Note:''' AcuPick will only function if only 1 camera is selected.)
| |
| − | <br>Select a date at the top right that has a dot underneath it.
| |
| − | <br>Then click on the timeline to start playing recorded footage.
| |
| − | <br>Make sure the AI Data Icon is selected above the timeline
| |
| − | | |
| − | [[file:AcuPickHumanTargetSearchMissingObject2.png|1000px]]
| |
| − | | |
| − | 3. Once you find the object that went missing, click the AI Filter Icon above the timeline.
| |
| − | <br>Then check the '''Human''' box.
| |
| − | | |
| − | [[file:AcuPickHumanTargetSearchMissingObject3.png|1000px]]
| |
| − | | |
| − | 4. Draw a box around the object that went missing.
| |
| − | <br>Then click the Magnifying Glass Icon below the box you drew
| |
| − | | |
| − | [[file:AcuPickHumanTargetSearchMissingObject4.png|1000px]]
| |
| − | | |
| − | 5. The timeline will change to show only when a person walked through the box you drew in the previous step.
| |
| − | <br>Click through the footage until you find the moment the object was taken.
| |
| − | <br>Once you find the person that took the object, press the AcuPick icon right above the timeline.
| |
| − | <br>Then click on the blue box around the person.
| |
| − | <br>And click on the Magnifying Glass icon below the blue box
| |
| − | | |
| − | [[file:AcuPickHumanTargetSearchMissingObject5.png|1000px]]
| |
| − | | |
| − | 6. Select which channels you want to search from the '''Channel''' drop-down.
| |
| − | <br>Adjust the time period from the '''Period''', '''Start Time''', and '''End Time''' options.
| |
| − | <br>When you are done adjusting those settings, click on '''Search''' to refine the search results.
| |
| − | <br>Adjust the '''Similarity''' slider at the top to a value that shows the most accurate results for the person you are searching for
| |
| − | | |
| − | [[file:AcuPickHumanTargetSearchMissingObject6.png|1000px]]
| |
| − | | |
| − | 7. Double-click on any of the result images to play a recorded clip
| |
| − | <br>It will automatically play 10 seconds before and 10 seconds after the event. (This amount of time can be adjusted at the bottom right while the video is playing.)
| |
| − | | |
| − | [[file:AcuPickHumanTargetSearchMissingObject7.png|1000px]]
| |
| − | | |
| − | 8. Double-click on the video playback to make it fullscreen
| |
| − | | |
| − | [[file:AcuPickHumanTargetSearchMissingObject8.png|1000px]]
| |
| | | | |
| | ==Devices== | | ==Devices== |
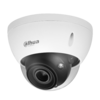
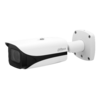
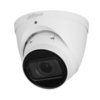
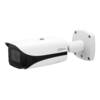
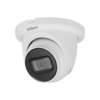
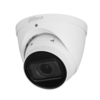
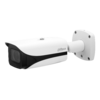
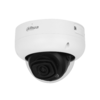
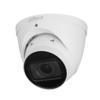
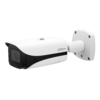
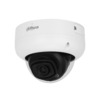
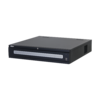
Save time and labor with just one pick with Dahua’s new game-changing AcuPick Search Technology! We are pleased to announce the release of Dahua’s NEW 4MP and 8MP AcuPick IP Camera Series.
Finding and tracking a specific person or vehicle of interest in security footage is a complex and laborious process. But, Dahua Technology’s AcuPick Search Technology is revolutionizing this process by making it quicker, easier, and more accurate to find targets. With just a single reference image, you can find, track, and identify a specific person or vehicle. The advanced AcuPick algorithm focuses on human body shape, clothing color, and other differentiators to find where a target has appeared in security footage captured by any AcuPick-enabled camera and NVR. Our new AI algorithm can find other instances of where the person or vehicle of interest was recorded based on a user-adjustable similarity setting.
