Difference between revisions of "SmartPSS/Access IVS Features"
| Line 7: | Line 7: | ||
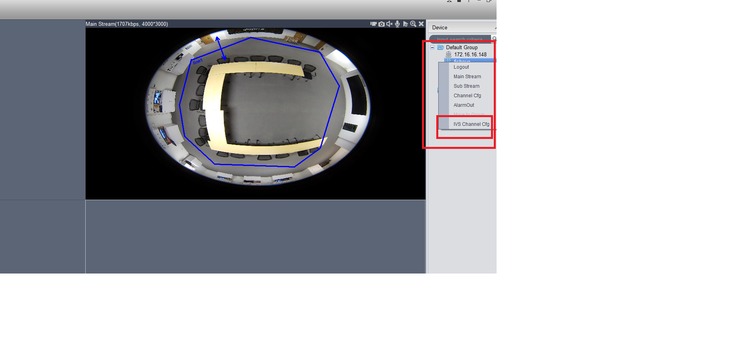
'''Step 2.''' On the right hand side menu select click on IVS capable camera and drag it into view > Right click to bring up sub menu > Select "IVS Channel Config" | '''Step 2.''' On the right hand side menu select click on IVS capable camera and drag it into view > Right click to bring up sub menu > Select "IVS Channel Config" | ||
| − | [[File:ivs_5.png| | + | [[File:ivs_5.png|750px]] |
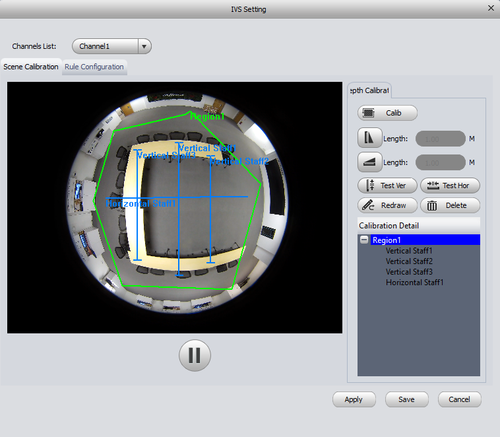
'''Step 3.''' Scene Calibration menu will now be opened > Select the "Calib" button. Draw Region 1 > right click on drawing when completed which will complete the drawing. | '''Step 3.''' Scene Calibration menu will now be opened > Select the "Calib" button. Draw Region 1 > right click on drawing when completed which will complete the drawing. | ||
Revision as of 18:18, 14 March 2016
How to Access IVS Features in SmartPSS
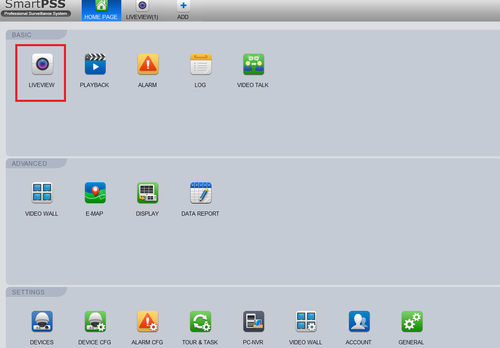
Step 1. From the Smart Pss home page select Live View.
Step 2. On the right hand side menu select click on IVS capable camera and drag it into view > Right click to bring up sub menu > Select "IVS Channel Config"
Step 3. Scene Calibration menu will now be opened > Select the "Calib" button. Draw Region 1 > right click on drawing when completed which will complete the drawing.


