Mobile/iDMSS IP Setup
NOTICE
Notice of Discontinuation of iDMSS and gDMSS
How to Access System Using IP/Domain via Mobile Application
Description
View your recorder and cameras on the go. With Dahua's mobile application IDMSS(IOS) GDMSS(Android) allows you to add Dahua recorders and Dahua IP cameras to the mobile app using the IP address of Dahua devices.
Prerequisites
- Smartphone (IOS device or Android)
- Cameras/NVR/DVRs User name and Passwords
- iDMSS/gDMSS
- TCP port must be forwarded on router if viewing off local network .
Video Instructions
Step by Step Instructions IDMSS/GDMSS version 4.80.001
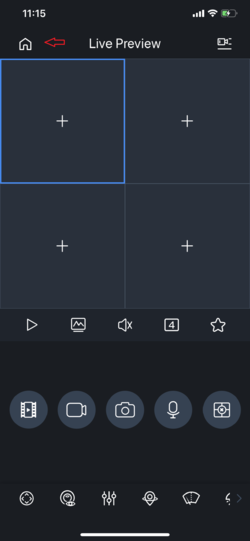
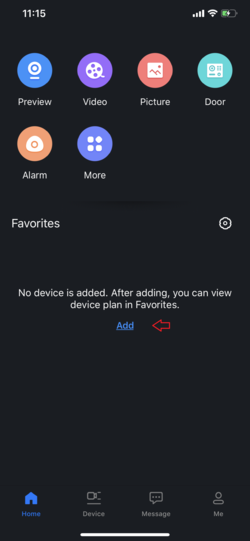
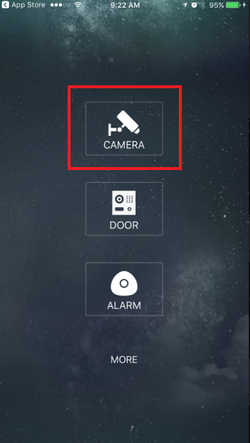
1. From the home screen of the mobile application select "Camera".
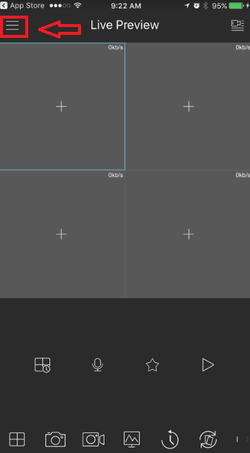
2. Select the menu button.
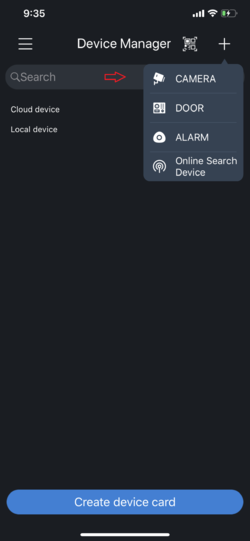
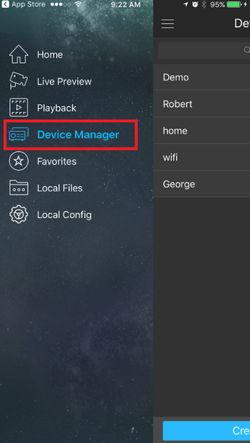
3. Select Device Manager.
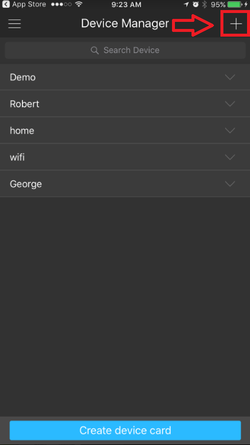
4. Select add button to add device.
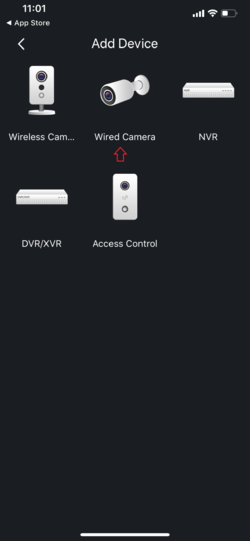
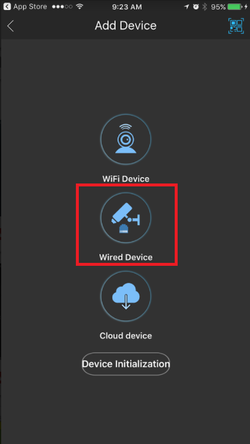
5. Select Wired Device.
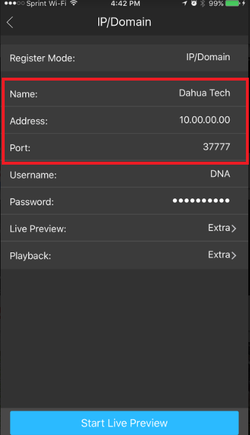
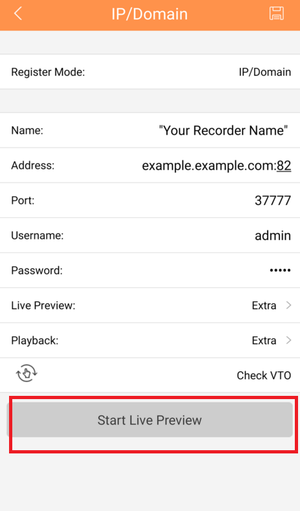
6.Input Device Name -> input IP address of Dahua device -> input TCP port. If using Pubic IP to view remotely off local network you will need to port forward the TCP port on your router (corresponding to the TCP port of the Dahua device).
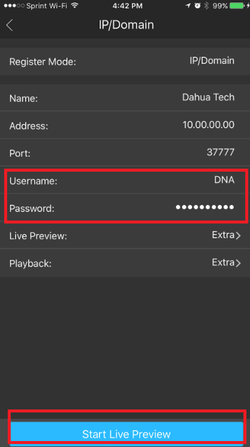
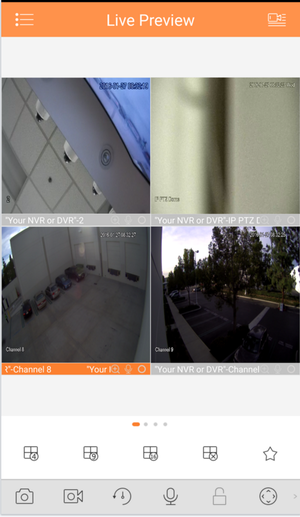
7. Input Username and Password -> select live preview. By selecting "Start live preview" device will be automatically saved into the application.
Video Instructions
Step by Step Instructions IDMSS/GDMSS version 4.41.001
1. From the home screen of the mobile application select "Camera".
2. Select the menu button.
3. Select Device Manager.
4. Select add button to add device.
5. Select Wired Device.
6.Input Device Name -> input IP address of Dahua device -> input TCP port. If using Pubic IP to view remotely off local network you will need to port forward the TCP port on your router (corresponding to the TCP port of the Dahua device).
7. Input Username and Password -> select live preview. By selecting "Start live preview" device will be automatically saved into the application.
Video Instructions
Step by Step Instructions
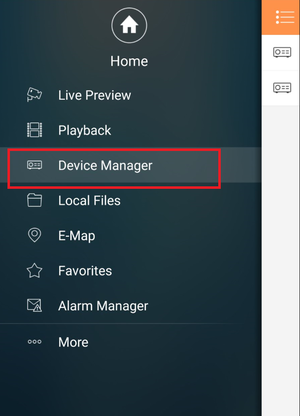
1. From Main Menu select "Device Manager"
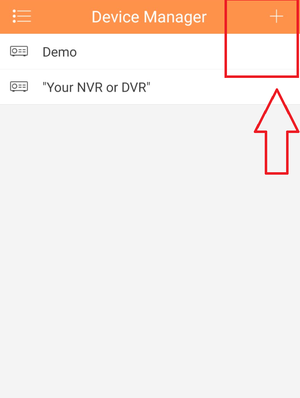
2. Select Plus Icon to add device.
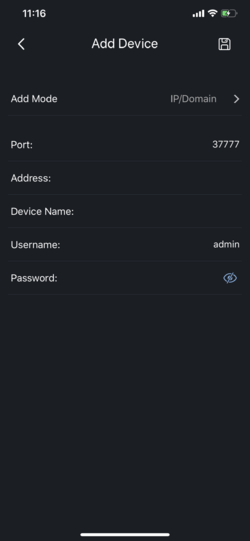
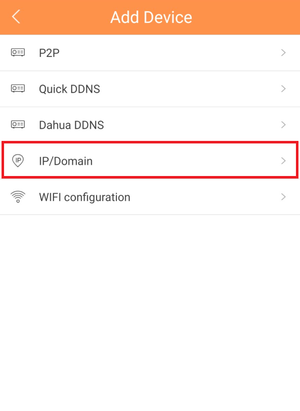
3. Select IP/Domain.
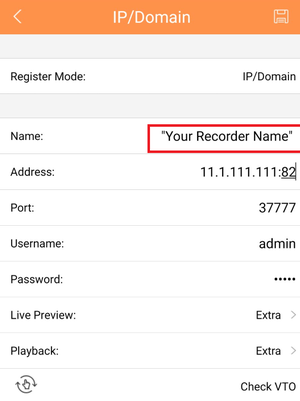
4. Name the device Note: Name on picture is an example.
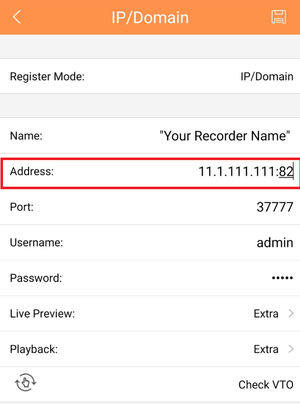
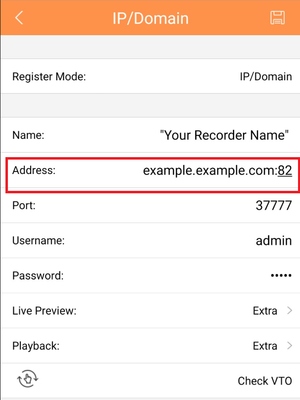
5. For Address, Input either IP address or Domain name. Note: IP address and domain are examples. Do not copy.
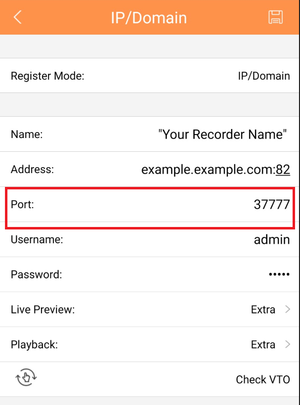
7. Input TCP port number. Note: it is defaulted at 37777
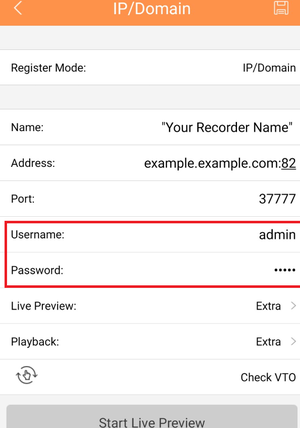
8. Input User Name and Password.
9. Select "Live Preview"
