Record/Basic/Alarm
Contents
- 1 Alarm Record
- 1.1 Description
- 1.2 Prerequisites
- 1.3 Physical Setup Instructions
- 1.4 How To Setup Alarm Recording Using A Physical Alarm Input
- 1.5 Instructions
- 1.6 How To Setup Alarm Record
- 1.7 How To Setup Alarm Record
- 1.8 How To Setup Alarm Record
- 1.9 How To Setup Alarm Record
- 1.10 How To Setup Alarm Record
- 1.11 NOTICE
Alarm Record
Description
This feature will allow you to specify a range of time for a Dahua device to record when a physical alarm is triggered.
Prerequisites
- Dahua device with Alarm Replay input that supports Alarm Recording
- Physical alarm device (such as door sensor) with external power and Normally Open (NO) / Normally Closed contacts
Physical Setup Instructions
How To Setup Alarm Recording Using A Physical Alarm Input
Description
This guide shows how to connect a physical alarm in conjunction to work with Dahua recording devices.
The correct wiring/relay connections can vary between models. Please refer to the User Manual for the specific device to look up the correct Alarm Relay diagram for the product you are working with
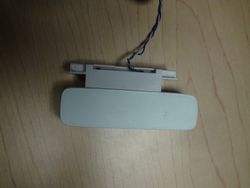
This guide will use a Door Sensor as the physical alarm input device
Prerequisites
Video Instructions
Step by Step Instructions
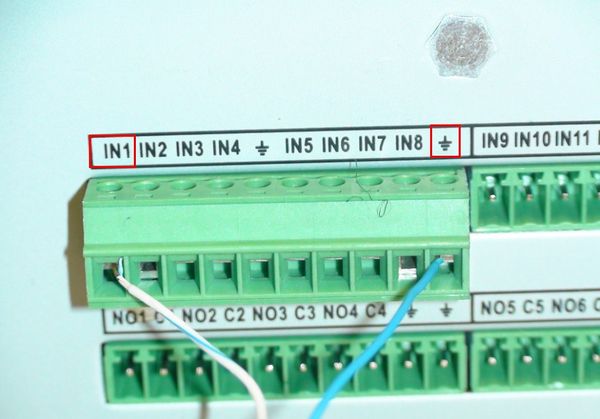
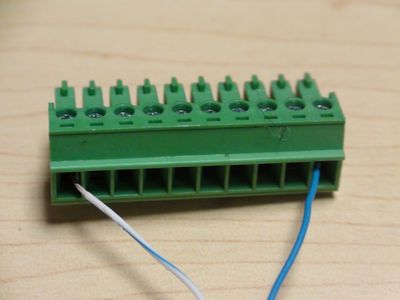
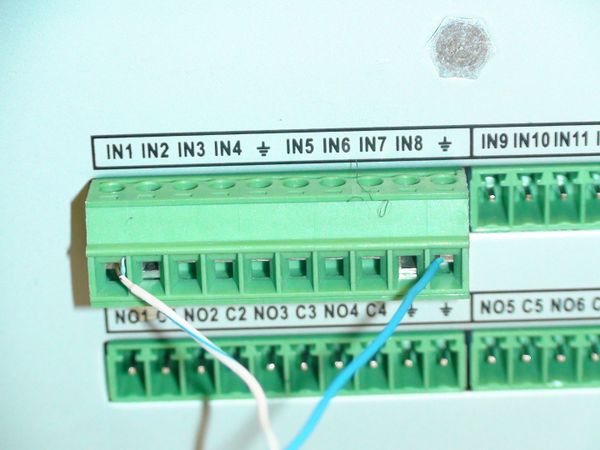
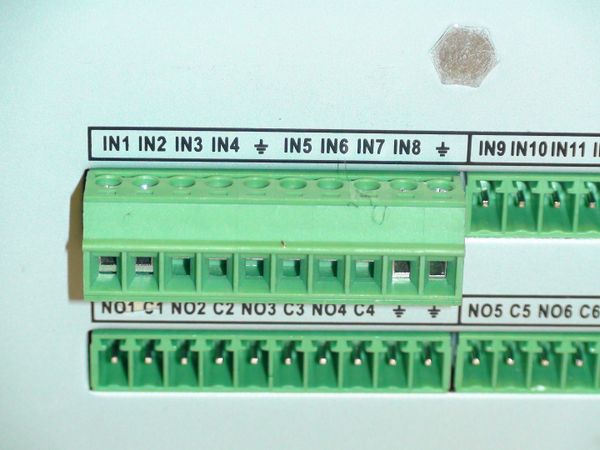
1. Identify which alarm out block you wish to use to connect your physical alarm. For this example we are going to use, "Alarm In Channel 1"
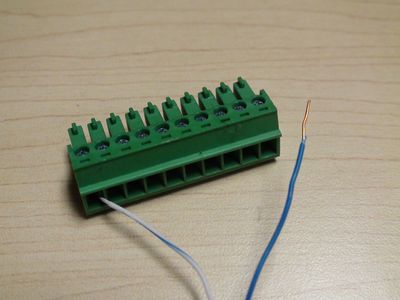
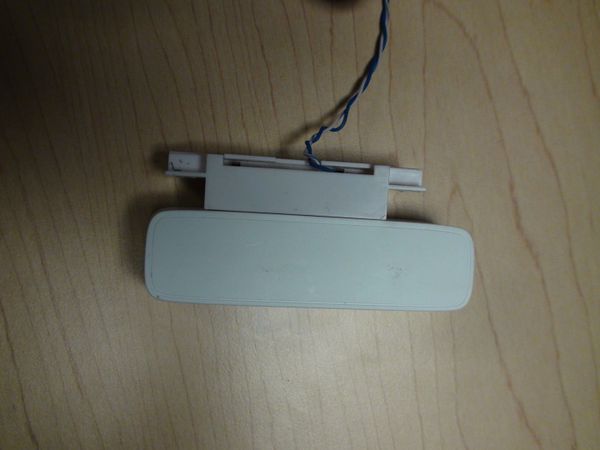
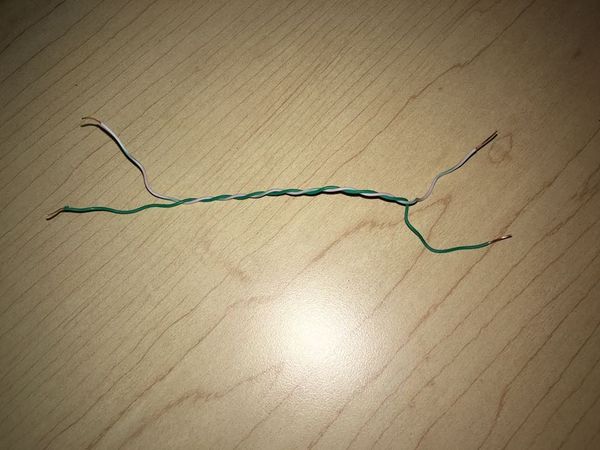
2. Connect the cable to your physical alarm.
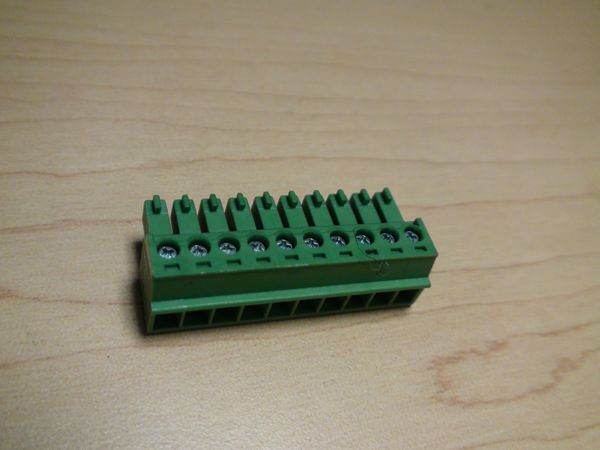
3. Connect the cable to the alarm block on the ports labeled, "IN1" and "Ground"
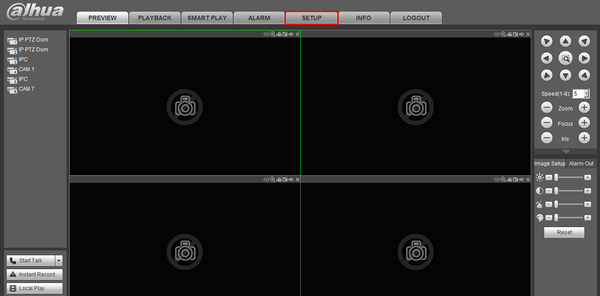
4. Login to the NVR, and click, "Setup"
5. Click, "Event"
6. Click, "Alarm"
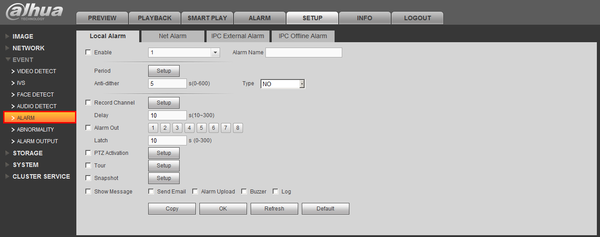
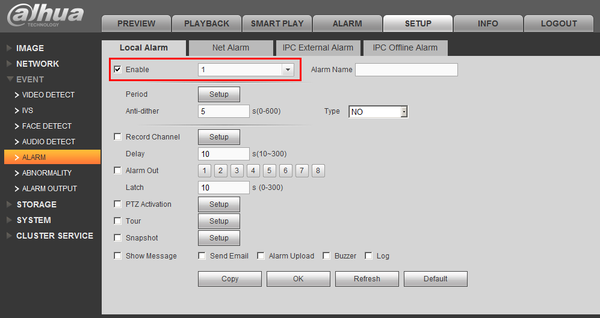
7. Select the Channel, and enable, "Local Alarm"
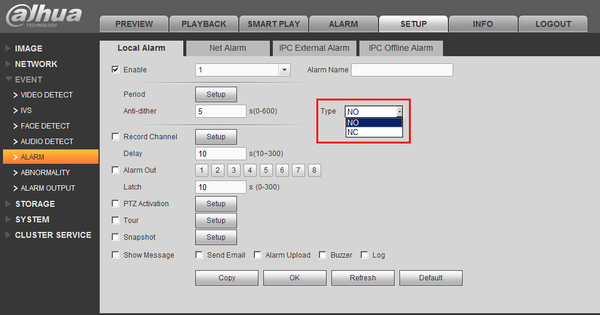
8. Select either, "NO" or "NC"
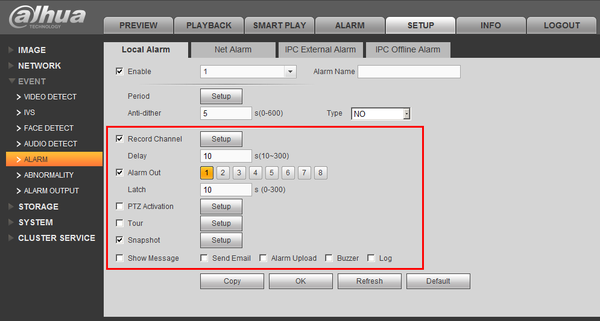
9. Next select what actions you want the system to perform, when the alarm is activated.
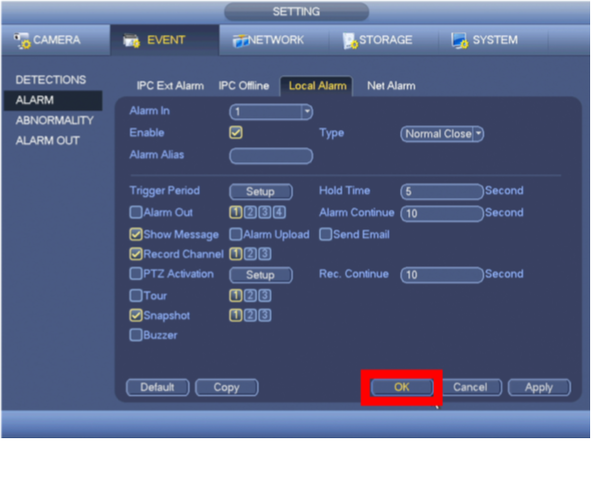
10. Click, "OK"
Links
| Related Articles in Category:Record | ||
|---|---|---|
|
<DynamicPageList> category = Record count=5 </DynamicPageList> |
<DynamicPageList> category = Record offset = 5 count= 5 </DynamicPageList> |
<DynamicPageList> category = Record offset = 10 count=5 </DynamicPageList> |
Instructions
How To Setup Alarm Record
Prerequisites
- Dahua device that supports Alarm Input recording
- Physical alarm devices wired into Dahua devices - How To Connect A Physical Alarm To A Dahua Device
Video Tutorial
Step by Step Instructions
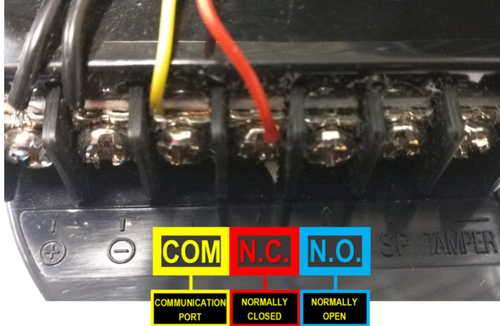
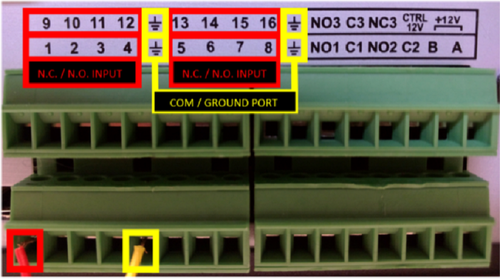
STEP 1. Identify the connections on the Alarm Trigger.
- COM: Communication Port or Ground N.C: Normally Closed - A Trigger that initiates when an object disrupts the communication line of 2 sensors
- N.C: Normally Closed - A Trigger that initiates when an object disrupts the communication line of 2 sensors
- N.O: Normally Open - A Trigger that initiates when an object completes the communication line of 2 sensors.
STEP 2. Connect the N.C. (Normally Closed) wire to one of the numbered ports. Connect the COM wire to the COM / Ground Port.
- Alarm Inputs are grouped in fours.
- Each group uses the Communication/Ground Port on the right. Alarm Inputs are grouped in fours. Each group uses the Communication/Ground Port on the right.
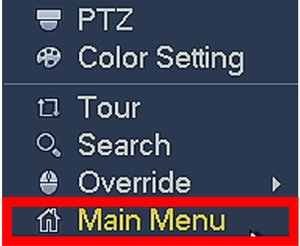
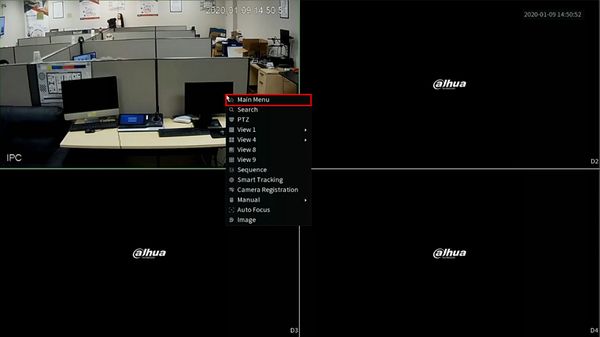
STEP 3. From your local GUI, right click on your live view screen and click on Main Menu.
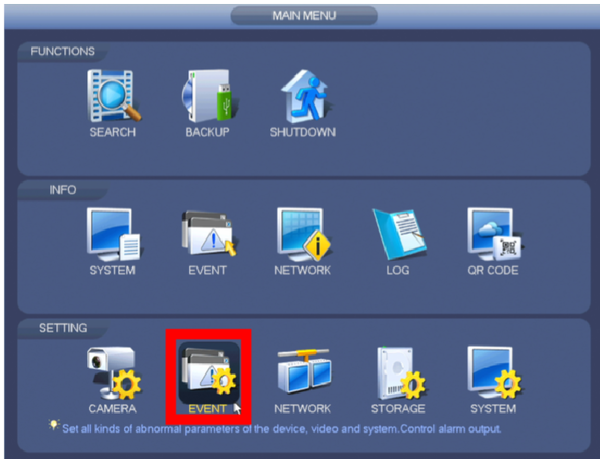
STEP 4.Click Event from the Settings menu option.
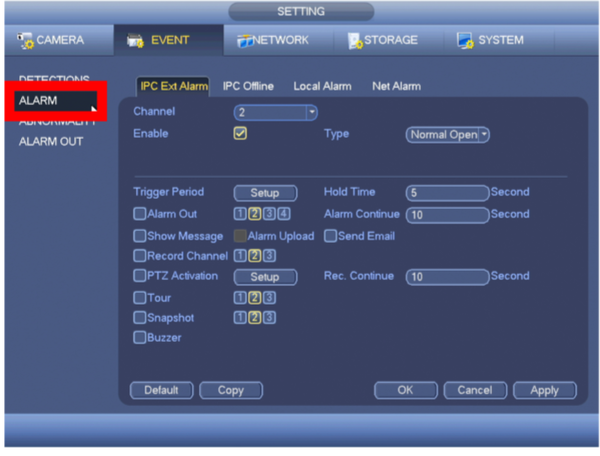
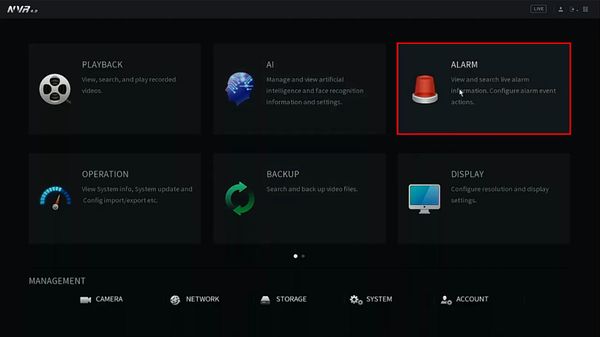
STEP 5. From the left menu tab, click Alarm.
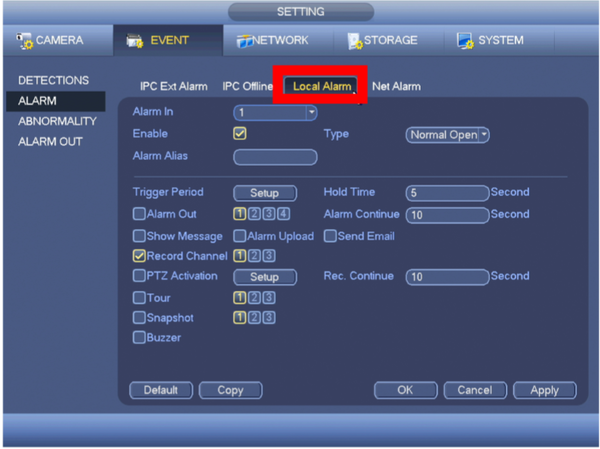
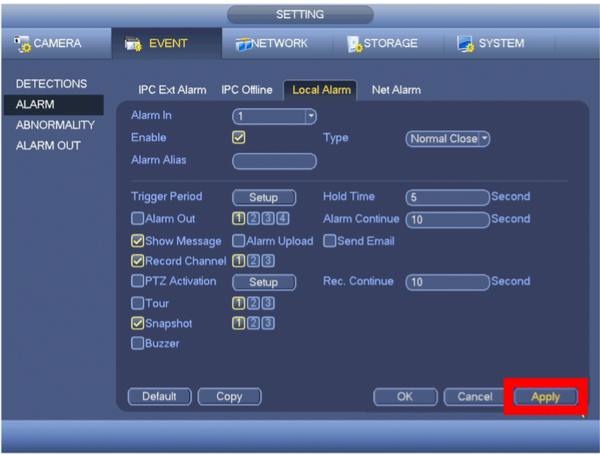
STEP 6. Click on Local Alarm tab.
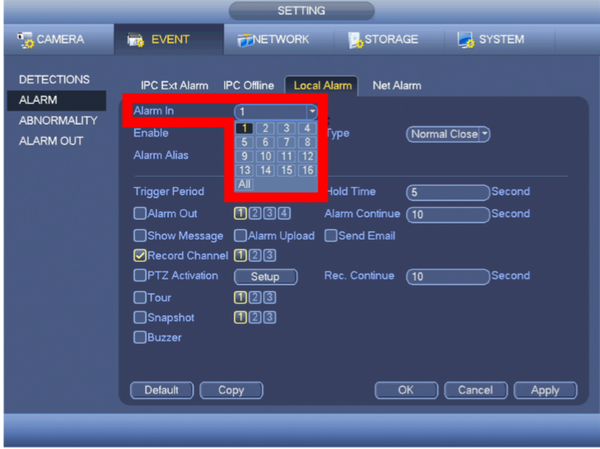
STEP 7. Select the Alarm In Port you connected from Step 2.
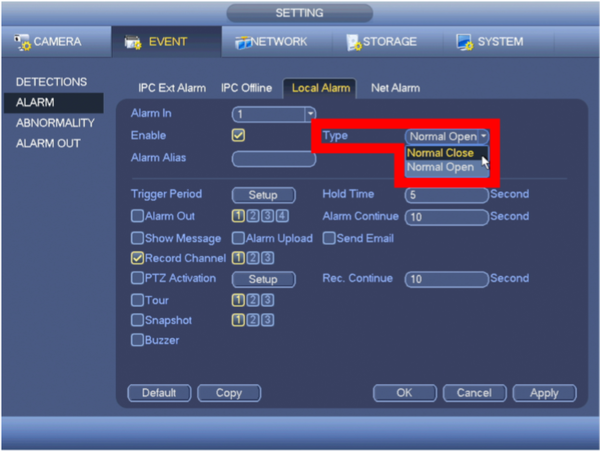
STEP 8. Select alarm trigger Type
- Normally Closed: A Trigger that initiates when an object disrupts the communication line of 2 sensors.
- Normally Open: A Trigger that initiates when an object completes the communication line of 2 sensors.
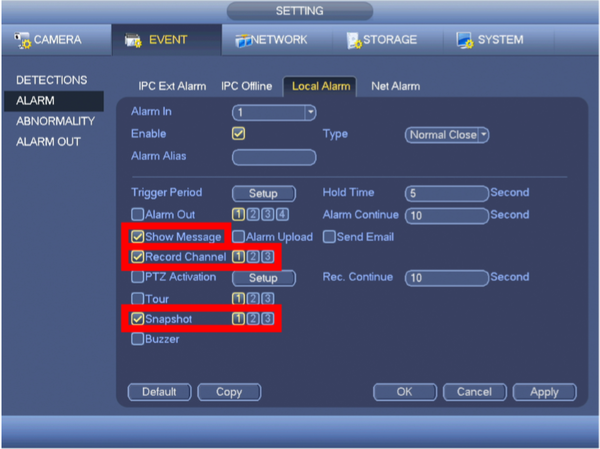
STEP 9. Configure the Alarm Trigger Settings
- Show Message: An alert will appear on the display attached to the system when the alarm is triggered.
- Record Channel: Configure the alarm to trigger recording on a specific channel, or all.
- Snapshot: A Snapshot will be taken by a specific channel or all when the alarm is triggered.
STEP 10. Click Apply.
STEP 11. Click OK
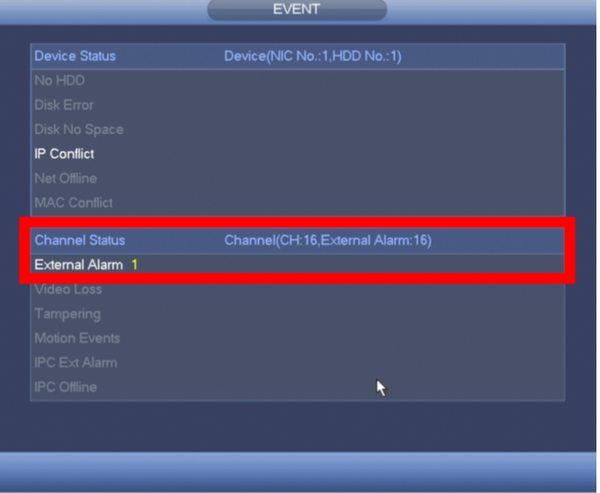
- If you configured the Alarm to "Show a Message", it will appear as soon as the alarm is triggered.
- Right-Click your mouse once to clear the message.
How To Setup Alarm Record
Prerequisites
- Dahua device that supports Alarm Input recording
- Physical alarm devices wired into Dahua devices - How To Connect A Physical Alarm To A Dahua Device
Video Instructions
Step by Step Instructions
1. From Live View
Right click select Main Menu
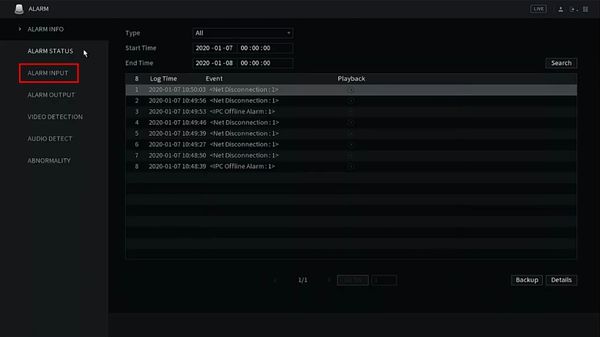
2. Click Alarm
3. Click Alarm Input
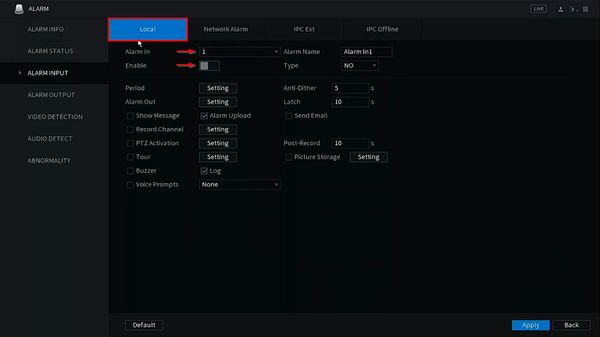
4. Click Local
Use the dropdown box next to 'Alarm In' to select the Alarm Input to configure
Click to Enable the input
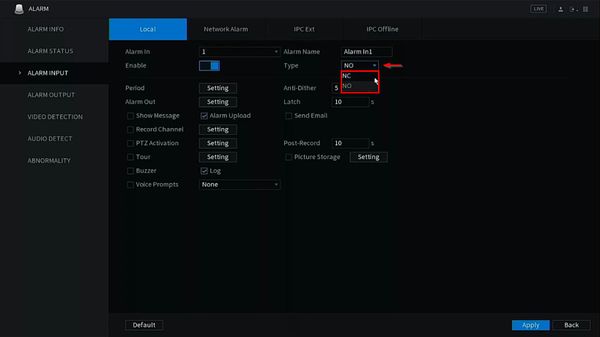
5. Use the dropdown box next to Type to select the type of Alarm Input:
- NC - Normally closed
- NO - Normally open
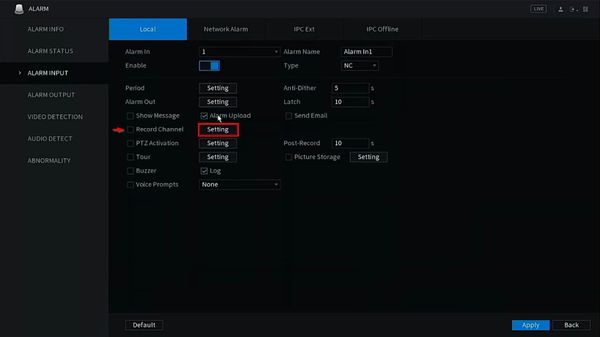
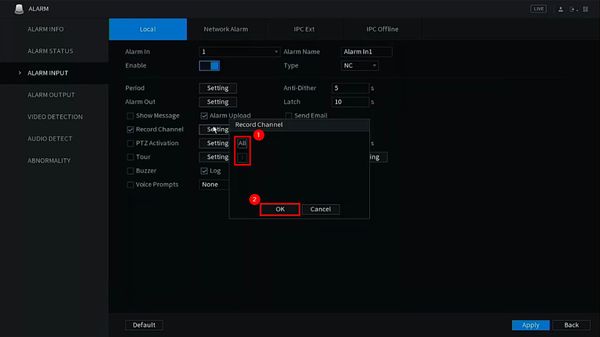
6. Check the box next to Record Channel
Click Setting
7. Use the Record Channel window to select which channels to record when the alarm input is triggered
Click OK to save
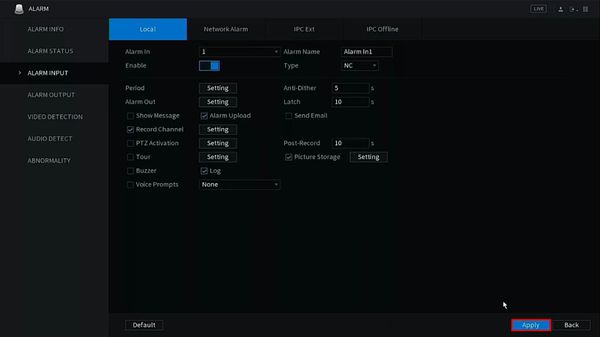
8. Click Apply to save settings
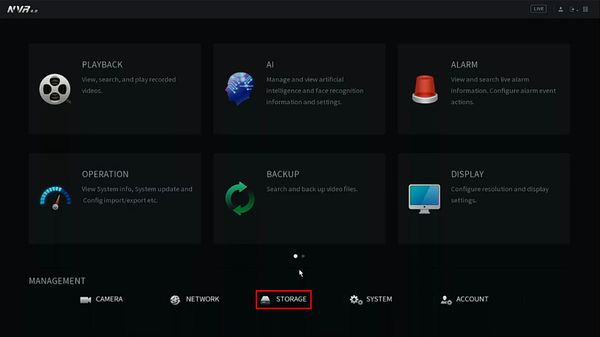
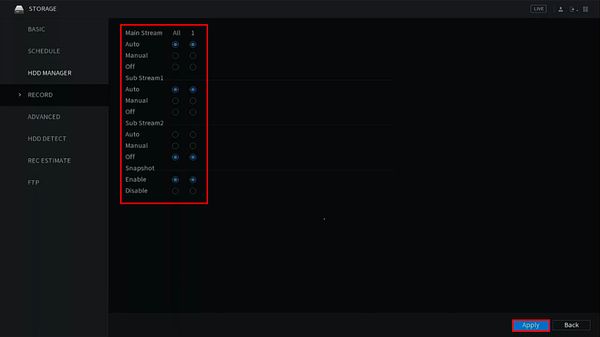
9. Click Storage
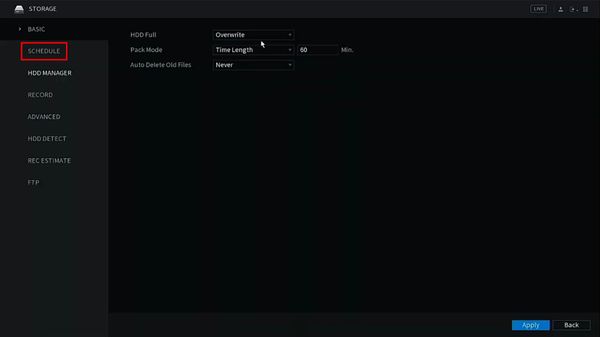
10. Click Schedule
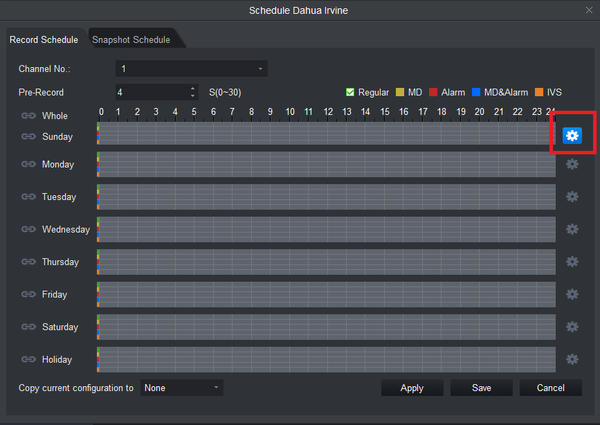
11. Under Rec tab
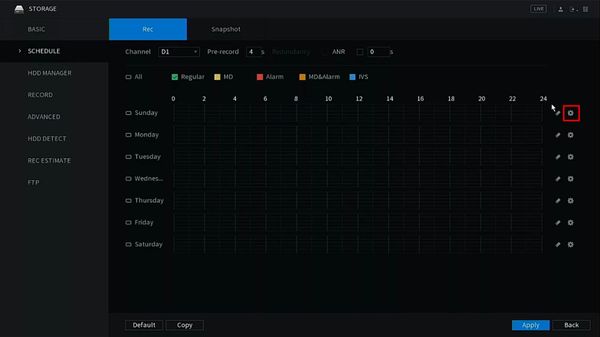
Click the gear icon to adjust Record settings
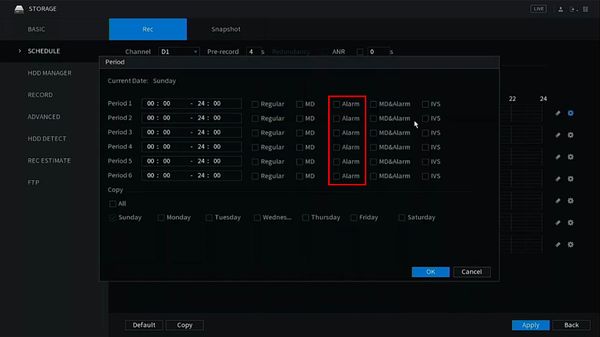
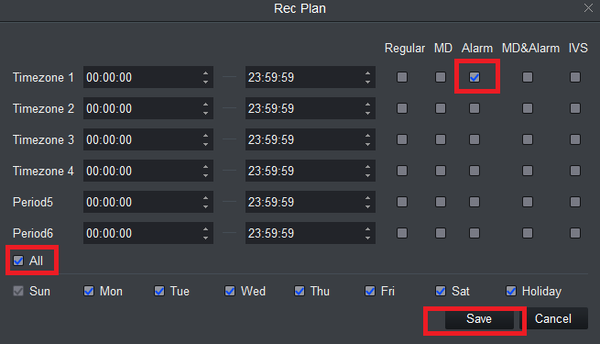
12. Use the window to set a recording period for the alarm input by checking the box next to 'Alarm' during the desired time periods
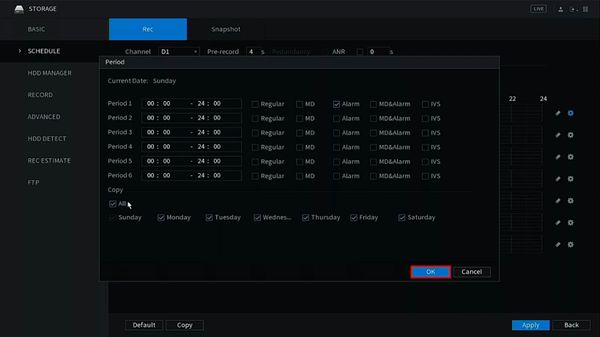
13. Click OK to save
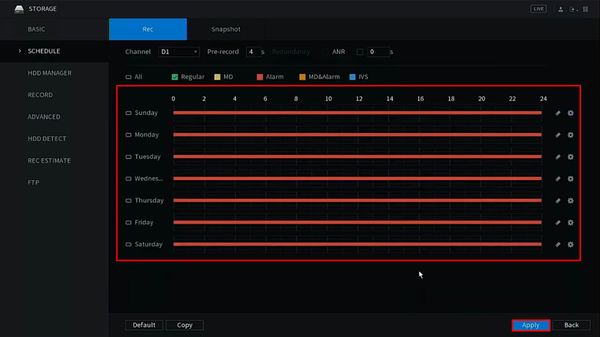
14. The recording schedule will be updated to reflect the changes
15. Click Apply to save all settings
How To Setup Alarm Record
Prerequisites
- Dahua device that supports Alarm Input recording
- Physical alarm devices wired into Dahua devices - How To Connect A Physical Alarm To A Dahua Device
Video Instructions
Step by Step Instructions
1. Identify which alarm out block you wish to use to connect your physical alarm. For this example we are going to use, "Alarm In Channel 1"
2. Connect the cable to your physical alarm.
3. Connect the cable to the alarm block on the ports labeled, "IN1" and "Ground"
4. Login to the NVR, and click, "Setup"
5. Click, "Event"
6. Click, "Alarm"
7. Select the Channel, and enable, "Local Alarm"
8. Select either, "NO" or "NC"
9. Next select what actions you want the system to perform, when the alarm is activated.
10. Click, "OK"
How To Setup Alarm Record
Prerequisites
- Dahua device that supports Alarm Input recording
- Physical alarm devices wired into Dahua devices - How To Connect A Physical Alarm To A Dahua Device
Video Instructions
Step by Step Instructions
Setup Alarm Input
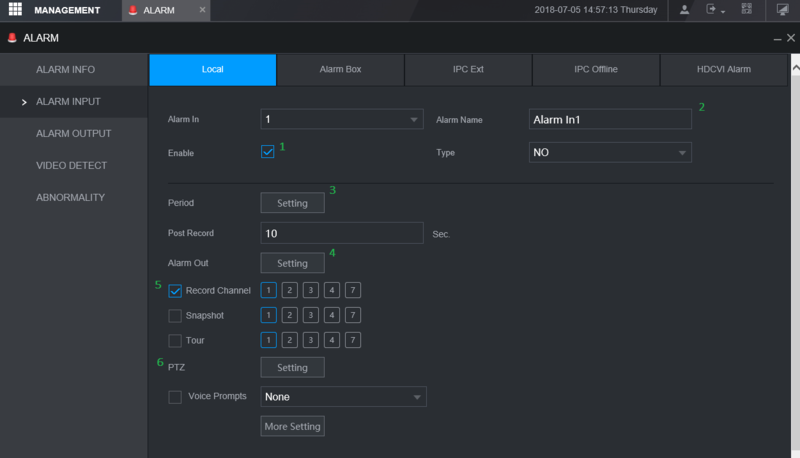
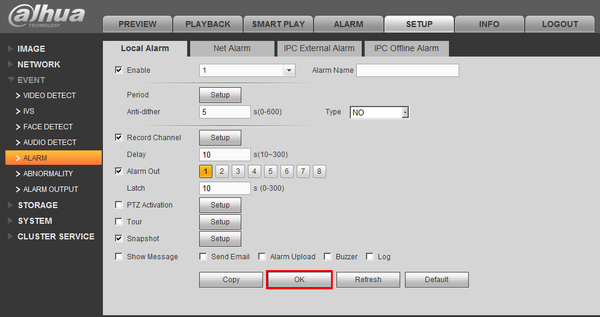
From main menu, click on Alarm. Click on Alarm input. We are using XVR 72 series for this example. The Alarm Input page will launch as shown below:
Select the Alarm input number that you like to use. This number is correspond to the alarm port on the back of recorder.
1. Click Enable to enable the alarm input.
2. Enter Alarm Name. By default is set to AlarmIn#
3. Period is to schedule your Alarm when you want to be enable.
4. With the alarm input, you can trigger recorder's alarm output.
5. This to select which channel you want recorder to start recording when alarm is triggered.
6. You can call basic PTZ action Preset, Tour, or Pattern when alarm is triggered.
Setup Alarm Recording Schedule
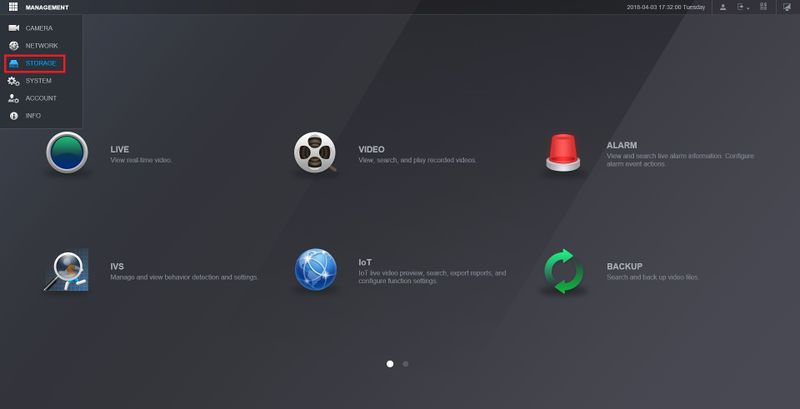
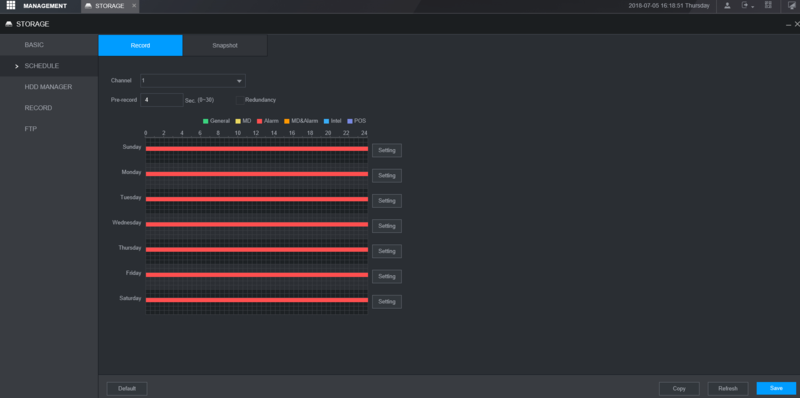
1. From the main menu, click on Management > Storage > Schedule.
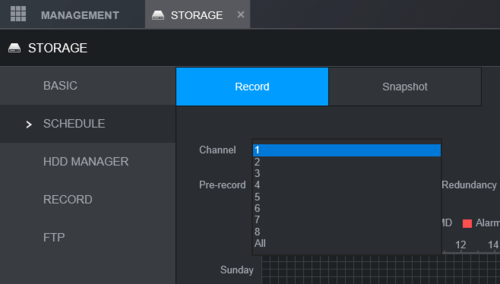
2. Select the channel you like to setup.
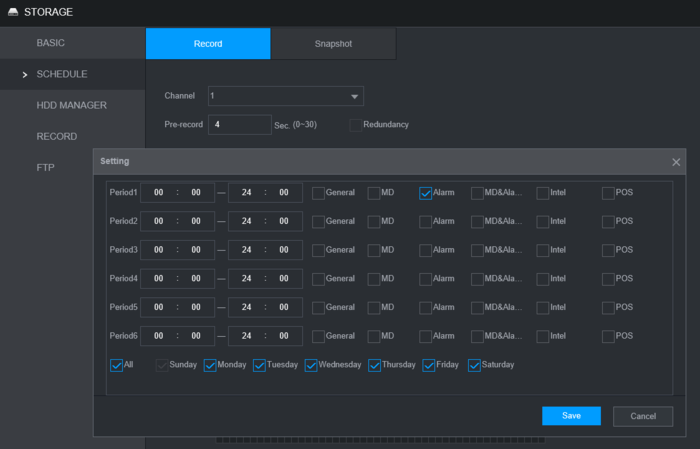
3. To enable Alarm recording, Click on Setting next to the timeline bar.
4. Set your duration (By default is 24 hour, 00-24). Then select Alarm.
You can select all days to copy the schedule to all week. Click Save.
5. Click Save.
Description
How to Setup Alarm Recording Using A Physical Alarm via SmartPSS 2.0
Prerequisites
- A NVR or IP Camera with an Alarm Out
- A low voltage physical alarm
- Dual pair 24 gauge run to the physical alarm
- Alarm block
Video Instructions
Step by Step Instructions
1. Identify which alarm out block you wish to use to connect your physical alarm. For this example we are going to use, "Alarm Out Channel 1"
2. Connect the cable to your physical alarm.
3. Connect the cable to the alarm block on the ports labeled, "IN1" and "Ground"
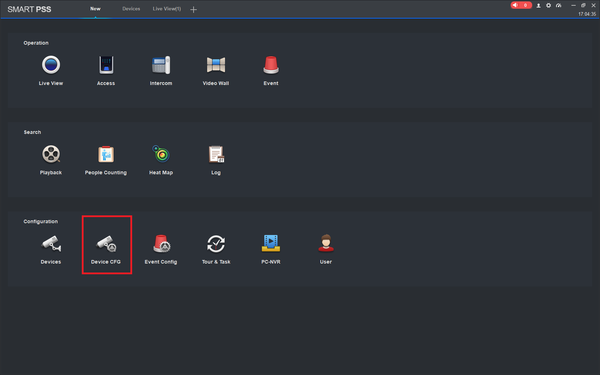
4. Log into SmartPSS -> Select "Device Configuration" from the home page.
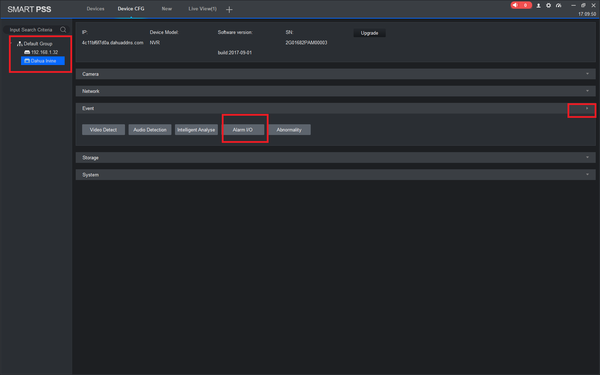
5.From the left hand side select device -> Expand Event -> Select Alarm I/O
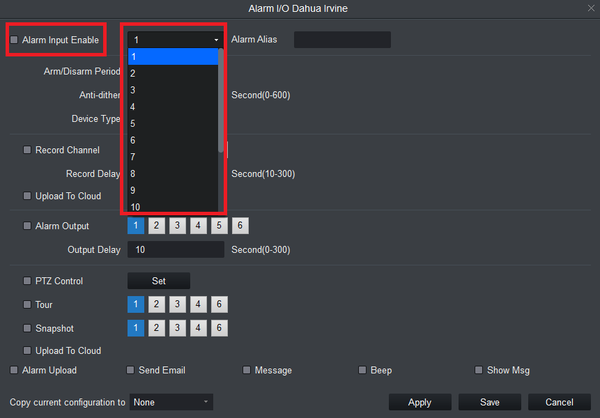
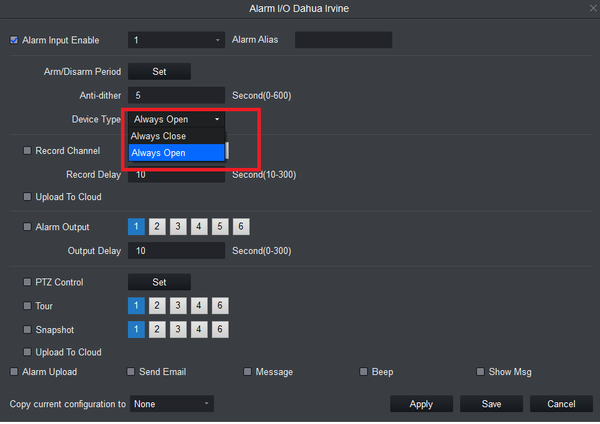
6.Check mark Alarm Input Enable -> Select channel.
7.Select either, "Always Open" or "Always Close"
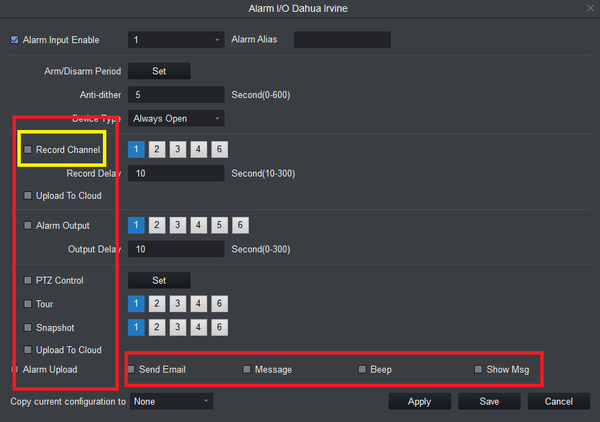
8.Next select what actions you want the system to perform, when the alarm is activated. To record the alarm event you will need to check mark "record channel".
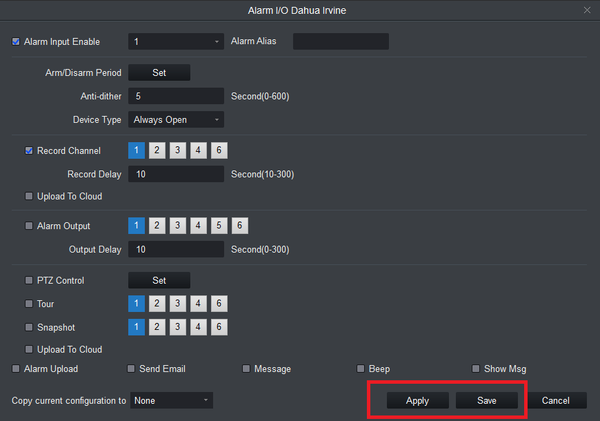
9.Select Apply and Save to save settings.
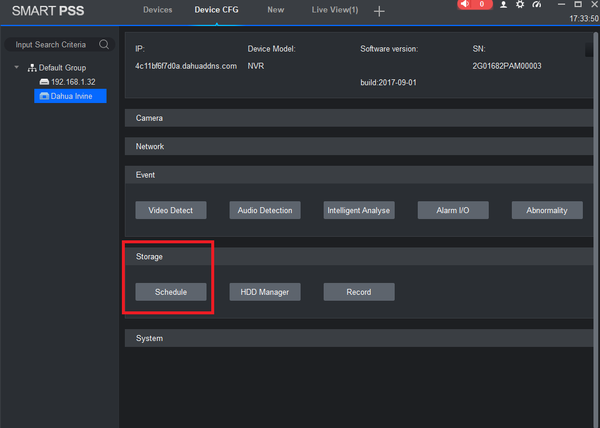
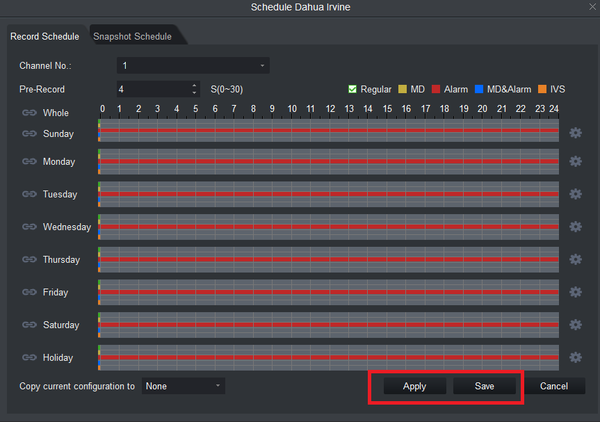
10.Next you will need to set the schedule to record the alarm event. Select Storage -> Schedule.
11.Select Channel Alarm recording was set for -> Select the gear icon -> Here you will see Period 1 (By default it will be set 0-24 hours). For this tutorial we are setting 1 Period -> Check mark "Alarm" -> Check mark "all" to record everyday of the week.
12.Here on the schedule you should see red for each day of the week as pictured below. Select apply and save to save settings.
![]() Mobile:iDMSS Plus & gDMSS Plus
Mobile:iDMSS Plus & gDMSS Plus
How To Setup Alarm Record
NOTICE
Notice of Discontinuation of iDMSS and gDMSS
Prerequisites
- Dahua device that supports Alarm Input recording
- Physical alarm devices wired into Dahua devices - How To Connect A Physical Alarm To A Dahua Device
- iDMSS / gDMSS app
- Device added to iDMSS / gDMSS app
Video Instructions
Step by Step Instructions
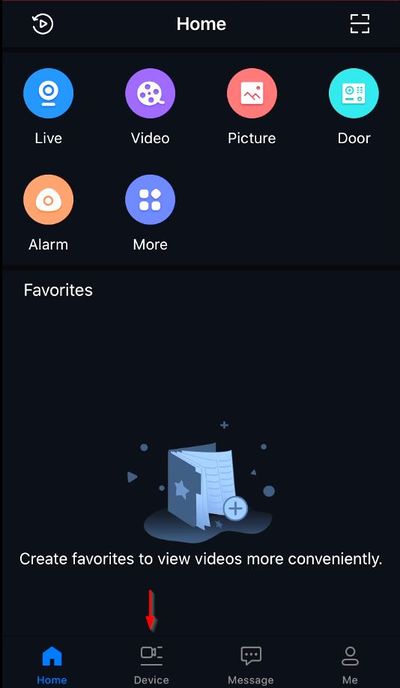
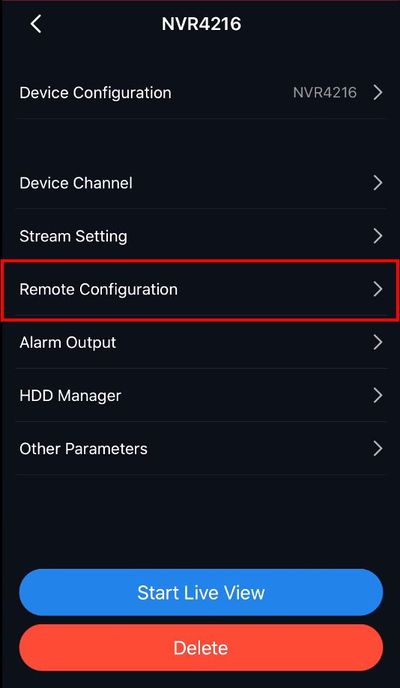
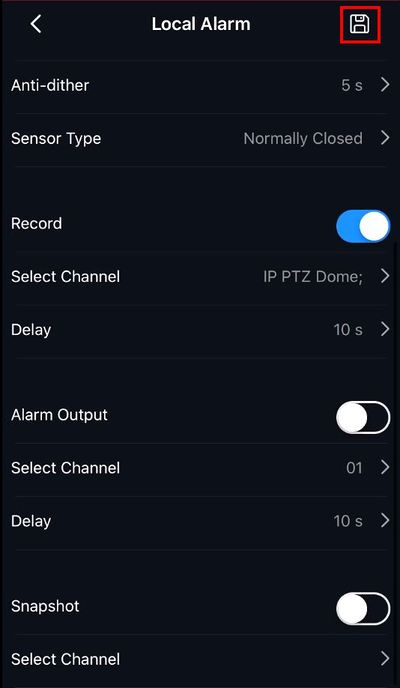
1. Press Device
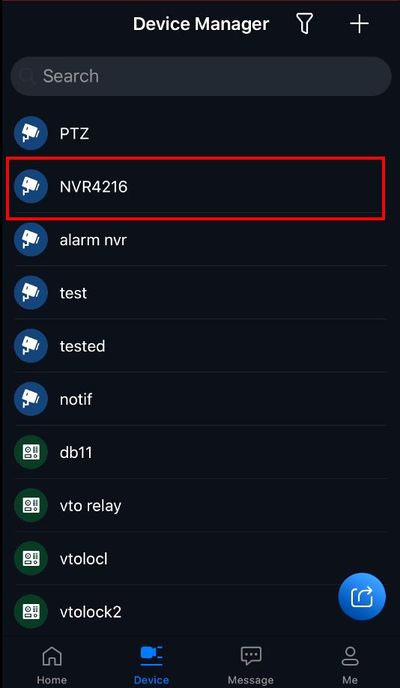
2. Select the device in the list
3. Select Remote Configuration
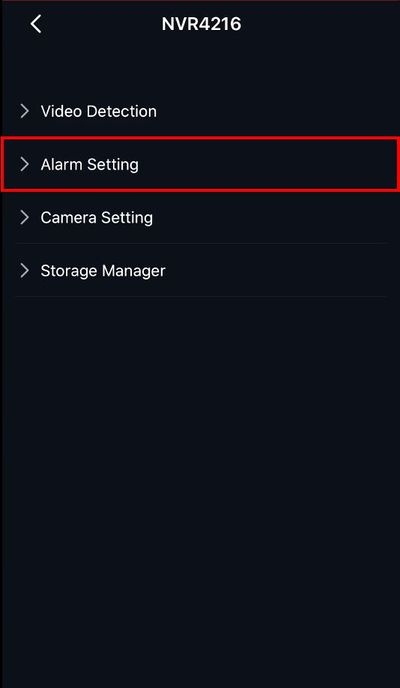
4. Select Alarm Setting
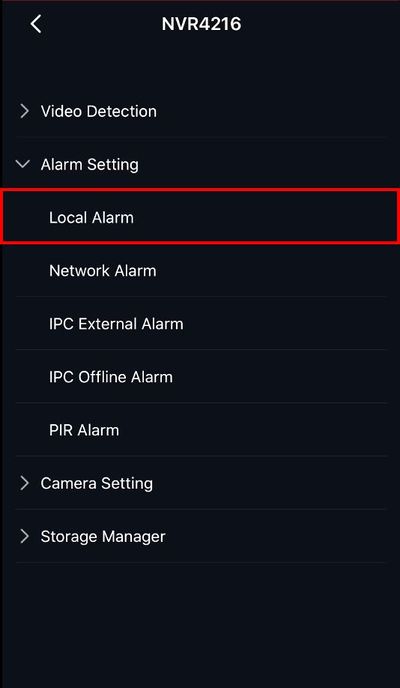
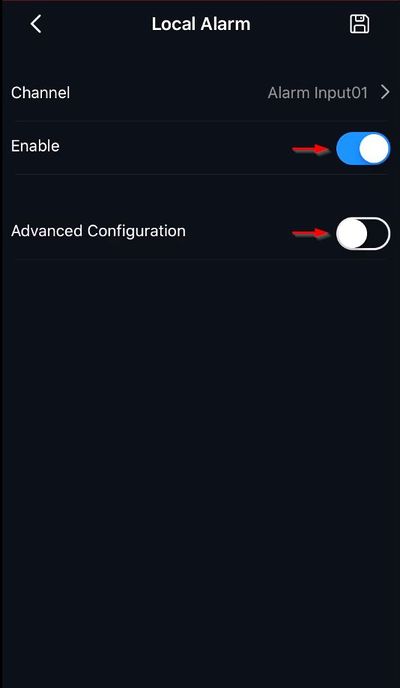
5. Select Local Alarm
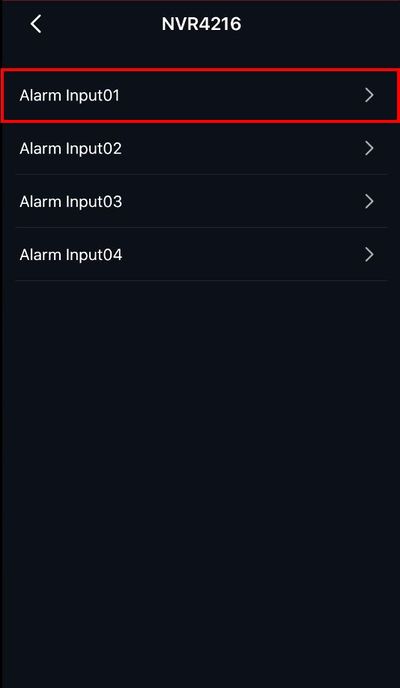
6. Select the Alarm Input to configure
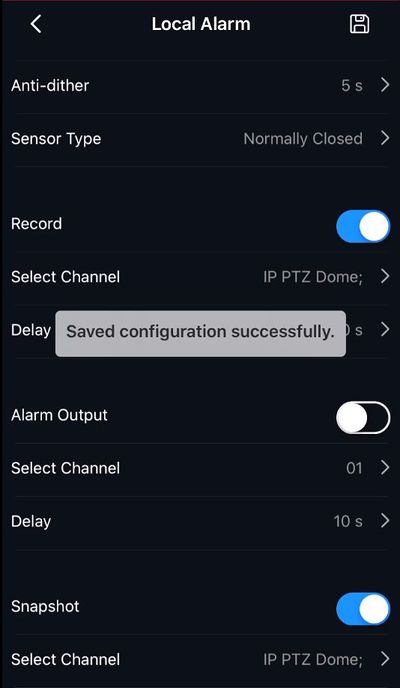
7. Toggle to enable the Local Alarm
Toggle the switch next to Advanced Configuration
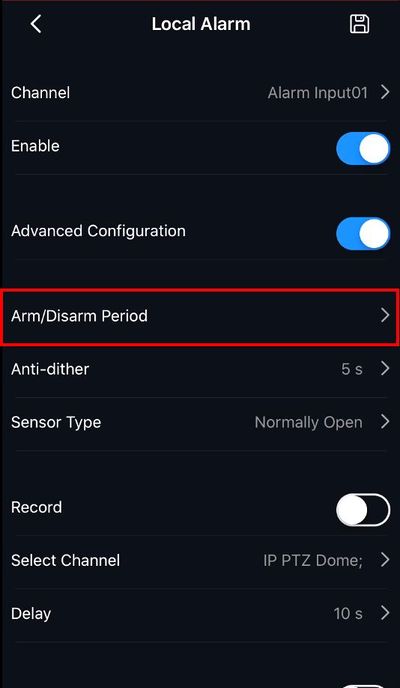
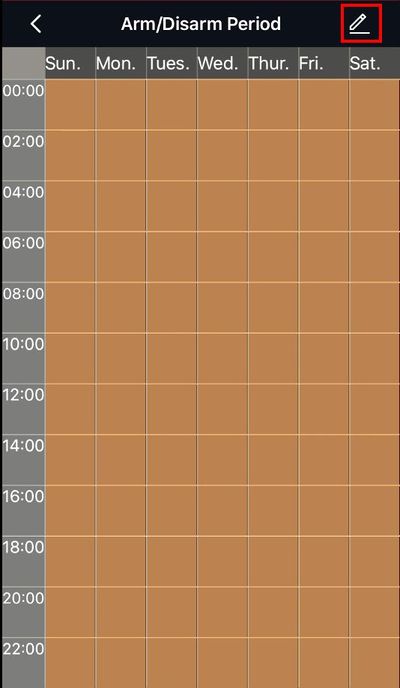
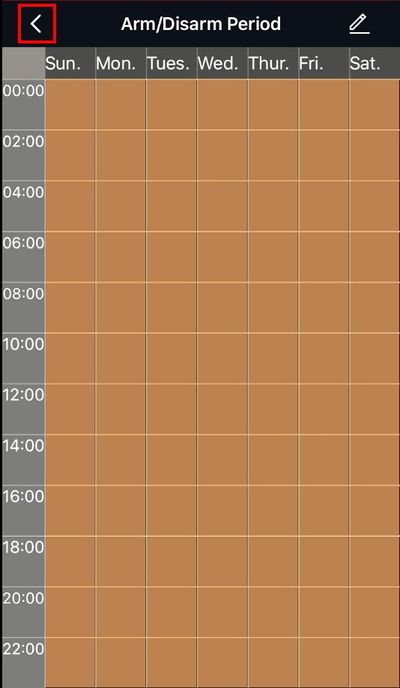
8. Select Arm/Disarm Period to set the schedule for the alarm input
9. Tap the pencil icon to edit the schedule
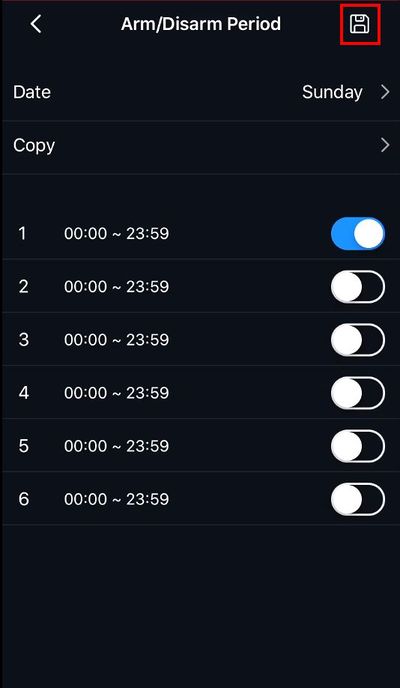
10. Use the interface to create
Tap the save icon to save
Tap the arrow to return to the device configuration
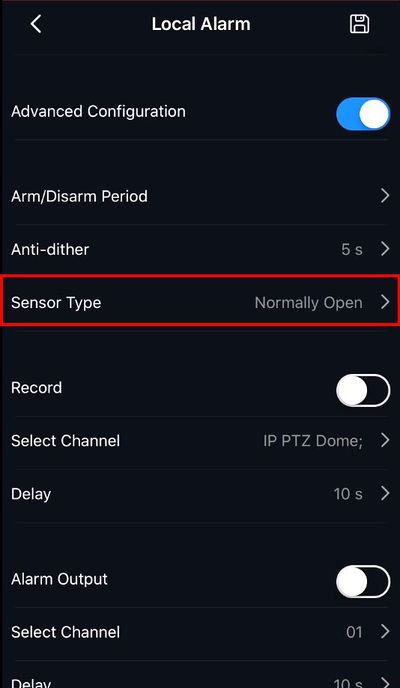
11. Select Sensor Type
Select which Alarm Input type is being used: Normally Open (NO) or Normally Closed (NC)
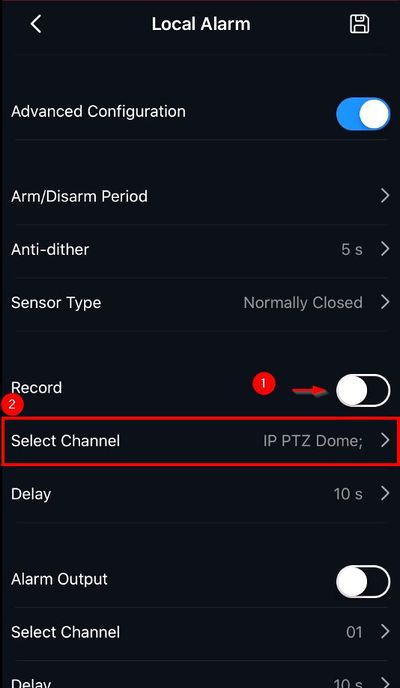
12. Toggle the switch next to Record to enable
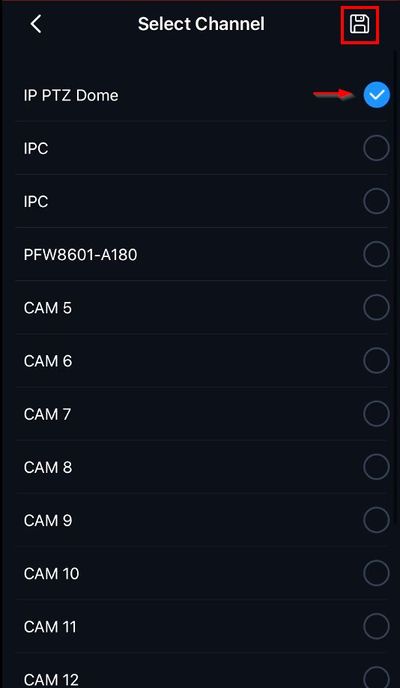
Tap Select Channel
Select which channel(s) to record when the alarm input is triggered
Tap the save icon to save
13. Tap the save icon at Local Alarm to save all settings
14. A prompt will appear to confirm
