FAQ/Change HDCVI Camera Resolution Output via OSD
Change HDCVI Camera Resolution Output via OSD
Description
Prerequisites
- Dahua XVR or DVR
- HDCVI Dahua Camera
NOTE: Output resolution of HDCVI camera must be equal to or less than recorder capabilities to access OSD.
Instructions
Description
These instructions were written with a C52A2N
Channel 1: 4K (8 MP) at 15 fps or 4 MP at 15 fps
Other Channels: 4 MP at 15 fps or 1080p, 720p, 960H, D1, HD1, BCIF, CIF, QCIF at 30 fps
Prerequisites
- Dahua recorder
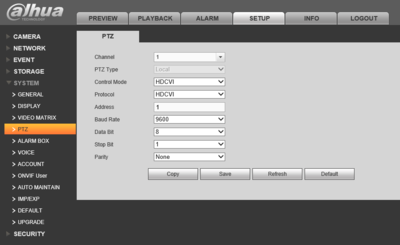
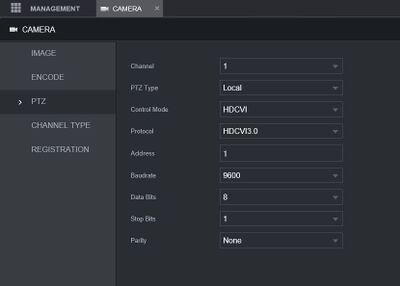
- PTZ settings of recorder set to:
Video Instructions
Step by Step Instructions
Change HDCVI Camera Resolution
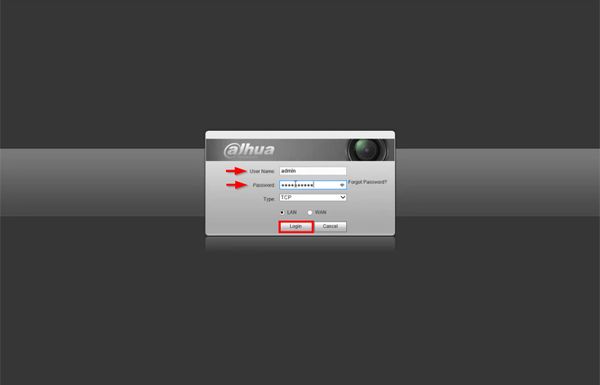
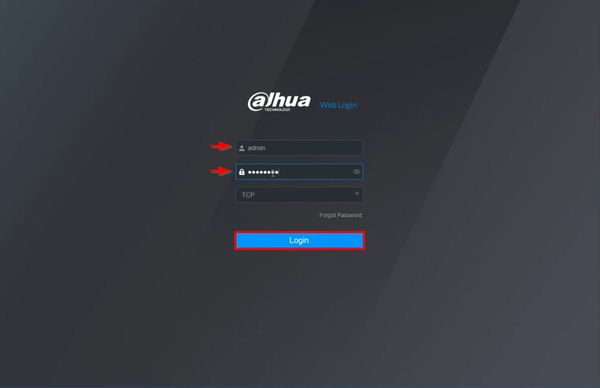
1. Enter the IP of the device into a browser
At the Web Login
Enter the Username and Password
Click Login
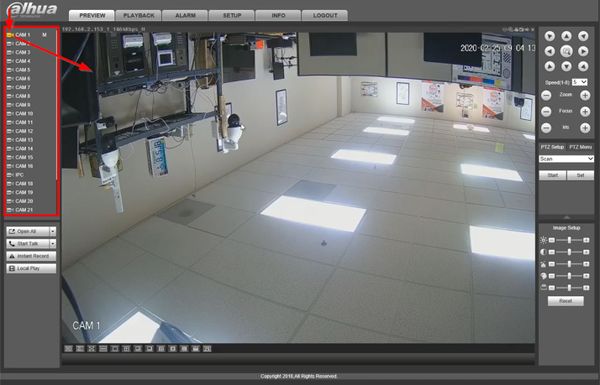
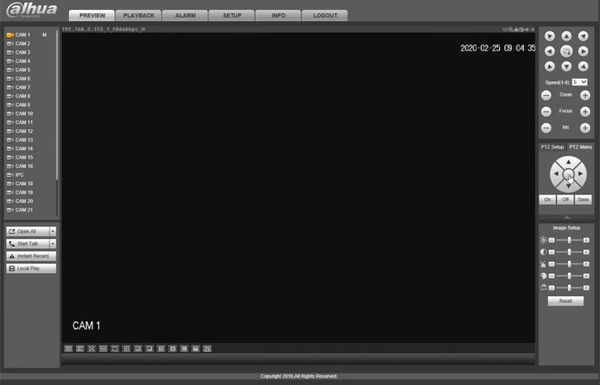
2. Use the device tree on the left to select the camera you wish to configure
Click the camera icon next to the camera/channel and it will load in the main window
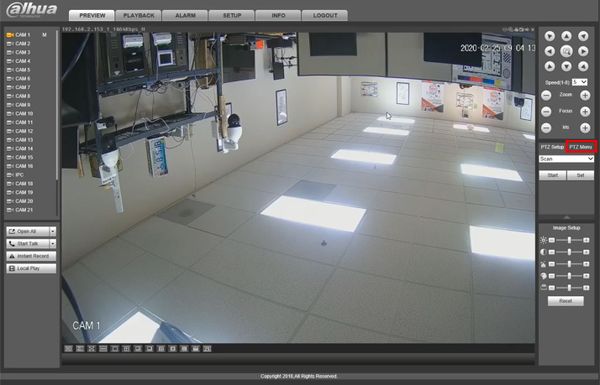
3. Click PTZ Menu
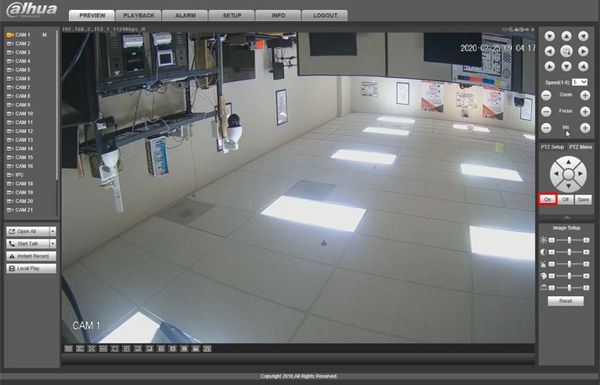
4. Click On
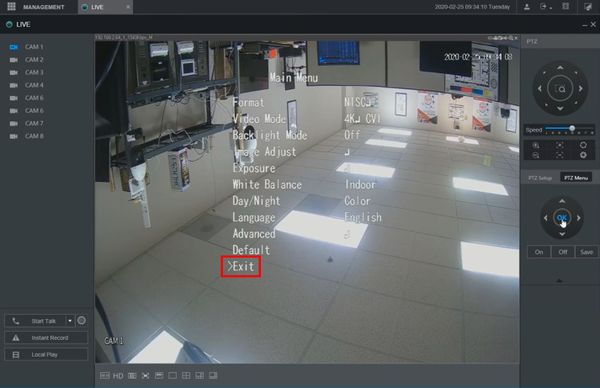
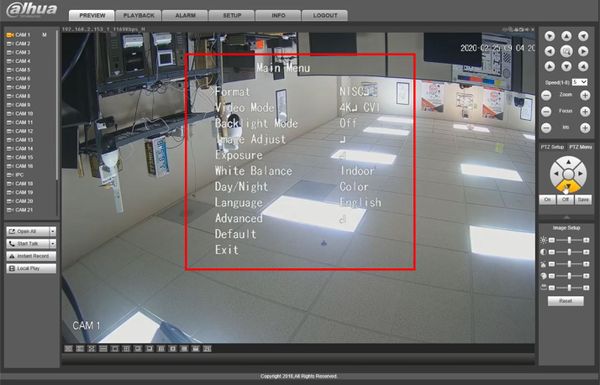
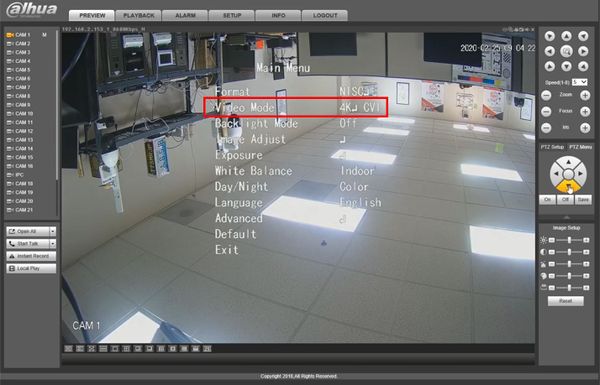
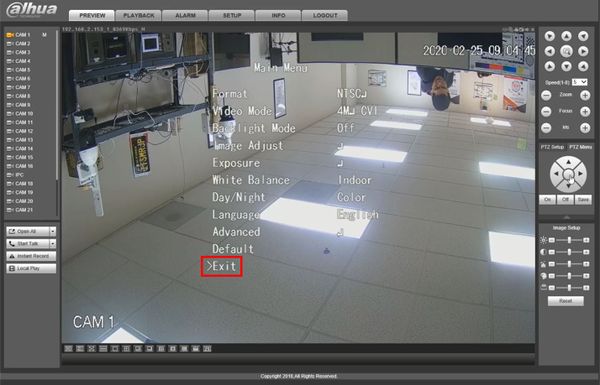
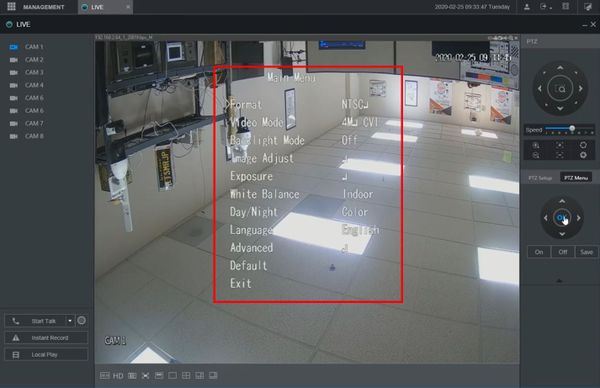
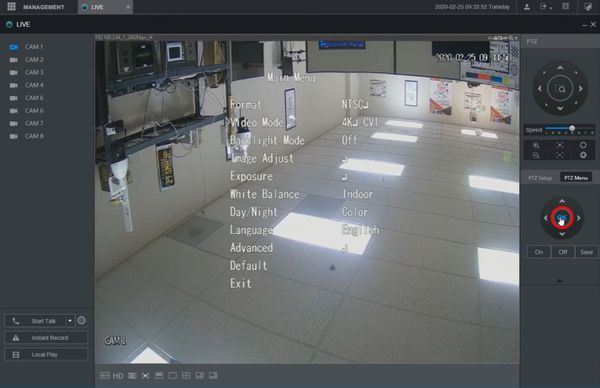
5. The camera's OSD menu will appear
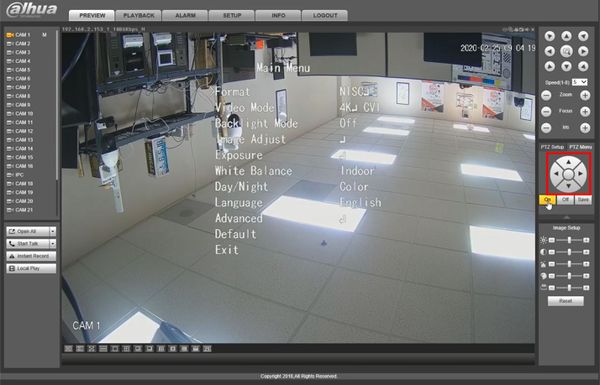
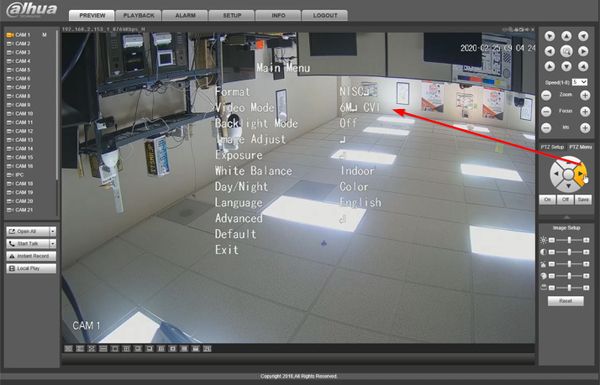
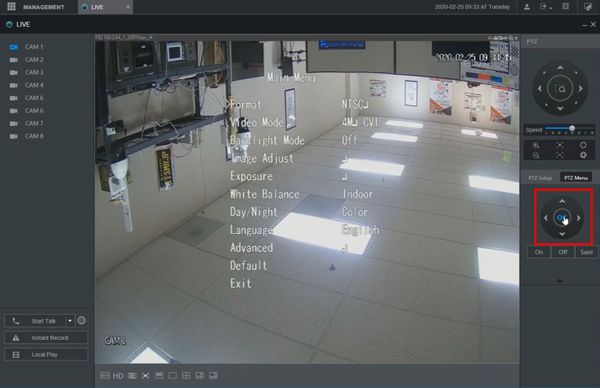
6. Use the on screen controls to navigate the menu
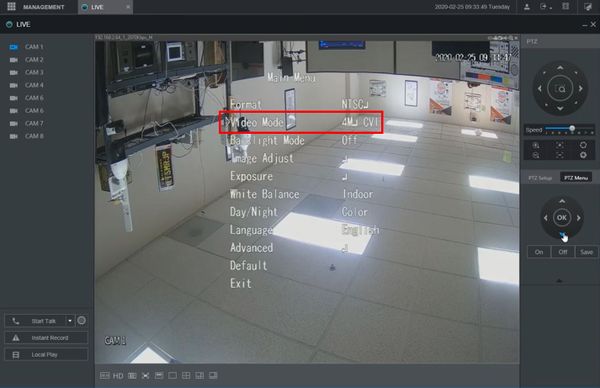
7. Under Video Mode
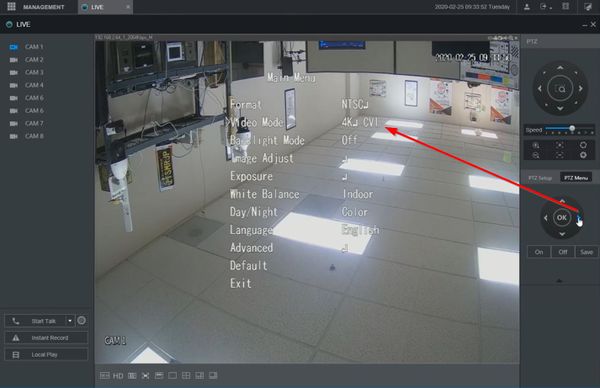
Use the controls to adjust the setting to the desired video mode/resolution
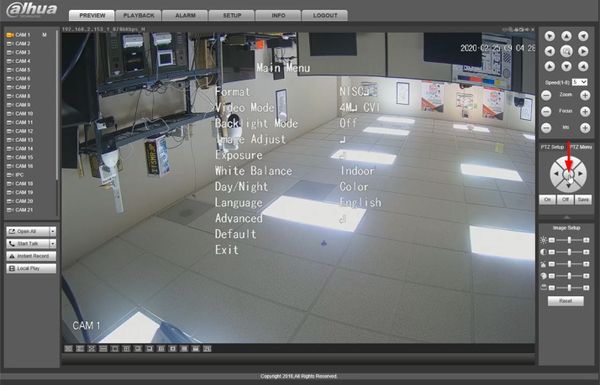
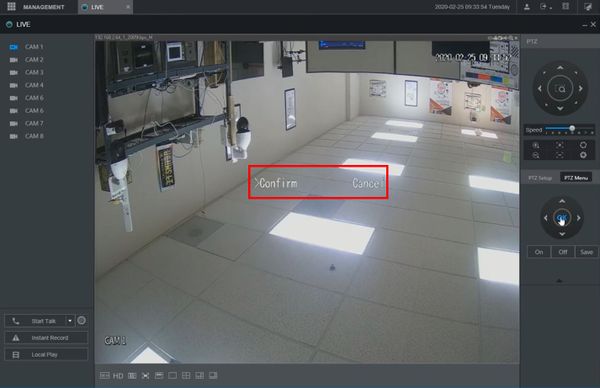
8. Click the center button to confirm the settings change
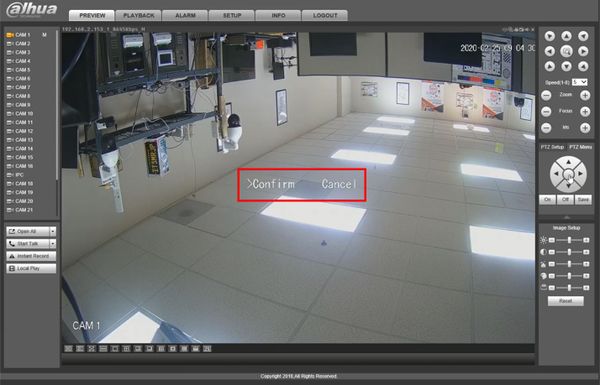
9. A prompt will appear to confirm
Click the center button to confirm
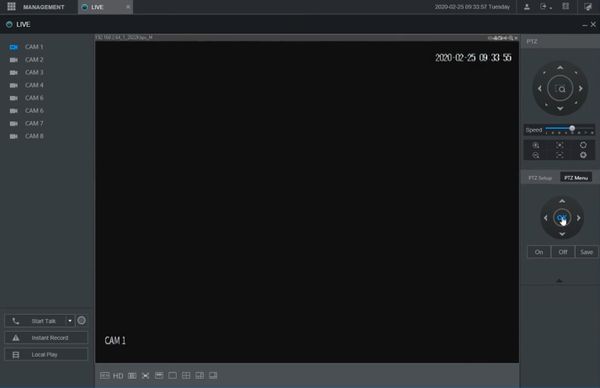
10. The camera will briefly reboot and then come back in the desired Video Mode
11. Navigate to Exit in the menu to exit the camera's OSD menu
Connect to Other Channel
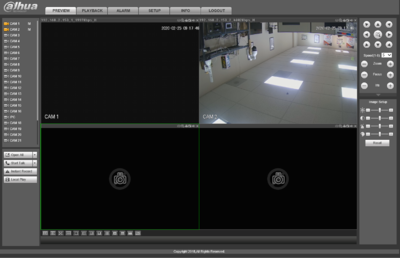
Prerequisites
- Dahua recorder
- PTZ settings of recorder set to:
Video Instructions
Step by Step Instructions
1. Enter the IP of the device into a browser
At the Web Login
Enter the Username and Password
Click Login
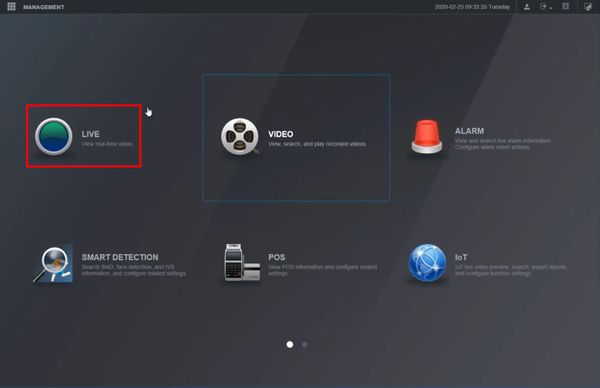
2. Click Live
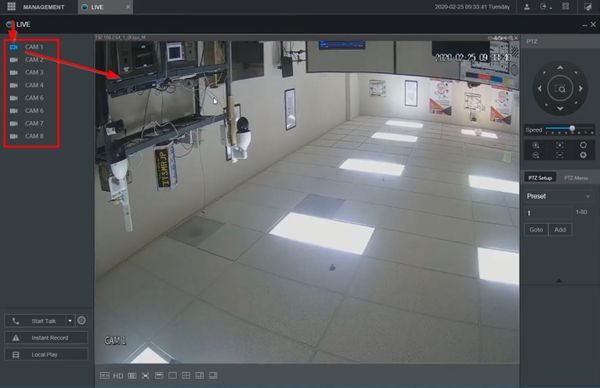
3. Use the device tree on the left to select the camera you wish to configure
Click the camera icon next to the camera/channel and it will load in the main window
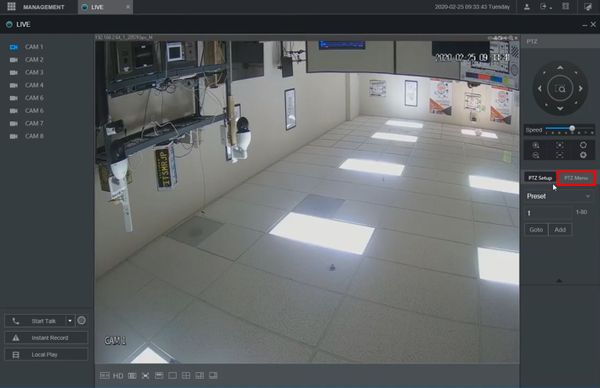
4. Click PTZ Menu
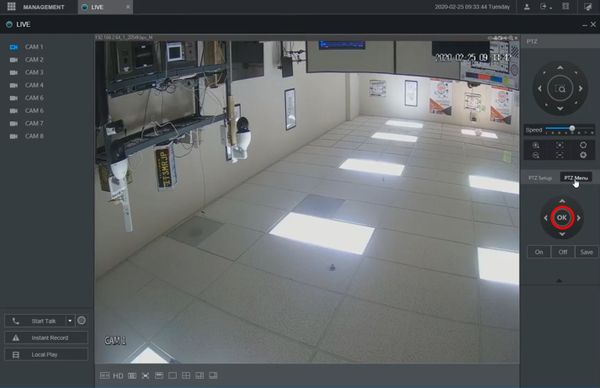
5. Click the OK / center button on the on screen controls
6. The camera's OSD menu will appear
7. Use the on screen controls to navigate the menu
8. Under Video Mode
Use the controls to adjust the setting to the desired video mode/resolution
9. Click the OK / center button to confirm the settings change
10. A prompt will appear to confirm
Click the center button to confirm
11. The camera will briefly reboot and then come back in the desired Video Mode
12. Navigate to Exit in the menu to exit the camera's OSD menu
