3rdParty/How To Add A Hikvision Camera to DSS
Revision as of 20:18, 1 November 2016 by JP (talk | contribs) (Created page with "==How to Add a Hikvision Camera to DSS== ===Description=== The below instructions will show you show to add a Hikvision IP Camera to a Dahua DSS server, that is on the same Lo...")
Contents
How to Add a Hikvision Camera to DSS
Description
The below instructions will show you show to add a Hikvision IP Camera to a Dahua DSS server, that is on the same Local Area Network, or LAN.
Prerequisites
- Dahua DSS Server
- Hikvision IP Camera
- DSS Server and IP Camera connected to the same LAN
- IP Address of DSS Server and IP Camera
- User name and password to both DSS Server and IP Camera
Video Instructions
Step by Step Instructions
1. Start by creating a list of your devices.
| DSS | Hikvision DS-2CD2342WD-I |
| IP:172.16.13.111 | IP: 172.16.13.41 |
| User Name:admin | User Name:admin |
| Password:(Your Password) | Password:(Your Password) |
Note:
- You can locate your DSS's IP address by going to the network menu, or using the ConfigTool.
- You can locate your Hikvision's IP address using Hikvisions SADP Tool.
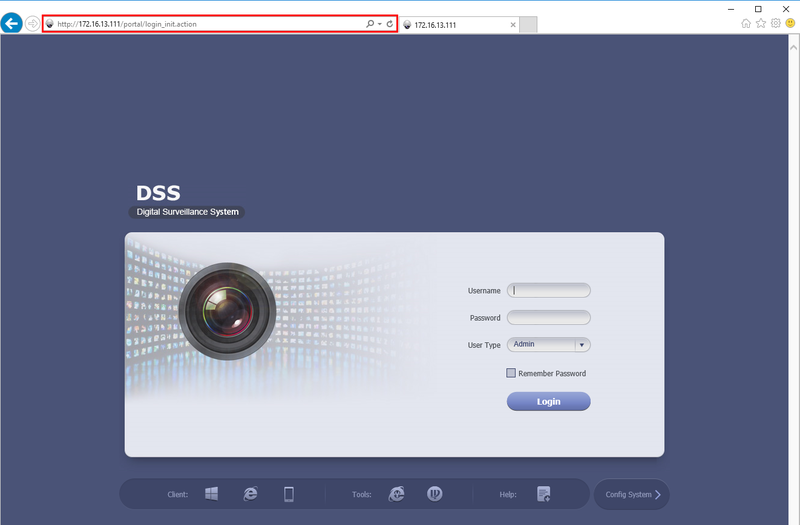
2. Open Internet Explorer, and input your DSS Server's IP address into the URL bar at the top of the browser window.
3. Enter your credentials, and click, "Login"
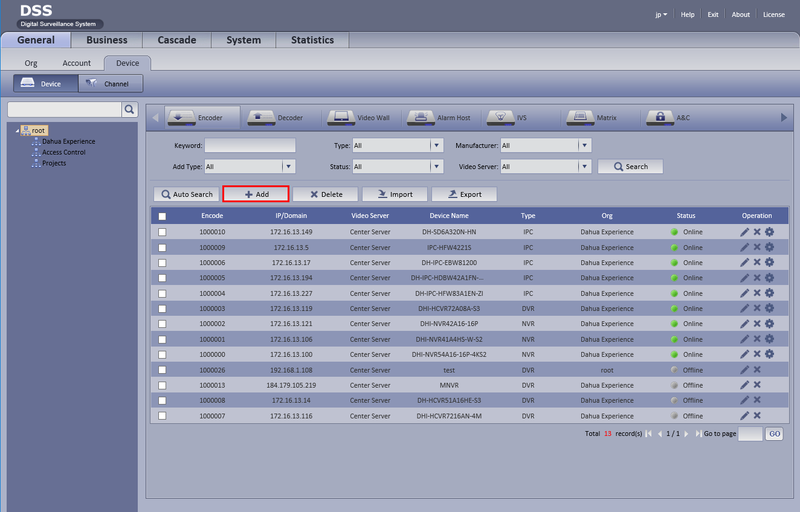
4. Click, "Device"
5. Click, "Add"
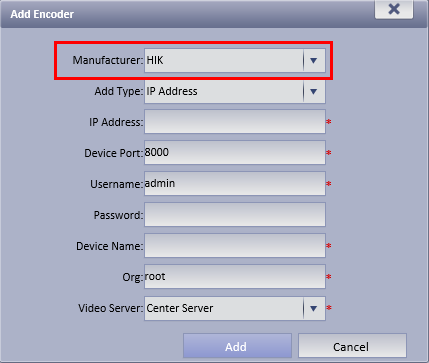
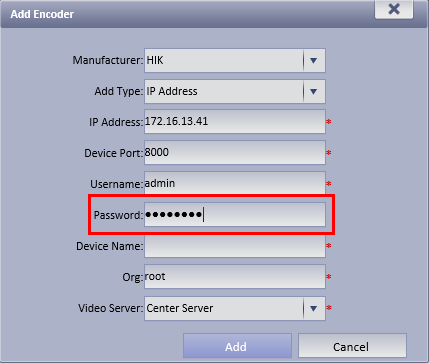
6. Change, "Manufacturer" to, "Hik"
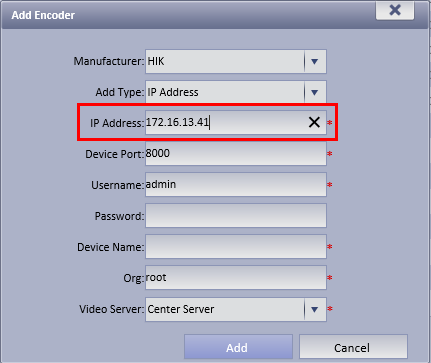
7. Input your Hikvision IP Camera's IP address into, "IP Address"
8. Input your Hikvision IP Camera's password into, "Password"
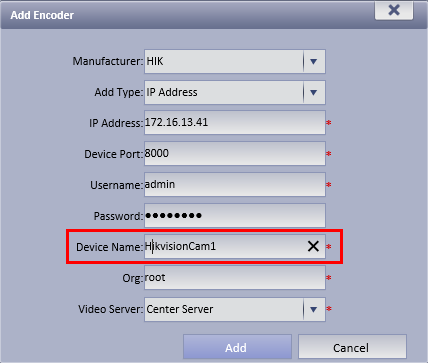
9. Give your device a name under, "Device Name"
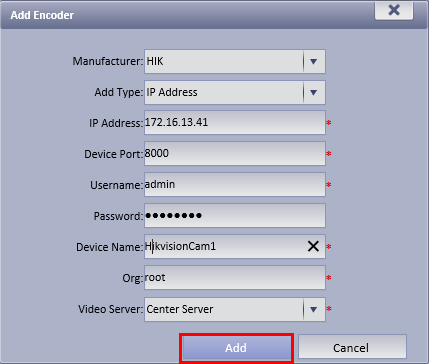
10. Click, "Add"
11. If successful, the device should be listed, in the table on this page with a Status of, "Online"
