Access Control/How To Setup DHI ASC1204B
Contents
How To Setup DHI-ASC1204B
Description
Follow the step by step instructions below to setup the DHI-ASC1204B four door access controller.
Prerequisites
- DHI-ASC1204B
- Network Connection
- Windows PC
-
 SmartPSS 1.16.1
 -
 Config Tool 4.05
Video Instructions
Step by Step Instructions
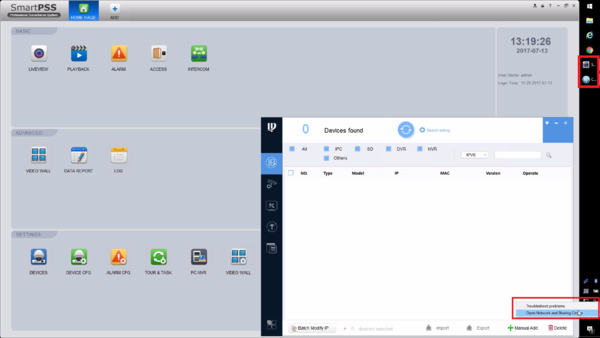
1. Begin with connecting a network cable and 12V DC power supply to the DHI-ASC1204B. Launch SmartPSS 1.16.1 and Config tool 4.05. Now connect the network cable directly to your PC. Right click your network connection on your computer's toolbar and select "Open network and sharing center".
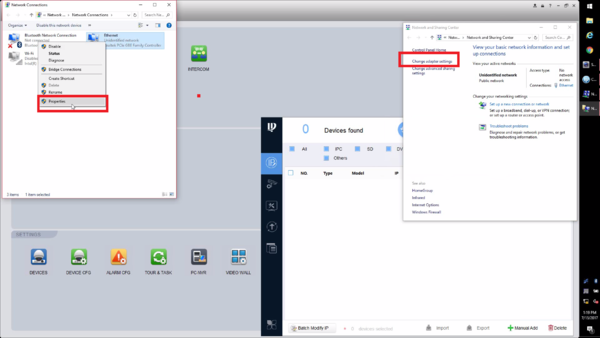
2. Select "Change adapter settings" then right click on your ethernet adapter and select properties.
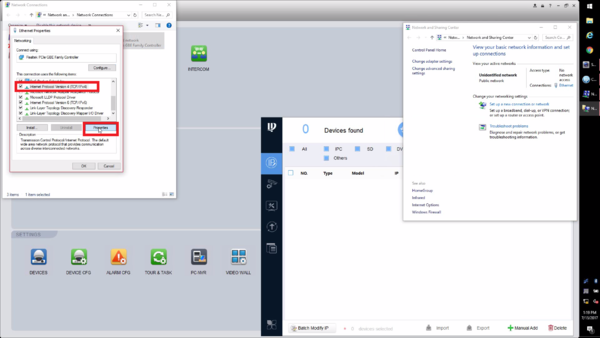
3. Now select "Internet rotocol Version 4(TCP/IPv4)" and the select properties.
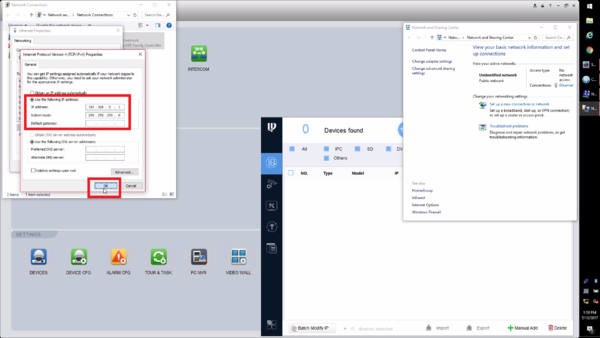
4. Select "use the following IP address" and enter 192.168.0.1 as the IP address and then press tab to populate the subnet mask. Once the Subnetmask is 255.255.255.0 then select ok.
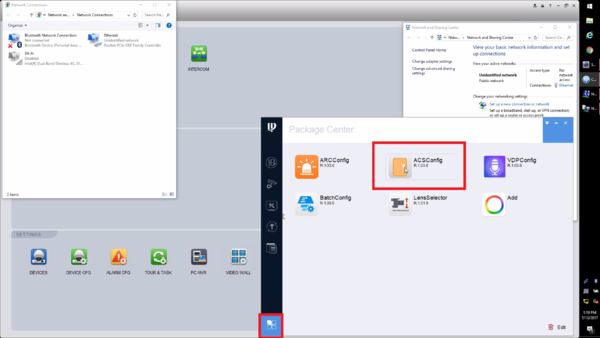
5. Switch to Config Tool 4.05 and then select the icon in the lower left corner. Now select ASCConfig.
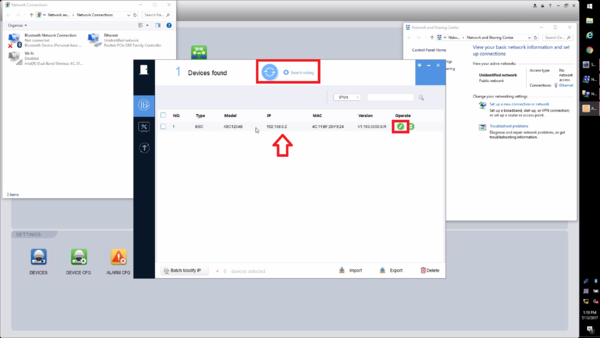
6. Select the refresh icon. The ASC1204B should now populate in the list with the default IP address of 192.168.0.2. Select the Modify IP icon on the right.
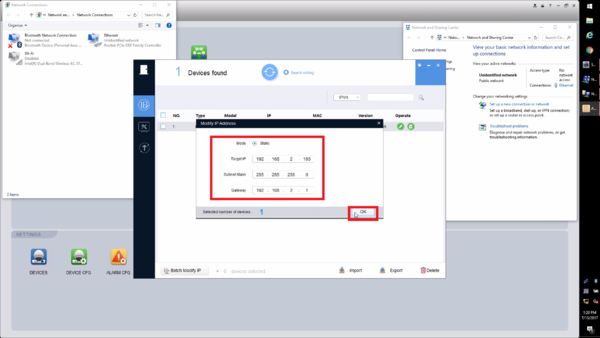
7. Change the IP to fit the network you are installing the device on, then select ok. You may now connect the ASC1204B to your network.
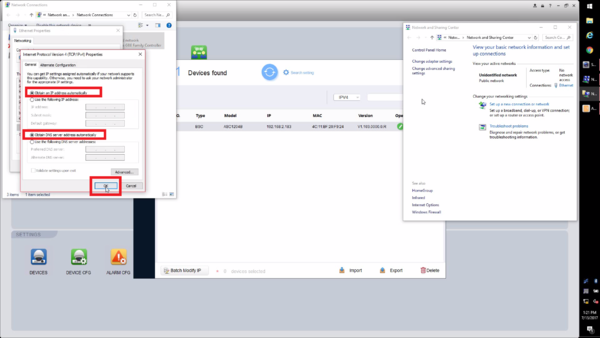
8. Go back to your ethernet adapter settings, and select Obtain and IP address automatically and Obtain DNS server address, or return to your previous configuration, then press ok.
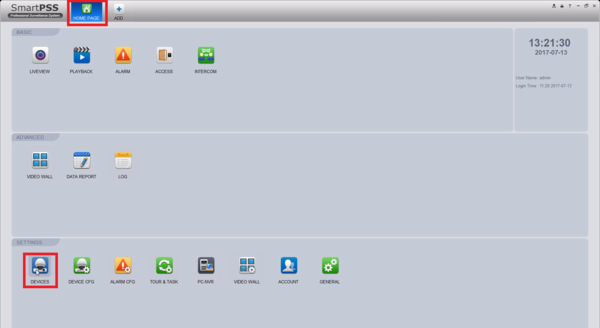
9. Switch to SmartPSS 1.16.1 and go to the home page. Select Devices.
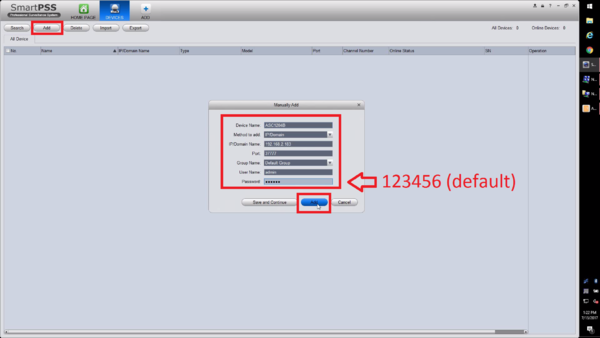
10. Select Add at the top right corner. Enter in a name for the device, the IP you configured in step 6 and enter Port of 37777, User Name as admin, and the default password 123456, then select ok.
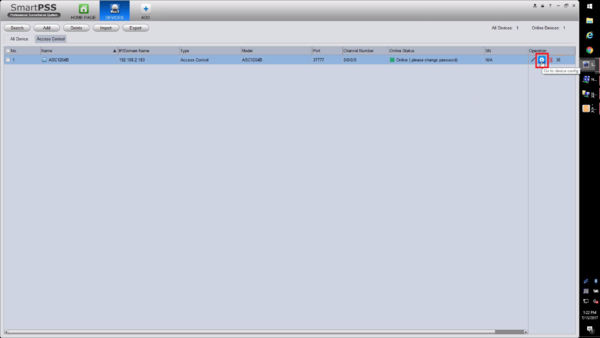
11. Now Select the Gear Icon to get into the devices configuration page on SmartPSS 1.16.1.
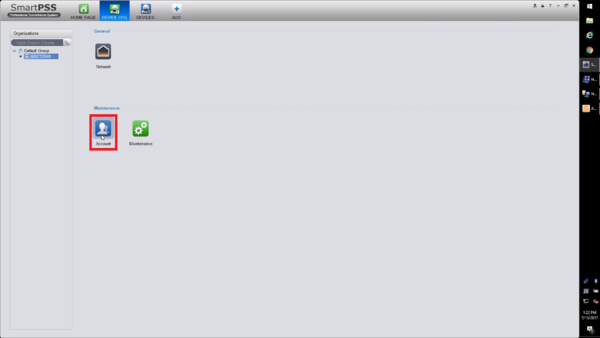
12. Select Account.
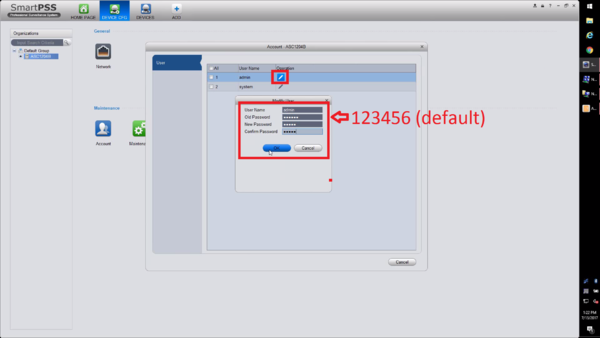
13. To ensure the safety of this device select the pencil icon for the admin account and change the default password of 123456 to something else, then select ok. Now reboot the device. In the Devices tab, select the pencil icon and change the password to reflect the changes made in this step.
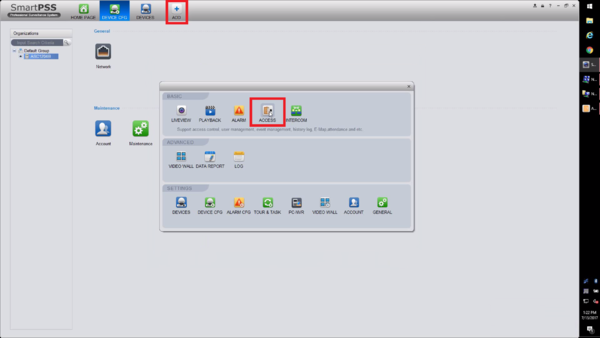
14. Select Add at the top of SmartPSS 1.16.1, and then select Access.
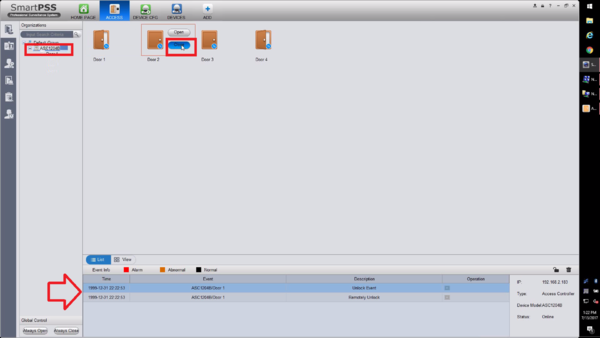
15. Under the Organization tree on the top left select the ASC1024B, you can now open or close doors and begin programming.
