Initial Setup
Initial Setup
Description
Prerequisites
- Dahua recorder, Not initialized
Instructions
Prerequisites
- Dahua Recorder: NVR, DVR, or XVR
Video Instructions
Step by Step Instructions
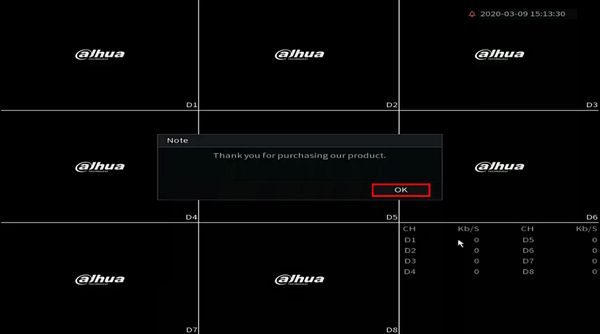
1. Connect the NVR to the display and power it on.
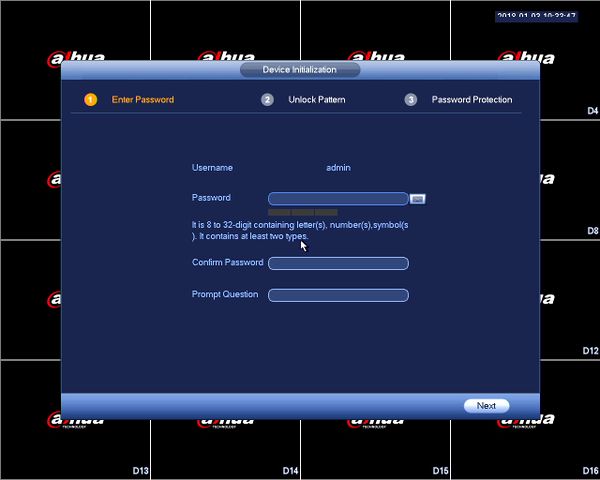
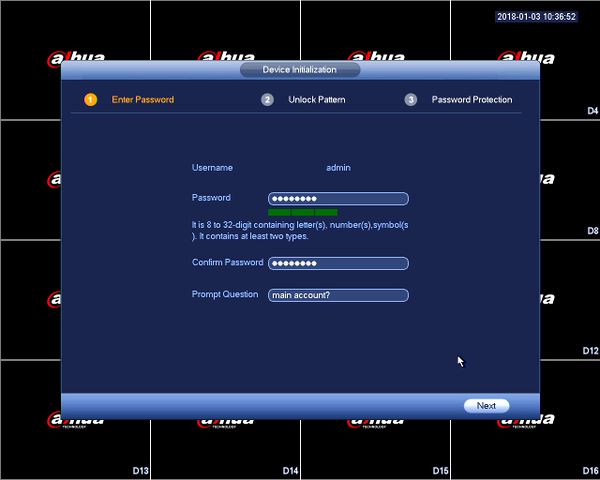
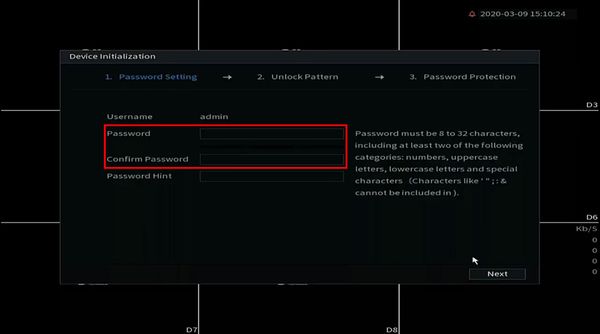
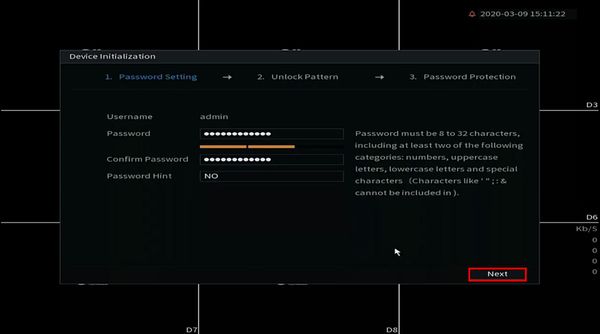
2. Enter Password - You will be prompted to change the default admin password. Make sure it's at least 8 characters long and contain letters, numbers, and symbols. (At least two of the three types.)
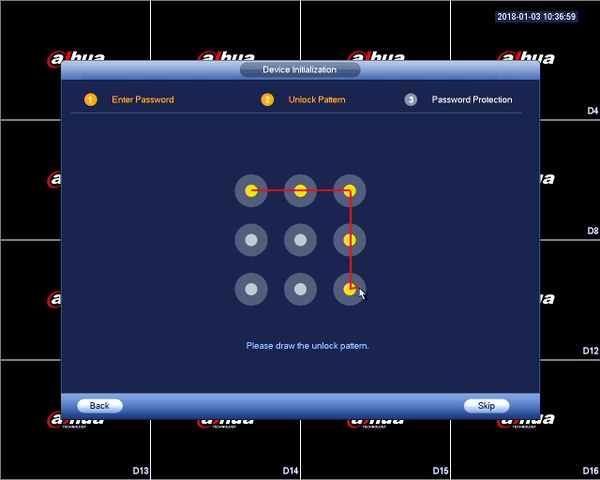
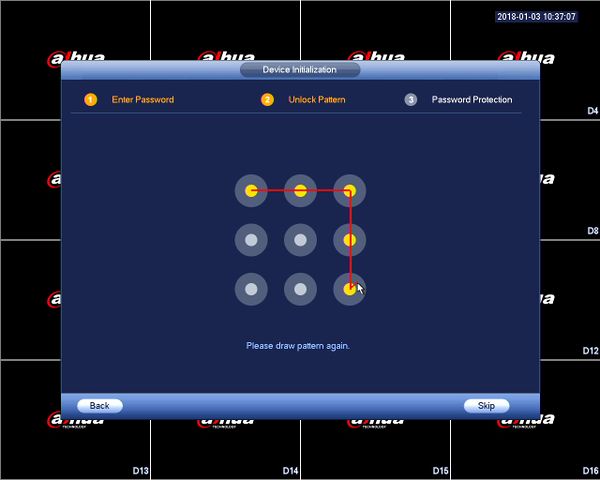
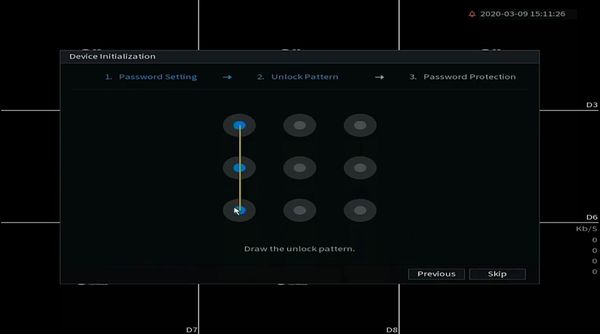
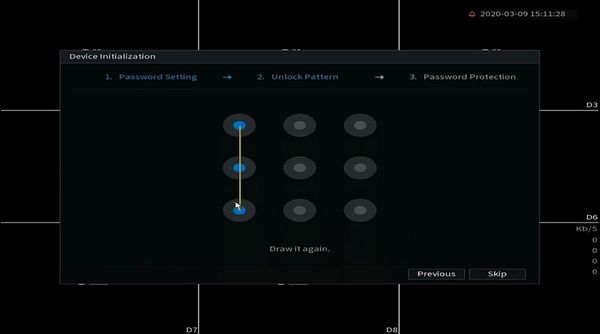
3. Unlock Pattern - Alternatively, you can unlock the recorder with a pattern to avoid having to type in the password. Click and drag on the circles to draw your pattern and re-draw the pattern to complete the setup.
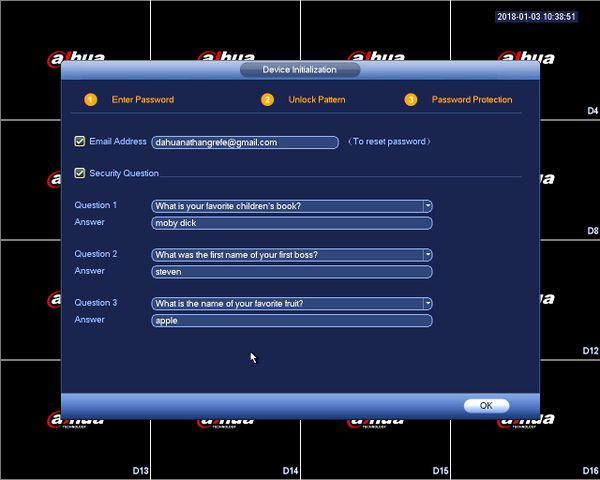
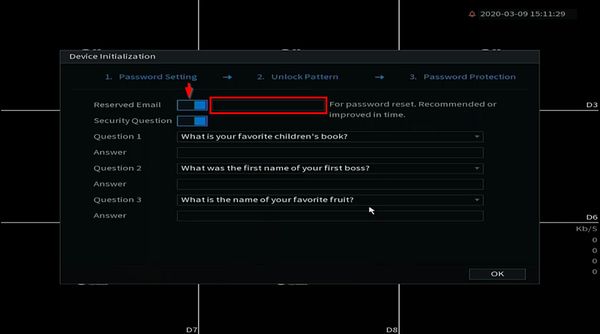
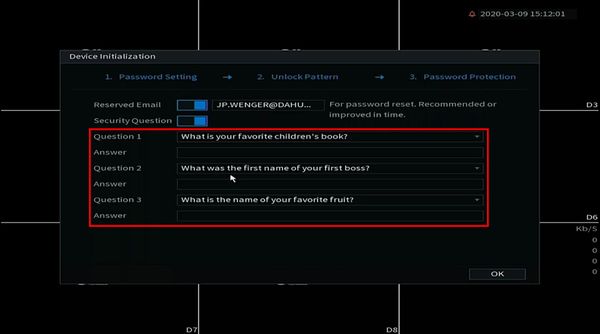
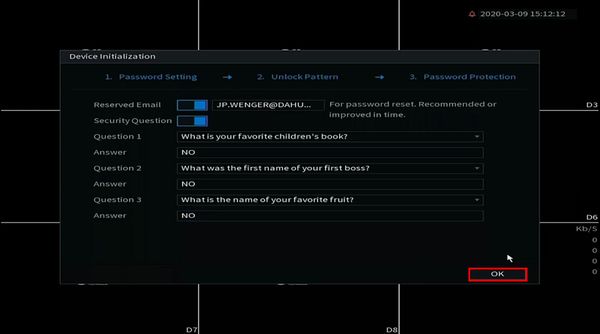
4. Password Protection - Input an E-mail address to be able reset the password. Answer the security questions to complete the password protection setup.
Warning - RMA is the only option if you forget your password, and skip this step.
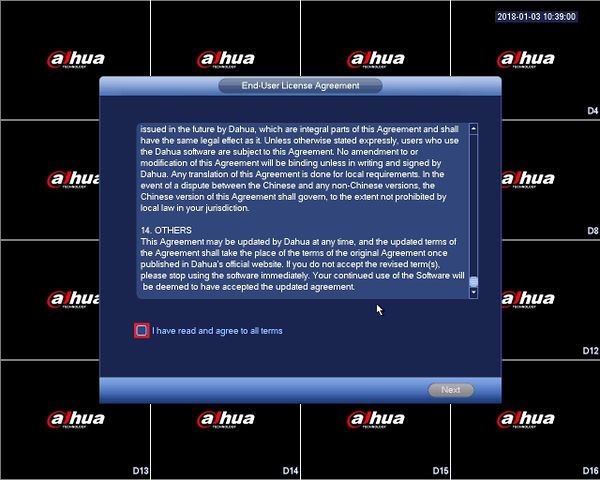
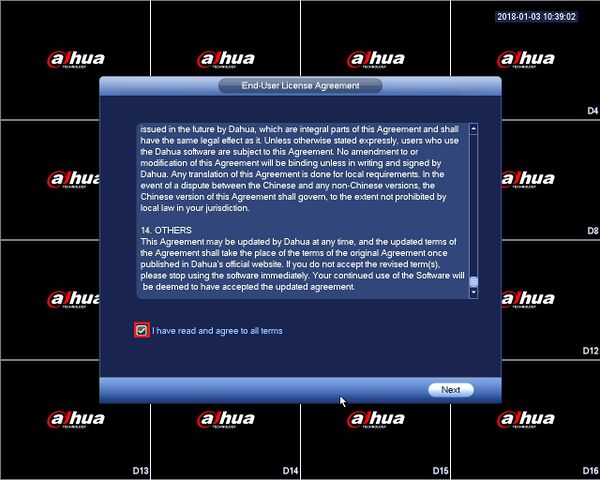
5. End-User License Agreement - Read through the End-User License Agreement, when ready check the agreement box to enable "Next".
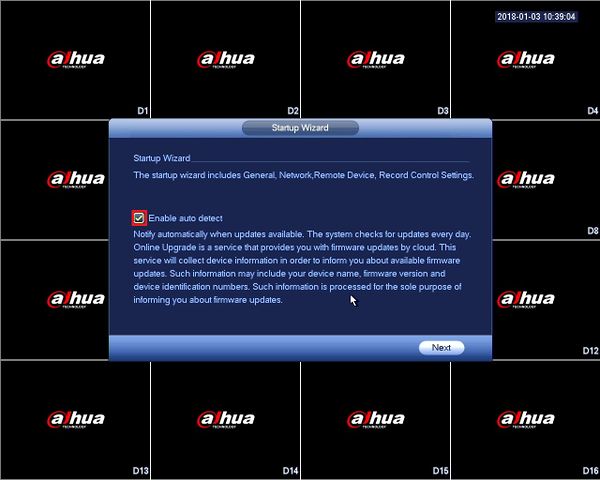
6. Firmware Updates - Check the "Enable auto detect" box to automatically check the latest firmware.
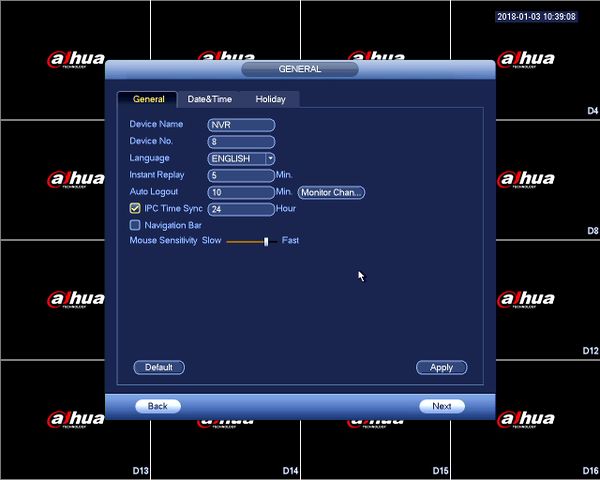
7. General Settings - You can set common general settings here. Click on "Apply" then "Next" when finished.
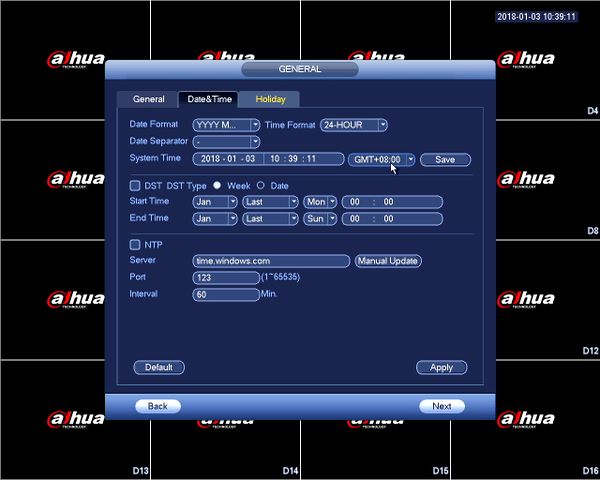
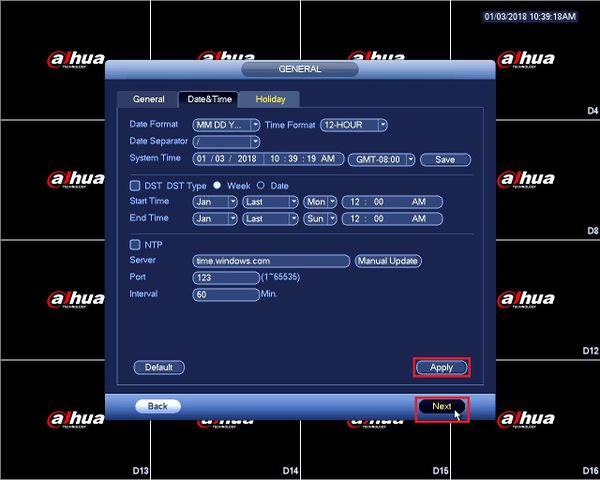
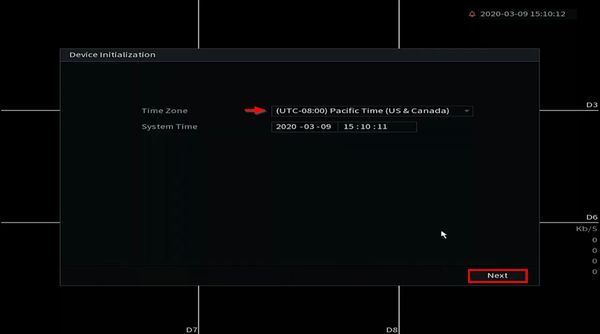
8. Date and Time - Make sure to properly set up your time zone to assure accurate time readings. You can also configure Daylight Saving Time (DST). When finished click on "Apply" and then click "Next" to proceed.
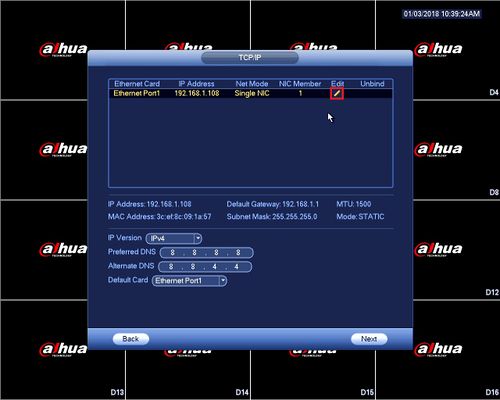
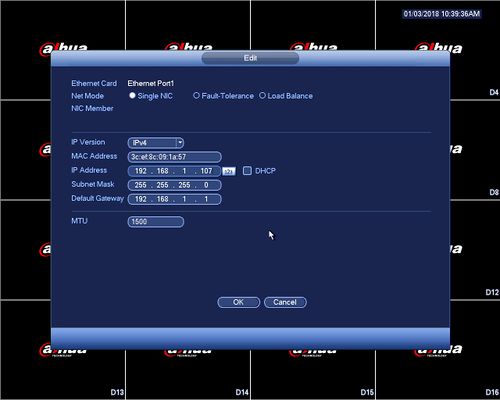
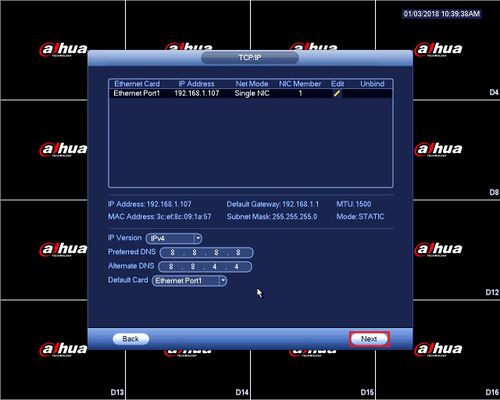
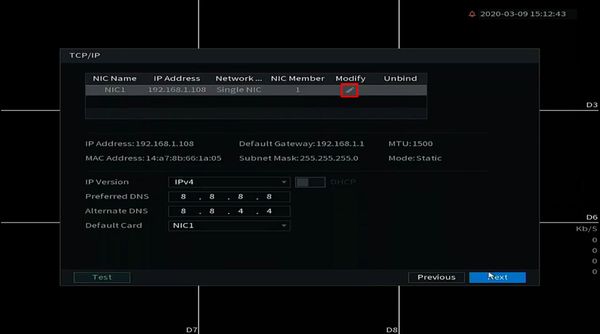
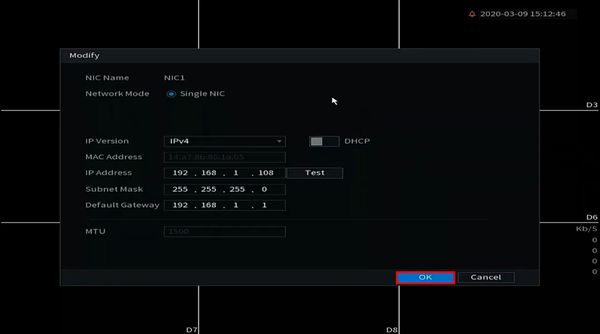
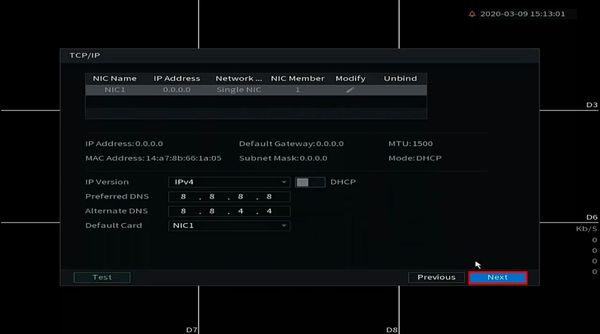
9. TCP/IP - To edit the IP Address on the recorder's NIC click on the pencil icon. You can now set a Static IP or enable DHCP to let the recorder grab an IP Address from the network, once done click "OK" and then "Next" to finish the setup.
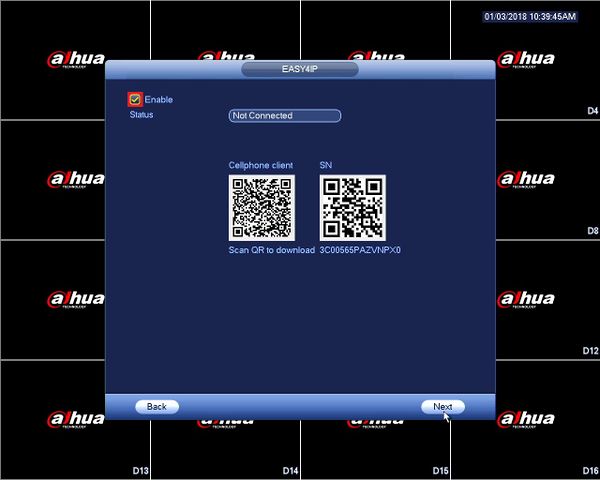
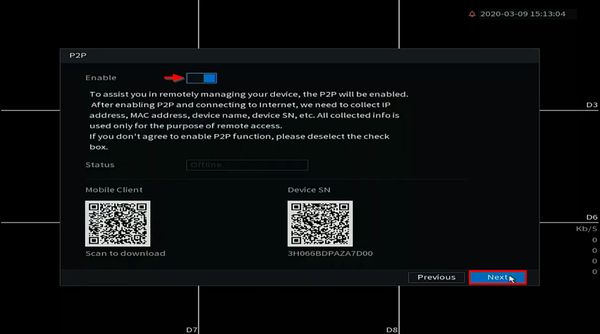
10. Remote Access - P2P (Easy4IP): By checking this box, it will connect you to Dahua's P2P server and will allow you to remote to your device. If TCP/IP was set properly for your network, the status will show as "online".
NOTE The QR code on the left will direct you to the smartphone application. The QR code on the right will allow you scan the SN of your device.
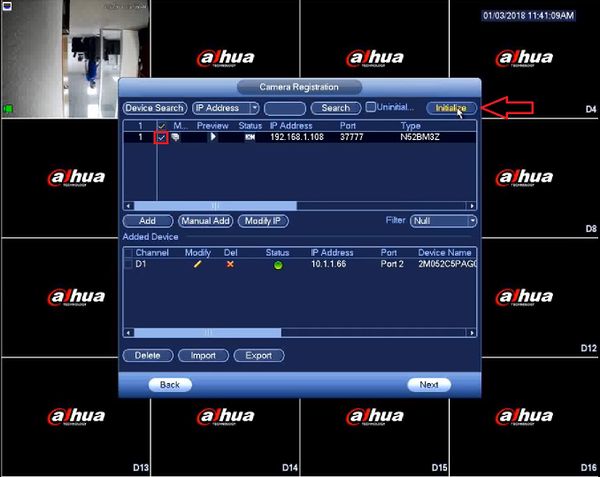
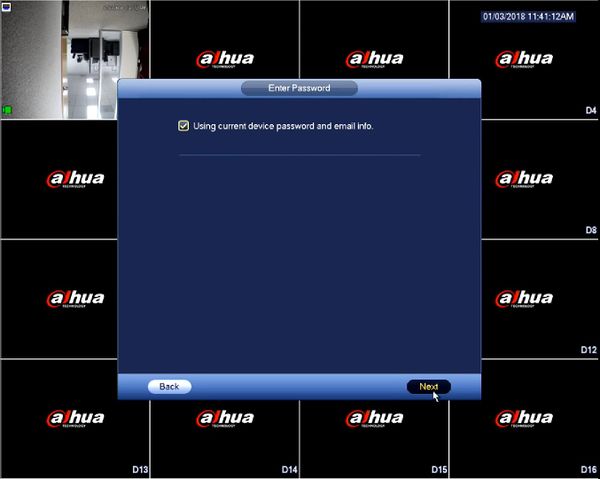
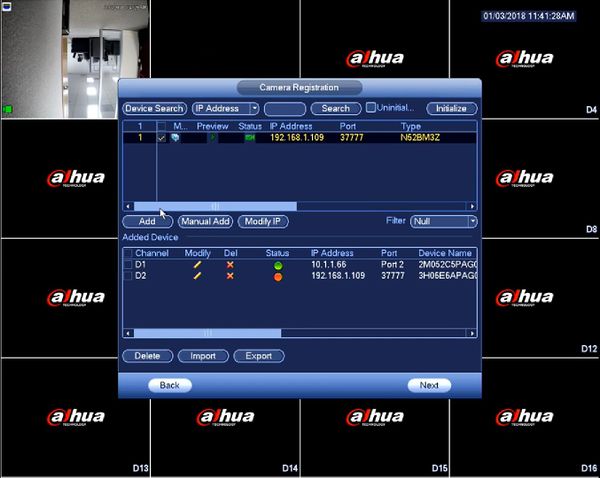
11.Camera Registration - To initialize the device from the NVR check the camera(s) that you want and click on "Initialize" - Keep the box checked if you want to sync the password and E-mail to the camera and click on "Next"
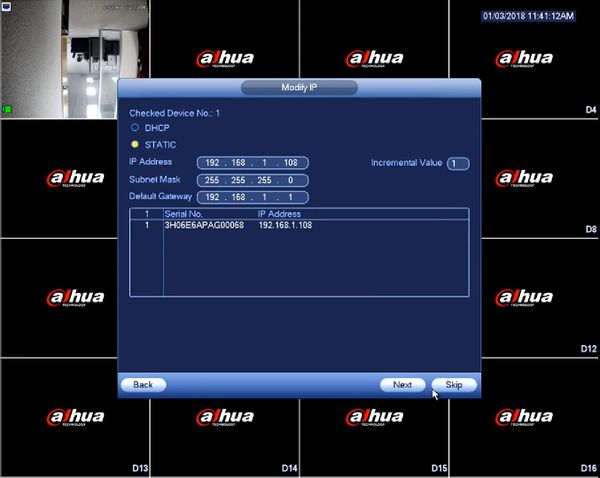
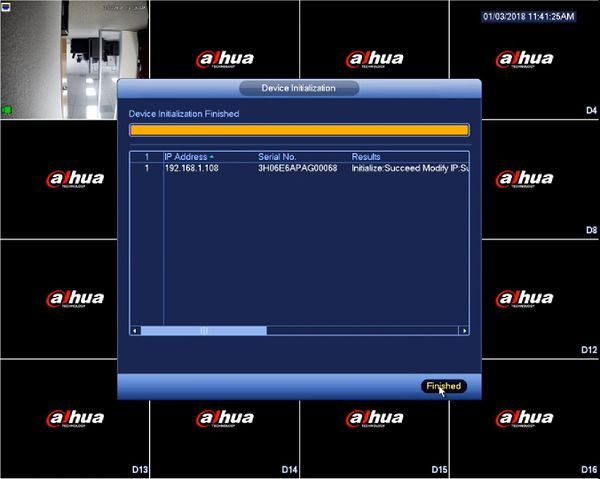
Modify the IP Address and click on "Next" - Wait for the initialization to finish and the "Finished" button will activate, click on it to proceed.
Check the camera you just initialized and click on "Add"
Prerequisites
- Dahua Recorder: NVR, DVR, or XVR
Video Instructions
Step by Step Instructions
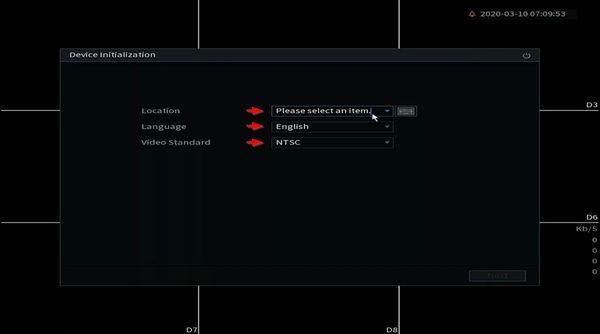
1. Connect the NVR to the display and power it on.
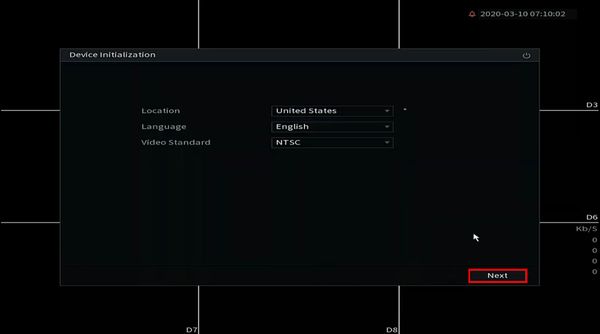
Use the dropdown boxes to select
Location Language Video Standard
Click Next
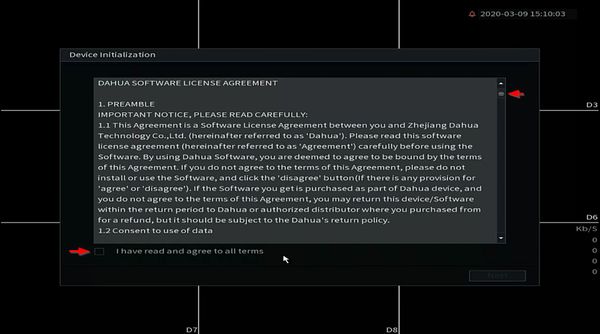
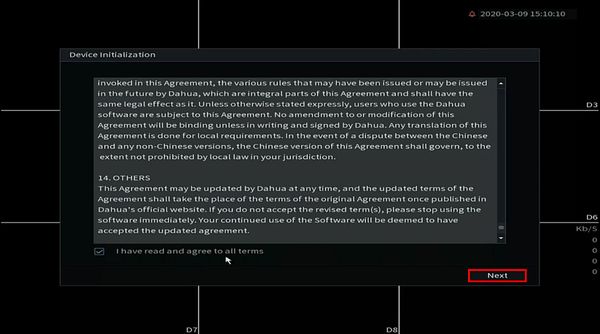
2. The Software License Agreement window will appear.
Use the scroll bar to review the agreement and check the box to agree
Click Next
3. Use the dropdown box to select the Time Zone
Click Next
4. Use the interface to create a password for the admin account
The password must be 8 to 32 characters, including at least two of the following categories: numbers, uppercase letters, lowercase letters and special characters (Characters like '";:& cannot be included)
Enter the password twice
Enter a Password Hint
Click Next
5. Use the interface to create a Device Unlock Pattern. This is another method of logging into the device. You can click Skip to skip this part of the setup.
Draw the pattern again to confirm
6. Use the interface to setup Password Recovery for the device in case the password is lost or forgotten
Click to enable the Email Recovery feature, then enter an email address that will be used in case of a password reset
7. Use the interface to select and enter Security Questions for the password recovery function
Click OK
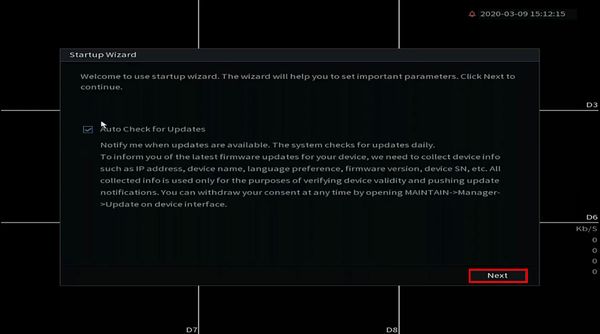
8. Check to enable or disable 'Auto Check for Updates"
Click Next
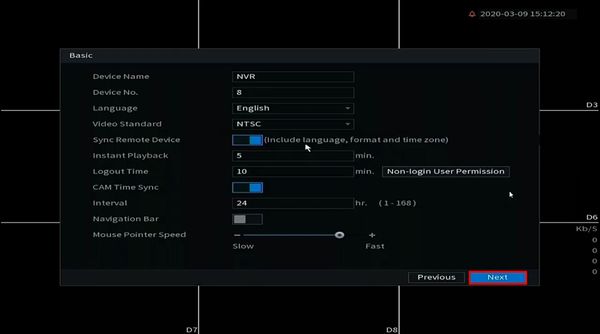
9. Use the interface to set Basic settings
Click Next
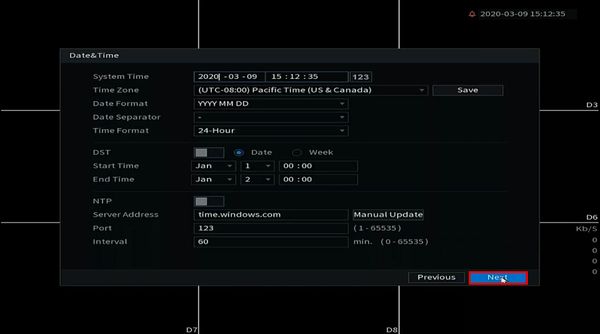
10. Use the interface to set the Date & Time for the device
Click Next
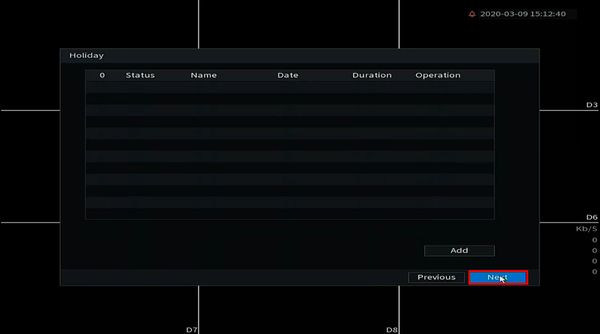
11. Use the interface to create any required Holiday dates for the schedule
Click Next
12. Use the interface to set the Network
Click the pencil next to the NIC card to modify the settings
13. Use the interface to select the desired network settings
Click OK
Click Next
14. Use the interface to enable or disable the P2P function.
Click Next
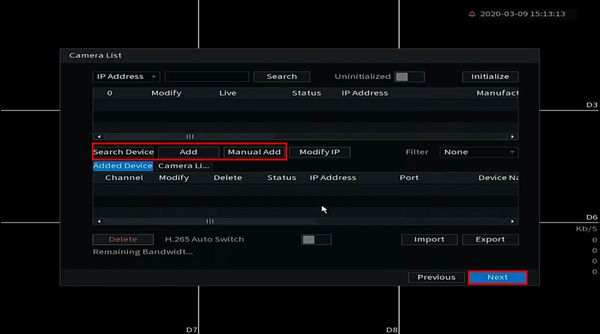
15. Use the interface to add Cameras to the system.
Cameras can be added via Manual Add or use Search Device to find cameras on the local network
Click Next to proceed
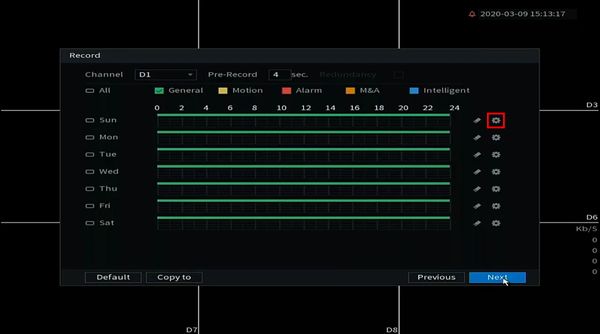
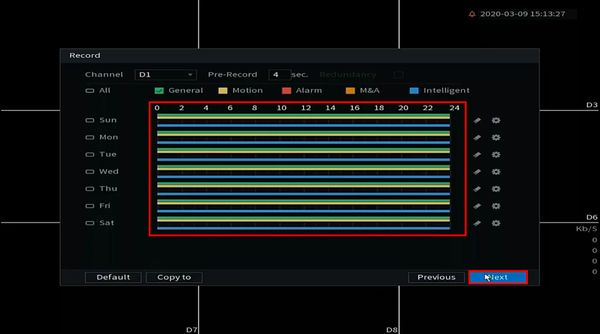
16. Use the interface to create the Record schedule for the device
Click the gear icon next to a day to adjust the time periods of the schedule
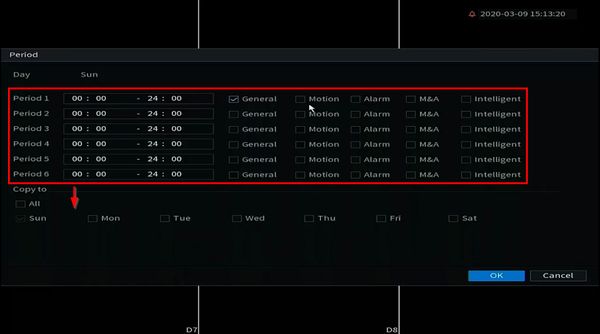
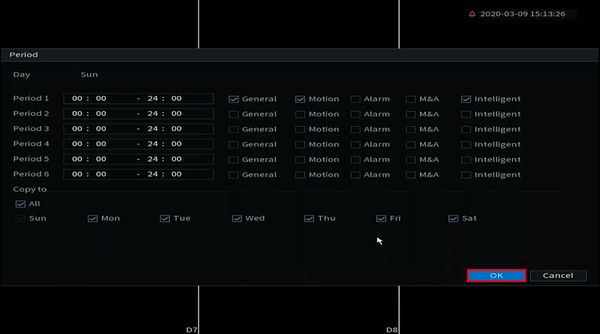
17. Use the interface to create the desired recording schedule and select the record type
Select which days to apply the schedule to
18. Click OK
19. The schedule will be updated.
Click Next to proceed
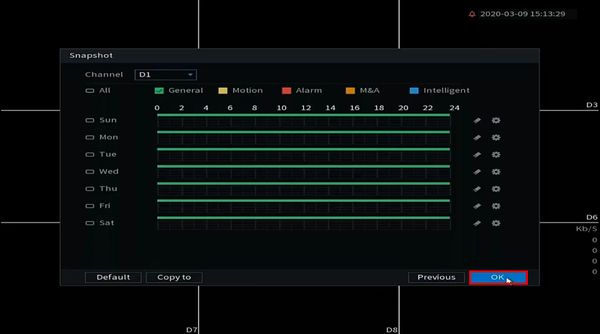
20. Use the interface to create the schedule for Snapshot recording the same way it was configured in the previous step
Click OK
21. A prompt will appear as the final step
Click OK
The device has now been initialized and setup with basic settings ready for further advanced configuration.
